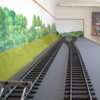
Jon Nazareth's G3 workbench

Jon Nazareth

Western Thunderer
PS. Actually, I have found a picture of a mess hut located at Hayling Island, at least, I think that's where it is. I'll draw it up and see how it fits.

Jon
 

Jon Nazareth

Western Thunderer
The mess hut so far with a slightly altered figure sent for from America stood outside. He did have a sort of trilby but I carved this away sanding his head smooth. I then made a new hat brim out of plasticard and glued it in place.

Back to the mess. The picture that I have been basing this building on shows a length of guttering on the front elevation only. Does anyone know of a supplier of G3 rainwater goods? I think that the answer will be a negative but, no harm in asking.

Jon

IMG_1615.JPG
 

geoff_nicholls

Western Thunderer
I think POLA and PIKO produce rainwater goods for G scale, but for buildings with large roofs and larger volumes of water than one would find in Britain. So you'd be better off scratch building it. For Lea Siding, I produced the guttering by soaking thick paper in water, shaping it over brass tube of the right diameter and leaving it to dry
 

Jon Nazareth

Western Thunderer
Here is a resin figure that I've altered to look more like a porter although, looking at him again, I'll need to take that curve out of his hat brim. I have cleaned him up with some abrasive paper but he still looks a little 'carved'. Having said that, I quite like the way that he has come out and would do it again should I come across a figure that doesn't look quite the part.

Jon

IMG_1620.JPG
 

Jon Nazareth

Western Thunderer
I started to machine a former in order to make a length of guttering as per Geoff Nicholls' suggestion of using damp card. That was the idea but instead of a former, I ended up with a length of brass guttering. The downpipe followed ad now I've ended up with what you see in the pictures. Luckily for me, the prototype only had this one length of rainwater goods on the front elevation obviously to prevent the users of the mess getting wet when it rained.

Jon

P.S. The guttering is straight. I think it is the camera that is making it look curved.

IMG_1626.JPG IMG_1629.JPG IMG_1630.JPG
 

Jon Nazareth

Western Thunderer
I've laid the track for my 'display' layout and the available length is 3.7m. The open area along the right hand side will be a sort of goods yard complete with crane. The crane that I would like to build will be similar to the old wooden one that was located at Pluckley Station in East Sussex or was it Kent, mmm. Dan Garrett kindly sent me a drawing well, actually, he has sent me two in all but I've mislaid both, fingers crossed that they turn up.
The points here are supplied by Cliff Barker and a discussion has started on how these may be sprung. Mike Williams has suggested an over centre spring but I'm not sure what one of these is or how it would work. I would think that these G3 and his G1 points are the same. Anyone have any suggestions?

Jon

IMG_1634.JPG IMG_1632.JPG
 

geoff_nicholls

Western Thunderer
Sorry if I'm throwing a spanner in the works, but have you considered turning it into an operational layout? 3.7m is just 20cm shorter than my layout Aldeburgh Wharf and 30cm longer than my Exhibition layout Lea siding. If you replaced 1 metre of the track at the left hand side with a fiddle yard, possibly a sector plate, you could run short trains, shunting wagons around, and use it as a test track for newly built stock. You would still be able to use it to store stock when not operating.
 

Jon Nazareth

Western Thunderer
Geoff
Thanks for the suggestion but, I'm more of a builder than a user, if you see what I mean. If I can spring the points, I will be happy with that and if I can't then, I'll have to put my trust in the friction of the throw over lever that I'm going to fit. As you mentioned above, I was intending on using it as a test track too. How do you operate your points?

Jon
 

geoff_nicholls

Western Thunderer
I use a couple of Tenmille levers:
16mm N.G Point Accessories
that were left over from a previous layout. One is hidden in a building, the other behind a fence. They work very well and can be finely adjusted.
I had been expecting to use an OMEGA loop in the push rod (1.5mm brass), but have found this is not necessary.
 

Jon Nazareth

Western Thunderer
Here is the mess hut finished. Well, I forgot to put in the glass so, that will next but the jury is still out on whether it gets a chimney or not. Also, the window frames should be the dark colour but I was making such a pigs ear of it that I cleaned it all off with a bit of white spirit. Pity, it would have looked better with the darker surrounds. I left the chap there just to give it some scale.

Jon

IMG_1635.JPG
 

Jon Nazareth

Western Thunderer
Here you are, Lankytank, one stove well, at least a chimney would hint at a stove inside. Looking at the picture of the prototype above, I though the pipe looked a bit large in diameter so, I scaled it at 6". The picture shows that someone wedged the cowl section in place stopping it rattling about in the wind.

Jon

IMG_1643.JPG IMG_1644.JPG
 

Mike W

Western Thunderer
This reminds me of an old and usually extremely reliable friend who told me that the bolsters on LNWR timber wagons carried their own numbers because a load could be craned off the wagon still tied to the bolsters and stored like that on the ground.

It sounded sort of logical I guess but firstly the whole load could be very heavy and also that means bolster wagons would be seen running around without any bolsters at all, which I've never seen or heard of.

On this forum with such well informed participants, does that sound correct to you?

Mike
 

Spitfire2865

Western Thunderer
Well the LNW did have a bolster loading guide that referenced wagons running with bolster removed.
The bolster wagons were 10T capacity, and when loaded over two wagons, the load couldnt exceed 75ish% total loading of wagons, so about 15-20T total load. More than enough for large cranes.
Seeing as to the railway, any stock was company money, (tarps, rope, etc) Id expect them to be very protective about removable pieces.
 
Top