You are using an out of date browser. It may not display this or other websites correctly.
You should upgrade or use an alternative browser.
You should upgrade or use an alternative browser.
Nick Dunhill's 7mm W (A6) or Whitby Tank Workbench
- Thread starter Nick Dunhill
- Start date


Yorkshire Dave
Western Thunderer
Well, the next full moon is due on 31 March.....
mickoo
Western Thunderer
In the post tomorrowNext we get a 3D printed smokebox door.....


Overall they have come out very nice, my only concern is the scale hinge brackets, see how you get on but we might have to run another set with thicker hinge brackets.
warren haywood
Western Thunderer
Probably be ok Mick as they will be picked out in silver paint
Nick Dunhill
Western Thunderer
You'll break them off anyway.")
Tim Watson
Western Thunderer
Not metal door with steel straps for this, Nick?
Tim
Tim
Nick Dunhill
Western Thunderer
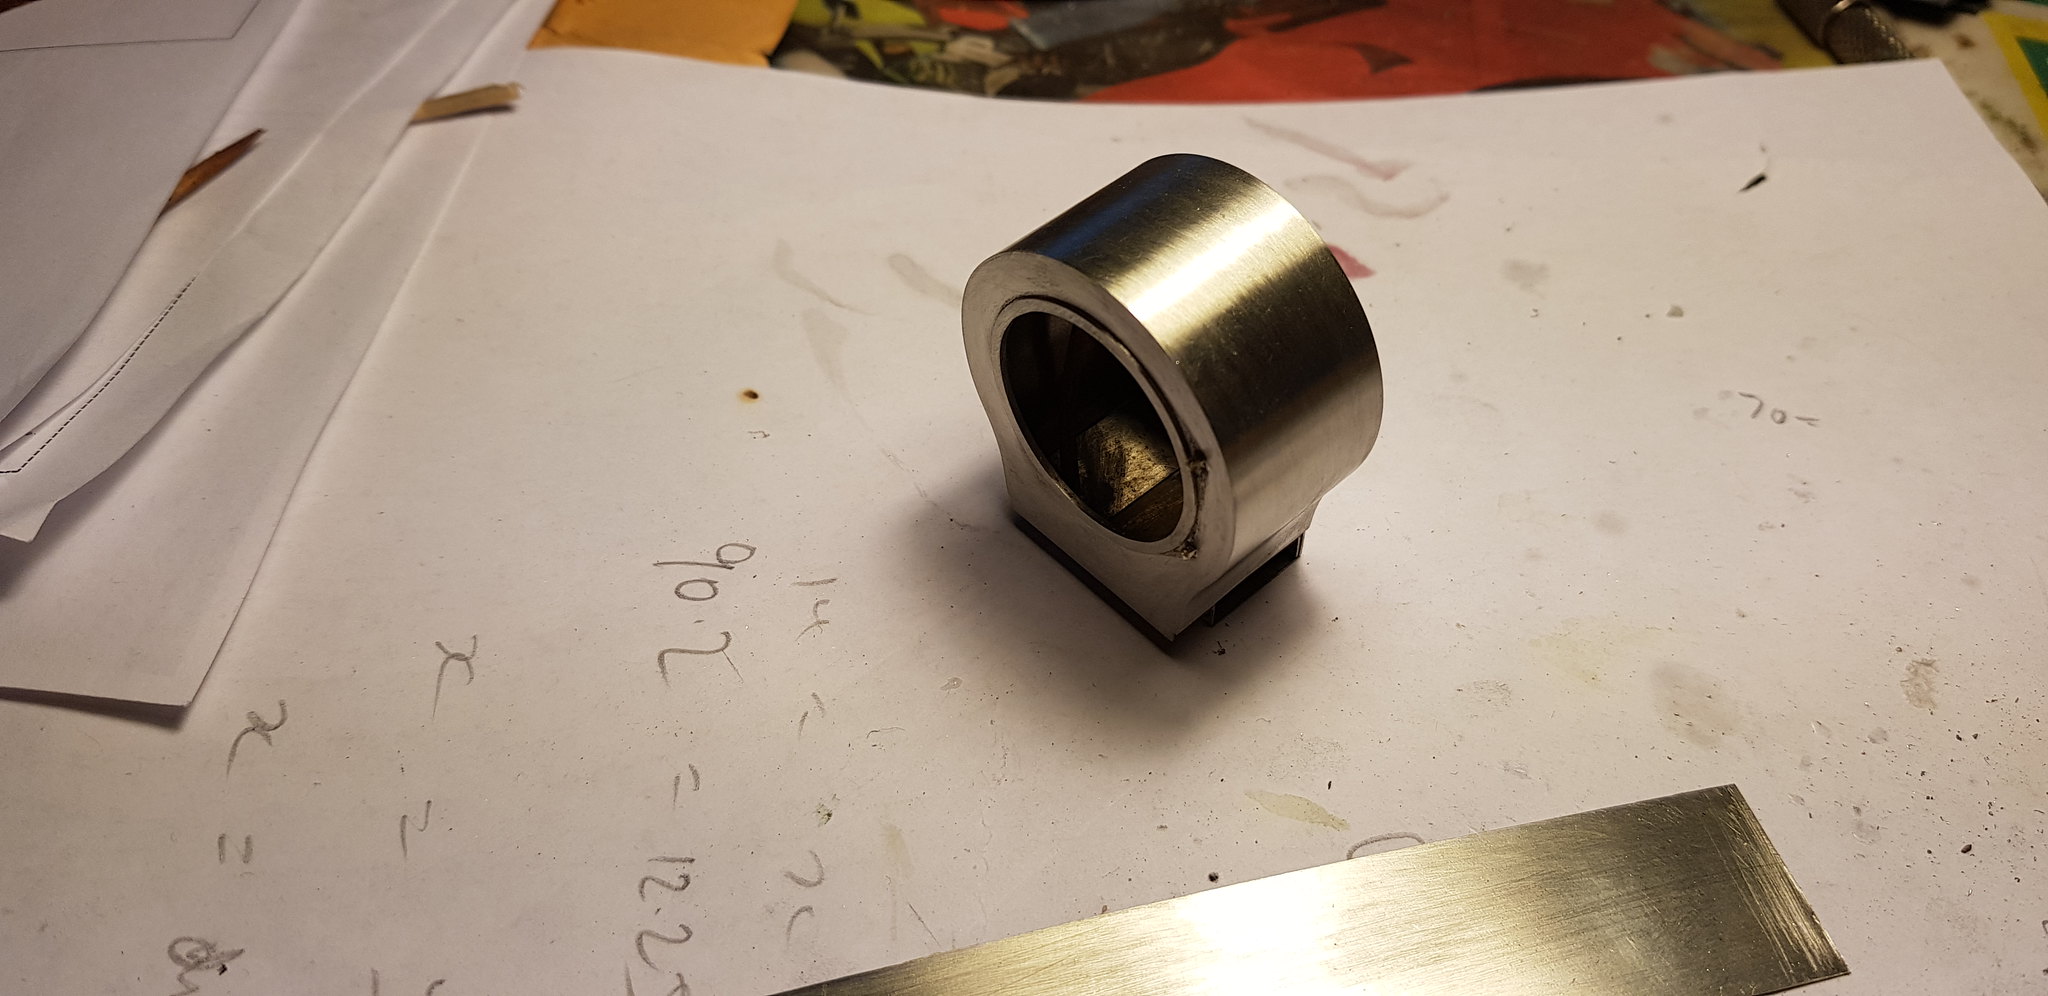
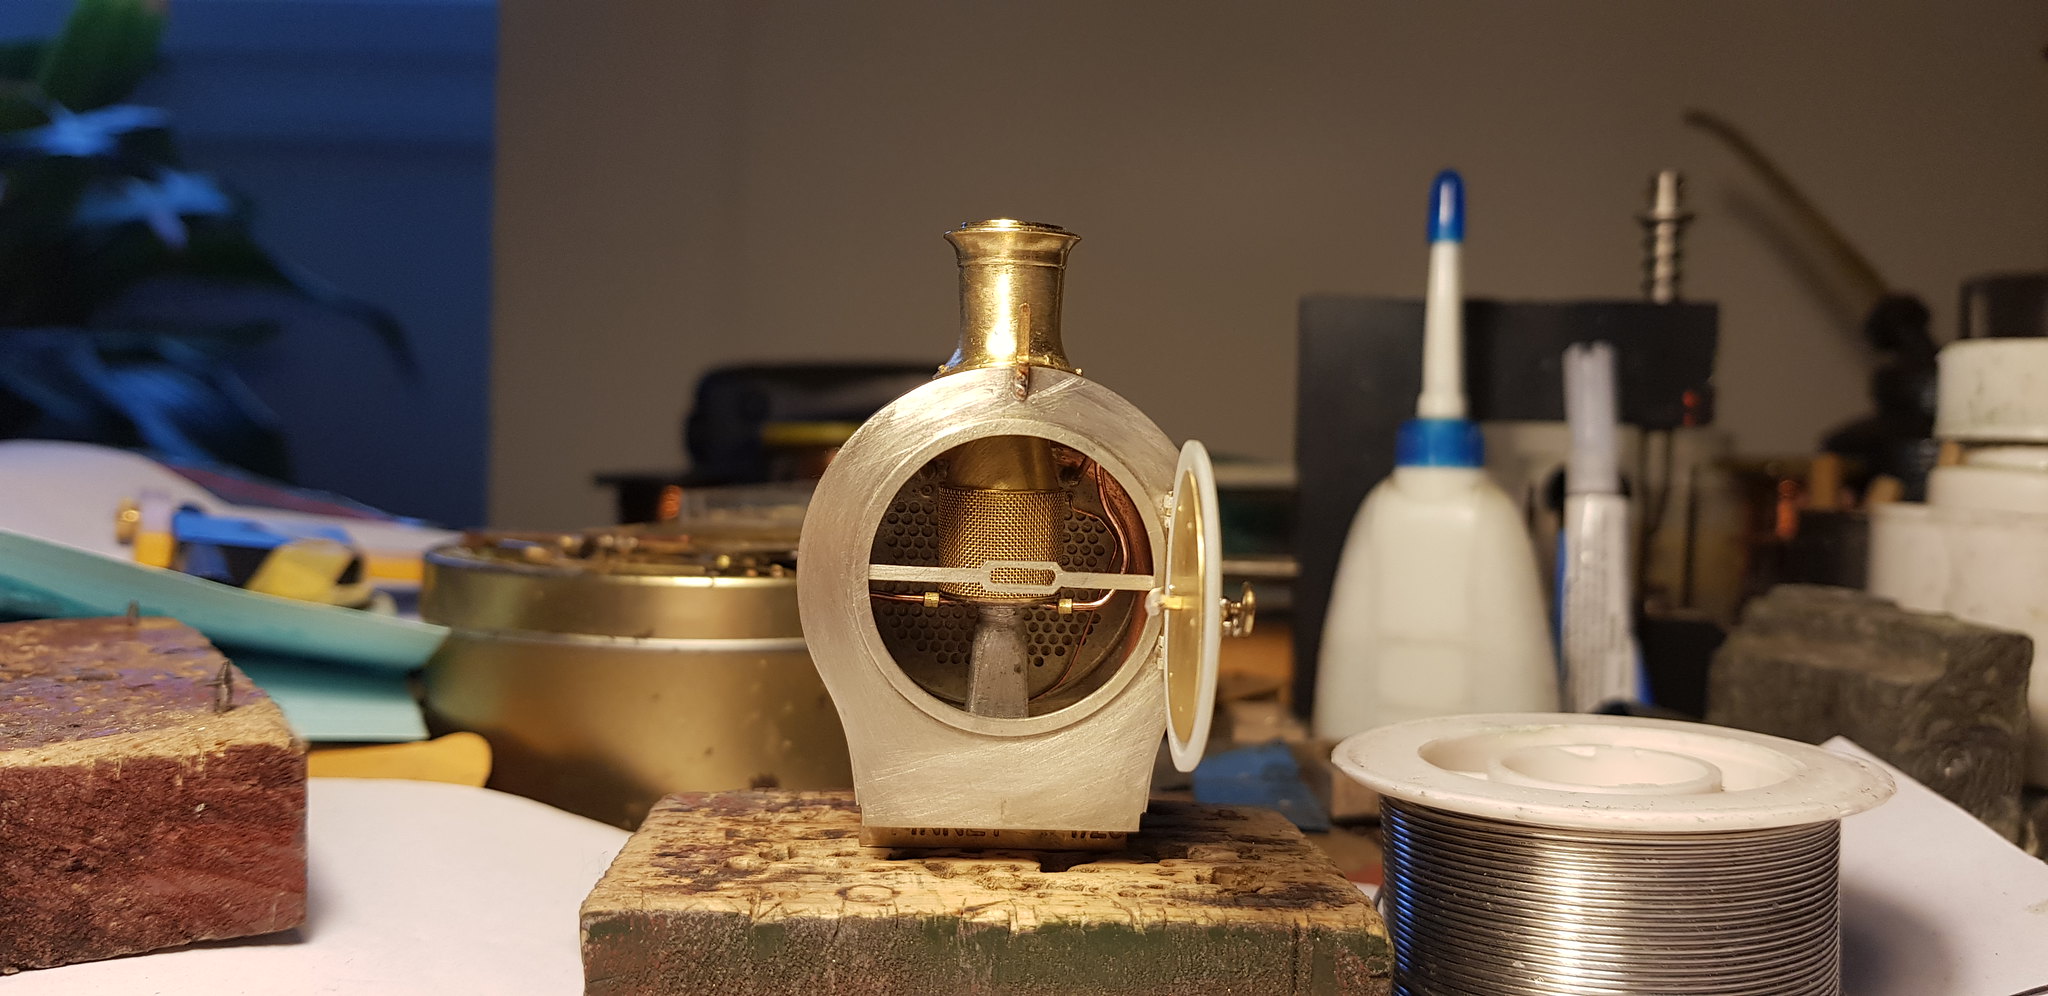
....and on to the 3D printed smokebox door. This is a completely new departure for me, and I was pleasantly surprised by the moulding. It is accurately made and not too 'layery' as are some other mouldings I have seen. It did require a bit of fettling as it had a slightly uneven surface, but it took minutes going up the grades of waterproof abrasive paper as opposed to hours. I might blow some primer over it to check the surface before it goes off to Haywood Towers (what sort of primer Warren?)
The hinge brackets were way to thin to be drilled for a hinge pin but this proved to be a blessing. I cut 4 lengths of 0.8 mm OD x 0.5 mm ID x 0.8 mm tube to act as bearings for the 0.45 mm hinge pin. The bearings were threaded on a 0.5 mm drill and tacked on to the underside of the 'ears' of the hinge bracket with minute amounts of superglue. This process ensured that the pin would be in the exact place relative to the door and sealing ring. I'm willing to bet that I'd have never done this successfully trying to drill out a thicker hinge bracket. Inevitably the hole would be in the wrong place or the drill would have wandered or I'd have broken something off! The drill was withdrawn and the tiny bearings encased in epoxy resin on the underside of the printed brackets. This took a couple of applications to get the required thickness and great care was taken not to glue up the ends of the bearings. After the epoxy had cured overnight it was easy to sculpt the correct shape hinge brackets with a fine rotary sander.
The rest, as they say, was child's play. Mark holes for the other hinge brackets on the smokebox front, and make the brackets from carefully drilled 1 x 1 mm brass rod. The door was united with the handles and locking bar (see previous posts), and, when correctly positioned, the brackets and bar soldered to the back of the smokebox front.
I think the slight flexibility of the plastic door hinge brackets will help it withstand a minor accidental bop better than a white metal item, and also the door is much lighter and exerts less stress on the hinge. Winner winner tofu dinner! Next the dreaded smokebox wrapper!...........
Just realised that the blastpipe/spark arrestor/petticoat pipe assembly can't be shoved through the front of the smokebox with the locking bar in place. D'oh, thinking cap on.......
mickoo
Western Thunderer
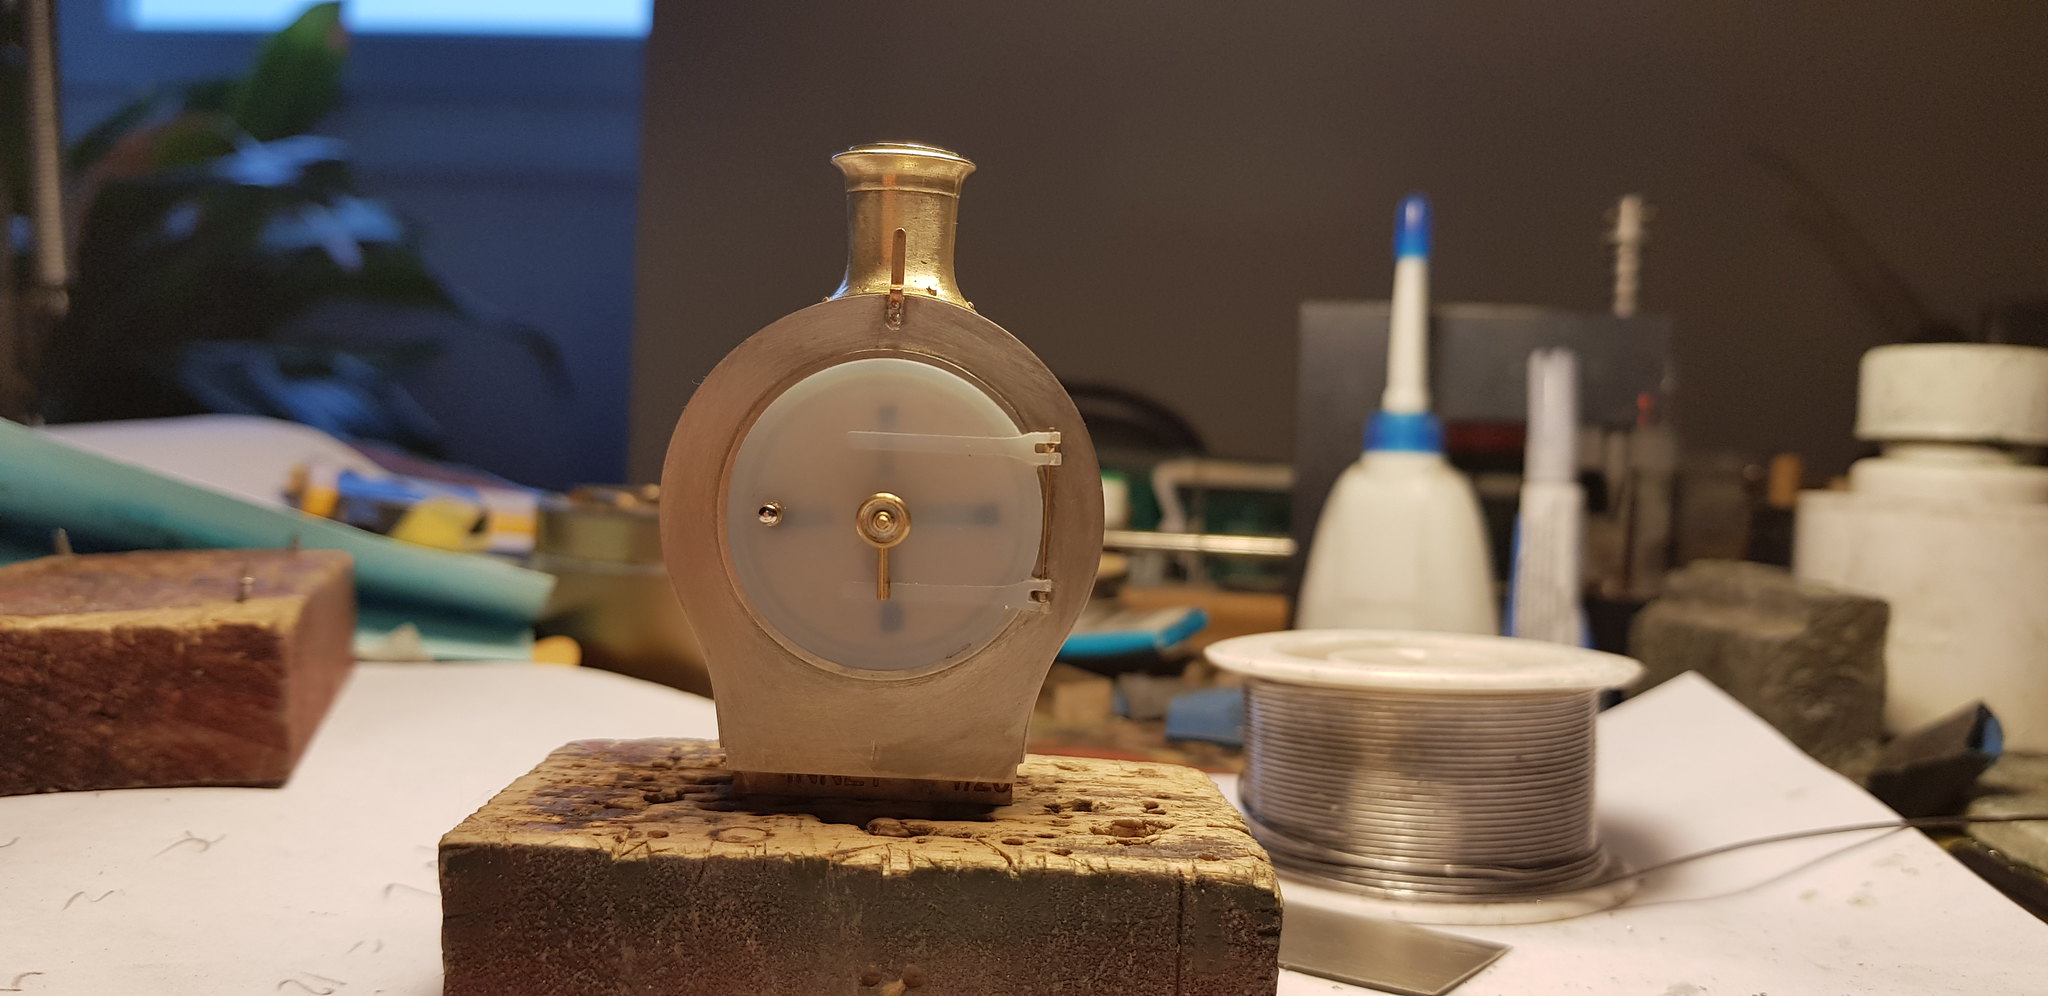
What I did on the B1 was to make a couple of shaped brackets (like the real engine) and soldered them to the back of the smoke box front, then you can leave the locking bar out of the way whilst you detail the smoke box innards. On mine I etched slots to make locating them easier but you have no wrapper as yet so it should be easy enough to line them up for fixing. Some locking bars are hinged but I suspect your A6 is like the B1 and just drops onto similar shaped brackets.
Once it's all complete and painted then drop the locking bar into the slots and hold with an adhesive of your choice. I found simple white wood glue quite good for the test build.

Those doors work just fine and the recessed interior will show a nice gap around the cinder shield, just like the real deal
Regarding drilling the hinges, if your hole is 0.8 mm then it would of been possible to have that in the 3D print, maybe not an accurate 0.8 mm, but enough of a hole to allow you to ease it out to the right size to insert your tubes.
Once it's all complete and painted then drop the locking bar into the slots and hold with an adhesive of your choice. I found simple white wood glue quite good for the test build.
Those doors work just fine and the recessed interior will show a nice gap around the cinder shield, just like the real deal
Regarding drilling the hinges, if your hole is 0.8 mm then it would of been possible to have that in the 3D print, maybe not an accurate 0.8 mm, but enough of a hole to allow you to ease it out to the right size to insert your tubes.
Nick Dunhill
Western Thunderer
Yes that had occurred to me but laziness was getting the better of me. I'll be up for it tomorrow when not knackered.....
Nick Dunhill
Western Thunderer
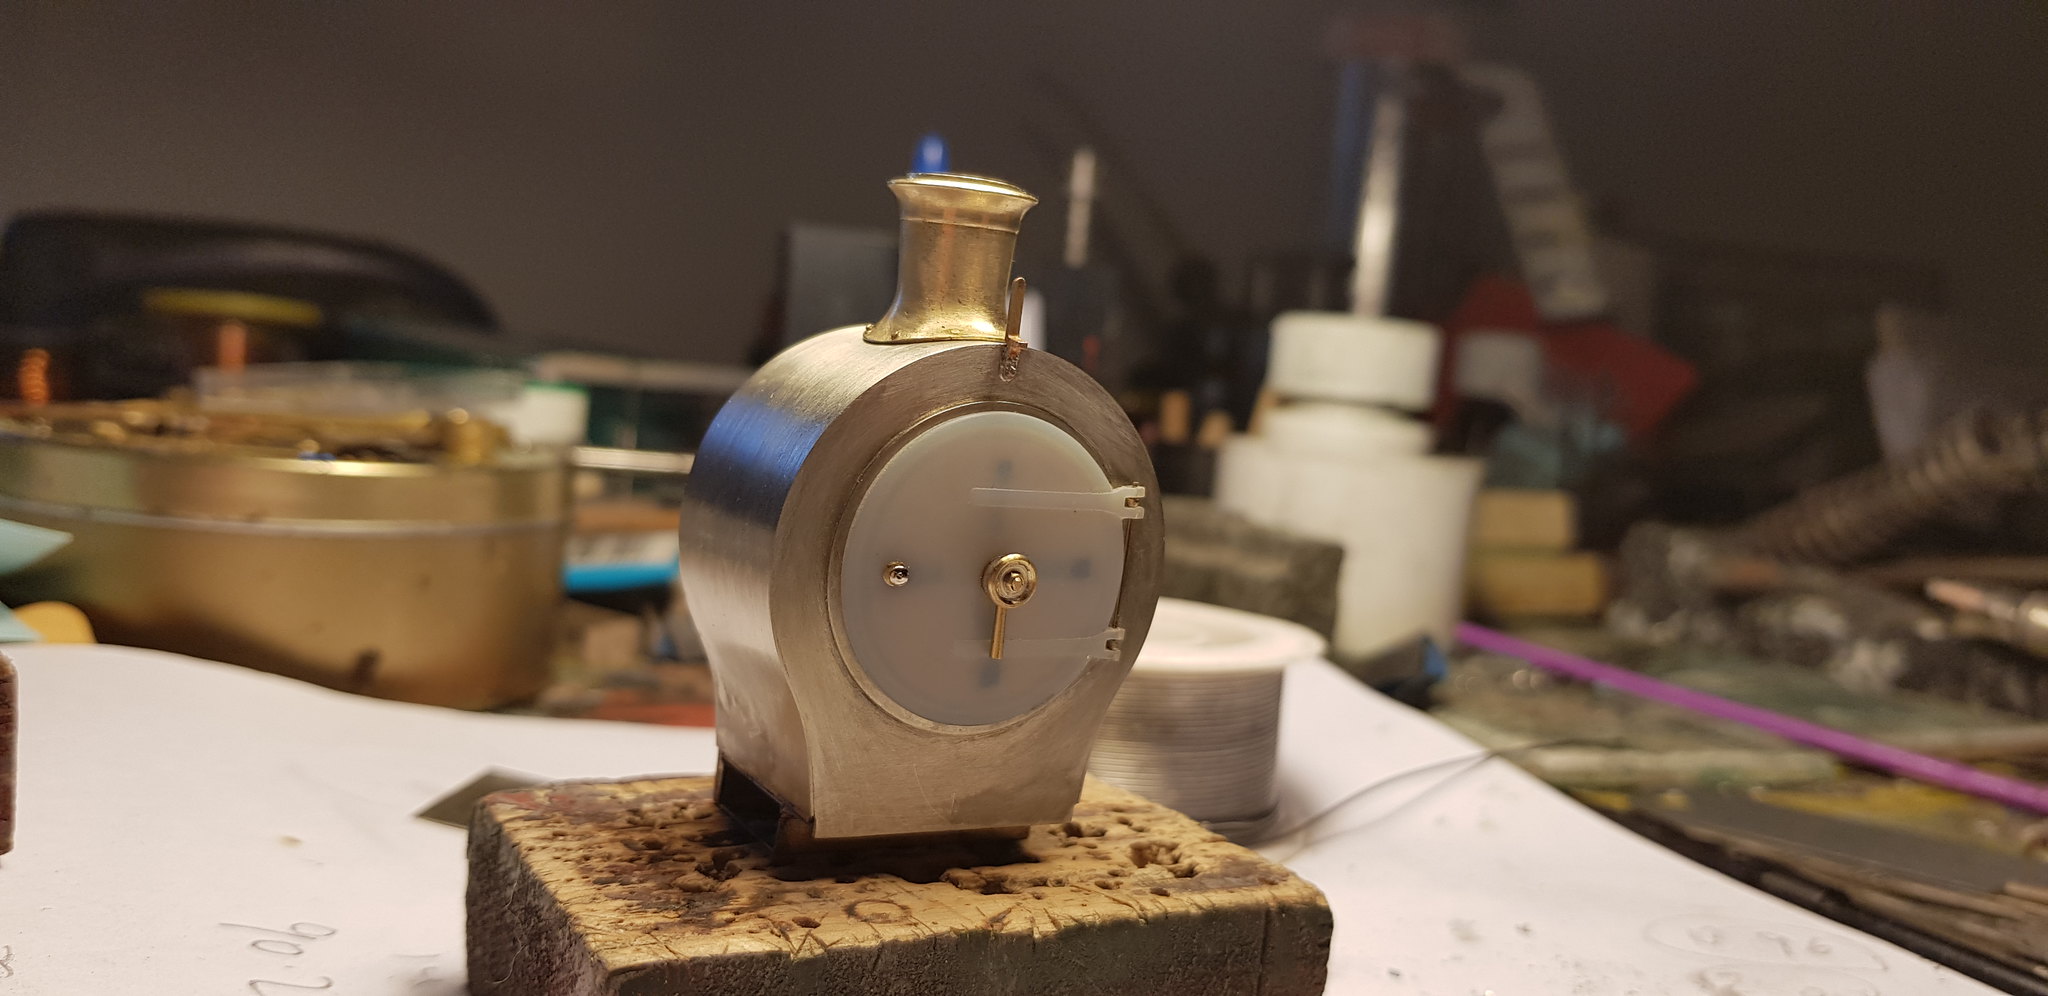
.....here it is all done. Another problem solved, cheers buddy.
Maybe should have taken the pic before washing it!!
Maybe should have taken the pic before washing it!!
Nick Dunhill
Western Thunderer
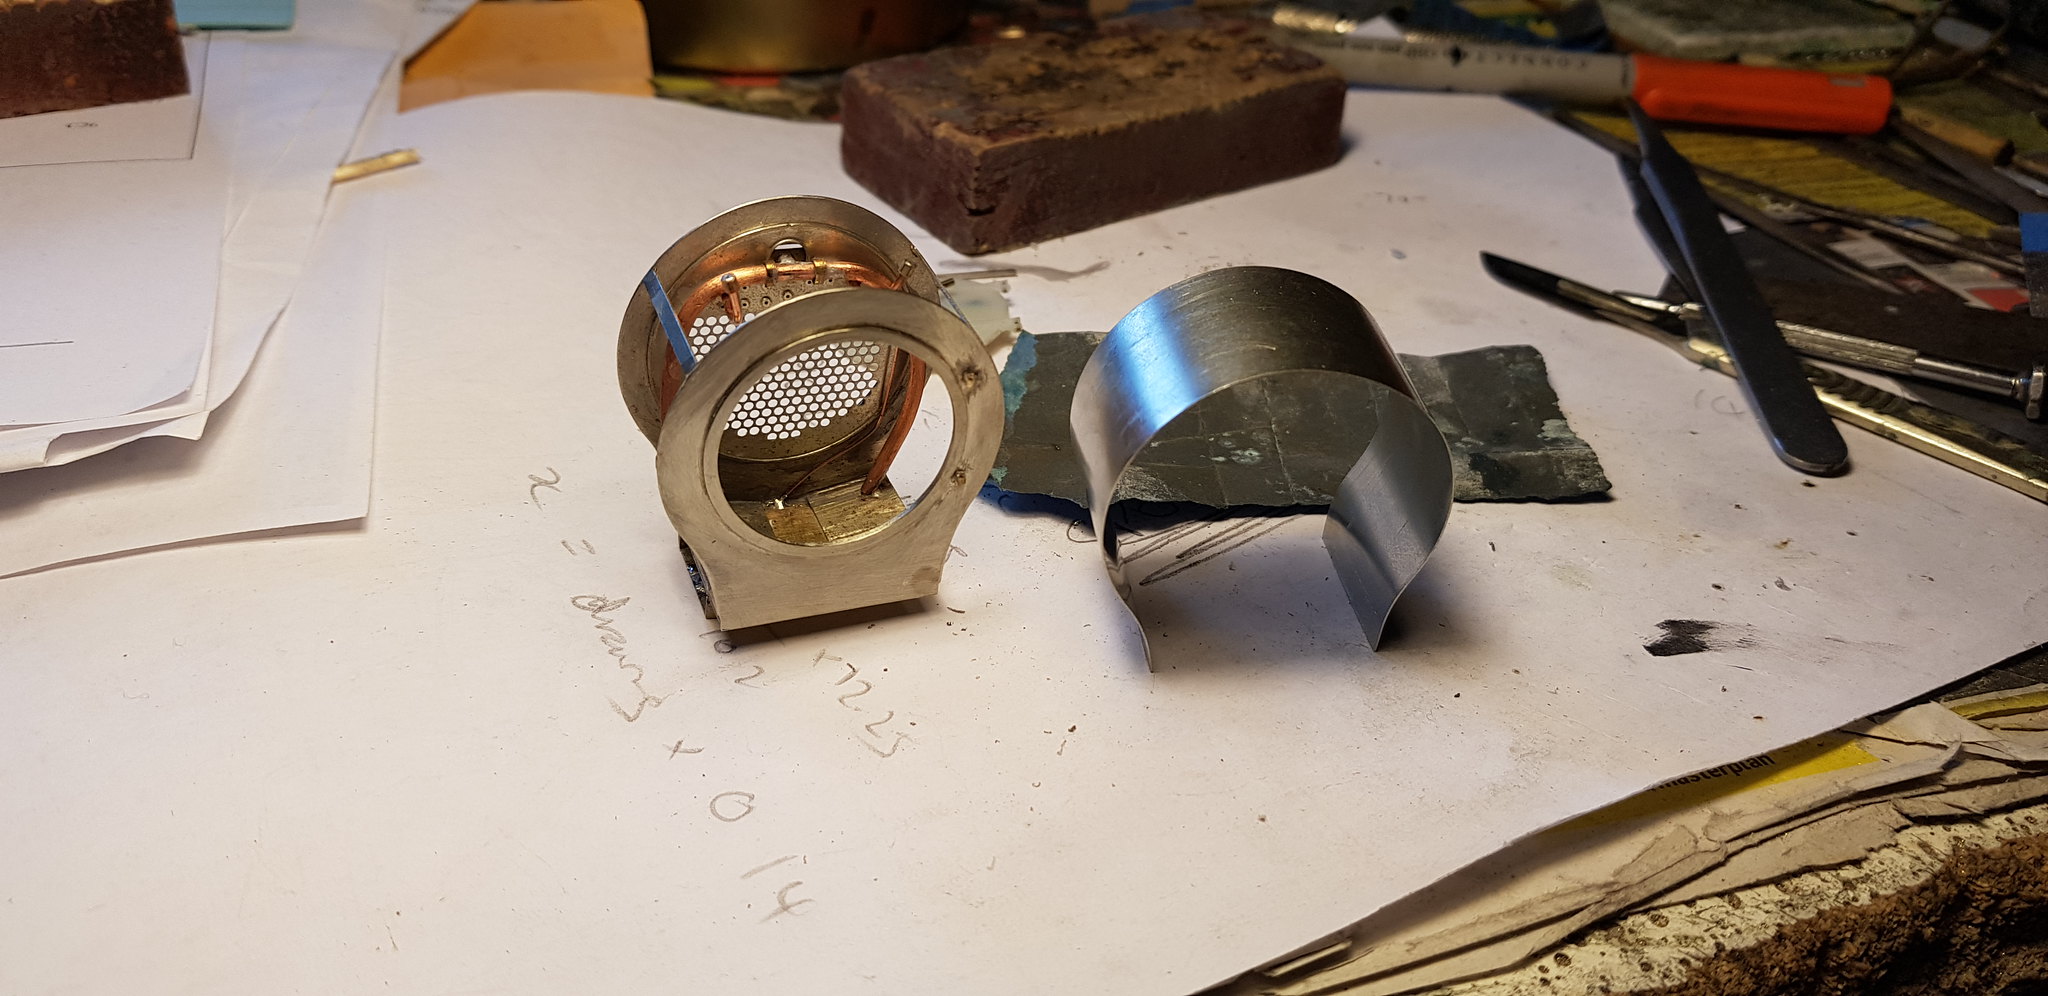
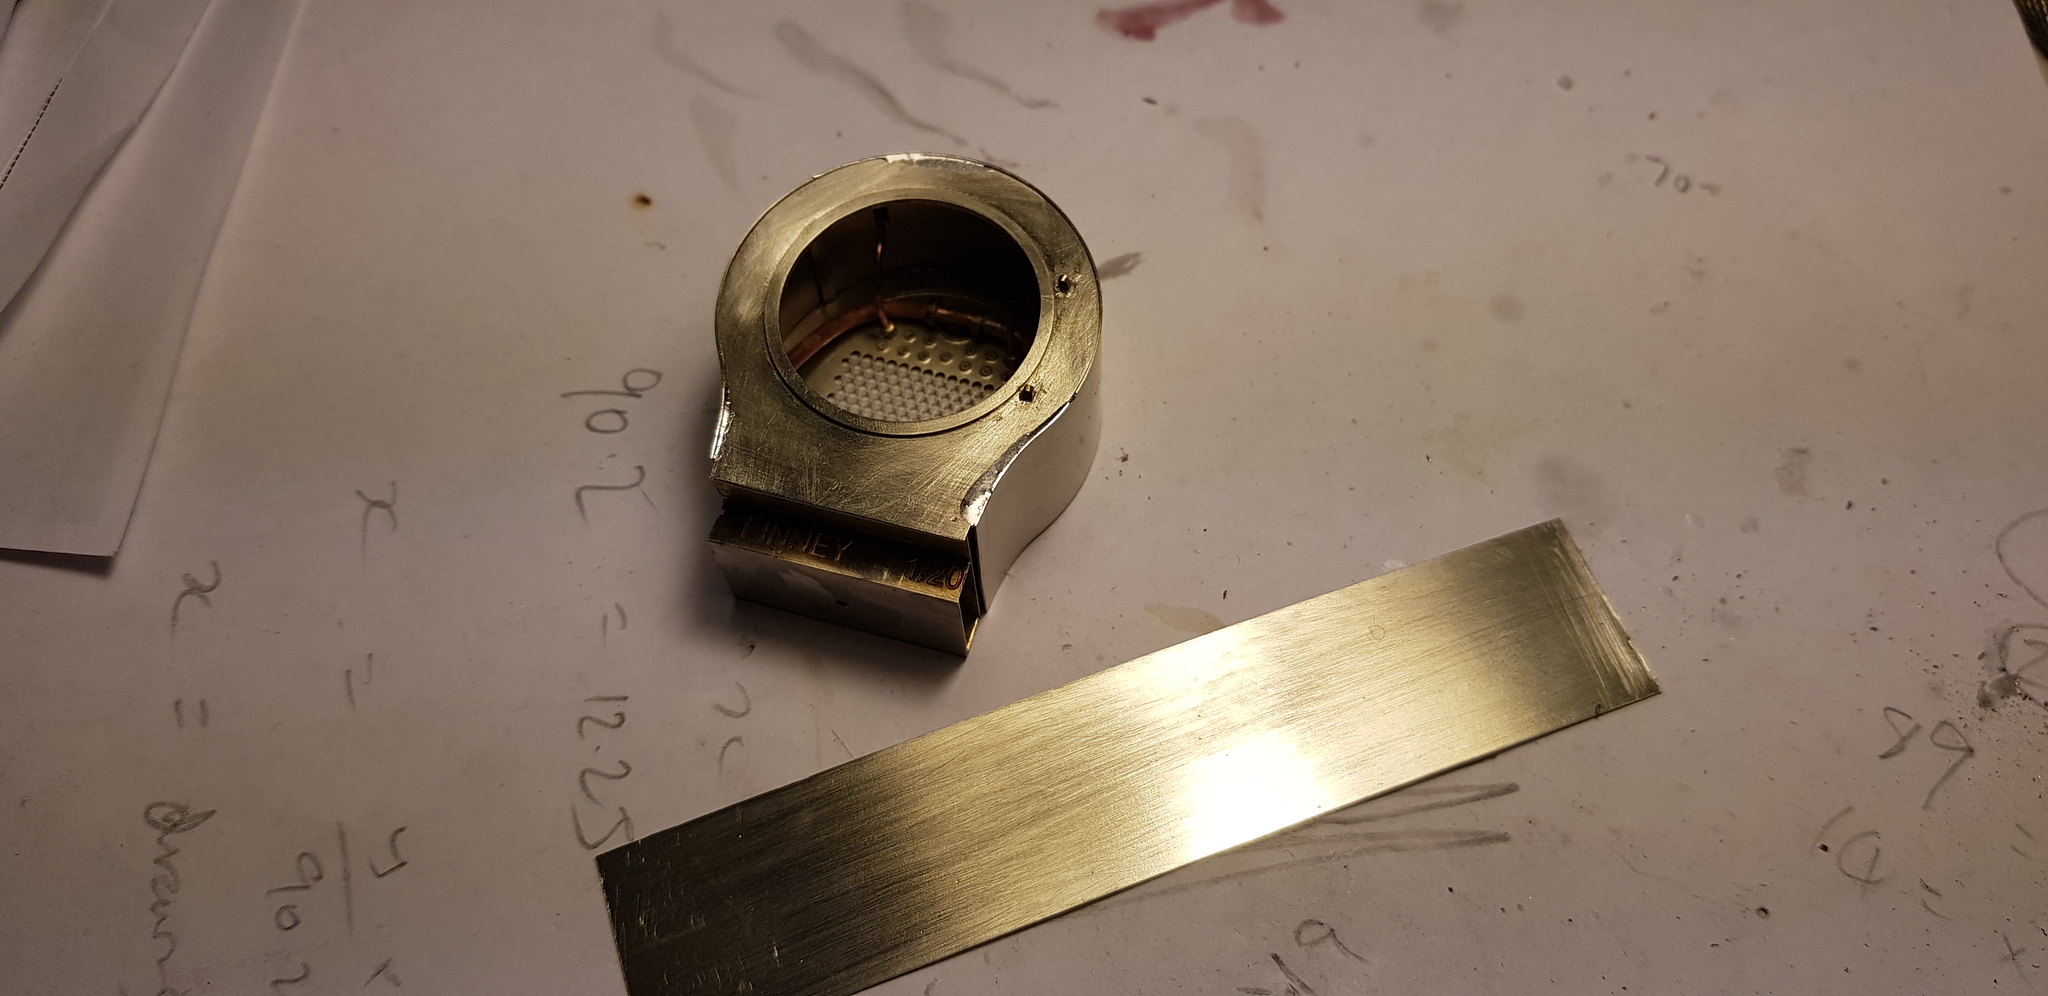
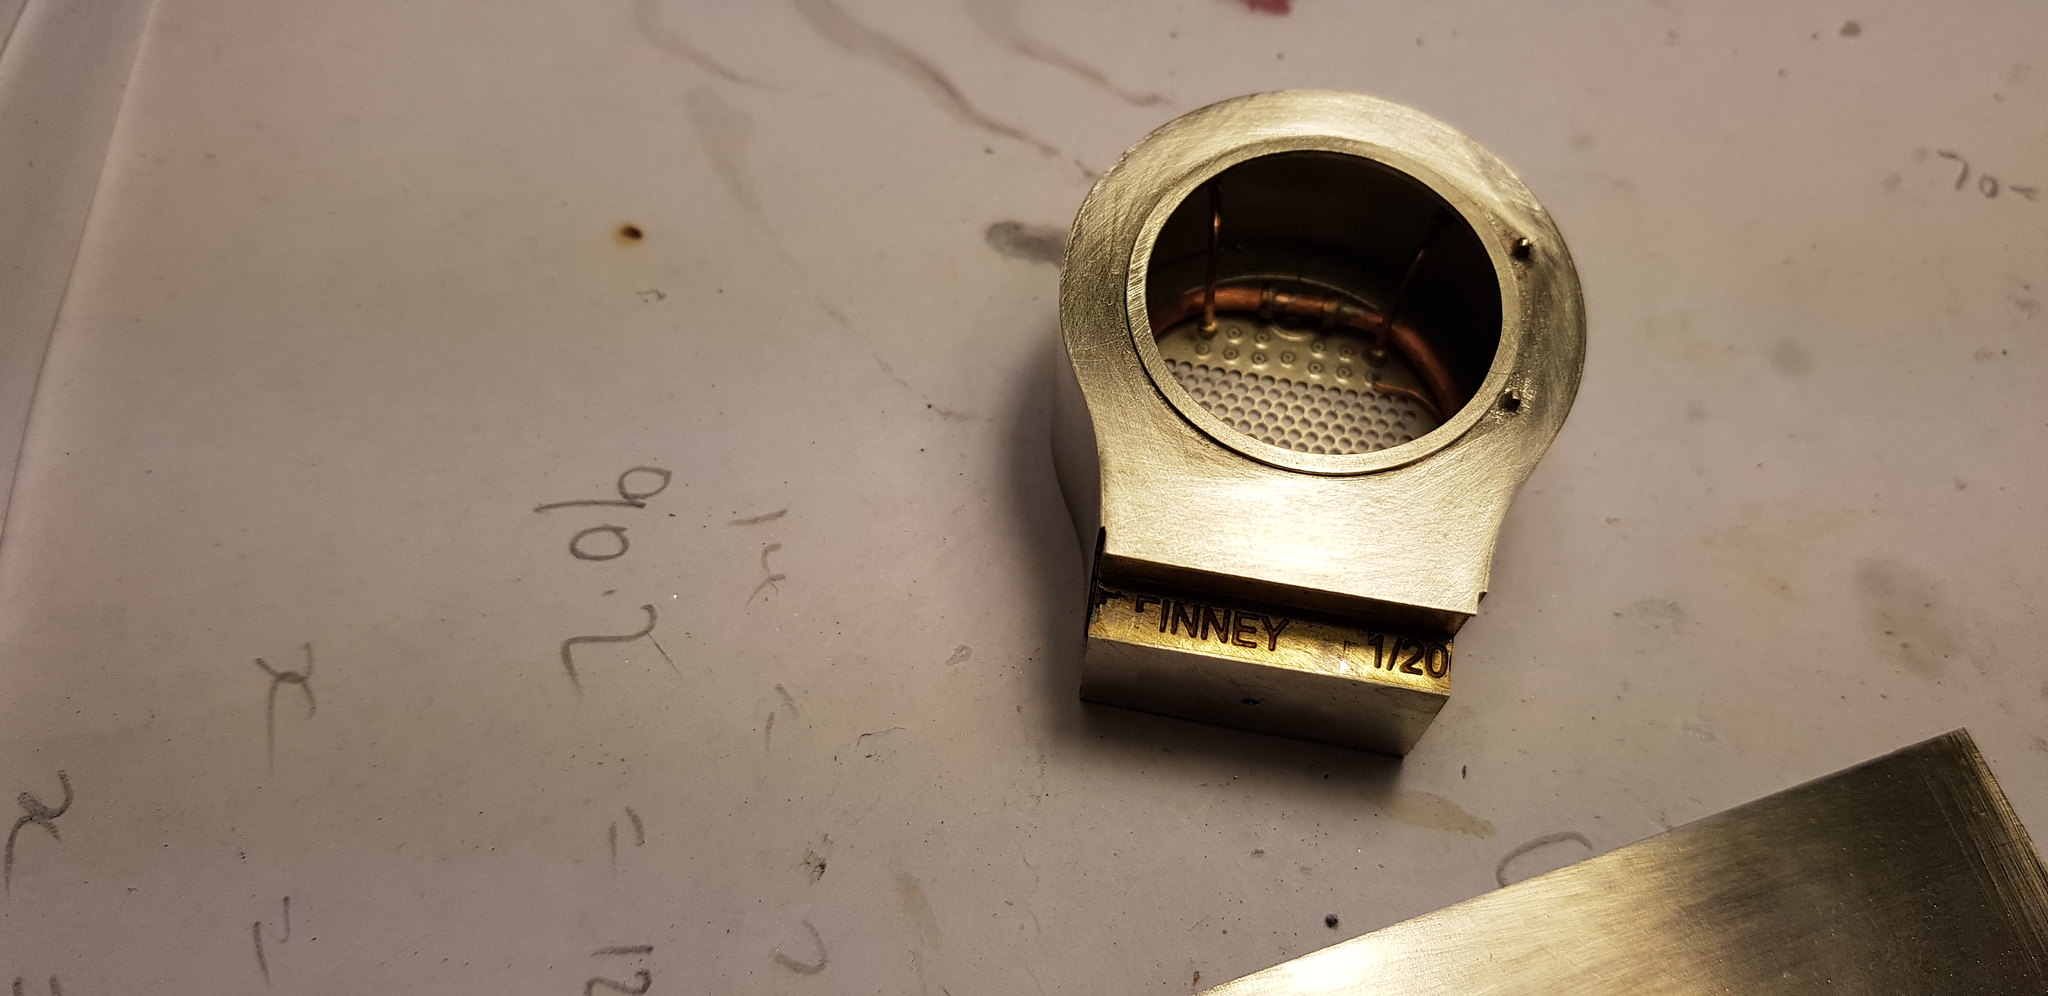
...right, back from hols so on with the show. I have cut out the smokebox wrapper and shaped it using rolling bars. For those out there making up Mick and my etches the pieces I cut out were 106.5 x 21.5 x 0.25 mm. The wrapper is lined up with the chassis tops on one side (scored lines needed here) and tacked in place. It was finally checked on the loco body and soldered up. A bit of filing up is required (I use a sanding disc in a mini drill and final finishing by hand) and then the rear plate was positioned and soldered in position.
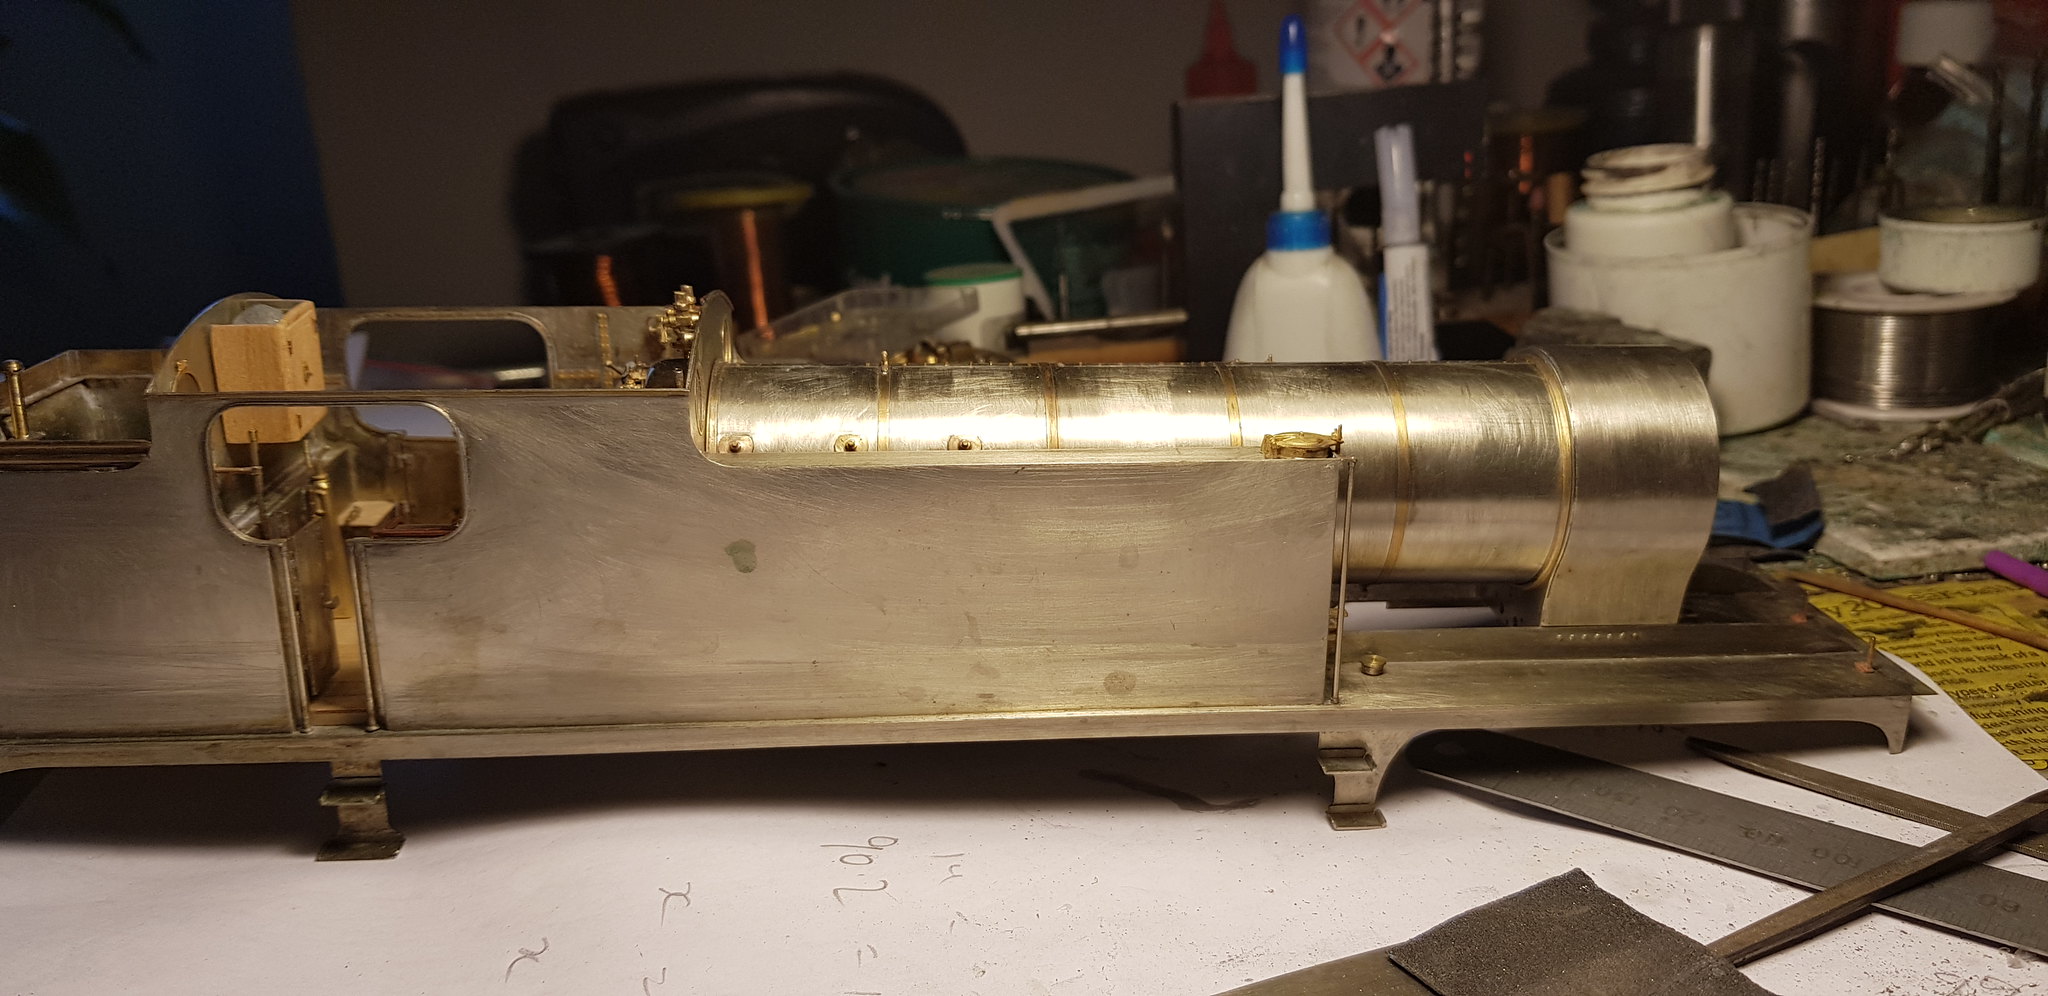
A quick check with the boiler showed a midges-dxxx needed to be taken off the length of the boiler at the firebox end. This was probably because I tacked an oversize plate to the rear of the boiler to represent the vertical section of the angle iron between boiler and cab.
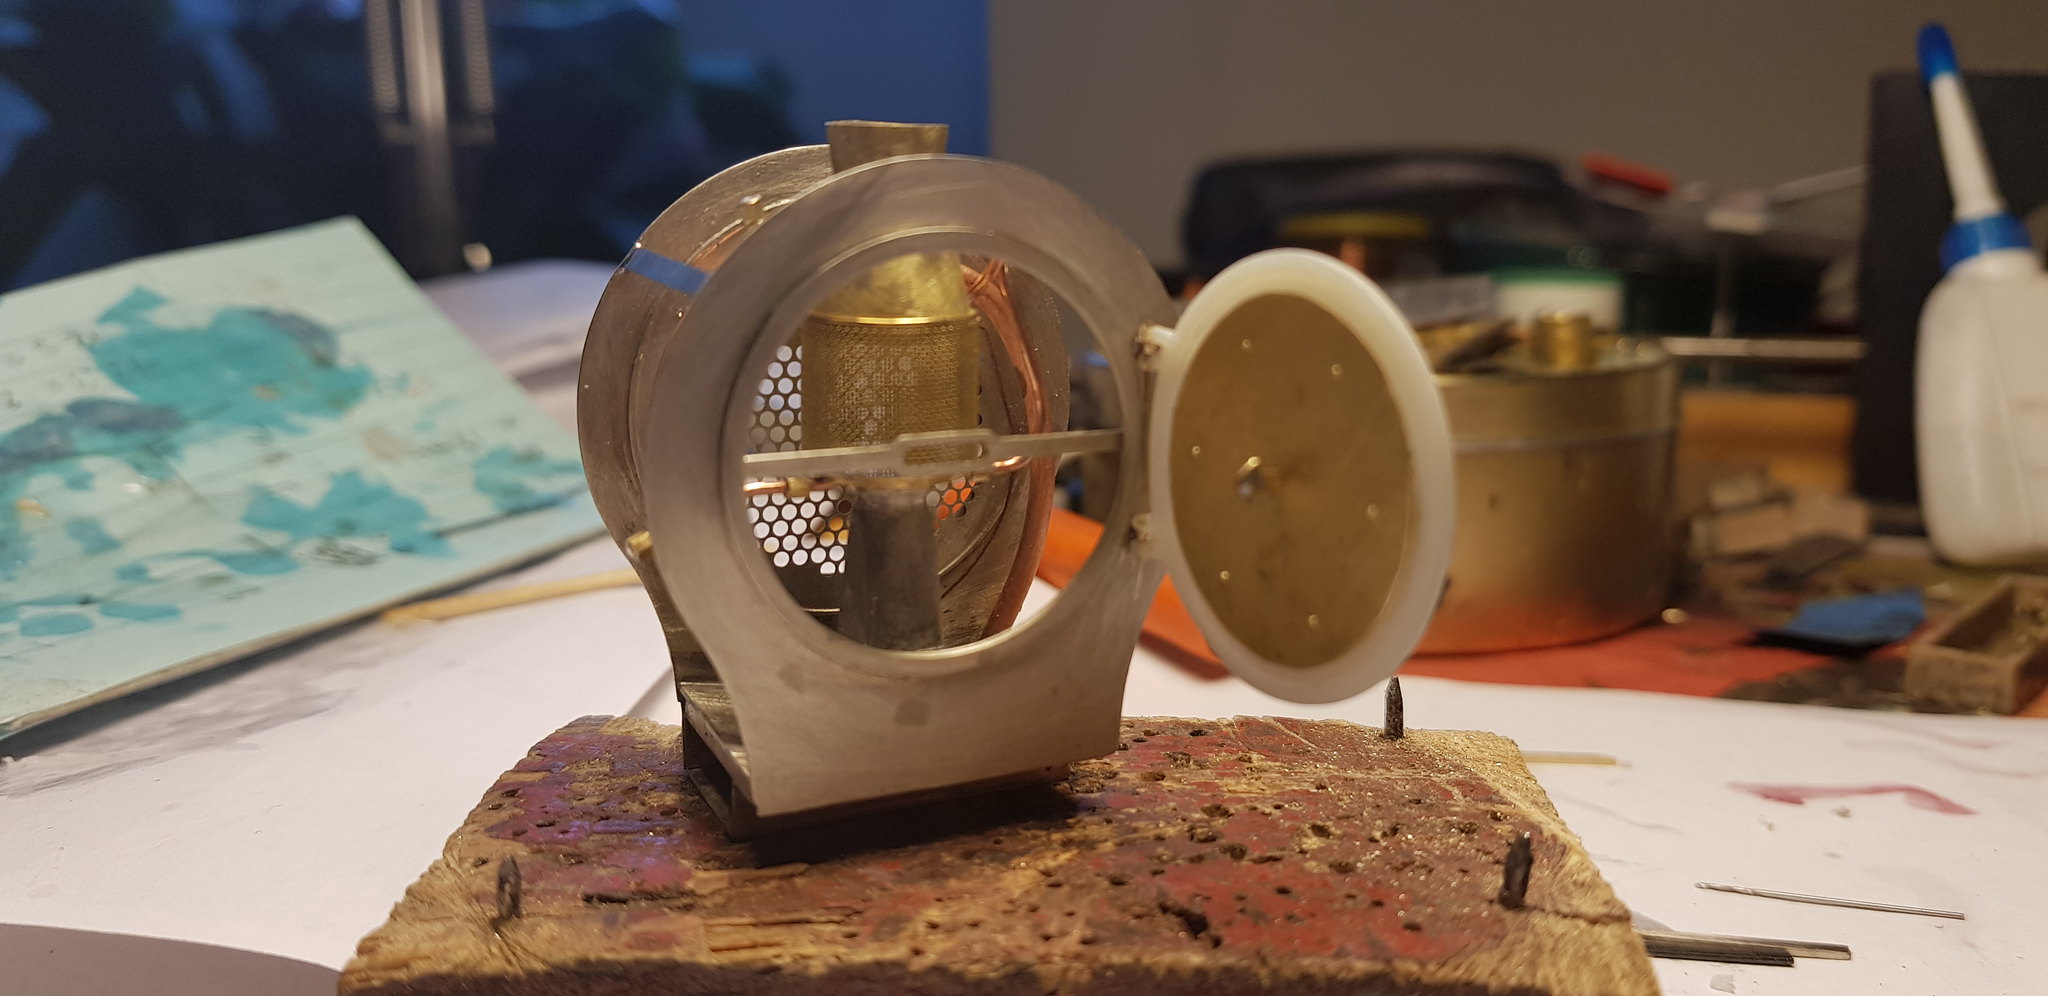
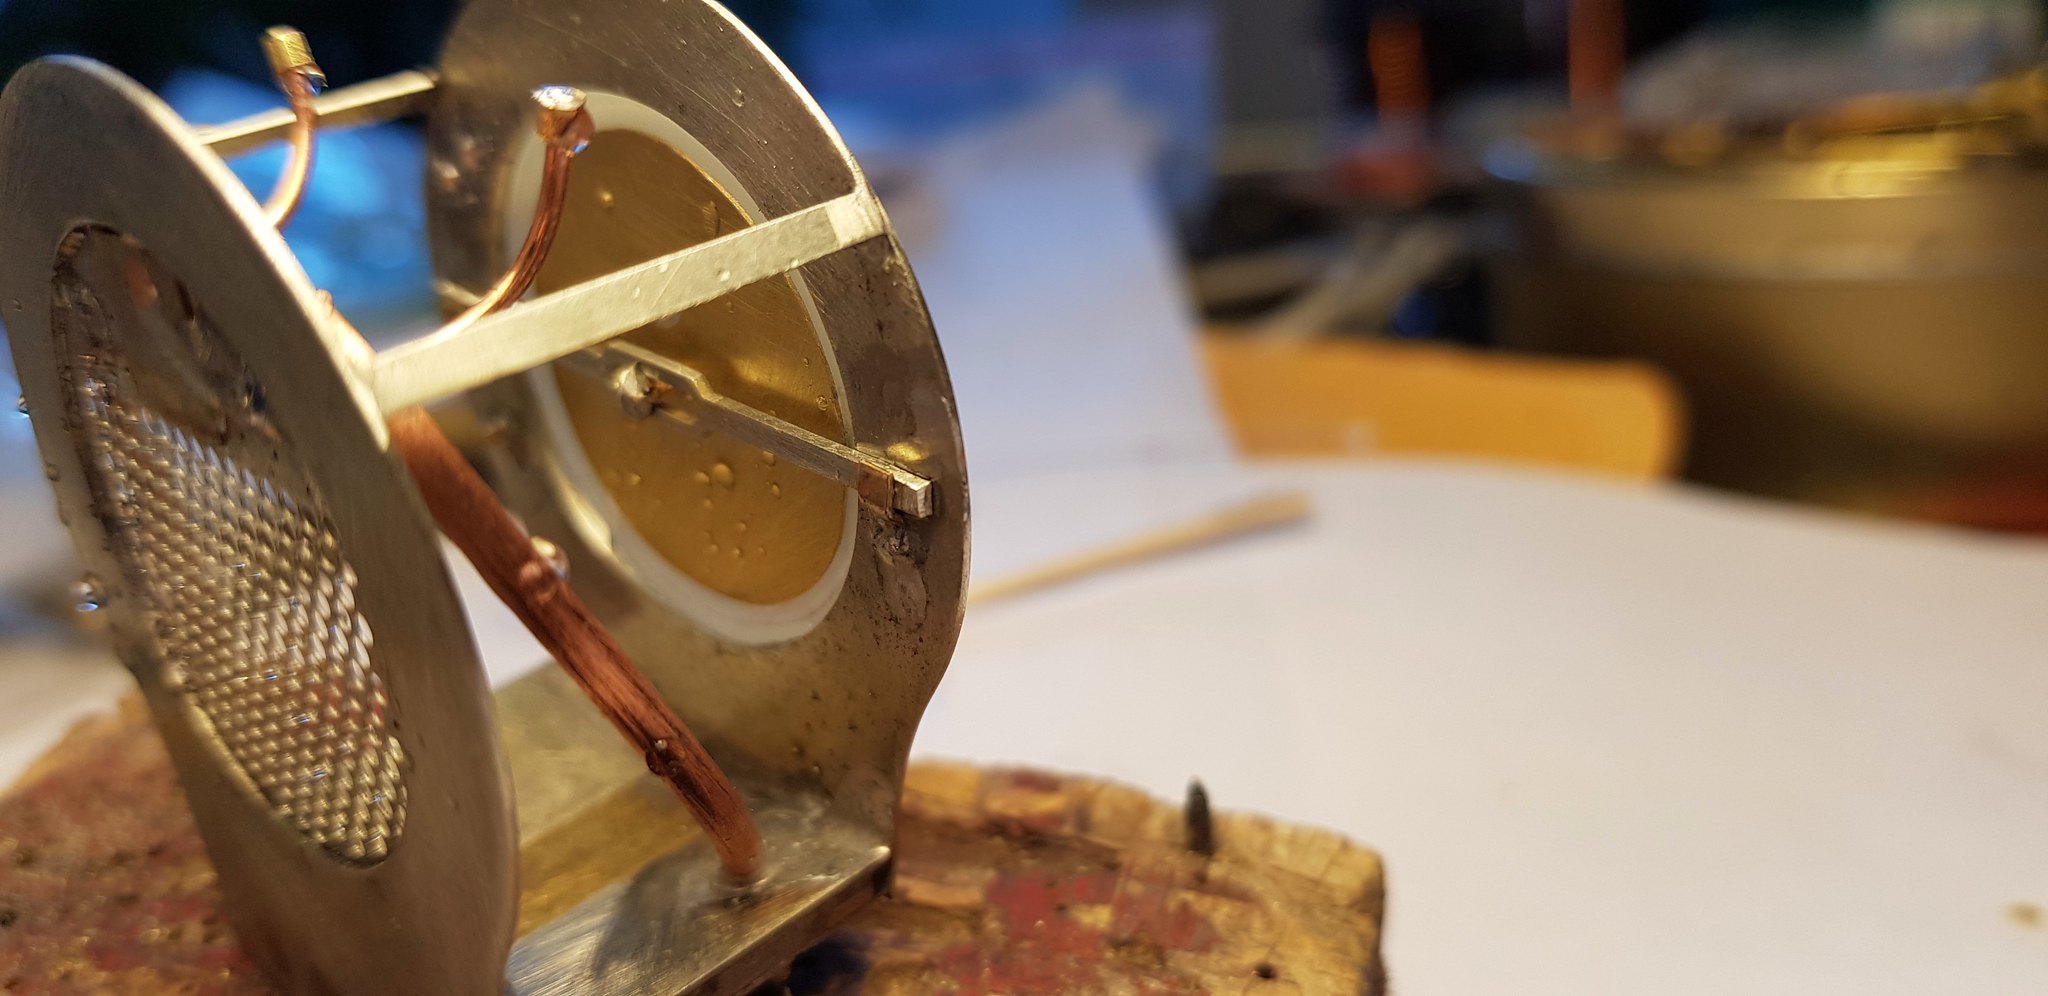
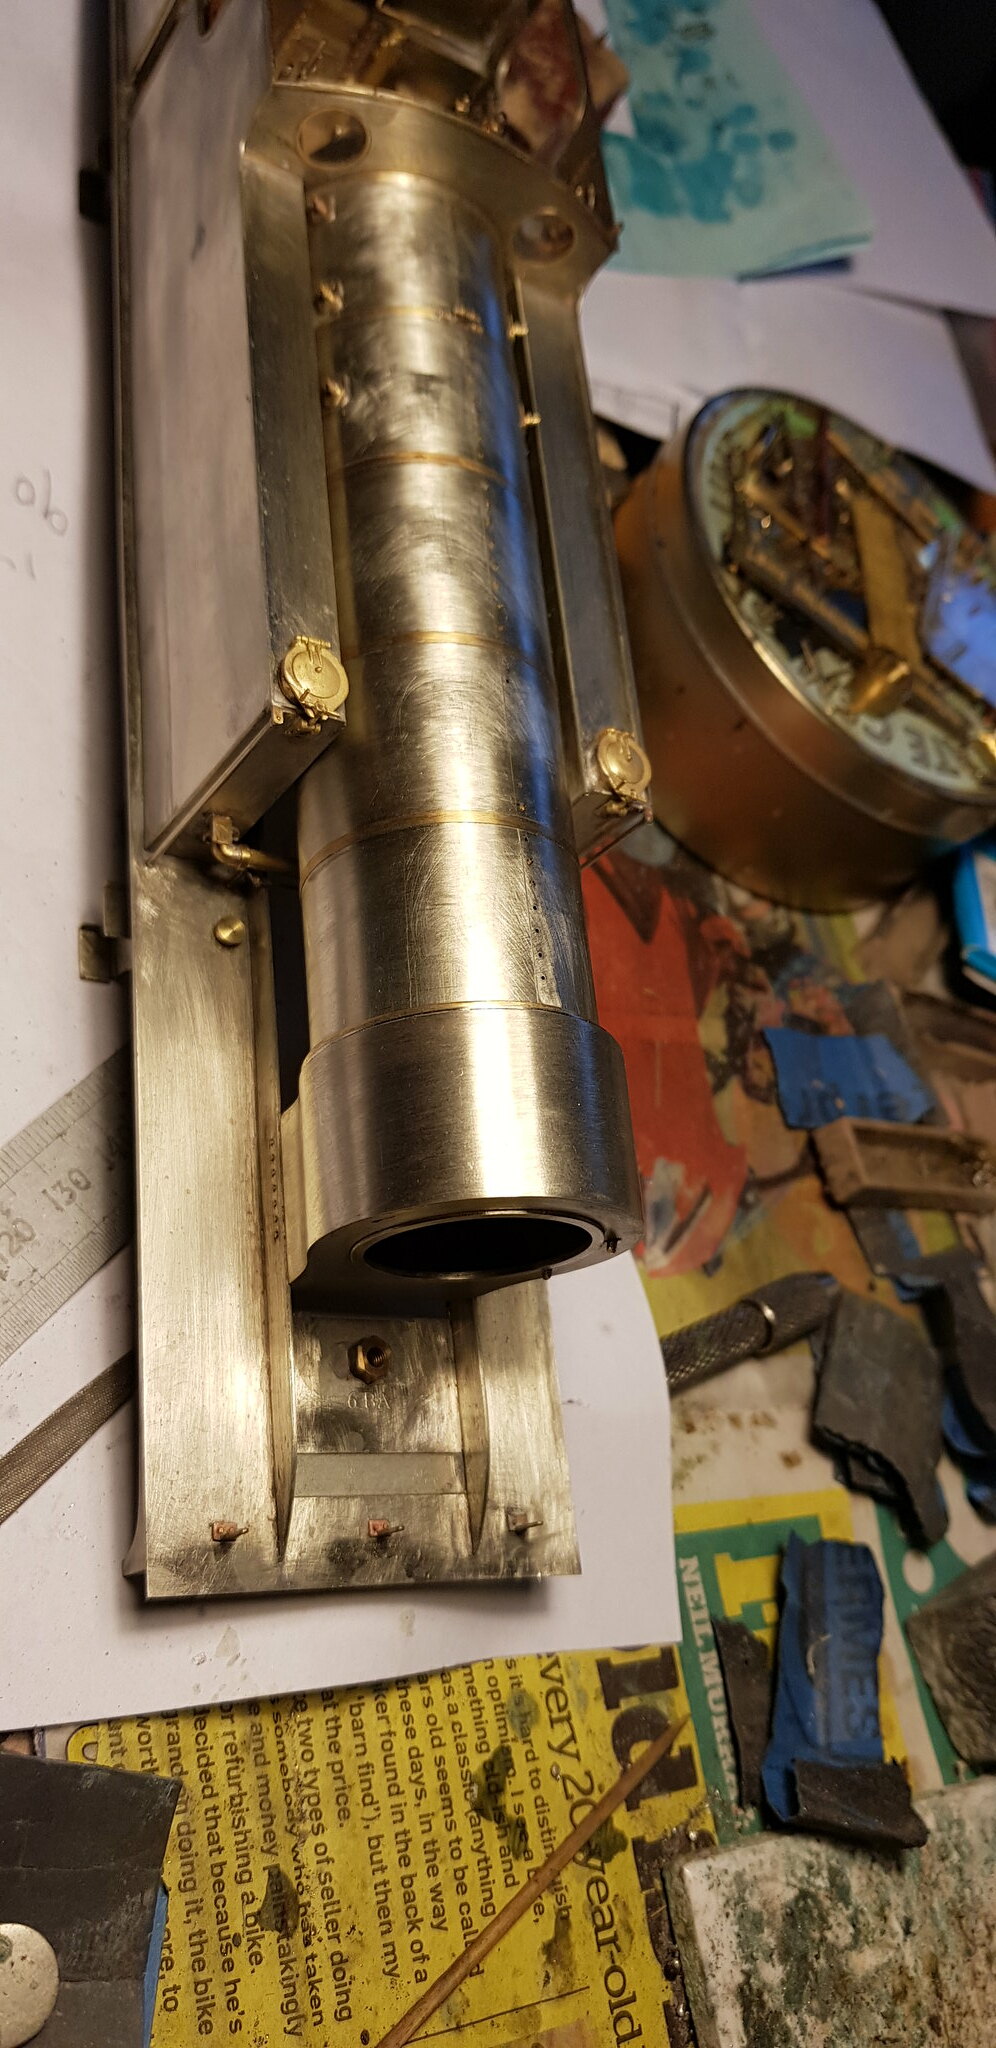
Next I drill an opening for the chimney and do a 'ship in a bottle' thing to get the blast pipe/spark arrestor/petticoat pipe in the smokebox front.....
A quick check with the boiler showed a midges-dxxx needed to be taken off the length of the boiler at the firebox end. This was probably because I tacked an oversize plate to the rear of the boiler to represent the vertical section of the angle iron between boiler and cab.
Next I drill an opening for the chimney and do a 'ship in a bottle' thing to get the blast pipe/spark arrestor/petticoat pipe in the smokebox front.....
Nick Dunhill
Western Thunderer
Ain't it always the way....it's really just a vanity project isn't it.
Last edited:
mickoo
Western Thunderer
But you know......and that's all that countsAin't it always the way....it's really just a vanity project isn't it.
Nick Dunhill
Western Thunderer
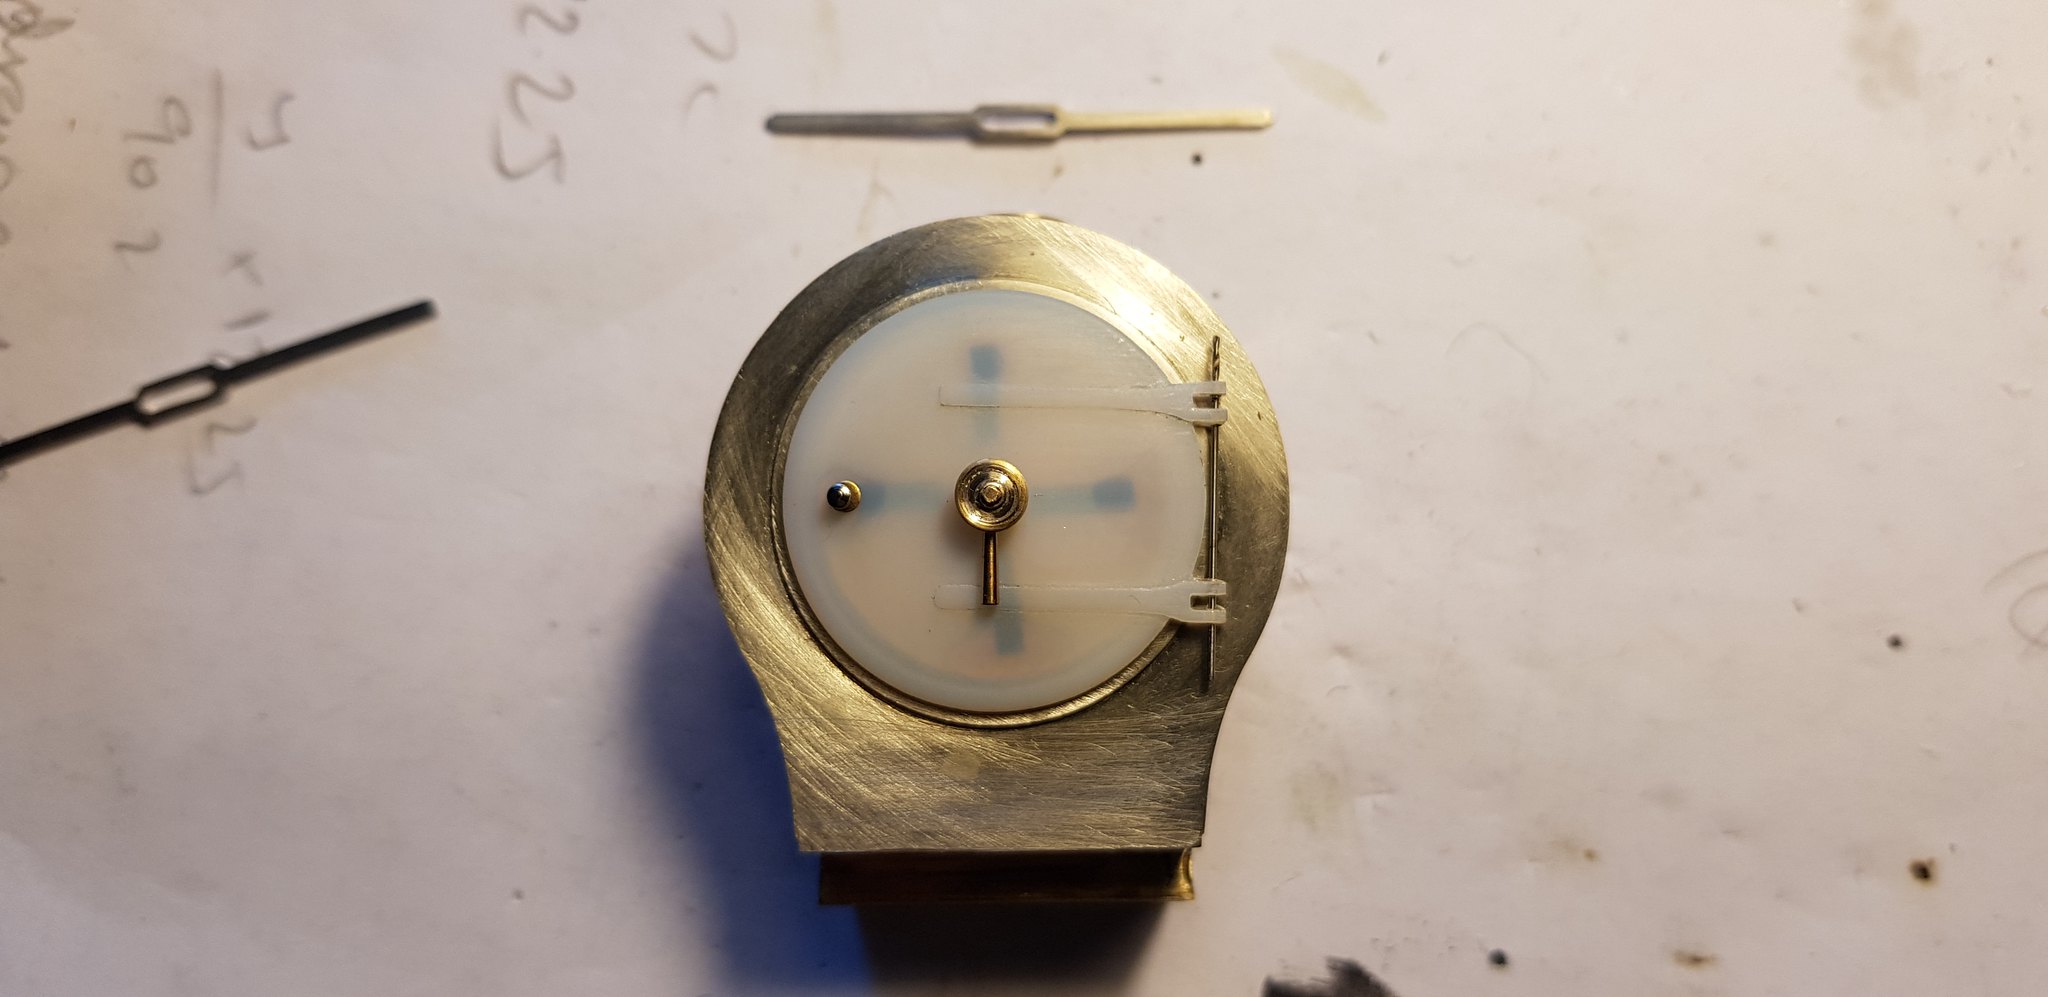
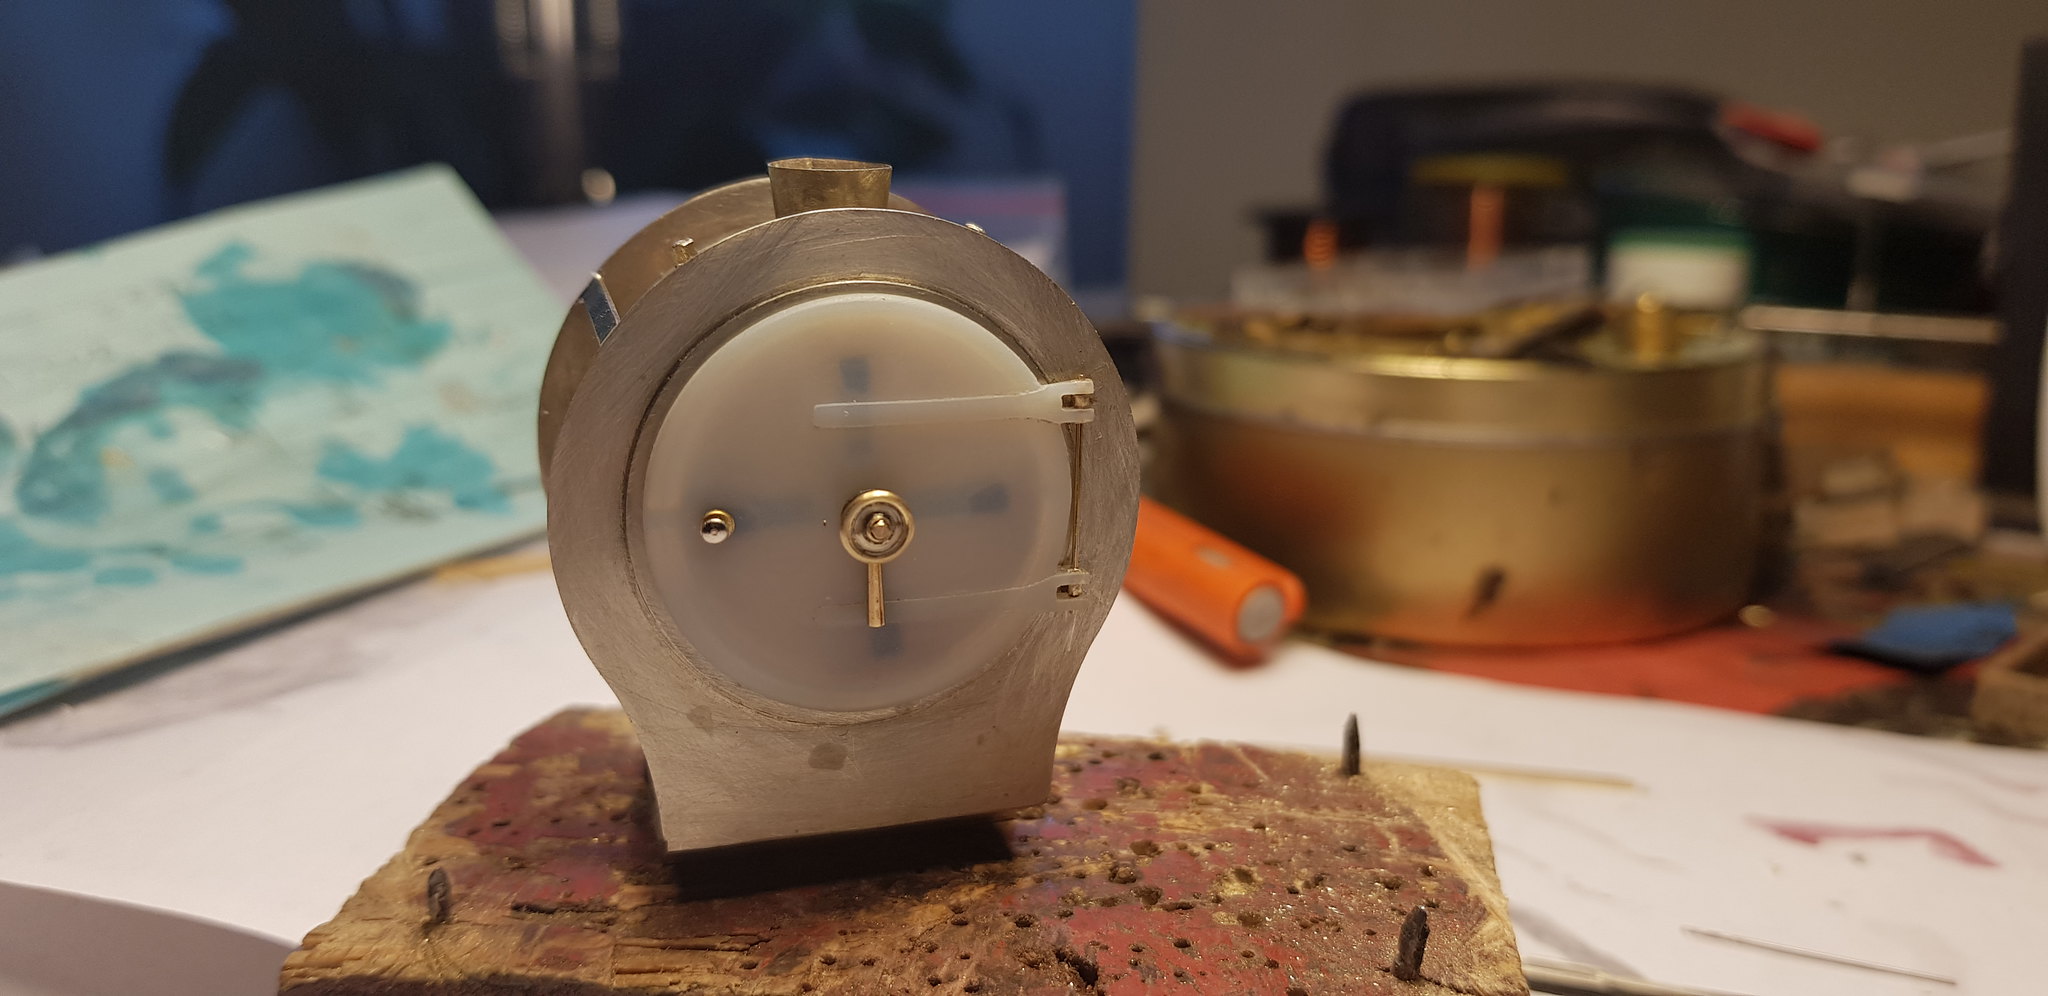
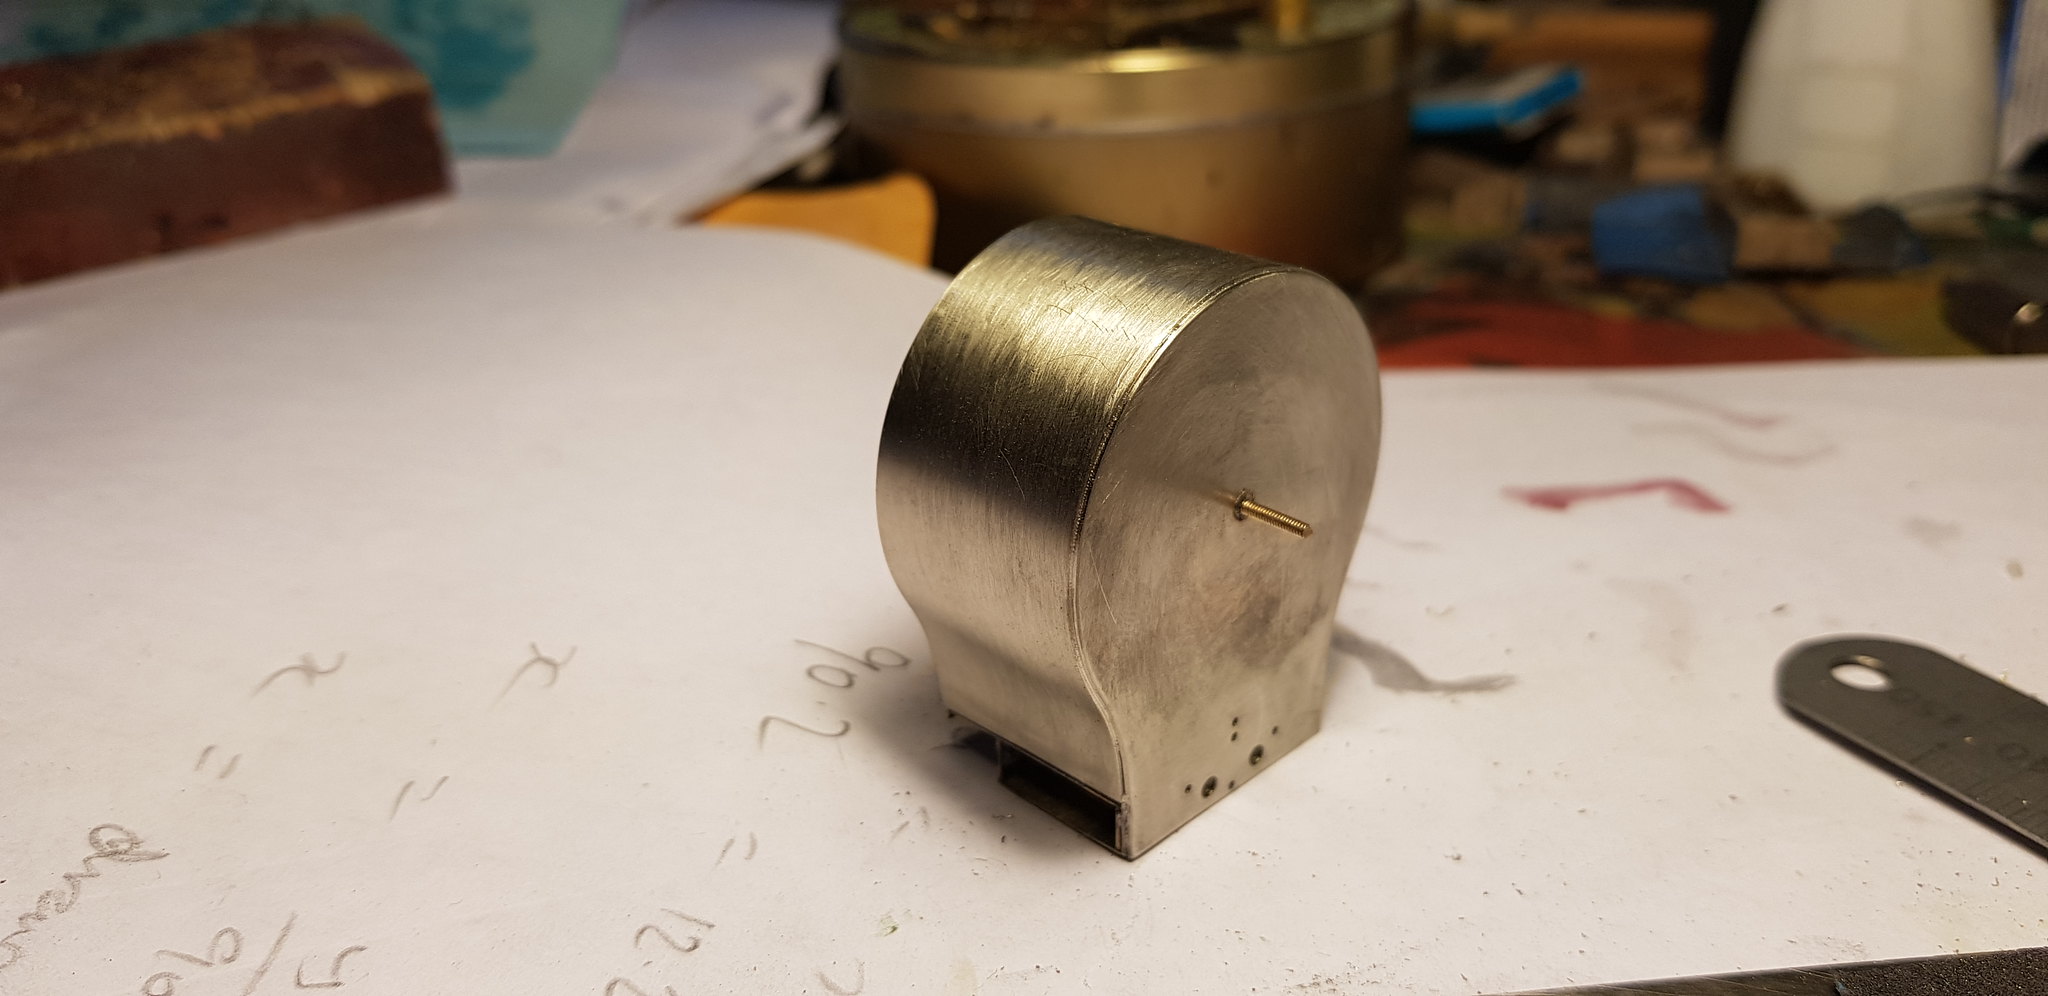
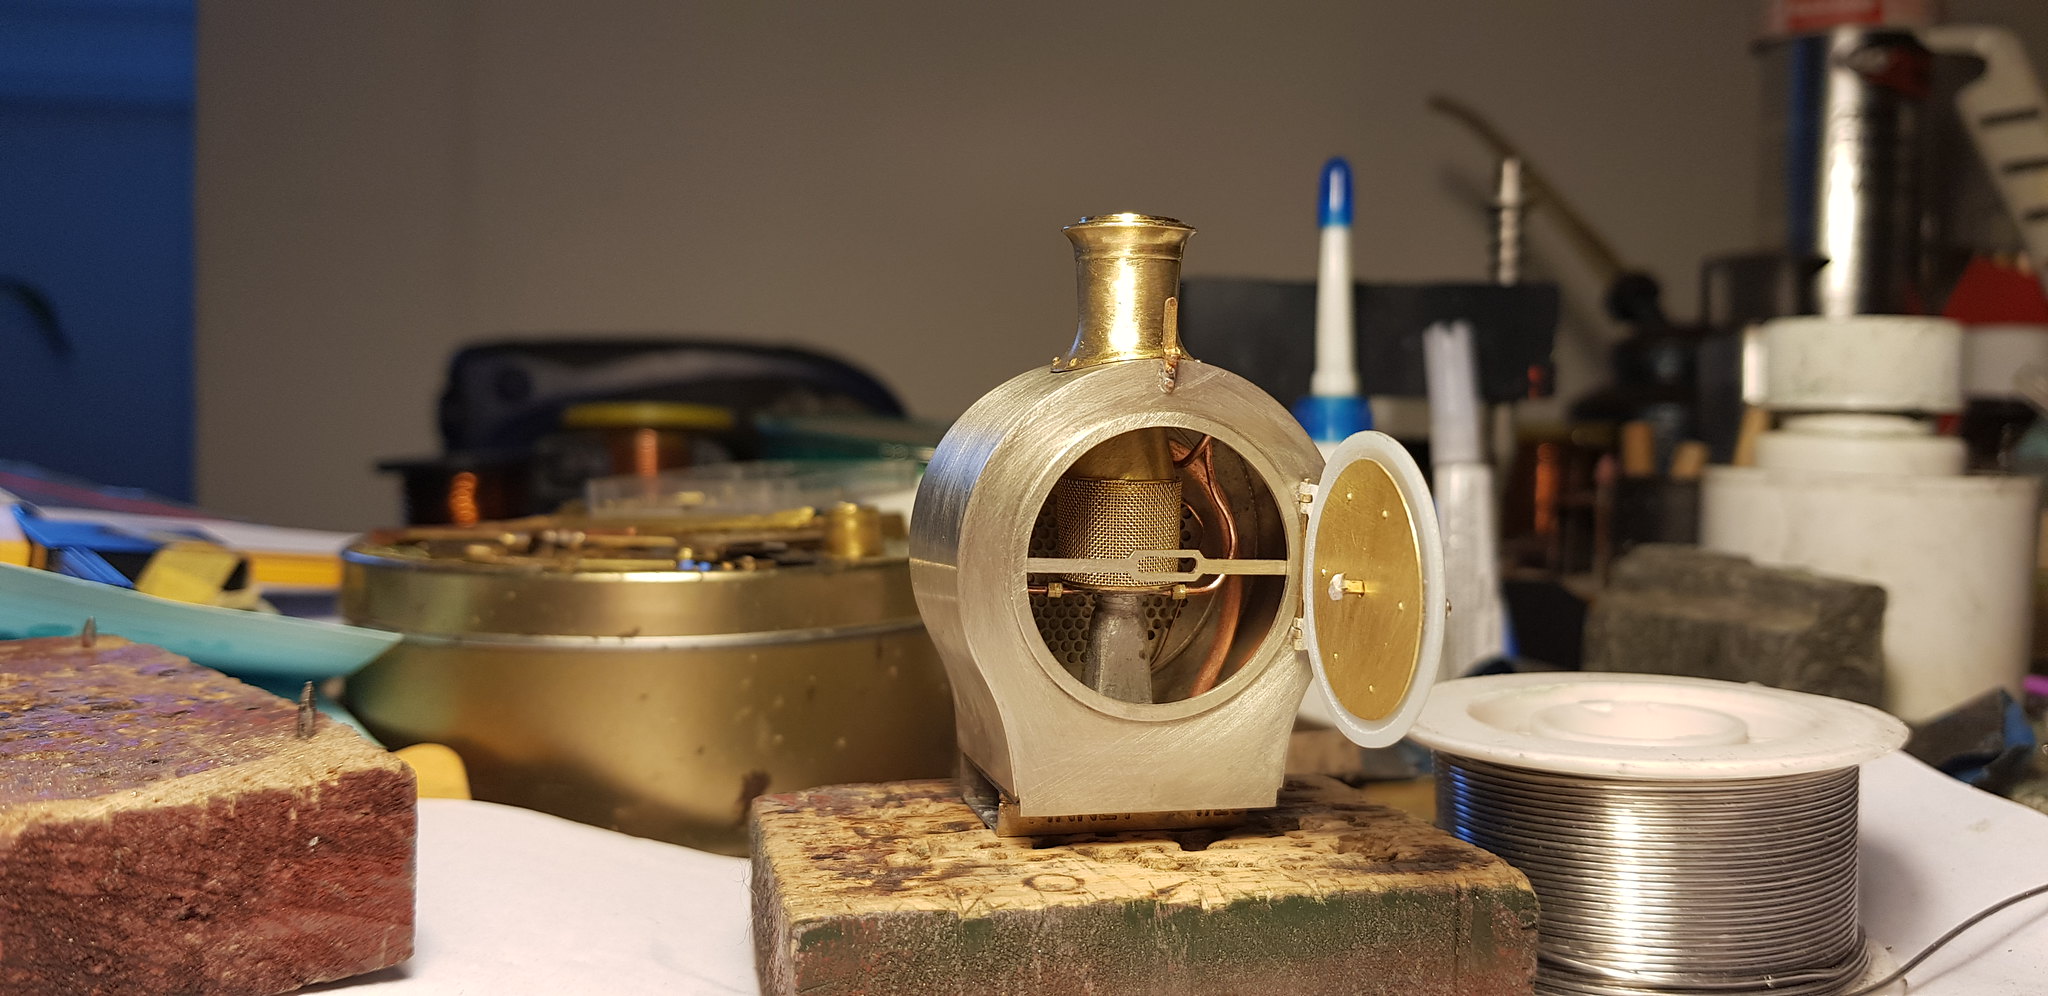
....wey hey here's one of my finished smokeboxes, not as difficult as I thought.
Now you see it,
Now you don't,
Next attaching a boiler...
Now you see it,
Now you don't,
Next attaching a boiler...
Last edited:
Lancastrian
Western Thunderer
That lamp iron look s a little skew whiff
Excellent work Nick.
Ian
Excellent work Nick.
Ian
warren haywood
Western Thunderer
It won’t beThat lamp iron look s a little skew whiff
Excellent work Nick.
Ian
Nick Dunhill
Western Thunderer
One of you was right!