Spike's folding table - Catching a Toad

Dog Star

Western Thunderer
...looking forward to watching the output from that fantatstic space emerge......
Peter has muttered something like - "need to mark out the parking bays (sorry, modelling spaces) for you, me and Chris so as to encourage production of GWR 16'0" wagon underframes".

What is not shown in the three recent photos are:-

1/ the phoenix has risen from the ashes in that "Lower Bank Shed" was re-erected, after almost 18 months stacked against the garden fence, by Peter and Chris Brown last weekend. The view out of the "New Top Shed" windows is much improved :)) .

2/ The electrical installation includes a consumer unit with separate circuits for lights and power plus space for additional circuits when Lower Bank comes into use as the machine shop beside the erecting hall.

What is going to happen to 'Tales from the Folding Table' now that the workshop is pretty well complete? you may well ask... Spike's Folding Table is to be promoted to a support structure at the fixed end of the workshop where the DCC equipment shall be stored for our layouts (if you have that long a memory, then think back to the construction of the "Witchcraft Suitcase" which was based upon ideas and examples by Simon Thompson (@SimonT ).

regards, Graham
 
Last edited:

Muddysblues

Western Thunderer
In between work on the 37 I have been making a pair of catfish from MMP kits. Just about finished them this evening, brake and hopper wheels remain to go, along with the pipe work on the ends.

View attachment 48326

Spike

Good morning Spike, I have just been browsing through this enjoyable thread, one question if you can answer it please, do you know what weight are those MMP Catfish wagons when completed please ? I am tempted with a couple of those Cats and Dogs from Mr Parkins website.

Great looking shed space :thumbs:

Best regards
Craig.
 
Last edited:

michael080

Western Thunderer
Good morning Spike, I have just been browsing through this enjoyable thread, one question if you can answer it please, do you know what weight are those MMP Catfish wagons when completed please ? I am tempted with a couple of those Cats and Dogs from Mr Parkins website.

Craig,

my Catfish has 149g. I don't have a Dogfish, sorry.

empty of course :)

Michael
 

Muddysblues

Western Thunderer
Craig,

my Catfish has 149g. I don't have a Dogfish, sorry.

empty of course :)

Michael

Thanks Micheal, so they are a decent weight even empty, I don't want to pay the sky high prices being demanded for the Heljan models, one can hope they might do a rerun, but heavens knows when ?

Best regards
Craig.
 

Spike

Western Thunderer
First batch of wagons from the new shed are almost complete, back in July I decided to complete two shelf queens and a trio of PO wagon's for Scruffs Junction.

The wagons being worked on were as follows:
1. Trimsaran 3 Plank - Dragon Models
2. Leadbetter 7 Plank - This was either Dragon or Powsides can't remember was bought a long time ago
3 - 5. Norchard 7 Planks - Slaters

One of the drawbacks to the plastic wagons is the lack of detail on the inside of the body, given I am building a Forest of Dean colliery the wagons need to be both full and empty for operation purposes at different times.

Using evergreen plastic strip and some jigs made by my Dad I have added all the internal washer plates and knees. To represent the bolts plasticard dots were punched from a tool made for my dad by the late Paul Penn Sayers. The transformation is definitely worth it, though my head hurts by the end of an evening sticking dots on multiple wagon sides.
IMG_2774.JPG

In terms of painting the wagons I am lucky enough to have a large collection of Games Workshop paints which contain all the colours I could want for weathered wood. Below are a number of pictures showing the transformation from start to end of how I built up the weathered effect using the paints and drybrushing.
Base layer - Dryad Bark
IMG_2775.JPG

1st layer of drybrushing - the top side is just the base layer of dryad bark, the bottom side shows the effect of Drybrushing Steel Legion Drab.
IMG_2778.JPG
After the Steel Legion Drab, I did another layer of drybrushing this time using Gorthor Brown, again the bottom side shows the effect of the drybrushing.
IMG_2779.JPG
To give a bit of lighter colour to the wood I then Drybrushed Zandri Dust over the whole side.
IMG_2780.JPG

The final layer of weathering used a grey paint which I can't remember the name of at the moment.
IMG_2784.JPG

After all the weathering is complete the washer plates were painted black and given a rust effect with some silver and orange paints.

IMG_2776 (2).JPG

The final pictures show the 5 wagons on my display/test track on the workbench. At this point they have had exactoscale underframes and brake gear added. The last jobs to do is some touch up of the painting and adding the brake lever and brake lever guards. The Norchard wagons also need to be numbered, I am going to wait till warmer weather for this job to allow spraying of matt varnish.

IMG_E2890.JPG

IMG_E2923 (2).JPG

Regards
Peter
 

Dog Star

Western Thunderer
You seem to be missing a ‘Parkend’ wagon in that rake.
JB (@Scale7JB ),

1/ There are three Parkend kits (black written white shaded red) here waiting on the Shelf of Queens;
2/ Four Lightmoor kits (colours as Parkend) sit alongside the Parkends;
3/ As written above, there are wagons of other colours pending construction, for example:- several Princess Royal kits (red written white shaded black) on the "start here" part of the Shelf of Queens;
4/ My understanding of the S&W Rly Train Working Instructions (circa late 1890s) is that a train clearing Parkend might not clear Norchard. No doubt Ian Pope (@Ian Pope ) could enlighten us.
 
Last edited:

ChrisBr

Western Thunderer
Why restrict the question to wagons? Some of us would like to see coaches next (4 or more wheels) and that's before we even open the door to motive power.......
 

Scale7JB

Western Thunderer
JB (@Scale7JB ),

1/ There are three Parkend kits (black written white shaded red) here waiting on the Shelf of Queens;
2/ Four Lightmoor kits (colours as Parkend) sit alongside the Parkends;
3/ As written above, there are wagons of other colours pending construction, for example:- several Princess Royal kits (red written white shaded black) on the "start here" part of the Shelf of Queens;
4/ My understanding of the S&W Rly Train Working Instructions (circa late 1890s) is that a train clearing Parkend might not clear Norchard. No doubt Ian Pope (@Ian Pope ) could enlighten us.

Ian Pope has more than 150 examples of FoD PO wagons... care to name them? Just as a hint, not all of them are in the POWSides range.

Thanks for the info. It was a loaded question, as I have one here that I built (in Finescale - yes it was that long ago) for a previous project that is no longer of any use to me, and wondered if you would like it.

Won’t take offence if refused.

JB.
 

Dog Star

Western Thunderer
Thanks for the info. It was a loaded question, as I have one here that I built (in Finescale - yes it was that long ago) for a previous project that is no longer of any use to me, and wondered if you would like it.
Yes please!

Address is in the S7 Members List.
 
A diversion to the Colliery - Sentinel 0-4-0

Spike

Western Thunderer
A week off work and not feeling the 4MT lead to the starting of a birthday present - A Judith Edge Sentinel 0-4-0 Chain Drive. As said previously I am building a colliery extension to my Forest of Dean Layout.

7mm - Scruft's Junction:- a goods shed from foamboard, depron and corrugated card

Whilst the layout will predominantly by run by steam I have a liking for Diesels mainly class 37's, therefore a suitable colliery loco was required and I felt this suited the job perfectly.

First up is the outside frames and footplate, I have left the ends off at the moment, I am trying to work out a method working lights for the loco. The kit comes with etched lights built into the buffer beam, my plan is for 3D printed light units and then cut off the etched version. At that point I can then attach the ends.
IMG_2963.JPG

One part I was looking forward to building was the engine casing, I just like the look of the front of the loco with the grills.
The grill is made up of three layers. I have drilled two holes in the headlights, to add working lights further along in the build.
IMG_2966.JPG

IMG_2967.JPG

I was thinking about how the model would be painted especially the engine casing once the sides were attached. The kit makes provision for this with both the engine casing and rear fuel tank removable, the kit provides bolts for the engine casing but suggests soldering the fuel tank to the footplate. I have decided to make both of them removable.

IMG_2968.JPG

I have attached both sides, cab rear and made up the fuel tank which is not screwed down in the below photo.
IMG_2970.JPG

Next up will be the motor and DDC gear. I want to get this worked out before progressing, the need to run lighting wires to the front and back as well as fit in a keep alive and speaker might case some headaches.

Peter
 
Last edited:

Dog Star

Western Thunderer
Scruft's Junction lies in a time warp - to be precise, in two time periods with selection of the time being driven by the rolling stock in view when the question is asked. Many years ago the time period was Edwardian and the stock was GWR with coaches and wagons from Swindon and Gloucester (GRC&W). Since starting the layout Peter has developed interests in Large Logo Blue on the West Highland and in late 1950s/early 1960s steam in the Forest of Dean. Scruft's is set in the FoD and the arrival of Minerva Pannier tanks in BR Black rather necessitated the introduction of appropriate wagons - enter the rust bucket courtesy of Dapol.

This 16T Mineral Wagon collection arrived recently... welded / rivetted / grey / blue-grey... all on 0-FS wheels. The first task is to re-wheel the wagons for Scruft's Jcn. is to S7 track standards. In front of the boxes are 8 wagons sets of suitable wheels, Slater's S7 wheels fitted to an axle which provides B2B setting for the wheels and with pin-points to suit the Dapol underframe (available from the S7 Stores as part number X710040S, listed under Stores Catalogue / Wheels).
IMG_6716[1].JPG

After conversion from 0-FS to S7 the wagons shall be going away for a holiday when the wagons shall be re-numbered and weathered.


In the meantime, a question about livery details. Dapol offers the 16T in a variety of "colours" and alternative styles of numbering, this photo shows some of the variations within our mineral fleet.
IMG_6718[1].JPG

Without getting hung up on the accuracy of the shade, for this discussion I shall refer to the wagon on the left as "grey" and the other two wagons as "blue-grey". Which came first... grey or blue grey? When, roughly, were these colours first used on the 16T minerals?

There are two numbering styles in our fleet, "small block" on the wagon to the far right and "large" block for the other two wagons. Which style came first... small block or large block? When, roughly, were these styles of black patches first used on the 16T minerals?


thank you and regards, Graham
 

Overseer

Western Thunderer
Scruft's Junction lies in a time warp - to be precise, in two time periods with selection of the time being driven by the rolling stock in view when the question is asked. Many years ago the time period was Edwardian and the stock was GWR with coaches and wagons from Swindon and Gloucester (GRC&W). Since starting the layout Peter has developed interests in Large Logo Blue on the West Highland and in late 1950s/early 1960s steam in the Forest of Dean. Scruft's is set in the FoD and the arrival of Minerva Pannier tanks in BR Black rather necessitated the introduction of appropriate wagons - enter the rust bucket courtesy of Dapol.

This 16T Mineral Wagon collection arrived recently... welded / rivetted / grey / blue-grey... all on 0-FS wheels. The first task is to re-wheel the wagons for Scruft's Jcn. is to S7 track standards. In front of the boxes are 8 wagons sets of suitable wheels, Slater's S7 wheels fitted to an axle which provides B2B setting for the wheels and with pin-points to suit the Dapol underframe (available from the S7 Stores as part number X710040S, listed under Stores Catalogue / Wheels).
View attachment 142782

After conversion from 0-FS to S7 the wagons shall be going away for a holiday when the wagons shall be re-numbered and weathered.


In the meantime, a question about livery details. Dapol offers the 16T in a variety of "colours" and alternative styles of numbering, this photo shows some of the variations within our mineral fleet.
View attachment 142783

Without getting hung up on the accuracy of the shade, for this discussion I shall refer to the wagon on the left as "grey" and the other two wagons as "blue-grey". Which came first... grey or blue grey? When, roughly, were these colours first used on the 16T minerals?

There are two numbering styles in our fleet, "small block" on the wagon to the far right and "large" block for the other two wagons. Which style came first... small block or large block? When, roughly, were these styles of black patches first used on the 16T minerals?


thank you and regards, Graham
To answer the easy question first, the ‘small block’ lettering was only used on newly built wagons. All repaints had the large black patch.

The Dapol greys are odd and it is probably better to respray all of them into a likely colour or two. From observation of photos, steel 16t wagons built after 1948 had thinner, poor quality paint which resulted in more widespread rust on the body. Earlier wagons had more layers of paint, especially after painting grey, so less general rust and different pattern of coating failure.
 
Oil Tanks for Fort William

Spike

Western Thunderer
My interest in the West Highland line and Oil tanks lead to the idea of creating a 7mm model of the oil terminal at Mallaig Junction. For that I would need a number of oil tanks, I originally had 3 wagons and bought a further 5 from Just Like the Real Thing now MM1 Models. My dad has posted pictures of the first one on his tread a number of years ago and two others are nearly finished. This winter I decided it was time to build the remaining 5 wagons.

As my dad did with the first wagon the tank is to be made removable to aid with painting. This results in needing to move fixings which are in the bottom of the tank onto the underframe. The picture below shows plasticard included to anchor the brake shaft.
IMG_3084.JPGIMG_3085.JPG

The second image shows the view from the top showing the plasticard glued in and the key for the glue.
IMG_3090.JPG

Started to add the brake fittings, the castings come with whitemetal pipework. I have replaced all of the pipework with brass wire for additional strength visible in a further image. The long brake shaft is not glued in, it is present to hold the whitemetal parts in the right place whilst the glue drys.
IMG_E3113.JPG
Above you can see the replacement wire, fitting these castings is not the easiest. In the instructions suggest a different order but having followed that during building the earlier wagons found it then difficult to fit the pipework. The first of the W irons have also been fitted. I modified them be drilling two holes to act as keys for the glue but also cut a section out as when detailing the solebars there is a casting that has spigots that go through the solebar and hit the W iron, therefore the need for the cutout.

This is how far I have got so far, and has been repeated across all 5 of the wagons. Next up is the cleaning up the axleboxes and brakeshoes.

Regards
Peter
 
Last edited:

Spike

Western Thunderer
After a pause of a year the first couple of coal wagons have now been finished.

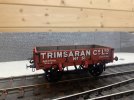
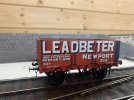
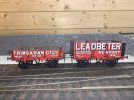
Trimsaran and Leadbeter coal wagons have been completed, when I left them I needed to complete the break gear and a bit of paint correction. The wagons needed Gloucester V hangers, brake levers and brake lever guards, and I did not have many left in my stock.

Given there would be a lot more Gloucester wagons it was decided to invest the time draw up the artwork and have etched the required components.

The Trimsaran also has door bump stops which the kit did provide but I was not happy with the shape, 3D printed replacements were produced, I could have just used plasticard but given I had other compenents being printed decided to add these on to the order.

Below are the pictures of the completed wagons.

IMG_3193.JPEG

IMG_3194.JPEG

IMG_3196.JPEG

Now on to the next batch of wagons.

Peter
 

Dog Star

Western Thunderer
You seem to be missing a ‘Parkend’ wagon in that rake.
I have one here that I built (in Finescale - yes it was that long ago) for a previous project that is no longer of any use to me, and wondered if you would like it.
Yes please!

Address is in the S7 Members List.
Tsk, tsk. Details via PM.
JB (@Scale7JB),

Did you get around to finding this model?

I shall be going to the S7 AGM so maybe you could pass the model to someone from the East Anglian area who is going to the event.

regards, Graham
 
Last edited:
Top