A table-top train set.

jonte

Western Thunderer
I convinced myself that this resembled grass, so I bought a large roll of it some time ago:

897C1C54-CD3F-407C-B96D-A9C96653D0DE.jpeg

Of course, it will need colouring some how or other, but with a little teasing, it might just do the job?

Still a long way from finished, and nowhere near care-worn enough, I rather think it might just do a job round those eighteen inch radiused curves:

CFEAEEEB-BE08-46DD-9303-33CD4F3457A3.jpeg

Mind you, I think I built the points to B7, so perhaps some respite for the six-coupled iron-horse.

Anyway.

Apologies if I’m boring you.

Jonte
 

NHY 581

Western Thunderer
Splendid stuff Jonte. Always nice to see something kickstarted back into life.

I will look in from time to time.

If I might make so bold, take the opportunity to try new stuff such as static grass as per Mr Gravatt.

You won't regret it.....I don't


Rob
 

Lyndhurstman

Western Thunderer
Hello Jonte,

When is a door not a door? When it's a baseboard. Or a launch pad :)
'Tis great that your amazing architecture (and by default the supreme suite of skills that created them) is seeing the light of day. Here's hoping that the muse holds your amusement. Mojo is a fickle mistress. She's been messing with me for nigh on eighteen months. Just when I needed her most. But I tinker. I make myself available. I submit to the potential of the gift of opportunity. And wait.

To Infinity And Beyond!

Cheers, Chum
 

jonte

Western Thunderer
Splendid stuff Jonte. Always nice to see something kickstarted back into life.

I will look in from time to time.

If I might make so bold, take the opportunity to try new stuff such as static grass as per Mr Gravatt.

You won't regret it.....I don't


Rob

Hi Rob, and thanks for your interest.

I’m a great admirer of the static stuff, not least on ‘Bleat’ et al, especially your restrained use of it which, to my eye, enhances it’s effect (less is more?). Rather fits with the overall starkness of your compositions which I find restful; very much reminiscent of Shell Island.

What concerns me is the cost of covering an area of this size, albeit only about a third of the whole board/door base. That said, I’ve not got as far as looking into the respective costs of the project; it just looks a dear-do from what I’ve seen. Thinking ahead a couple of years ago (not like me at all), following an Internet article, I purchased an electric fly swatter for the purpose (for the supply of electrical current not swatting flies) just in case the day ever dawned where I might have to go green. However, knowing my luck, I’ll end up getting zapped and it’ll all end in tears, so when I’m ready, I think it prudent to part with the cash for a purpose built tool.

Whilst the process looks rather straight forward, I rather suspect that, like most parts of this wonderful hobby, it requires a little more than just glue and an electrical socket. Hence, I’m not giving up just yet on my carpet underlay or whatever it is I bought.

Thanks for looking in, Rob.

Jonte
 

jonte

Western Thunderer
Hello Jonte,

When is a door not a door? When it's a baseboard. Or a launch pad :)
'Tis great that your amazing architecture (and by default the supreme suite of skills that created them) is seeing the light of day. Here's hoping that the muse holds your amusement. Mojo is a fickle mistress. She's been messing with me for nigh on eighteen months. Just when I needed her most. But I tinker. I make myself available. I submit to the potential of the gift of opportunity. And wait.

To Infinity And Beyond!

Cheers, Chum

Hi Jan.

So good to hear from you:)

Glad to find you in good spirits; the wit as sharp as ever.

Mojo be damned!

How’s the loco coming along? Not noticed any updates of late, but am aware that perfection cannot be rushed ;)
No doubt it’s a casualty of your Luke-warm interest. Sigh.

In my case, I’ve bags of enthusiasm (for far too many projects) but not enough time......

I’m sorry that I’ve had to resort to regurgitating ol’ photos that have been wheeled out once too often, but at present, I can only offer ideas ........and the same ol’ photos. Haven’t shown those old crossing gates in a while, so might wheel those out for a shoot, if I can find them of course ;)

In the meantime, thanks for your forebearance, my old friend, and, as always, for brightening my day.

May your wait be short.

Bestest,

Jonte
 

jonte

Western Thunderer
Morning all.

Just thinking out loud again, so sorry to disappoint anyone looking for a bit of progress :(

But nobody’s as disappointed as me at this forced inertia.

Now that I’ve made the change from Downtown LA to the green, green grass of home, thoughts have turned to the track plan.

Lack of space dictates that the run-round loop will remain just that, and not a full passing loop reminiscent of many country, single-tracked branch lines. However, that single siding has to be addressed in terms of safety alone; not only would the Disused tramway have had to be protected from runaways, but also the main line, obviously still in use at this time. To this end, I’m thinking of employing a catch-point, and as I recall, I may have just the ticket in the odds ‘n’ sods box ( it’s also another lame excuse to dig out an old photo):

ECEB602B-8FA7-464D-909C-FB5896627DF2.jpeg

I was contemplating building one from scratch using some left over plastic chairs from a C&L point kit, together with some veneer sleepers or some ply jobbies from C&L. However, in my limited experience, I find the stock rails being forced outwards as the switch rail hits home, so I’m really not sure about the longevity of points built with this method. Perhaps a hybrid method using the existing point with ply and plastic chairs employed here and there just for aesthetic reasons? Wire-in-tube using angle cranks (either GEM or home made) would be the choice of operation; the tubes being recessed and taken through a hole in the backscene, to be operated by hand from the rear. Btw, that outside rail extends too far and will need cutting back.

The mainline will also be punctuated with C&L chairs and ply sleepers, the pcb sleepers remaining to provide rigidity and maintain gauge.

Turning to signalling, I’m hoping that the project might also find a use for this:

F7FCEECC-7A96-4025-AA11-C8829B15D84A.jpeg 462AA706-B292-4B05-9BE2-A68EBE5C3F55.jpeg

It’s based on a photo in Stephen Williams’ first tome, and believe it or not, it’s designed to work, although the operating wires were removed when this photo was taken. A weighted bar still needs to be fashioned, my intention having been to modify the arm that comes with the Ratio GWR signal kit.

The post carrying the arm pivot is a bit of an eye sore (it’s all I had in the odds box) but I’m thinking of disguising it as some sort of hydrant-with-hose. Dunno. More thought required there me thinks. Not sure if anyone would notice it anyway due to its minuscule proportions.

Well that’s it for now, but I hope nobody minds me posting as and when thoughts/ waffle/developments arise.

Best wishes,

Jonte
 

jonte

Western Thunderer
Hello again, fellow Westerners.

I eventually found those crossing gates I referred to in an earlier post (I really must learn to keep everything in one place):

72452577-B709-43F7-B443-281D49B46595.jpeg 4CE4CE14-D798-4754-9758-92906A478875.jpeg

They’re Peco with detailing added from thin plastic rods and bits of sprue from plastic kits. I see from the bits in the box that I keep it in, that I’ve yet to fit some more of the cross-struts I prepared, and bits have come unstuck in places which will need gluing back on. The blobs on top of each gate are where the brackets supporting the lamps will go - again, yet to be fitted; I recall buying some white metal lamps from one source or another, but as far as I remember, they were SR lamps, as the gates were originally intended for a small SR based layout. Need to get some GW ones.

Apart from the balsa wood posts, the gates are still in too much of a serviceable condition for what I intend, so perhaps they need to be subjected to further distressing?

Looking at the photos, I’m beginning to wonder what they would look like built entirely from balsa. They still look a bit plasticky to me. Hmmm...

Thanks for looking,

Jonte
 

matto21

Western Thunderer
Looking good Jonte! Nice to see those ex-Superquick buildings find a home too. I'll be sure to follow this with interest!

Matt
 

jonte

Western Thunderer
Looking good Jonte! Nice to see those ex-Superquick buildings find a home too. I'll be sure to follow this with interest!

Matt

Hi Matt, and thanks for dropping by.

It’s cheap and cheerful, and despite several bits I’d like to change, overall I‘m still rather fond of it. In keeping with a table-top train set I suppose :)

Best wishes,

Jonte
 

jonte

Western Thunderer
In a recent post, fellow Westerners, I made mention of some signals I’d cobbled together from bits of rail, wire and whatever I could find in the off-cuts tin. I’d even plundered the odd lamp or signal arm from some leftover Ratio signal kits from way back when.

The problem here, however, was that I’d built them to later SR designs. Initially, this wasn’t a problem as I was considering a joint company approach to the model. More recently, I’ve decided to abandon that idea and keep it a dyed-in-the-wool job. So, to the back of the drawer/wardrobe/garage/model room loft, and any other bolt-hole I use to abandon these fleets of fancy, they went.

Until, that is, I chanced upon a b&w photo of old Cirencester Town station Cirencester Town disused railway station – Victorian Gothic stuck in a car park

I refer of course to the rail built signal in the foreground. Up to this point in time, I hadn’t realised that the GWR had employed this method of construction; my heart skipped a beat (cue Olly Murs) as perhaps I could at last find a use for at least one of my home-made constructions (cue another old photo with sincerest apologies for washing on line in background - btw, it’s the little one on the left):

F3B0137B-6AFF-4587-9901-97E7547F7C6B.jpeg


I recall that Modelu have introduced the ball and spike finial, so the plastic ‘cap’ on the top can be filed back to the post, the cap providing an ideal plinth on which to plonk it. The lamp can be removed and a better e.g. purchased, which can be outrigged to a more appropriate position in line with the arc of swing of the arm. Talking of which, rather than unsweat the old hand fabricated incumbent, I’m sure a radiused piece can be fashioned and melted on - I don’t solder, just melt stuff together :(

The ladder’s a bit on the chunky side (Ratio) but, hey, isn’t it traditional for table-top train sets to have chunky signals?

Jonte

PS ......An error: I erroneously wrote that the curves employed were of 18” radius. They’re not. They are in fact Set track 1st radius: proper train set track:eek: . Still, the six- coupled steamers should be okay, as this photo of me running-in a Hornby Grange testify to (a purchase intended for conversion to P4 and still on the to-do list):
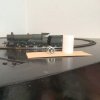
A6026B15-A748-430C-94ED-FFC0F86C0845.jpeg

Quite astonishing how the manufacturers can accomplish this. Respect.

Jonte
 

jonte

Western Thunderer
Further cogitation, Westerners - I really should be getting on with some work :( - had me looking at trees.

Yes, this is probably just another excuse to dig out an old photo (sorry Adrian; I’ll try and stop;)), however, I noticed that silver birch trees seem to be a feature of the rail-side scene, especially looking at photos of old GWR country branch lines.

Thinking back, I once had a bash at making a tree although I only got as far as making a skeleton from twisted wire and solder:

95F663A6-F77C-4675-92AB-55A7062AAEA2.jpeg

It didn’t take too long as I recall, and looking at it now, I think (with a little more bone structure here and there,) it could well pass for a birch tree? Or maybe not. But worthy of further investigation surely not when the time comes?

The paler one on the left is from confectioners, paper-coated, wire that I bought off the internet, and is the recommended method of construction of another modeller. I suppose when coated, it would do, but I think I prefer my own from twisted wire - and I’ve a reel left and plenty of cored-solder which should see me through? We’ll see.

Thanks for reading.

Jonte
 

jonte

Western Thunderer
Spent most of day evicting several families of spiders and dusting down, followed up by a spot of weight-lifting with the generous assistance of my dear lady. She’s definitely made of good stuff.

Finally in place on the bench, we find ‘Jones-the-Goods’ in process of running round its single, solitary ward:

D9927D8B-03BA-4DFA-B802-59F1117799F9.jpeg

BA8545C1-1A81-4851-A96D-8F39A286F193.jpeg
59C1FCF8-995B-41C4-8444-74940F844990.jpeg

Jones and crew pause on the tram way crossing:

34016736-826E-4D0F-98B5-B3E8233B6F75.jpeg

The Dean is the Oxford product, recently acquired from and detailed by Larry G. It’s the main reason I was forced into action; it runs beautifully and has forced me to rethink the location of the model.

Still GWR in nature, I’m relocating to the Welsh Marches; not only does this fit with a further loco I’m in the process of acquiring, but the smaller utilitarian type of buildings are congruous to the space available including short run round loop, so characteristic of branch lines in this region. I’m afraid that my planned use of the Superquick based building has been shelved: it’s simply too big for such a small layout and a little to opulent for a simple branch line.

With regards to the layout itself, I was disappointed to discover that two of the point motors failed to operate; I suspect that the wiring may have been a casualty to all the huffing and puffing of lifting it and turning it round in the small space available.

But most disappointing of all, one of the points on the entry to the loop is causing a derailment in one direction.

I can’t deal with it at the moment, but there are two options for the future: fabricate and relay a replacement, or totally replace all the visible, hand made track with proprietary (retaining the tramway crossing), which is a shame as the rest works perfectly.

Anyway, just thought I’d share.

Jonte
 

NHY 581

Western Thunderer
Lovely to see the layout coming together, Jonte.
Progress, however small and stuttery(!),is still progress..

A pity about the point failure. As you know, my ovine creations all use PECO code 75 track. As we know, it's quick to lay and get things running but ultimately is it as satisfying as using your own hand built track work?

One project I looked at was a small through station, 'somewhere in Wales'.

These photos of Cilau Aeron station on the Aberaeron branch provided the inspiration.

Rob. 14243853426_d3d5bed473_b.jpgs-l1000.jpg14086049599_46a878c10a_o.jpg
 

jonte

Western Thunderer
Hi Rob

A sincere thanks for your kind interest and likes; ‘tis much appreciated.

Those photos are breathtaking (well, to me anyway). I really am drawn to the minimum, down-at-heel type lines like this, although why, I don’t really know. I’d always wanted to build a model based on the Red Wharf Bay and Benllech Line, probably due to many wonderful holidays spent in the area as a child, but also because of the agricultural look of the buildings and scant track layout; the type of scene where even the telegraph poles ooze character, like the subject of your photos above. Wonderful stuff.

You’re right about the trackwork, Rob. It’s satisfying but also darned frustrating, especially when one item of rolling stock goes through but another won’t. Not that I’m that experienced in the field; I just meddle! There are one or two dodges I’d like to try before digging out the scraper, although I’m pretty darned sure that the b-t-b’s are a little tight on the loco, an occupational hazard I’m afraid when working in ‘OO’ based gauges. I’ve a wheel-puller somewhere or other, but I’m loathed to mess about with locos. We’ll see.

If I did opt for proprietary, I’d go with the latest Peco BH. Not only does it look good, but their tolerances are excellent for RTR stuff I find, which removes much of the ‘will it or won’t it’ angst of trying out hand built track for the first time.

Anyway, thanks for dropping by and especially for sharing those wonderful photos. You gotta do it ;)

Bestest,

Jonte
 

NHY 581

Western Thunderer
Hi Jonte.

I agree. I think my next OO layout may well use the PECO BH track work but it won't be Western Region I'm afraid.

I intended to use the Hattons/DJM 14xx as the main motive power but they were so poor running wise that it really put me off.

Next one will probably see a return to the Lamb Regis branch with a model of the terminus at Lamb Regis itself.

It's always hard to scrap stuff and start again.

I took a deep breath and did it with Bleat Wharf. Not easy but with a point failing, I had no choice.

I am now much happier with Bleat so it was worthwhile. Bleat really has progressed very quickly as a result.


Rob
 

jonte

Western Thunderer
Hi Jonte.

I agree. I think my next OO layout may well use the PECO BH track work but it won't be Western Region I'm afraid.

I intended to use the Hattons/DJM 14xx as the main motive power but they were so poor running wise that it really put me off.

Next one will probably see a return to the Lamb Regis branch with a model of the terminus at Lamb Regis itself.

It's always hard to scrap stuff and start again.

I took a deep breath and did it with Bleat Wharf. Not easy but with a point failing, I had no choice.

I am now much happier with Bleat so it was worthwhile. Bleat really has progressed very quickly as a result.


Rob

You’ve hit the nail on the head, Rob: you have to be happy with it.

Right, where’s that scraper!

Will watch with interest as and when Lamb comes together.

Keep us posted.

Jonte
 

jonte

Western Thunderer
In my earlier post, I mentioned about settling on a final location for the model and a more suitable style of station building commensurate to both model proportions and location.

This is what I came up with:

B915ACD7-4C8E-4336-B0FF-045E5F1CB31B.jpeg

It’s Blodwell Junction with which I’m sure many fellow Westerners will be familiar. The photo is from Steam Days magazine, June 2006, and forms part of an article about lines around Oswestry. I feel that the overall size of the platform and buildings are more proportionate to the small space afforded by a table-top layout such as this, and I’m also going to think up something along similar lines operationally to provide added interest and justify the stand of signals I’d like to incorporate i.e. a junction to a quarry just out of sight and possibly a branch off that.

Talking of signals, I received a despatch from Modelu, which includes lamps for signals and gates, together with a some finials to convert my home made jobbie. An order will also be placed with MSE for appropriate signal arms, weights and washers to help stop the arms from wobbling on their pivots. Well that’s the idea.

Enjoy your Easter break folks.

Jonte
 

jonte

Western Thunderer
Sorry to disappoint those fellow Westerners who’ve been kind enough to express an interest thus far in my humble creation, especially those that might have been hoping to see some progress, but just thought I’d introduce the latest addition to my fledgling stock:

10C96DAD-05D9-4179-83B7-4B124E20FC5B.jpeg

It’s a Bachman Earl class, adorned in the earlier, ferret and dartboard BR insignia, like my previous acquisition, the Dean Goods. I’ve always wanted one, so when Larry G offered his for sale, I couldn’t resist. And I’m not disappointed. It’s a fine, slow runner, ideal for what I want.

But more importantly, and the prime reason for my post, is that it flatters my dodgy trackwork :)

You may, as the case may be, recall that the Dean Goods was a reluctant performer when negotiating the point at the LHS of the loop as you look at the layout. In fact, it derailed on either road on entry to the loop. Being a pessimist, I was prepared to believe that my less than formal approach to trackbuilding was at fault, although in the back of my mind was the sneaking suspicion that the loco’s b-t-b’s were to blame. Why? Quite simply, everything else in my possession - OO and HO gauges - all went through without issue. Now I’m satisfied that this is indeed the case, I no longer need to lift the trackwork at that point and remove and replace the offending article. Relief.

Therefore, I need to address the btb issue of the Dean, something I’ve not attempted before; something that fills me with more than a little anxiety. I’ve a GW wheel puller - not surprisingly, never raced or rallied - but still it’s something I’m not relishing. I will also need to replace my digital callipers or purchase an appropriate btb gauge if I’m to succeed. Incidentally, looking back at those poorly shot videos of the Dean, I’ve noticed that the loco itself seems to go through the crossing okay, so I’m wondering, nay, hoping that the tender wheels are at fault which I’d feel a little easier about addressing. We’ll see.

Talking of poorly shot videos, here’s more of the same, this time of my new acquisition to prove the point(s):


Thanks for looking, and if anyone could kindly advise about altering the btb’s of the Dean Goods, I’d sincerely welcome and value your advice.

Bestest,

Jonte
 

jonte

Western Thunderer
Just after posting my last, I realised that the Dean was derailing from the opposite direction, so it was back to the layout to turn the loco round to test it in the opposite direction.

Relieved to report that there were no problems in that direction either.

Phew.

Recorded for posterity


Jonte
 
Top