Brettell Road, 1960s black country (ish)

AJC

Western Thunderer
Interesting; having worked with road fridge trailers, I can understand that. It just didn't seem immediately obvious because no similar provision was generally made in other enclosed/'van' wagons, was it? (eg, window-less Parcels stock)

The only examples of largish (steam era) windowless vans I can think of we're Fruit Ds which had either gas or electric lighting (with dynamos in the case of the latter). The LMS motor car vans had no lighting but then, they were CCTs so I guess lighting wasn't deemed useful.

Adam
 
Last edited:

Jim smith-wright

Western Thunderer
A while ago I started work on a Lima 94xx tank I've had from my childhood. The idea was to match it to a high level pannier or Collett chassis as a quick project. However after speaking to Chris at High Level he decided that the 94xx wasn't really like either and said he would be interested in doing a specific kit for the loco - the , at the time, recent announcement from Bachmann that they intend to look at the class too might have helped.

94xx-chassis.jpg

Top view of the chassis before fitting the wheels - at this stage I decided to give it a basic coat of paint. Below is the underside.

94xx-chassis-underside.jpg

Cheers

Jim
 

Jim smith-wright

Western Thunderer
With the chassis complete and test fitted thoughts turn to the footplate.
lima-footplate-LH-side.jpg
Left hand side. One little point to mention, I mounted the valve gear rivet backwards on the coupling rods as the hollow appearance seemed to match prototype pictures better.
I tend to carry forward things from one project to the next and stuff I've worked on before seems much more obvious in the future. In this case the splashers are too big and the rear one is in the wrong place. so these will need changing. Somewhere in the history of owning the model the forward footstep has broken off and been long lost.
lima-footplate-RH-side.jpg
The lower part of the firebox is much wider than the upper part - no doubt to accommodate the RTR mechanism. So this will need looking at. It also means that the details on it are all a bit flat.
94xx-footplate-mods-1-.jpg
And after! I filed up new forward tank supports from a bit of H section. The forward steps are from a mainly trains etch, I replaced the steps under the cab too and the rear-most steps are knocked up from a bit of brass. The splashers were cut off about a mm from their base and remounted. the ones behind the toolboxes coming from a scrap chassis
94xx-footplate-mods-2-.jpg
I carefully cut away the lower firebox sides - leaving the front bracket in place and made new sides from plasticard. The injectors were an enjoyable little project, soldered up from bits of brass and tube. Below is a close up of either side.
injectors-detail.jpg
 

Jim smith-wright

Western Thunderer
So lets start with a buildings and a request, When I posted the image of the pub at night I was asked for a picture of the area in the light so here it is

higher-level-buildings.jpg
This also shows the water tower I was working on too, speaking of which…
hidden-building.jpg
Remember the lower part of the Hornby water tower I was fiddling with and how I didn't worry too much about details? This is the reason why - you can just about see it, if you know where to look!
lms-bolster.jpg
Moving on to some wagons. This is the Chivers kit for a Dia1674 LMS Bolster wagon. A nice simple kit to build although given the long wheelbase I did opt for Bill Bedford springing.
grazebrook-wagon-finished.jpg
This was supposed to be a quick win. I liked the local livery and thought that it would break up the sea of grey and bauxite wagons. Its a Bachmann product but an older one that was stretched to fit their 10ft wheelbase steel chassis. Some careful cutting in 4 places lost some of the extra length and while it is still too long it does now fit the longer Cambrian wooden chassis.
fish-van-finished.jpg
I've finished off the vans I was working on too. Not a lot more to add about them really but here's the pictures. LMS 6 wheel fish van - Chivers Kit.
lms-GUV-finished.jpg
LMS GUV
palethorpes-6-wheel-van.jpg
Palethorpes 6 wheel van
palethorpes-bogie-van-finished.jpg
And the larger bogie version - Transfers are from Cambridge custom transfers. Sheet BL153 covers the 6 wheel vans while sheet BL154 covers the bogie vans.

Finally aside from the crew and some coal (plus a slight warping of the footplate) the 94xx tank is done too. Here's a few images.
8403-portrait.jpg
8403-portrait-2-bw.jpg
8403-climbing-the-hill.jpg
8403-parked-up.jpg
 

Jim smith-wright

Western Thunderer
Recently attention has returned to the main warehouse with the top floor being finished off and the ceiling added.
[/img']www.p4newstreet.com/wp-content/uploads/2017/03/end-windows.jpg[/img]
top-floor-1.jpg
I decided on a sort of rest room that wasn't lit. I quite liked the idea of light from deeper in the building coming through the internal windows and bouncing off the tables and chairs.
top-floor-2.jpg
On the main floor, again just a hint of activity.

kirtley-weatherhood.jpg
After much experimentation and having tried different materials (thanks to those who made suggestions) I have settled on black latex from a surgical glove for the Kirtley weather hood.
kirtley-rear.jpg
8403-tweaked.jpg
After some good, constructive feedback I've made a few tweaks to the 94xx tank. The chimney cap has been swapped back to the original lima one which was mounted in my mini-drill and 'improved' with a sanding stick. The whistles have been replaced with a shielded set from Modelu and the toolboxes have been made 20 thou deeper.
pannier-and-Kirtley.jpg
The 2 latest loco's together. Is it me or does the pannier look like it dwarfs the Kirtley? Finally below another mood shot!
parked-up-rain.jpg
 

Jim smith-wright

Western Thunderer
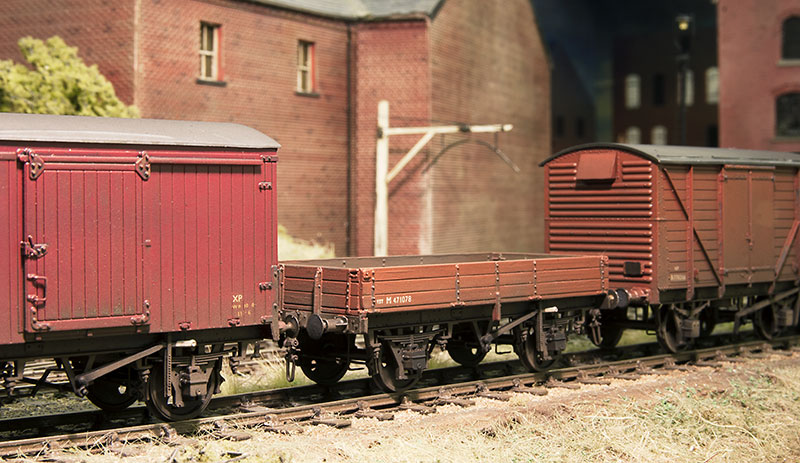
Work continues on buildings for Brettell Road
board-2-buildings.jpg
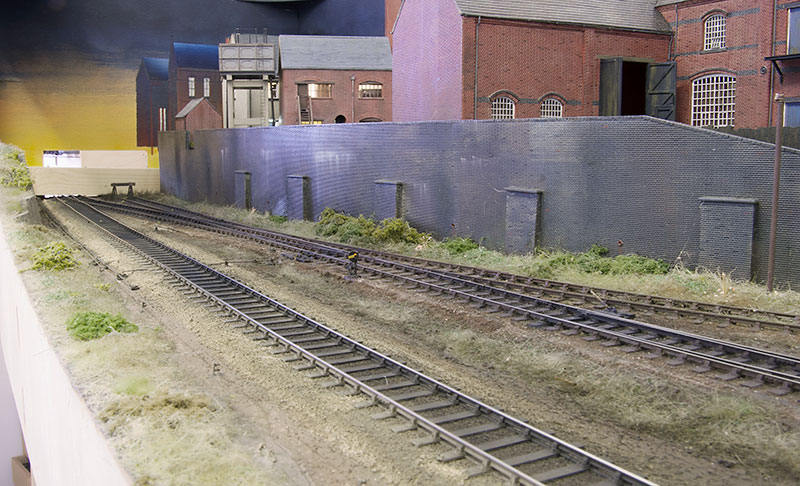
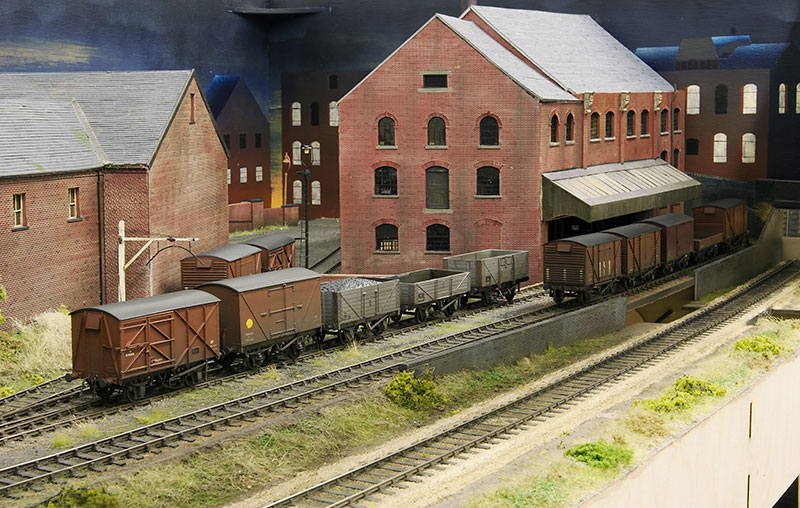
The big warehouse now has a roof (thanks to Mr Horn for his laser cut tiles. Just the bridges and front/backscenes to do on this board and I can call it done.
backscene-building.jpg
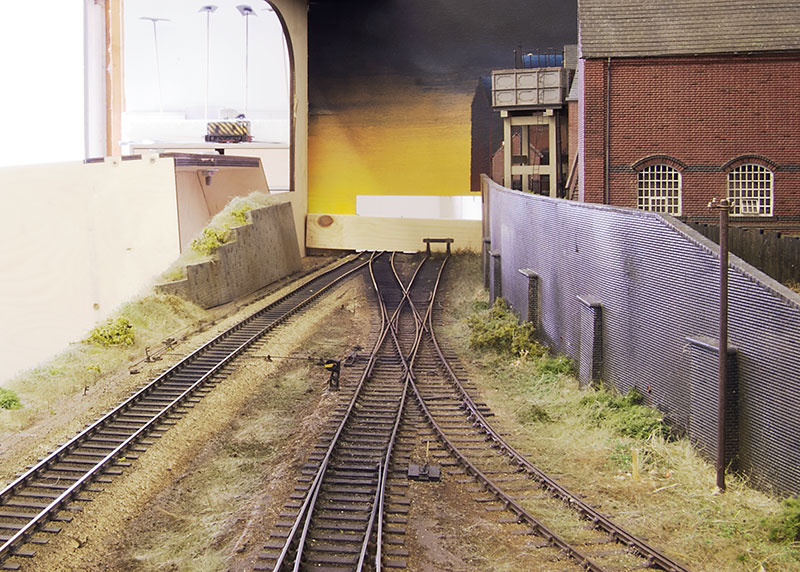
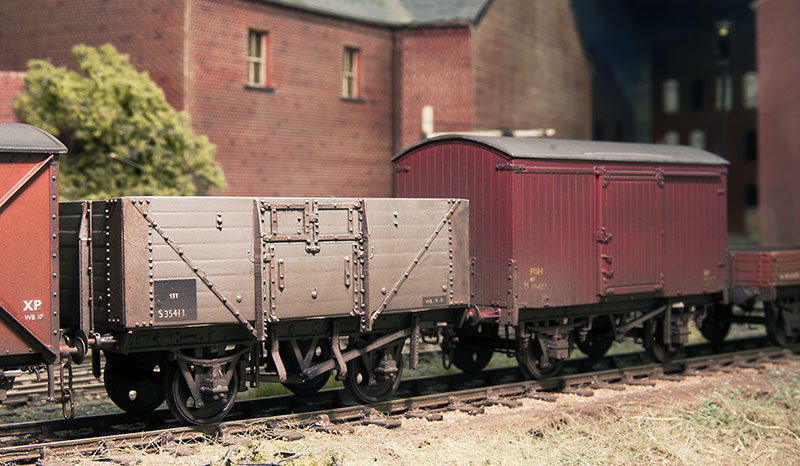
Looking the other way, I knocked up a very low relief building to go behind the pub.
new-building-2.jpg
Across the alley way is this small building based on a local one I found in Brierley Hill.
last-big-building-1.jpg
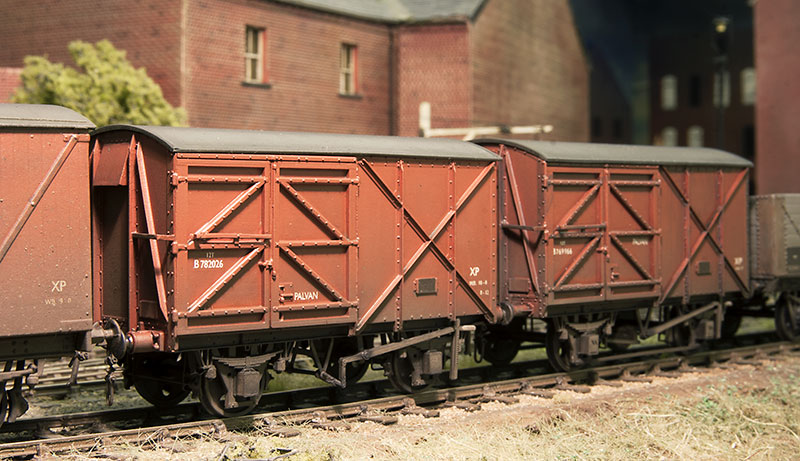
Work in progress on its neighbour. Again local influences but nothing specific. I don't know if I will need a small outbuilding here to fill up the space or if ill just leave it open for clutter.
last-big-building-2.jpg
The other side - I've a vague idea that this will be some sort of woodworking industry or perhaps a commercial vehicle repair shop.


D5402.jpg
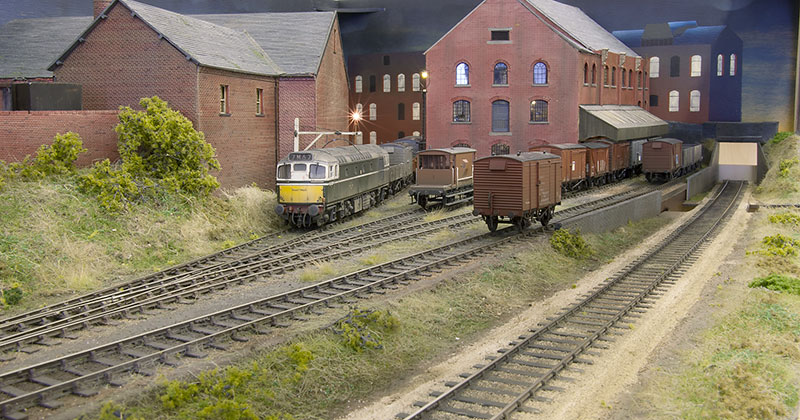
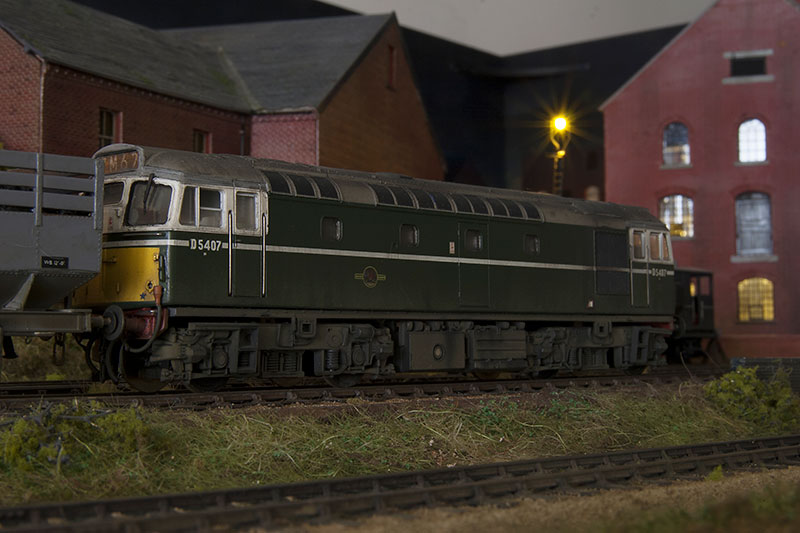
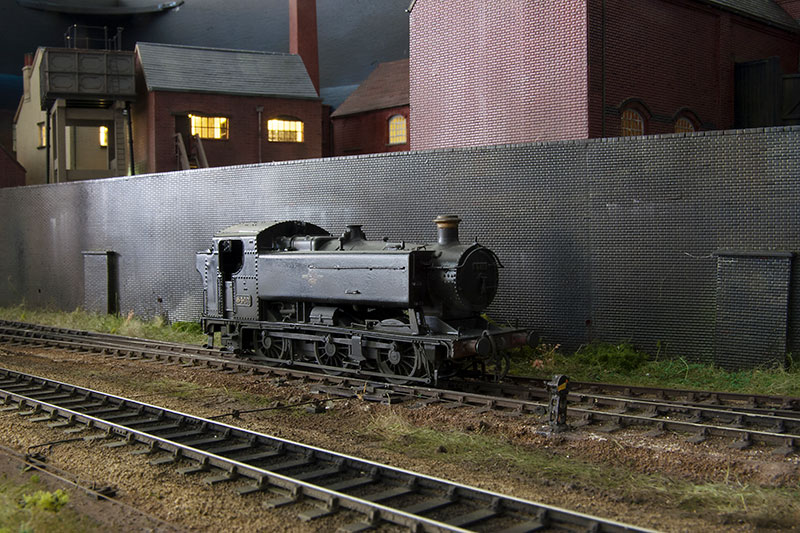
If you have explored my website you might have come across this picture before, I brought this loco years ago just because I like class 27s but thoughts have turned to doing something useful with it. This loco has become a bit of a clone of Brettell road itself in a way as it started out with the simple idea of just fitting a chip and sorting out the bogies and that would do. nothing to serious but like Brettell Road it's all gone a bit wrong!
D5407-at-brettell-road.jpg
moving the bogie springs in a bit and fitting the decoder was easy enough but the roof fan looked horrible. unfortunately the hole is too big for Brian's nicely etched replacement so that ended up being a bit more of a faff than I hoped! Then there were the nose end doors. They needed adding along with the details. I renumbered it to an example I found at Saltley (Class 27s were quite regular visitors to the midlands in their early lives) and re-weathered it. Also while I remember the yellow panels were too wide so a spot of Pheonix BR loco green sorted that out.
class-20-roof-fan.jpg
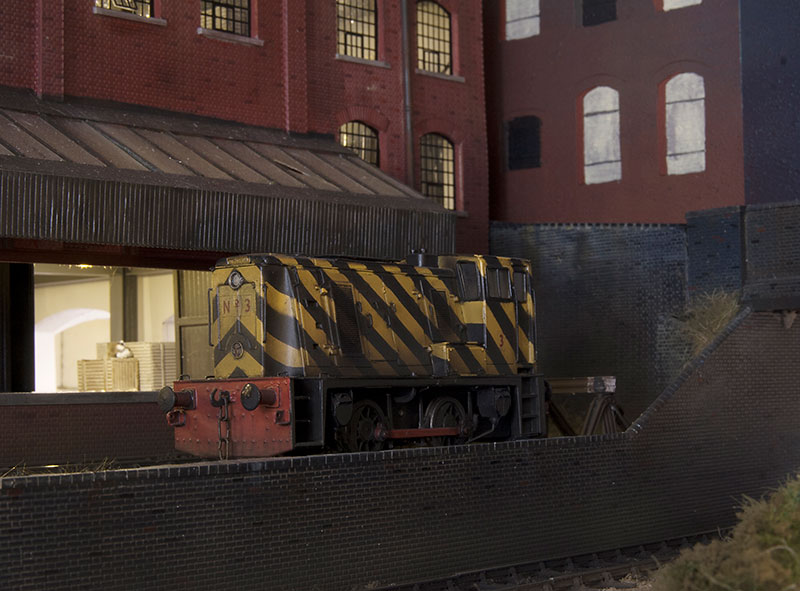
On the mention of roof fans this is one of Brian's for the class 20. I always quite liked them. I think it stems from a pair sitting outside my bedroom window one Sunday as a kid while the down North Warwickshire line was being relayed. I quite like the idea of them working on their own so I decided to get a green one. The grill is made up of 4 parts. A plain ring that goes onto the roof first. The ring with with the bracing and then the mesh, finally the last ring goes on. Zap pink is ideal for this and make sure you get the mesh the right way up!

On the loco itself I replaced the bogie sideframes with Heljan Baby Deltic ones as first suggested by my friend Shane. I had done this on my Lima ones and, this being my first Bachmann example, I was surprised to find the supplied bogies were quite poor too. I filled the lower beam on the bogie ans sanded it smooth as I was doing one of the first batch. Buffers were from Lanarkshire models.
D8017-at-Brettell-Road.jpg
 

Jim smith-wright

Western Thunderer
last-building-1.jpg
The last actual building for Brettell road is now finished which means I can now give you a reasonable overview of how the layout will look. There is still more to do and more clutter to add yet.
last-building-2.jpg
I want to add a couple of cranes to this scene too.
LH-end-night.jpg
Here's how the area looks at night.
evening-chat.jpg
little-yard.jpg
The courtyard for the building shown last time and below at night
parked-van.jpg
overview-LH-end.jpg
A couple of overviews from the left side...
night-overview.jpg
end-on-view.jpg
overview-RH-end.jpg
...and from the right side.
class-11-at-brettell-road-may-2017.jpg
Probably should include a couple of trains really!
D5407-at-brettell-road-may-17.jpg
94xx-at-Brettell-Road-may-2017-BW.jpg
 

Jim smith-wright

Western Thunderer
Thanks All

I spent the early part of this week visiting my friend Tim to get the extra bits of wood cut for Brettell Road. With Scaleforum looking at the end of September I needed to turn it from a plaything to something that could survive on the exhibition circuit. My list was as follows:

2 fiddleyards
Cassettes for the fiddleyards
New sides and ends for the layout itself
Fronts for the layout
Legs for the layout

The reason for the new sides and ends were that when I built Brettell Road it wasn't supposed to be taken out. I used 3mm MDF for the backscenes and it was too weak The entire construction was MDF and while this is absolutely fine for small, simply shaped boards the design of Brettell Road was a little too ambitious for the material. So the 3mm MDF has been replaced with 6mm ply instead.
BR-fiddleyard.jpg
Pictured above is the right hand side (as the viewer will look at it) fiddleyard. Quality control dog Earl doesn't seem all that impressed!

Laser cutters can be quite hypnotic to watch. Here is the large cutter cutting out a test piece for the layout logos.

BR-logo-test.jpg
The logo test. the scratches on the acrylic were not caused by the laser but by yours truly cleaning the dust off with something a tad too abrasive!

As always - thanks to Tim for allowing me to take over his machines for a couple of days.
 

Jim smith-wright

Western Thunderer
Brettel road now has its final front and backscenes added. More work to do on the fronts yet but its starting to look like a proper layout!

overview_small.jpg

warehouse-corner-copy.jpg
Here is a view of the warehouse with the new backscene in the distance.
Ive decided to take some pictures of trains too. (sorry this post isn't a bit more, erm, informative!)

railcar-passing-Brettell-Road-June-2017.jpg
Railcar 22 trundles past towards Dudley

pannier-on-the-sausages.jpg
Pannier tank arrives with the sausage train.

kirtley-on-ballast.jpg
Kirtley shuffles some ballast wagons around

class-20-descending-the-hill.jpg
Class 20 descends the bank.

jinty-parked-up.jpg
Jinty waits for something to do.

deeley-shunting.jpg
Deeley takes its turn at some wagon worrying.

railcar-returns.jpg
The railcar climbs back up the back towards Stourbridge.
 

Jim smith-wright

Western Thunderer
Well I've reached the end of adding green stuff to the layout with the slim strip of it at the front. There's only really the bridges, some more road vehicles and some industrial clutter still to do on the scenic side now.

view-left.jpg

This is the view of the Stourbridge end. there are 2 metal over bridges still to build for this end.

new-wall.jpg

a view from inside the yard showing the new retaining wall on the left. <

view-right.jpg

The Dudley end. there are 3 under bridges to build for this end.

pannier-through-bridge.jpg

I decided to revisit an older picture i quite liked, well why not?
 

Jim smith-wright

Western Thunderer
I've nearly finished off another batch of a dozen wagons. Some are repeats of types that have gone before, some are variations and some are typed I've not done before.
july-wagon-batch.jpg


Below are the repeats
repeated-wagons.jpg

A LMS 5 plank open from the Cambrian kit. 2 shockvans and a 9 plank private open from Parkside kits.
12t-vans.jpg

A couple of standard 12t vans from Parkside kits. The plywood one (furthest) is built as per kit with my usual mods to detail the underframe a little. The nearer planked example with plywood doors runs on the Red Panda 10 ft clasp brake chassis.
3-plank-wagon.jpg

This one is a mix of old and new Parkside. The body is one of their old kits mounted on their newer LMS clasp brake underframe to produce a diagram 1927 vac fitted 12 ton goods wagon.
southern-and-fish.jpg

Nearest is a diagram 1379 Southern railways 8 plank open from the Cambrian kit. Furthest a 6ton LMS fish van from Parkside.
palvans-lo.jpg

2 palvans from the Parkside kit. Furthest as supplied and nearest converted to a clasp brake variant using parts from the red panda underframe. Not quite as simple as the 12 ton van shown earlier as I needed to retain the palvans slightly odd springing and solebars.
banana-van.jpg

Finally a diagram 2111 LMS banana van. The body is from the ratio kit and the underframe is a little bit weird. It is basically the standard LMS clasp brake design but with a shorter 9 ft wheelbase rather than the usual 10 ft. I think it gives quite a nicely proportioned vehicle .
banana-van-in-progress.jpg

Above shows how I did it. I've been finishing the bodies first for a while now and adding the underframe later as, provided the underframe is supplied in black plastic, it saves some time painting, especially the visible bits on the insides. This one uses spare bits left over from other wagon kits. The solebar is from Cambrian and the handbrakes are from Parkside. W irons are Bill Bedford with Wizard models brakes and Rumney Models axleboxes and springs. Question is, will anyone ever notice?
 

Lyndhurstman

Western Thunderer
Lovely stuff, Jim.

As to whether anyone will notice; who can say? But for those of us interested in the oddities of wagonry, your efforts are very much appreciated. They serve to provide inventive impetus, and recharge our inquisitive bent into such things.

You've created a smashing layout to host them, too :)

Cheers

Jan
 
Top