Tales from the Tinkering Table - Brinkley Works

Nick Rogers

Western Thunderer
Thank you for your comments and likes, gents. Very much appreciated. I have looked around, but not posted, as I haven't felt I've had anything to contribute!

Having completed some work in the morning, I decided to make the most of a sunny day and primed 20 Modelu figures. These are carriage sets A-D. Charming figures I have to say. I don't know if every single character will go in the coaches, mind!

I decided to prime half in Chaos Black and the other half in Grey Seer - both are Games Workshop spray primers. I think I prefer the grey primer and will stick with this. It is easier to make out the details, and I'm a big fan of washes for shadowing.

IMG_4688.jpg

IMG_4693.jpg

I tend to use paints from the Vallejo acrylic range for people, starting with a light coat of Light Flesh (928) and following that with Basic Skin Tone (815). Some figures then have Flat Flesh (955) or Sunny Skin Tone (845) as highlights. I then tend to work on shirts and trousers, ties and jackets and so on. I have covered the faces in a small amount of varnish in the past, which makes it easier to remove any overpainting if a mistake is made.

Some figures have advanced further than others.

IMG_4695.jpg

I'd be interested to learn how other people paint small figures. I've tended to copy 28mm painting techniques; learnt either from YouTube or a couple of old school chums who paint Napoleonic era figures.

Best wishes,

Nick.
 

GrahameH

Western Thunderer
Some fine painting there young man, I also use the Vallejo range and always paint any figures in black to begin with.
The flesh tones are a very useful range but at this scale I have always found it awkward to get full details on the figures hence moving up to 7mm !

Nevertheless I think you're making a spiffing job of them and being Modelu they probably present themselves better for detail painting.

G
 

Nick Rogers

Western Thunderer
Some fine painting there young man, I also use the Vallejo range and always paint any figures in black to begin with.
The flesh tones are a very useful range but at this scale I have always found it awkward to get full details on the figures hence moving up to 7mm !

Nevertheless I think you're making a spiffing job of them and being Modelu they probably present themselves better for detail painting.

G

Thanks for your kind words, Grahame. I must admit, I am very tempted with 7mm in the future. My eyesight has deteriorated quite a bit over the past 8 years (I'm only 32!) and find working in anything less than 4mm a real strain on my eyes; even with a visualiser and glasses!
 

Phil O

Western Thunderer
Next time you go to the opticians get a 2nd pair of glasses with a x3 prescription, by 'eck it don't 'alf make a difference. When I had the eye test I mentioned that I had a problem seeing the small stuff when I was modelling and that was the result, but it makes looking for the difficult if more than arms length away and takes some getting used to and if I'm still struggling I use the optovisor as well.
 

Nick Rogers

Western Thunderer
Nick, is the title of this thread a statement?

Hello old fruit!

To be totally honest, I can't remember exactly who said it; however, at our local club many years ago, I hadn't been for a while and then turned up and actually did some modelling! (Previously, we all tended to sit around, drink tea and watch the trains on the test track!) I think someone shouted 'Nick's actually working' or something along those lines, and then someone else piped up 'Rogers Works'! So that is where it came from! It could be a statement mind! :p:D

The Brinkly bit is my late grandfather's name - technically the spelling is Brinkley - but years ago Brinkley was already spoken for on a different platform, so I opted to drop the e.
 

Nick Rogers

Western Thunderer
Nice work on the figures Nick...going into anything special?

Mike

Mike,

Thank you for your comment - I'm so sorry I missed it. These figures were destined for a Maunsell P-Set; however, I suspect they will now grace a Bachmann auto trailer. It has started to reach the top of the list and will be fitted with the 3D interior parts from David Lane.

All the best,
 

Nick Rogers

Western Thunderer
Well, I didn't realise over two years had gone by without updating this thread! Quite a few things have changed in the past couple of years. I am now gallbladder-less, having had a horrid 6 months of being in and out of hospital in early 2021, and I now no longer teach! Having had such a rough ride, I returned to work and my heart wasn't in the job, which had become quite awful pre-Covid let alone post.

I changed my career completely and now work for GWR as a guard based at Exeter and I truly love life again! I should have done it years ago.

Anyway... on to modelling.
 

Nick Rogers

Western Thunderer
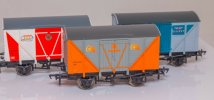
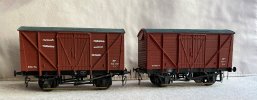
At the end of last summer, I purchased some cheap Bachmann BR standard box vans on eBay. However, they were all a bit jazzy!

s-l1600 (1).jpg
(Not my photo, but these were the liveries!)

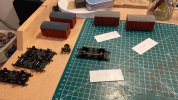
So, I stripped their liveries and looked at building replacement chassis. As these were all destined for my 00 gauge project layout, I was able to salvage four chassis from P4 projects (which had had replacement sprung chassis fitted) and two had some salvaged kit parts.

44A8E603-DDDF-408C-885A-C2C3223117AC.JPG
Chassis under work.

IMG_4901.jpg
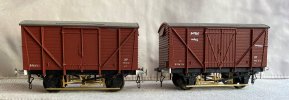
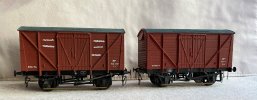
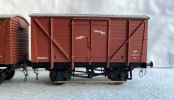
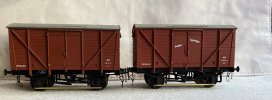
Chassis completed - two were treated to Comet 10ft underframes as an experiment - they certainly enable a perfectly square chassis to be constructed. Vacuum pipes are from Lanarkshire, as are the two sets of buffers: couplings are from Smiths. Some of the vans have been treated to Romford 3-hole wheels. Tiebars are from 1mm x 1mm L-shaped brass.

IMG_6093.jpg
Transfers are a mixture from Fox and Railtec.

IMG_6094.jpg
The two with etched brakes (Comet parts)

IMG_6096.jpg
Second pair.

IMG_6098.jpg
I do like the chalk markings from Railtec.

Anyway, I will post some more bits soon if there is enough interest.

Thanks for reading; please feel free to comment. I'm always happy to learn and improve.

All the best,

Nick
 

Attachments

  • IMG_6097.jpg
    IMG_6097.jpg
    199.2 KB · Views: 4
  • IMG_6096.jpg
    IMG_6096.jpg
    227.1 KB · Views: 3
P4 Panniers - 3629 & 4658

Nick Rogers

Western Thunderer
Greetings all,

Well, it has been a little over a year - I have actually made and completed quite a few models in that time but have deliberately avoided spending too much time online. However, as it is a wet day and someone might find this useful, I thought I'd share a couple of days' work.

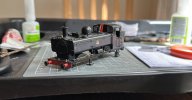
For my (very) long-term Launceston branch project, which involves building a model of Horrabridge station to P4 track standards, I need several pannier tanks. In the post-war period and into the 1950s, several freight turns were in the hands of Laira's panniers. 3629, 3686, 4658 and 4678, to name a few, all were photographed working various freight trains along the branch. Using photos and written records from Philip Rundle's A Laira Fireman book, I set out to model 3629... over 13 years ago!

I actually couldn't believe I started this 13 years ago, but I found a photo, and the date stamp on it was April 2010! There are a few things I would do differently now, but I wanted to get it finished and in traffic. Some of the original detailing parts were removed replacements have been fitted. The conversion to P4 was relatively straightforward using Ultrascale wheels. Ted Scammel wrote an article on CLAG's website, which was very useful.

IMG_1834.jpg

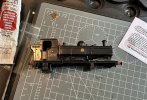
The locomotive is a modified Bachmann model. Originally purchased in lined black, I carefully removed the lining using T-Cut and cotton buds, avoiding the nicely printed early BR cycling lion emblem. I tidied up the front using flexible sanding sticks.

B411F896-0F23-4674-8861-9EF2873B562C.JPG
3629 heading out of North Road with a freight during April 1955.

Using the only pictures of the engine I could find, I set to work copying the position of the lamp brackets, sanding gear and whistle shield. The cycling lion emblem was a bit worn, so I carefully removed some of it using a bit of T-Cut. It was then cleaned up and sealed in varnish to ensure further removal of the logo couldn’t happen. I wanted to keep the worn logo, as I felt it gave the engine a bit more character.

Turning to the body, numerous aftermarket detailing parts were fitted. Etched lamp irons from Martin Finney (now under the Brassmaster’s banner) and Mainly Trains cab grills were the first bits to go on. Followed by the sanding gear linkage (another etch from RT Models). Then a Modelu whistle and whistle shield were fitted – the original Bachmann one was far too chunky for my liking. A turned smokebox door from Comet was installed.

CC338694-4261-44D7-B741-D53C9EDE007C.JPG
The top lamp bracket is now straight. This was a test fit.

IMG_1835.jpg
New numberplates to change the identity (Model Master plates from stock were used).

7B144986-BF6A-49C3-AFE3-341C6B788376.JPG
I quite like the etched smokebox numbers. I know some don't but I quite like them but I think they look more prototypical compared to a transfer. An etched shed plate (83D from Fox) was also fitted, along with a smoke box dart.

5EDF4395-C554-4CE5-BEC8-46E549725AFF.JPG
The rear was a bit of a pig to do. I removed the moulded grills years ago and fitted the etch. There is one small area that needs some attention with the filler. The lamp brackets are all by Finney - also a pig to remove!

IMG_1852.jpg
It is much easier to remove the keeper plate when converting. The brake rods need thinning down to enable the wheels to freely rotate and for balance weights to be fitted.

IMG_1853.jpg
Wheels in and a quick test. I thinned the brake shoes down a bit and filled some of the plastic away from the sanding gear to, providing greater clearance.

IMG_1854.jpg
A few bits of detail are still needed to finish 3629 off. Coupling hooks front and rear, balance weights, and checker plate on top of the buffers will be fitted before touch painting and then weathering.

IMG_1856.jpg

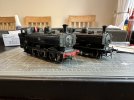
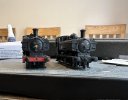
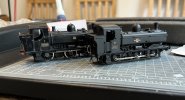
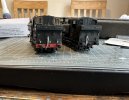
Having put the pair side by side, I need to tidy up the front of 4658. Possibly the removal and re-fitting of the smoke box door plastic.... do I remove the Mainly Train's lamp brackets on her? Another dilemma! In storage, one of the pipes has come adrift. I'll look at that soon.

IMG_1857.jpg

I'm pleased with the side-on look. One thing it has highlighted is to check the transfer on 4658, which might not be on straight. D'oh!

IMG_1858.jpg

4658 also needs a buffer beam repaint (she had a total repaint). I haven't used Mainly Trains lamp irons since fitting them to this loco - they are a bit thick (too many sneaky portions of pie and chips, me thinks!).

Anyway, hopefully, this will be of use or interest to someone.

Not sure what I'll work on next. I'm not planning on taking a year for my next post, though!

Thanks for reading,

Nick.
 
BR Standard Vans - P4

Nick Rogers

Western Thunderer
Greetings,

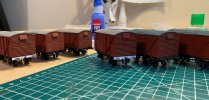
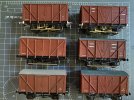
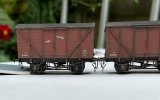
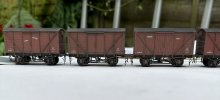
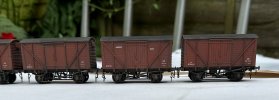
A little over a year ago, I purchased six Bachmann BR standard box van bodies from eBay. Each cost £1.50 - a real bargain. I decided to convert these to P4 but kept them ridged. A combination of Ultrascale wheels and 50 grams of weight seems to be a good combination for smooth running.

The weather was reasonable for airbrushing over the past couple of days, so I decided to fire up the Neo and make four of them look as though they work for a living.

IMG_1947.jpg

I only used three colours to weather these. Humbrol 33 Matt Black and 29 Matt Earth, with a little waft of Precision Track Dirt. My process is very simple, but I find it works. I mix up a dirty mix (roughly 40/60 paint to thinners) using 29 and 33 (more Matt Earth than black) and spray this over the body sides. I try to get into the nooks and crannies and vary the amount I apply. I then darken the mixture quite a bit and spray the roof and top of each vehicle - the idea being soot and crud. Then using a flat brush dipped in thinners, I then remove a fair amount of the mix from the body sides.

IMG_1948.jpg
Chalk lettering are transfers from Railtec.

IMG_1949.jpg

IMG_1950.jpg

Once thoroughly dry, I'll do a bit of dry brushing and powder weathering to add a little more, but I am quite pleased with my work.

More to follow! Please do add any thoughts - I'm happy to receive feedback!

Nick.
 
Southern Way - Ratio Bogie Van B Restoration

Nick Rogers

Western Thunderer
Greetings all,

A few days ago, a good friend discovered a part-built Ratio Bogie Van B. He brush-painted the model, but all the brass detailing parts had been forgotten about (the model was started quite a long time ago). Brian tried to fit the parts but found it very tricky as his hands have never quite been the same since his carpal tunnel opp. I very quickly offered to finish the model by way of thanks as I have used Brian's lathe a considerable amount turning 00 wheels to P4 profile over the past few months.

Some of the photos aren't quite right as I used my phone, and it doesn't like close-up work like a proper camera.

I thought the best bet was to strip the paint off the model and start afresh.
63950554-D13A-470B-B443-2E07777A5511.JPG
The first job was to strip the paint with Super Strip. I then used a knife to carefully remove the clogged planks (that was a labour of love!).

1CF6CBAC-D37E-4254-A5F2-4AA2132922BB.JPG
The etches are very small. I decided not to use the handrails as they were just too flimsy.

2B299609-274C-4AE7-997A-B891C0E862EF.JPG
I used my Bill Bedford Jig (the Scalefour Society has some of these if anyone is after one - very useful!)

IMG_1921.jpg
End handrails on.

AE564618-A9A7-4D4F-B734-53A4351D7776.JPG
Bar the guard's handrail, the detailing was complete.

IMG_1937.jpg
Into the spray booth and a coat of Games Workshop Mechanicus primer - a great undercoat for green paint.

IMG_1939.jpgUsing my Neo airbrush, I gave the van a coat of Precision Post-War SR Malachite Green (Brian models the Southern circa 1947). I spray at 20PSI and thin the paint 50/50 with their general thinner.

IMG_1952.jpg
The body ends were painted Humbrol Matt Black - I realised I forgot to fit the vacuum and steam heating pipe. D'oh!

I am very pleased with the paint work. It has gone on very smoothly, with no gritty feeling or orange peal. I also was very happy with the Tamia masking tape!

More to follow on this one soon. The next job will be to fit the missing pipes, brush paint the chassis and then varnish.

Thanks for reading,

Nick.
 
Southern Way - Bachmann PMV Repaints

Nick Rogers

Western Thunderer
Greetings,

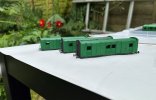
I've really made the most of the last couple of days of good weather. Whilst painting Brian's Bogie Van B, I thought I would take the opportunity to paint a few models of my own.

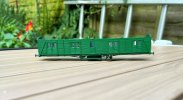
A few years ago, I purchased three Bachmann PMVs for a very reasonable price from a friend who gave up 4mm modelling. My own interest have moved more towards the late 1940s to early 1950s, so I thought I would wind the clock back a few years and repaint the trio in SR Post-War Malachite from their original BR SR Green.

IMG_1936.jpg

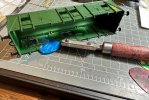
The first job was to remove the glazing. I carefully cut the glazing down and then slid a plectrum between the body side and the glazing pieces. These then just 'popped' out. No damage to the glazing - result

Before painting, I removed the lettering with a cocktail stick. Then primed with Games Workshop Mechanicus primer.
IMG_1953.jpg
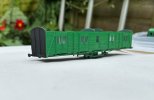
The bodies were painted with Precision SR Post-War Malachite through the airbrush.

IMG_1954.jpgThe ends were painted in Humbrol Matt Black 33. I masked the ends off with Tamila tape, which produces a fantastic barrier.

The next stage will be to detail paint the lamp brackets, then varnish. That should be towards the end of the week if the weather holds...

Thanks for reading,

Nick.
 
Southern Way - Maunsell BSK/BCK Stock

Nick Rogers

Western Thunderer
Greetings,

Over the weekend, I made the most of some good weather, and with the airbrush set up for Brian's Bogie Van B repaint, I decided to get on with the Maunsell P-Set I started during the first lockdown.

Originally, these coaches were destined for my Cornish clay layout, but I have opted not to proceed with that project for the time being. With their original purpose abandoned, I didn't really know what to do with the coaches but equally didn't want to part with them as I had already detailed up the interiors. Reading one of the Launceston branch books one evening, I discovered a couple of photos showing SR stock in use on the line. This seemed to be quite a regular (I think daily) working on the Launceston branch after Nationalisation through till the mid-1950s, so empowered with this knowledge, I decided to get on with them.

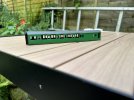
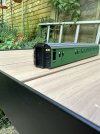
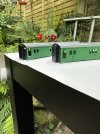
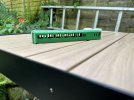
To save a bit of work, I masked the ends and roofs up and applied Mechanicus Primer (Games Workshop).

IMG_1837.jpg

IMG_1941.jpg
Precision SR Malachite was applied with the airbrush.

IMG_1944.jpg
I will need to change the coach set number, but my goodness, what a saving masking the ends and roof off proved to be.

IMG_1956.jpg
BSK/BCK ready to form a P-Set.

IMG_1945.jpg
Finally, a second BSK part-way through the paint shop. I picked up this coach for £5! The downside was it had a hideous weathering job. So it was fully stripped and then primed with Grey Seer - I wanted to see if there was much of a difference with the undercoat colour.

There is a fourth Maunsell coach, a second BCK, about to undergo an identity change, which means I'll have two P-Sets. More than enough for Horrabridge.

The next job will be to varnish the models and then apply the transfers.

Thanks for reading; any feedback is welcome!

All the best,


Nick.
 
Top