Building the MOK Class Q1, or From the Sublime to the Cor Blimey

oldravendale

Western Thunderer
Excellent suggestions for dealing with my (minor) issue, chaps. Thanks so much. I've used those foam stick files previously, Simon, to good effect but they tend to relieve sharp edges so am selective where they are appropriate. I too have several sets, the oldest of which are just right for the final polish sequence. And board nail files are all good, Steph - used them too - but they are quite coarse and can scratch such that polishing out can be difficult. I prefer the emery on board approach.

And yes, I am missing the challenge Peter. In the sense of not missing it at all!! I've not tried twisting the tabs off, though, as I've been cautious about the possibility of damaging/bending one of the components.

The price of those flexible boards from Cookson Gold is not bad, Mick. Thanks for the advice. They are one of my preferred suppliers but I had no knowledge that they can supply these boards. I'll add some to the next order.

Brian
 

SimonT

Western Thunderer
Steph,
I find the nail file types small and short lasting, but each to his own. Having used wooden sticks I now prefer the foam type.
Simon
 

Paul Cambridge

Western Thunderer
I habitually have a piece of MDF with a full sheet of wet&dry stuck down with spraymount handy to the workbench. Obviously different grades on each side is an option. Very handy for getting long straight edges decusped.

Atb
Simon
When I worked in engineering, I’ve seen the inspector do this with the wet and dry stuck to a surface table with wide double sided tape. I don’t think you’re looking for flatness +/- 5 microns, but the principle is used in industry. Don’t know how he got the old wet & dry off though.
 

P A D

Western Thunderer
Oh and while in 'so obvious I forgot to mention it' territory, I 'stick' my chosen abrasive to the MDF with water - the surface tension is enough to hold it in place with the assistance of atmospheric pressure. So I can change abrasive grades at will.

Poor old Will....

Steph

What were you saying about terrible puns Steph? :D
 

oldravendale

Western Thunderer
So, to today's progress. For someone who builds as glacial slowly as I this kit comes together remarkably quickly.

This is where I started from this afternoon.

IMG_20190120_142411433.jpg

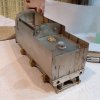
Tender front complete and tender body part completed and soldered.

Then, by the end of the afternoon the tender body was pretty well complete apart from castings and detailing. Those coal ploughs just clicked in to place - amazing. As things stand right now the fire iron tunnel has to be soldered in but it's all curved to shape and fitted.

IMG_20190120_172814492.jpg IMG_20190120_172835013.jpg IMG_20190120_172851117.jpg

Nowt more to be said!

Brian
 

adrian

Flying Squad
You can get them into 1000s grit these days Dad. Used for buffing 'shellacs' apparently. Whatever they are...
I always associate Shellac with french polishing - a little googling appears to show that it's current popularity is with the fairer sex using some UV cured nail polish as a more durable polish than the normal gel polish. Whether it's based on French polish remains a mystery to me.
 

mickoo

Western Thunderer
Shellac is also what they coat copper wire in in transformers and motors to insulate it, it then gets wound around a core and often then wrapped in a cloth strip, the whole lot in then further dipped in shellac to stop the wires moving when high current is passed through them.

What I didn't know until today was that Shellac is secreted by an insect, we've got some really big motors and transformers so the little blighters must have been really busy.
 

Steph Dale

Western Thunderer
I also use shellac, with a quality card, to produce a very useful modelling material. You just have to make sure you use the wax free stuff otherwise you can't glue it.

Of course, these days anti-tracking and insulating varnishes aren't actually made from shellac, but from a synthetic equivalent. It's still called 'shellac' by most that use it. I think the nail stuff must be synthetic too as it apparently dissolves in acetone, which I don't think shellac does. Its solvent tends to be methylated spirit.

Steph
 

Ian@StEnochs

Western Thunderer
Shellac is secreted by the ‘Lac’ beetle and comes from the Far East. The secretions are, somewhat similar to the material you see in snail trails, harvested and purified and dissolved in alcohol, usually methylated spirits. Shellac was first used in the West by French furniture makers from the 17th century as a fine lustrous polish for fine woods hence the term ‘French Polish’.

Shellac comes in different shades of brown from almost clear through to a dark brown which is often termed as ‘ButtonPolish’. It still has a big following in high quality furniture even though it is not as durable as synthetic varnishes. It does however have the property of being easily repaired if scratched merely by rubbing with alcohol!

Card modellers still use Shellac to stiffen and seal the board. It is also used as a sealing spray for foodstuffs where it creates a shiny impervious layer. I wonder how many folk know that they could be eating the excretia of insects?

Ian.
 

oldravendale

Western Thunderer
Honest - I have been working on the Q1, just become so carried away that I've not posted any photos recently. I'll be drummed out of the Brownies......

There are few superlatives one could not use in describing this kit. If there are any criticisms they are with regard to the instructions where sometimes the part numbers are not properly identified and the details need a bit of interpretation. Fortunately Mike/Ressaldar of this parish provided me with a load of photos of his own builds which have proved invaluable. Anyway, update photos are overdue.

This is where I was this morning:

IMG_20190206_134045219.jpg IMG_20190206_134103626.jpg IMG_20190206_134137227.jpg IMG_20190206_134147422.jpg IMG_20190206_134225542.jpg
An observation about the external brake rigging which requires a .5mm wire to be soldered between the operating levers at both ends and a bracket to centre left. With some forethought (by me it has to be said) a proper location could have been drilled to give a positive mounting for the wire. By the time it came to be fitted it was too late - all the operating parts were in place so the wire was simply soldered to the appropriate locations. It works but cannot be as strong as it might have been. However, it has to be said that the detail is supreme.

IMG_20190206_134308502.jpg IMG_20190206_134327119.jpg

Now to this afternoons shenanigans. It has taken the full afternoon to build the (working) cab doors. The design is clever and with care they create a convincing fitting.
IMG_20190206_170235788.jpg IMG_20190206_170256984.jpg IMG_20190206_170319333.jpg

Tomorrow (time permitting) will be fitting the remaining few missing details and building the jig for the ladders.......

Brian
 

Mr Grumpy

Western Thunderer
Hi Brian,
Don’t know if this helps, but I chemically blackened my ladder jig for the BR1G to prevent accidental soldering the ladder to it.
Your soldering may be more precise :)
 

oldravendale

Western Thunderer
Thanks for that thought.

I used a permanent marker on the hinge ends of the cab doors and it's worked well, so a bit of chemical blacking - or permanent marker - may well be appropriate on the ladder jig, I'd not previously considered that.

B
 

Ressaldar

Western Thunderer
Hi Brian,

glad that my meagre offerings are of use to you. I'm looking forward to seeing more progress photos soon.

kind regards

Mike
 

oldravendale

Western Thunderer
Yesterday was not a good day. In fact, one of those days when I should simply have given up. It was the day to start work on the ladder.

Firstly. Can you see my deliberate (not) mistake?

IMG_20190207_143420843.jpg

Yep. I'd fitted the tender tank lid the wrong way round so the holes for the ladder mounting did not line up with those on the footplate. (In my defence the instructions do not warn about the need to ensure that these holes line up, but it takes a proper numpty to not work that out!) Not a disaster as it was easy enough to drill two new holes in the right positions and fill the incorrect ones. After this I anticipated that the ladder itself would be a trial so peace and quiet reigned while I proceeded.

There's a very nifty jig etched in to the kit parts which is built up with the ladder components wired to it. The instructions suggest thin copper wire for this purpose, but I used black iron wire as solder wouldn't stick to it. The pictures below show the wired up components in 0.7mm brass.

IMG_20190207_160509202.jpg IMG_20190207_160539246.jpg IMG_20190207_160556932.jpg

At close of play yesterday (the process including drilling the new holes had taken three hours!) I soldered all the ladder bits together with 245 degree solder. Problem was that I soldered one of the rungs to the jig as the result of which the ladder pulled apart when I tried to take it from the jig.

I gave up in disgust, came indoors and had half a bottle of red wine. I felt better after that. It's the first cock up in the build and I'll try to make it the only one.

Today I thought I'd really go for it, so with Queens of the Stone Age playing Lullabies to Paralyze at full bore I made up the ladder in half an hour.

IMG_20190208_140602570.jpg IMG_20190208_160052953.jpg

Thereafter it was fitted, together with the rear handrail, tank brackets, water filler and water treatment lid. Subsequently I've attached the overlays on the rear buffer beam and drawbar beam. I've started the buffers and will complete them - I hope - on Sunday or Monday, followed by the footplate footsteps. Tomorrow is rugby day.:) (Except for proof reading of some instructions.......)

Brian
 
Top