You are using an out of date browser. It may not display this or other websites correctly.
You should upgrade or use an alternative browser.
You should upgrade or use an alternative browser.
7mm DJH Streamlined Coronation.
- Thread starter Rob Pulham
- Start date
Rob Pulham
Western Thunderer
Looking good Rob.
I think the radius rod might be a bit low in the expansion link, it's causing the reversing lever to bob up and down on both sides. Can you raise it up a touch?
JB.
Thanks JB, I bow to your greater knowledge on such things but I can't alter it without major surgery and the instruction is to build it out of the box so it will remain as is...
Rob Pulham
Western Thunderer
And then there were two!
I have made a start on the backhead and as I picked up a second kit to build at Donny it makes sense to do them both together, al la Nick D. - Although I may also do the body in tandem I won't be doing the tender or chassis until later.
I have made a start on the backhead and as I picked up a second kit to build at Donny it makes sense to do them both together, al la Nick D. - Although I may also do the body in tandem I won't be doing the tender or chassis until later.
Rob Pulham
Western Thunderer
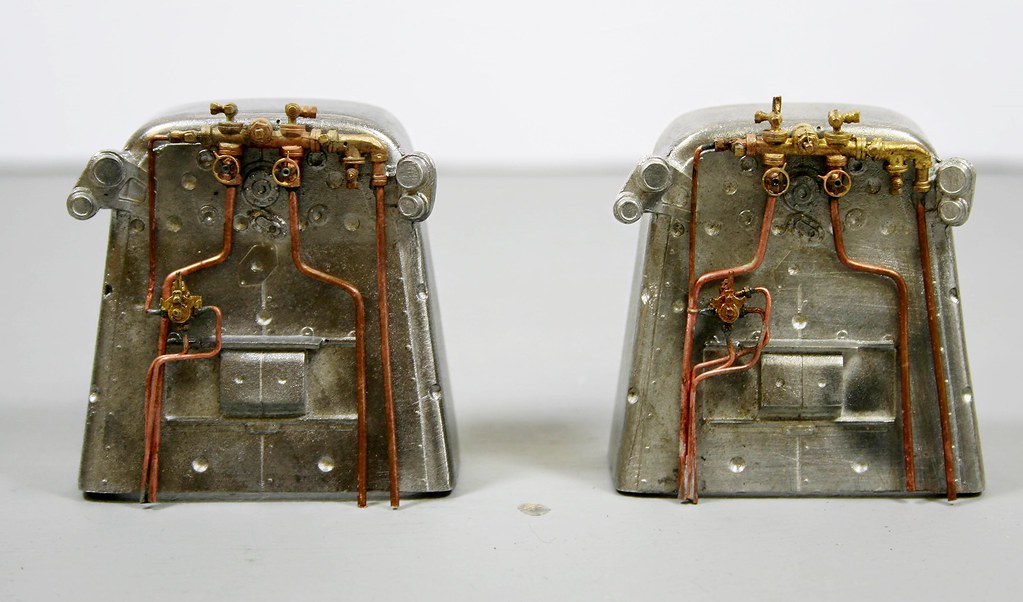
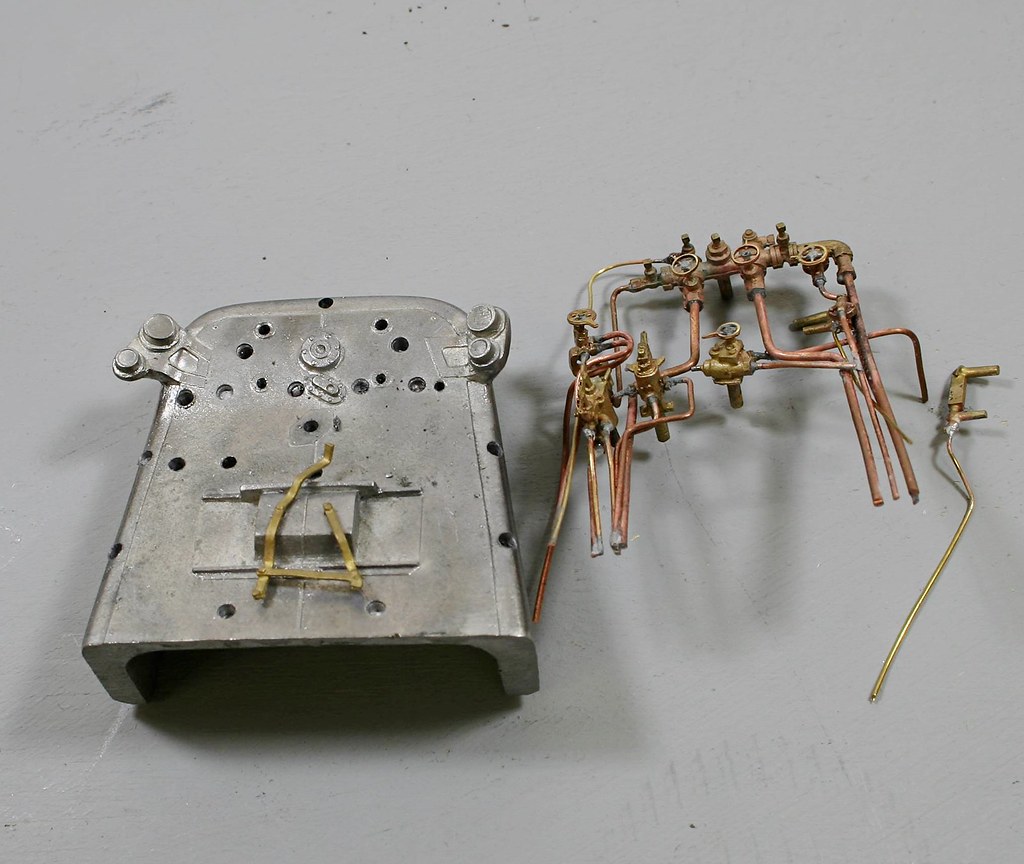
The last few sessions have been spent working away on detailing the backheads they are almost there now and I hope that a last session tonight will see them complete.
Given the differences in age of the kit there are subtle differences in the castings and some of them have either been upgraded or replaced due to loss over time.
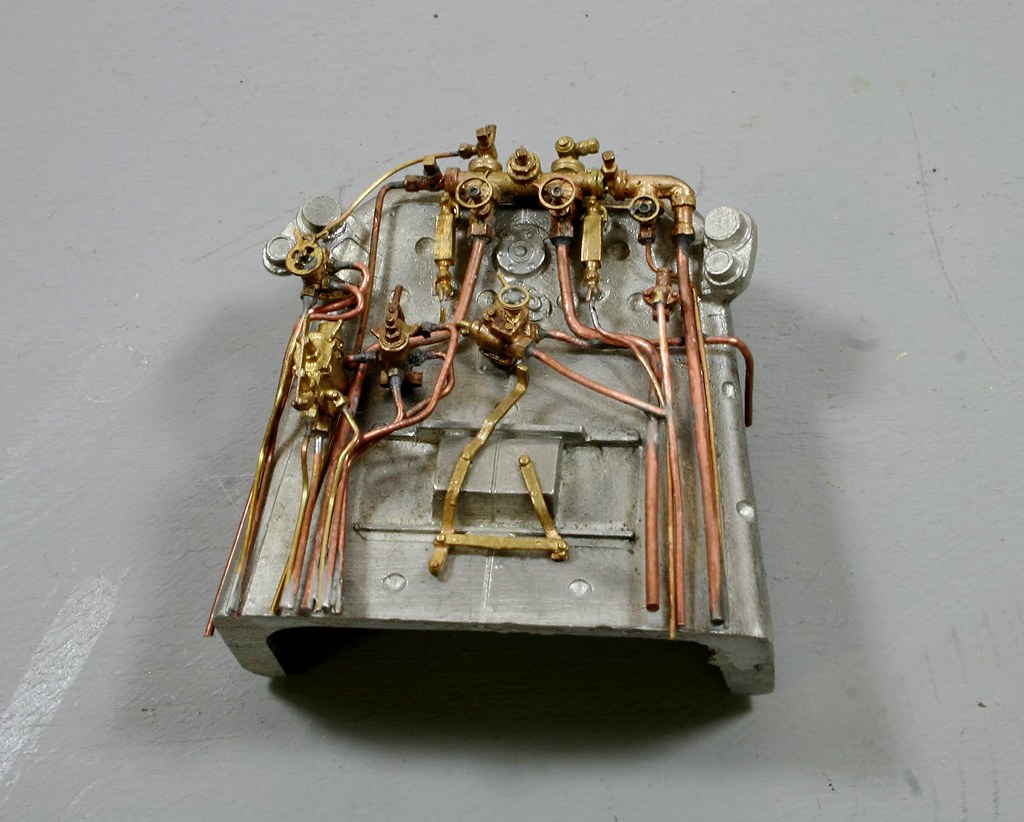
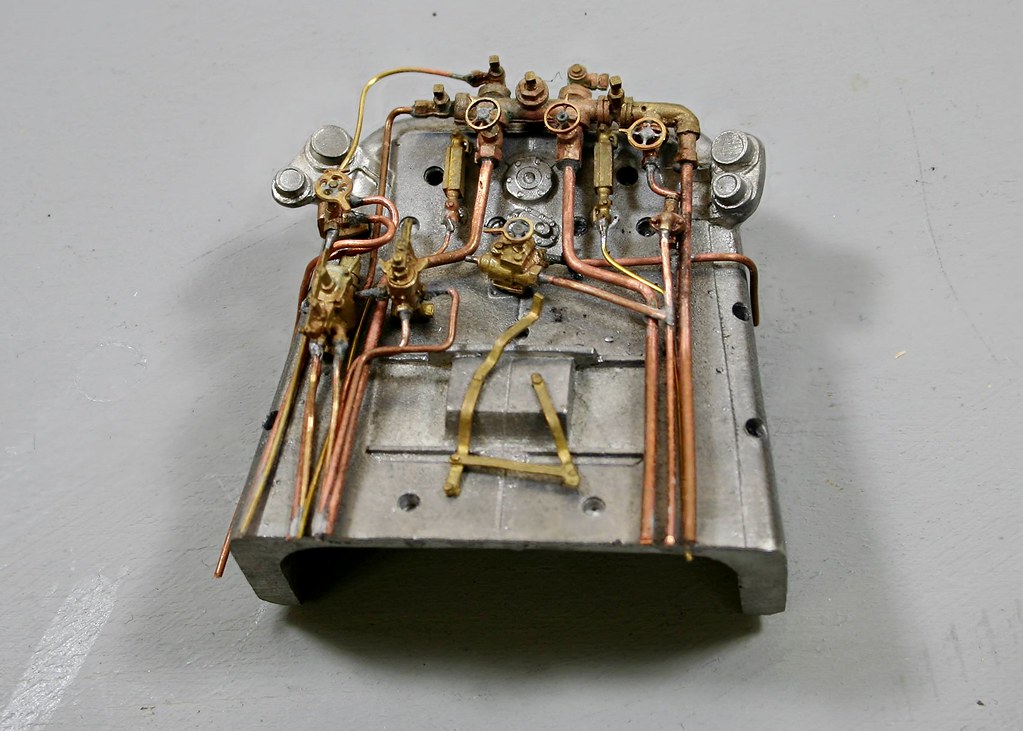
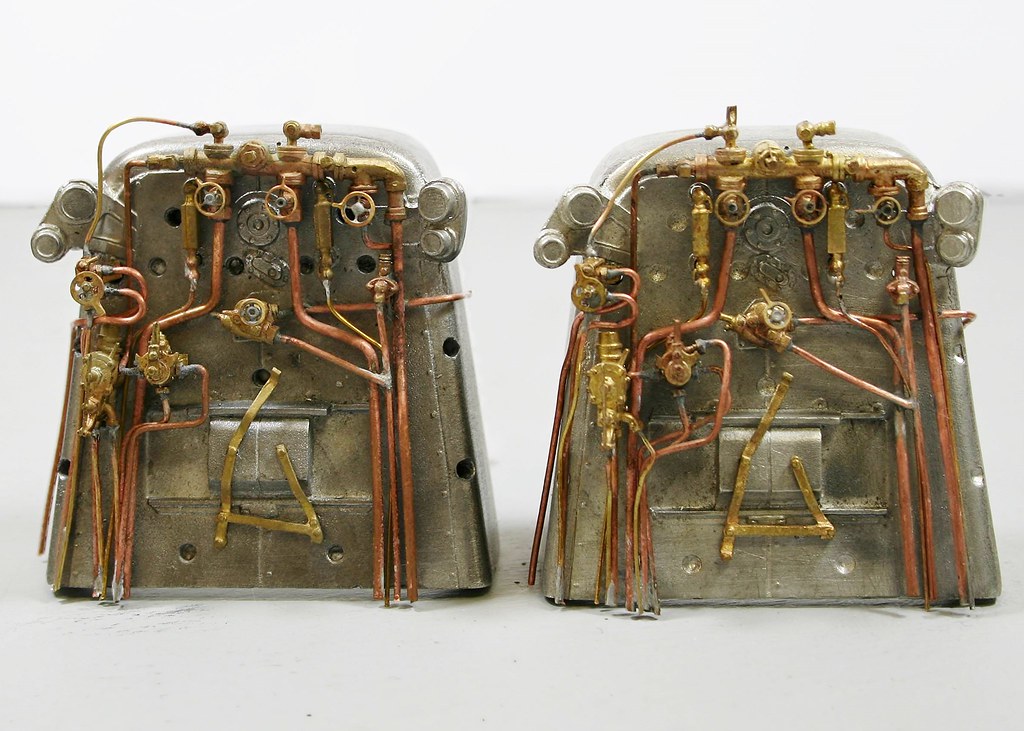

And then a now you see, it now you don't moment
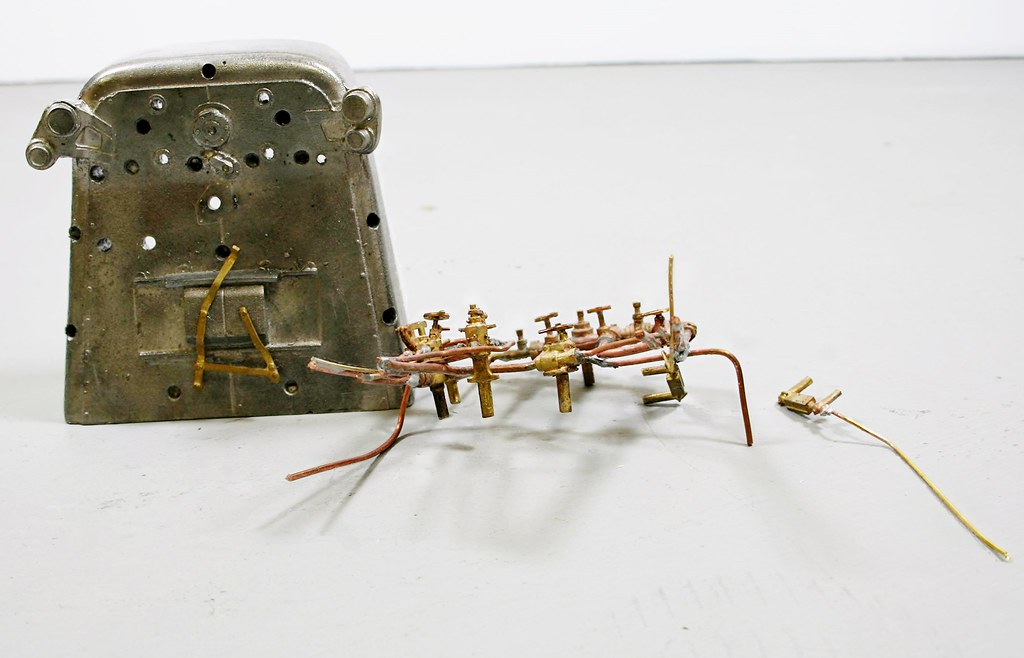
Given the differences in age of the kit there are subtle differences in the castings and some of them have either been upgraded or replaced due to loss over time.
And then a now you see, it now you don't moment
Rob Pulham
Western Thunderer
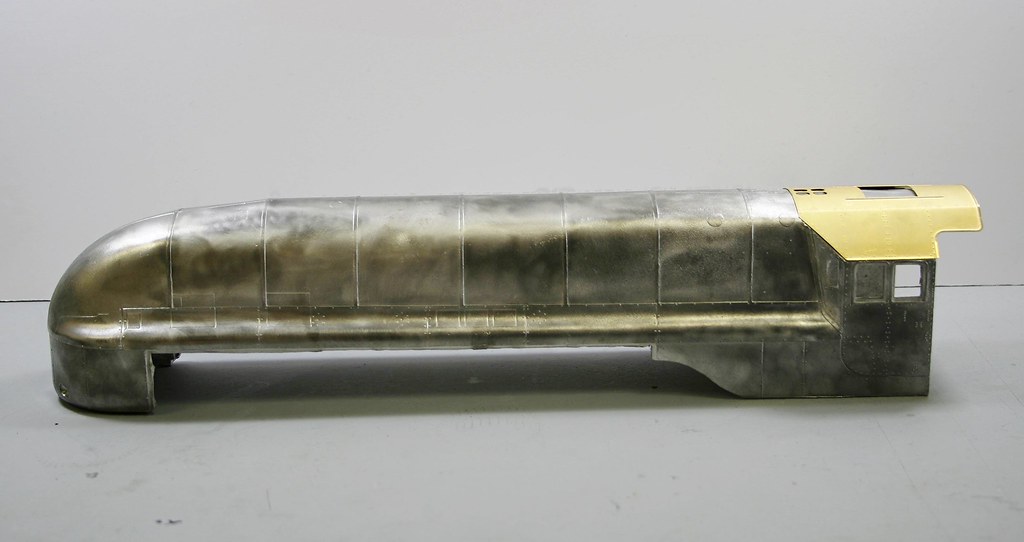
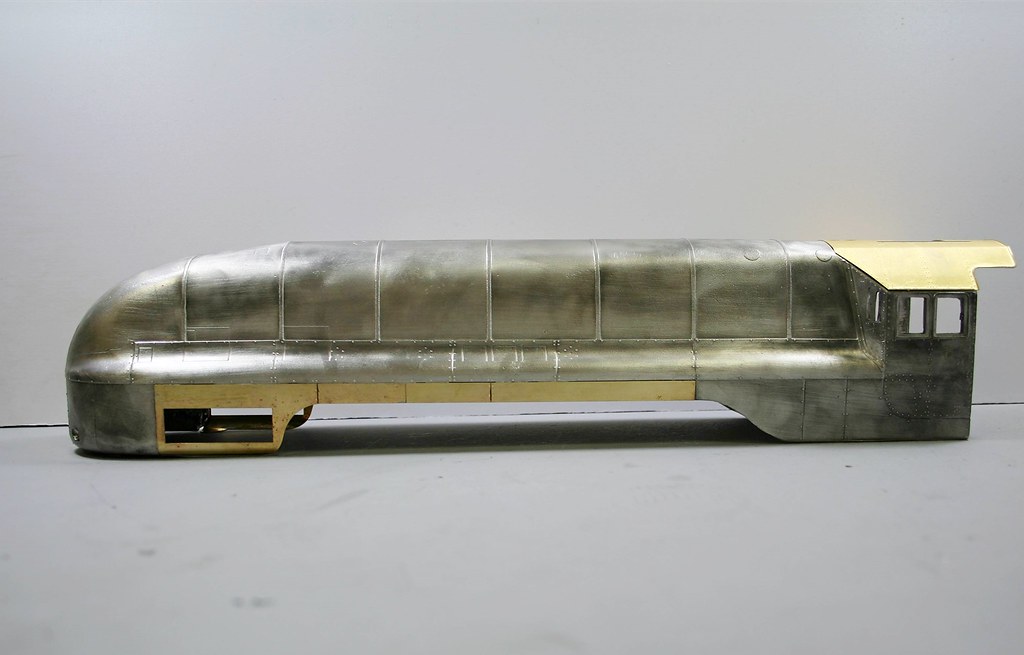
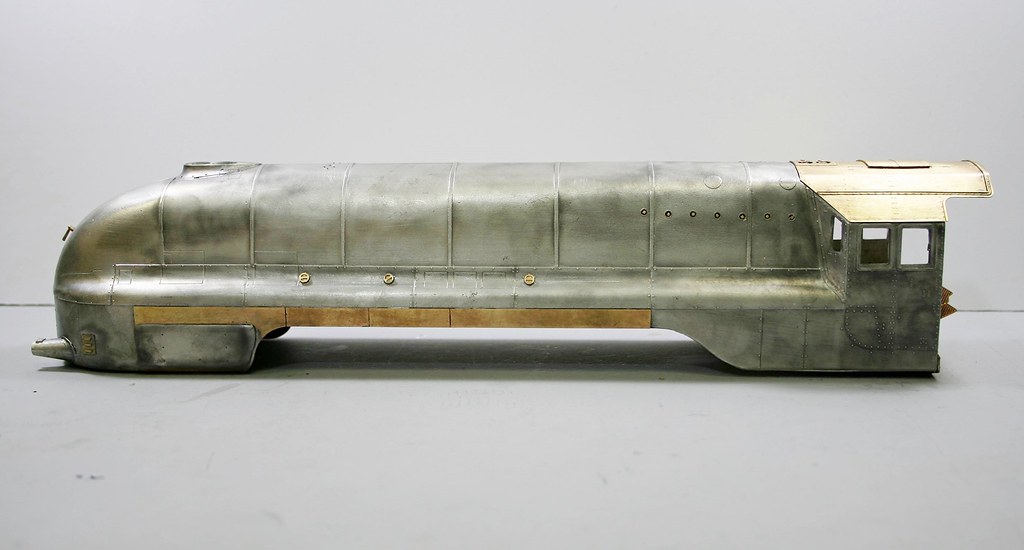
Having sent the two chassis off to Warren for painting and having completed the last couple of bits on the back heads I made a start on the bodies.
First the easy bit fitting the roofs
The early kit was pretty much spot on on the two sides but needed rolling a bit to shape on top. The later release kit that I have built the chassis etc for needed everything shaping.
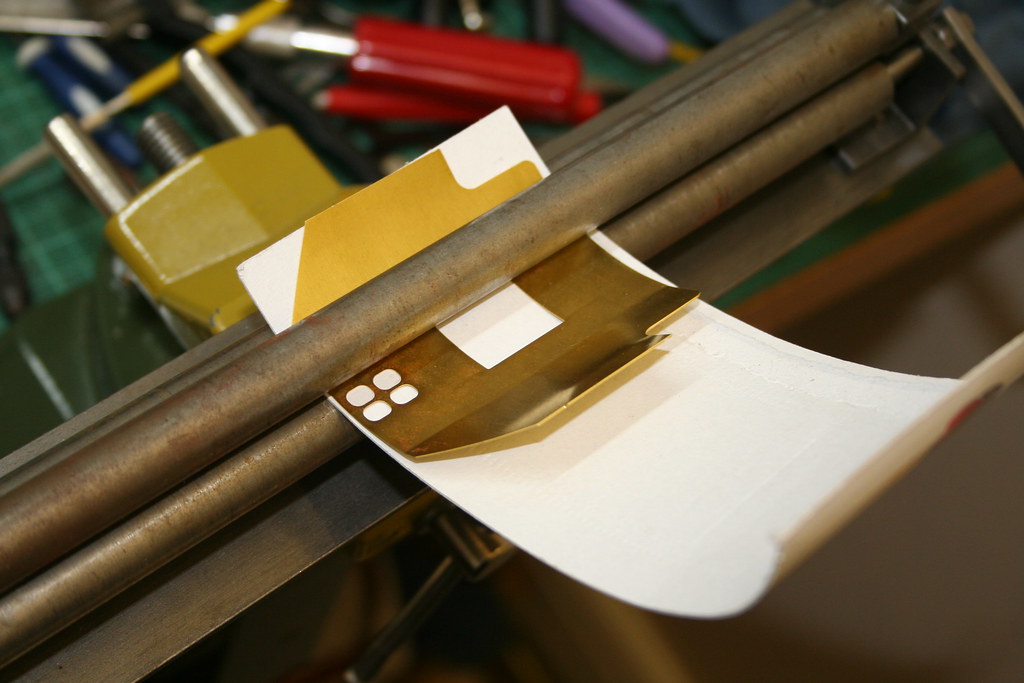
I ran it through my GP models rolling bars rolling only the centre section into a curve. I then used my hold and fold to bend the two edge sections to the right angle for the roof - these sections are flat and using the hold and fold helped to take the minor curvature out of them from the etching and foring of the middle section.
I floated them through the rollers on a piece of card to help preserve the rivets on the outer side.
First the Ian Atkinson version
Then the original Tower version
First the easy bit fitting the roofs
The early kit was pretty much spot on on the two sides but needed rolling a bit to shape on top. The later release kit that I have built the chassis etc for needed everything shaping.
I ran it through my GP models rolling bars rolling only the centre section into a curve. I then used my hold and fold to bend the two edge sections to the right angle for the roof - these sections are flat and using the hold and fold helped to take the minor curvature out of them from the etching and foring of the middle section.
I floated them through the rollers on a piece of card to help preserve the rivets on the outer side.
First the Ian Atkinson version
Then the original Tower version
Rob Pulham
Western Thunderer
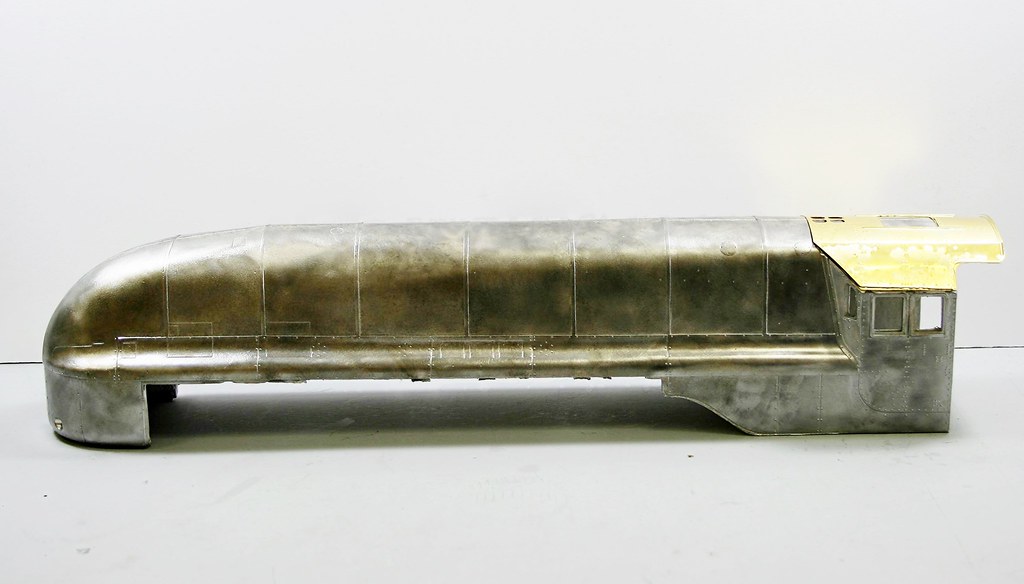
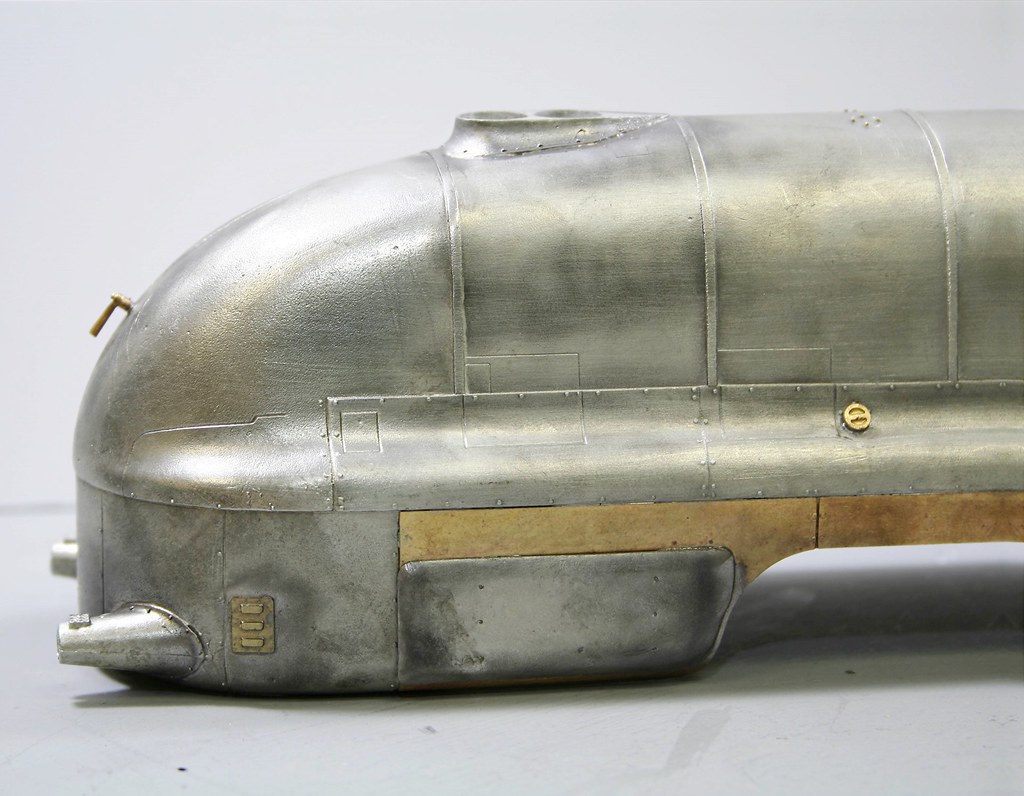
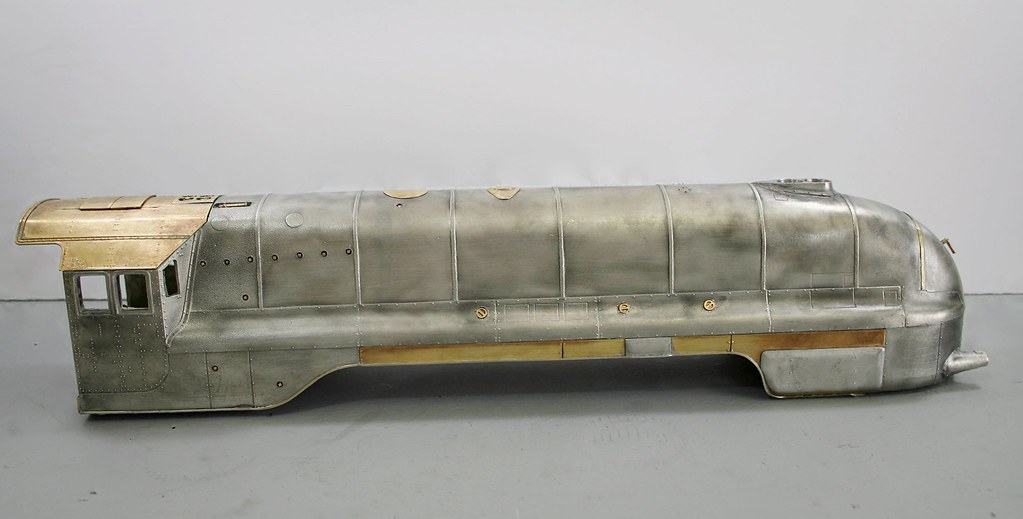
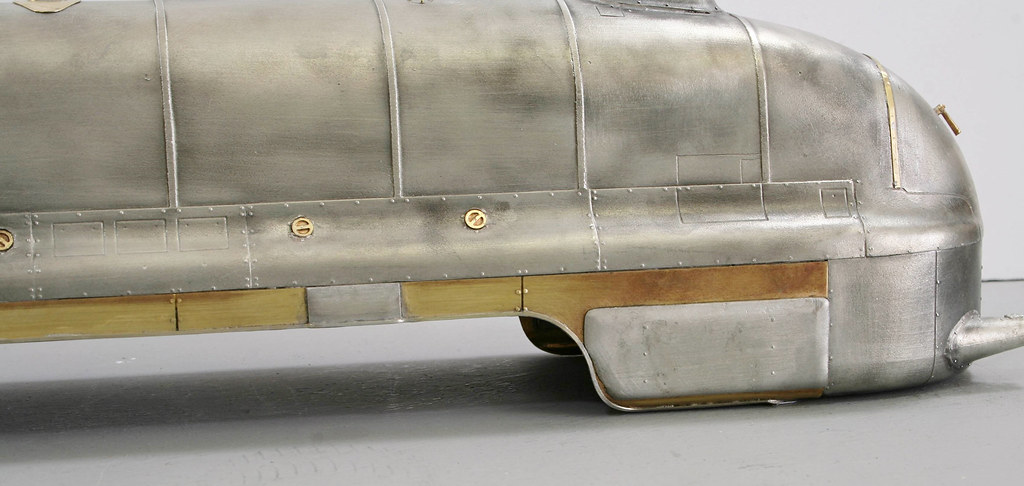
Before wandering off to do my demo at the weekend I managed to get the valances fitted to one of the bodies.
In line with the tender, the front valance piece was pre-curved but not any where near where it would fit - too high. I didn't get a photo of it before I recurved it, but this is what it looked like after the exercise.
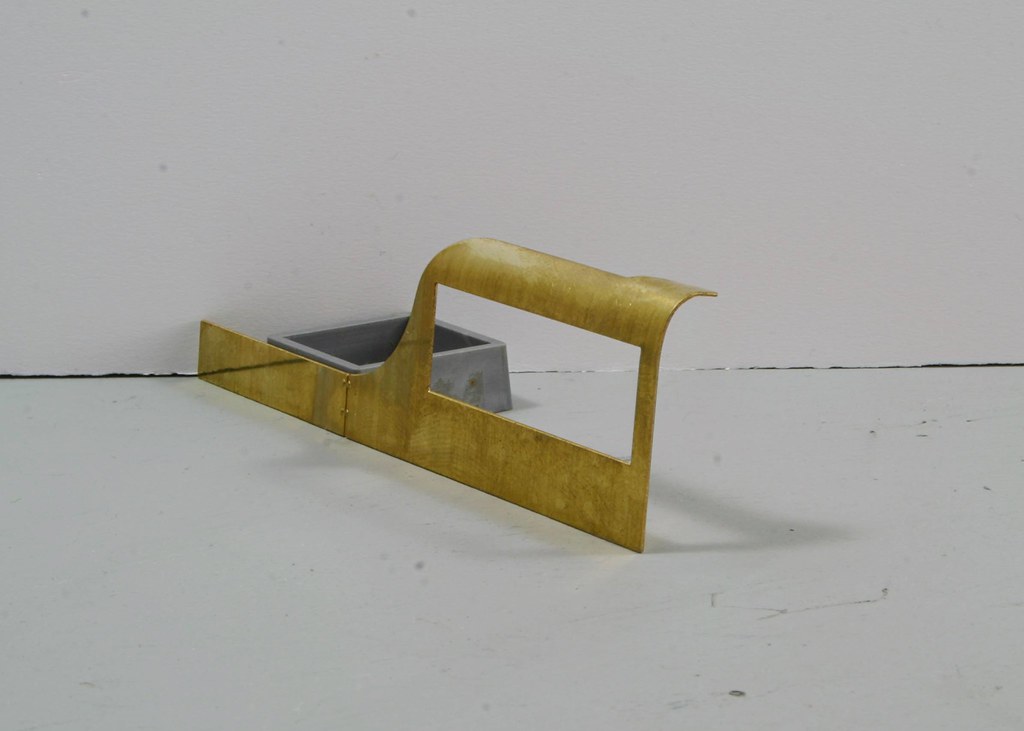
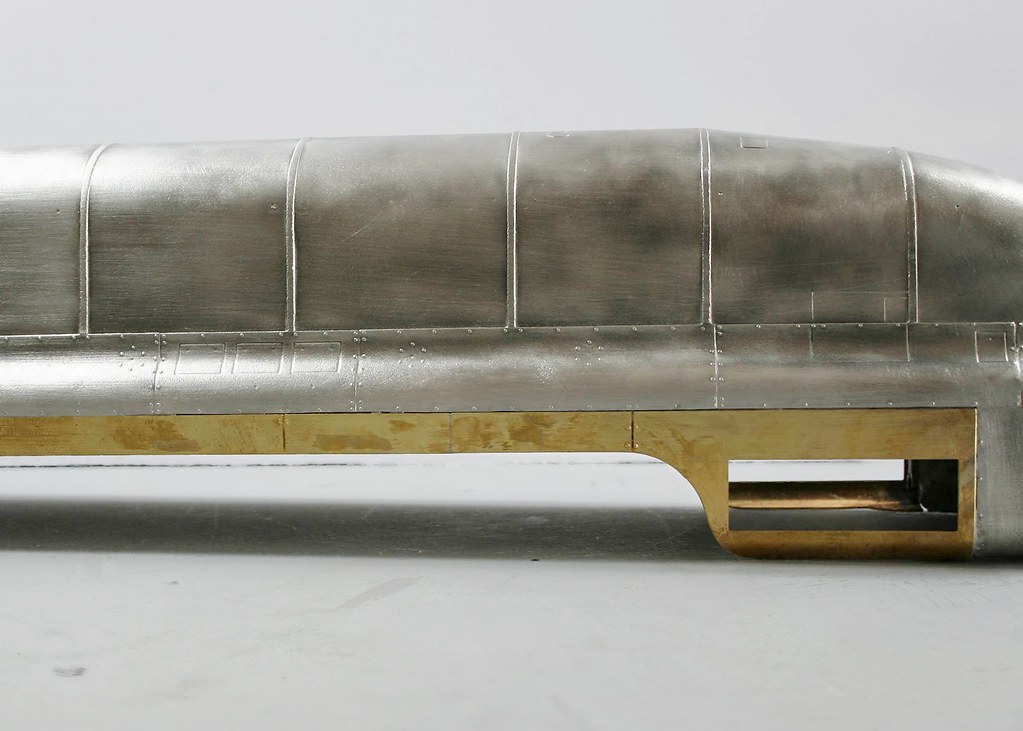
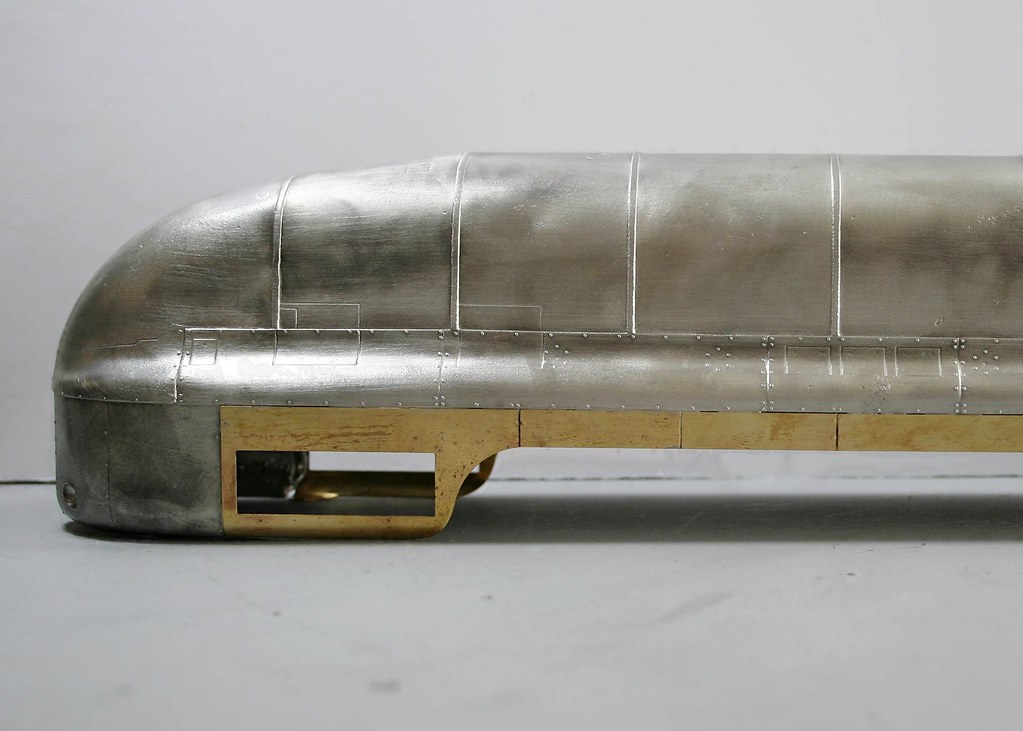
I have also got them ready for fitting to the second body but I still need to finish removing some of the excess under the body in line with the instructions before I start to add anything.
In line with the tender, the front valance piece was pre-curved but not any where near where it would fit - too high. I didn't get a photo of it before I recurved it, but this is what it looked like after the exercise.
I have also got them ready for fitting to the second body but I still need to finish removing some of the excess under the body in line with the instructions before I start to add anything.
Rob Pulham
Western Thunderer
Thanks Ken,
I was quite practiced at it by the time I had done four.
I was quite practiced at it by the time I had done four.
Rob Pulham
Western Thunderer
I have had a couple of one step forward, two steps back on the build but I am making good progress.
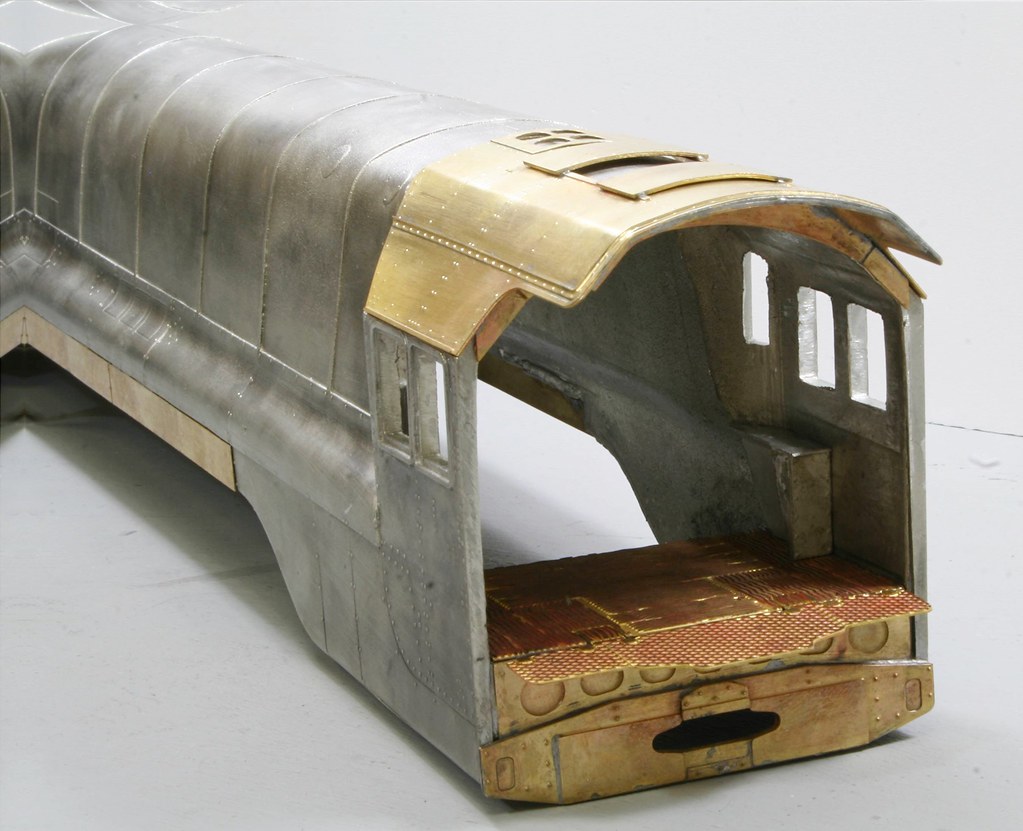
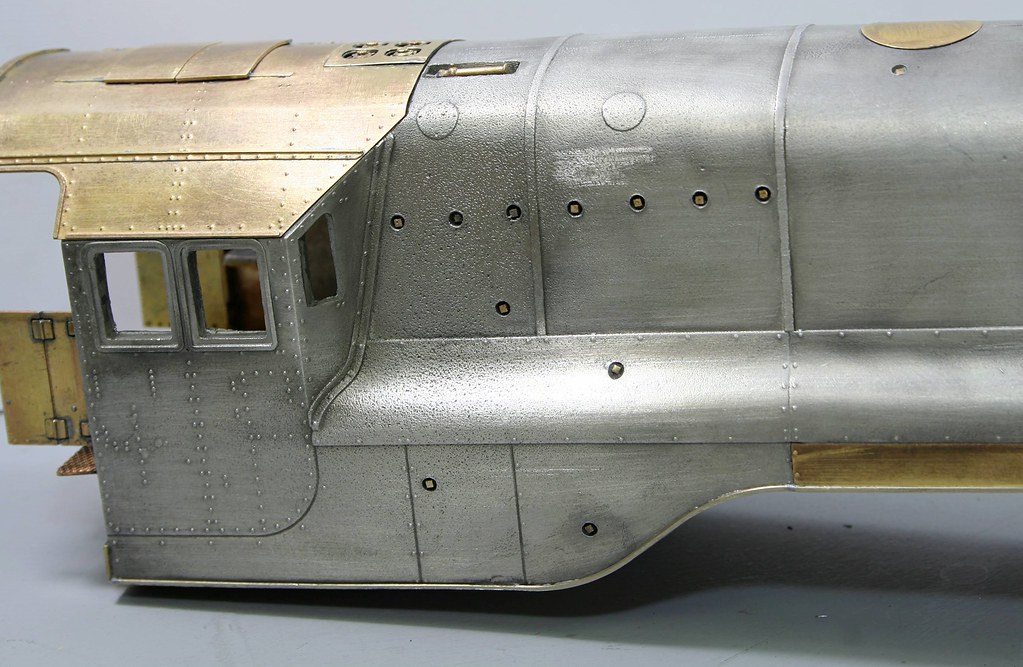
First I detailed up the cab roof and in my usual fashion left the ventilators open. - Epic Fail:headbanger:

Oops! had I thought in advance of fitting the cab floor, cutting out the opening would have been a reasonable easy task with the piercing saw. Not being able to get the blade in, I really didn't fancy chain drilling that thickness whitemetal so I took the easy way out and closed the vents.
Next came washout plugs. I added the line down either side then discovered more lower down on each side...
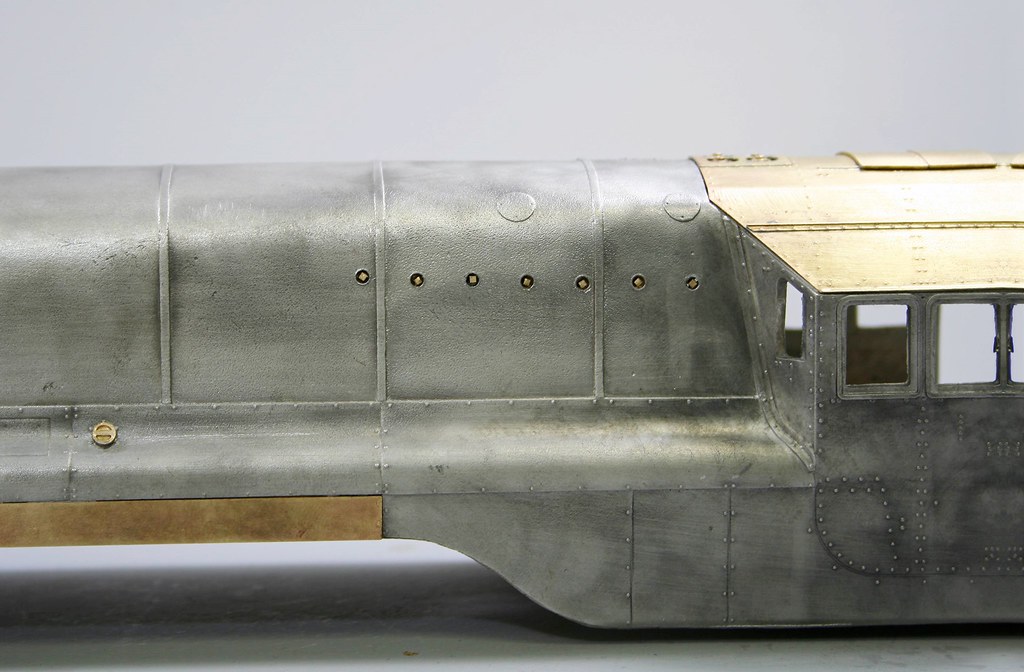
Next the instructions have you solder two layers and a .45mm pin for the sand box fillers but no instruction to recess them into the body - I only noted it after fitting them as they are in the photos
More modification needed...
I was going to fit the reversing lever to the cab too but on this I had the foresight to check that I could get the back head in if I did. No chance!
So it will need fitting after painting. A friend who is building one of these had made the cab floor removable something that I will consider for the next one.
I have made further progress but the photos are still in the camera so they will keep for another day
First I detailed up the cab roof and in my usual fashion left the ventilators open. - Epic Fail:headbanger:
Oops! had I thought in advance of fitting the cab floor, cutting out the opening would have been a reasonable easy task with the piercing saw. Not being able to get the blade in, I really didn't fancy chain drilling that thickness whitemetal so I took the easy way out and closed the vents.
Next came washout plugs. I added the line down either side then discovered more lower down on each side...
Next the instructions have you solder two layers and a .45mm pin for the sand box fillers but no instruction to recess them into the body - I only noted it after fitting them as they are in the photos
More modification needed...
I was going to fit the reversing lever to the cab too but on this I had the foresight to check that I could get the back head in if I did. No chance!
So it will need fitting after painting. A friend who is building one of these had made the cab floor removable something that I will consider for the next one.
I have made further progress but the photos are still in the camera so they will keep for another day
Rob Pulham
Western Thunderer
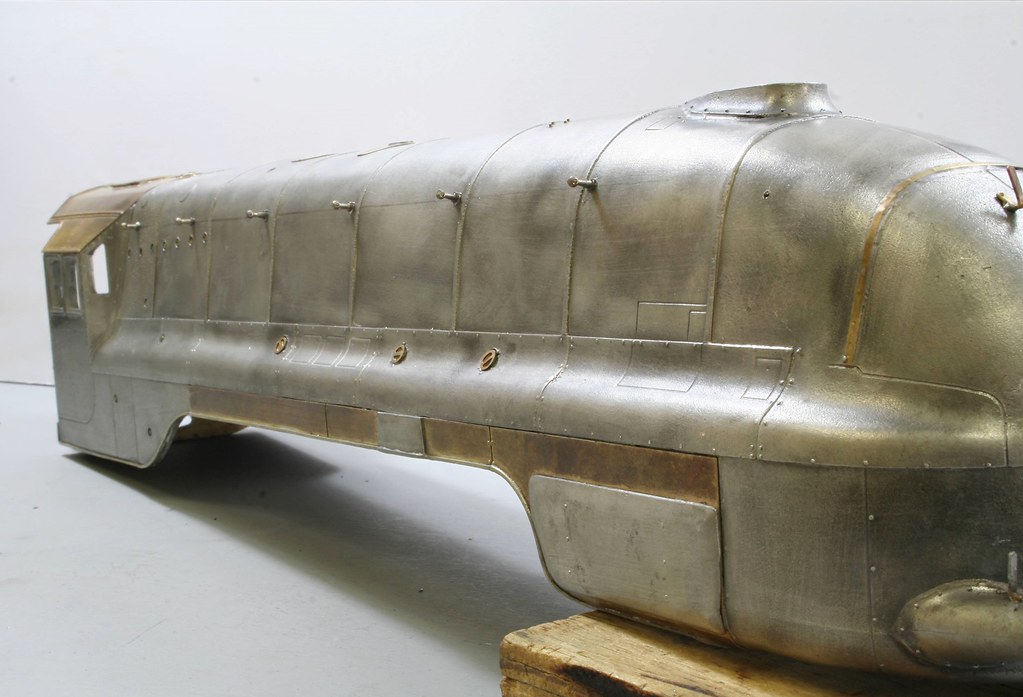
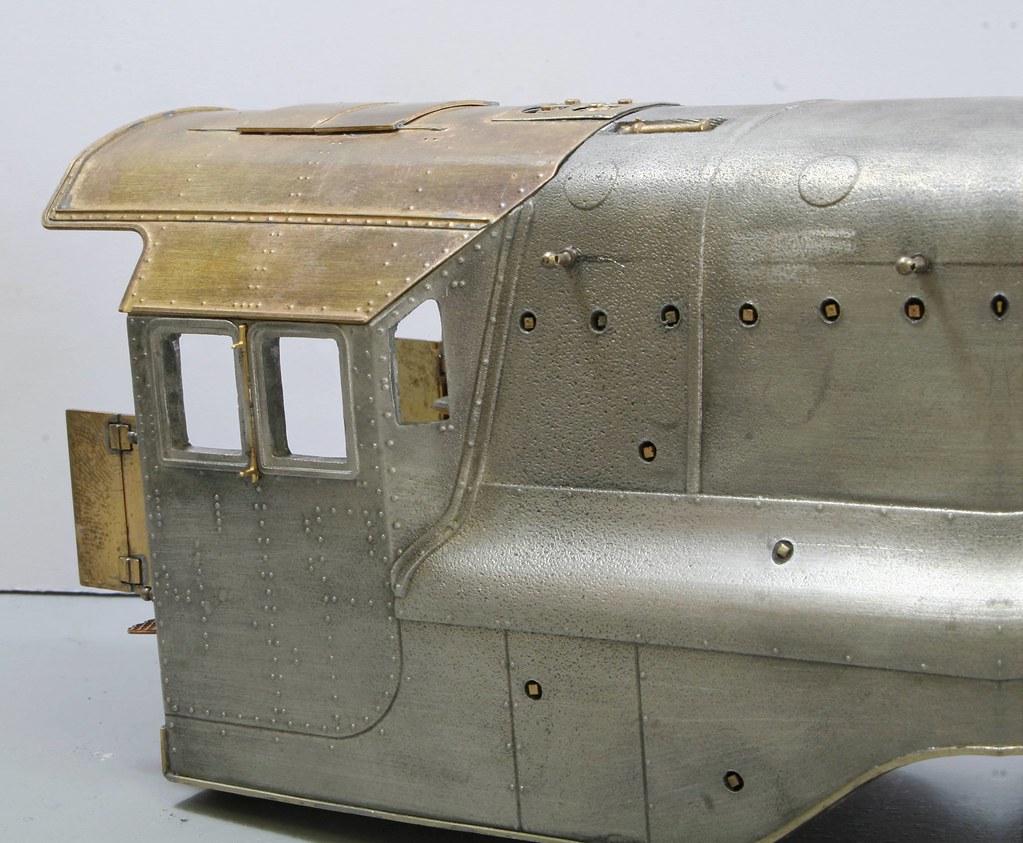
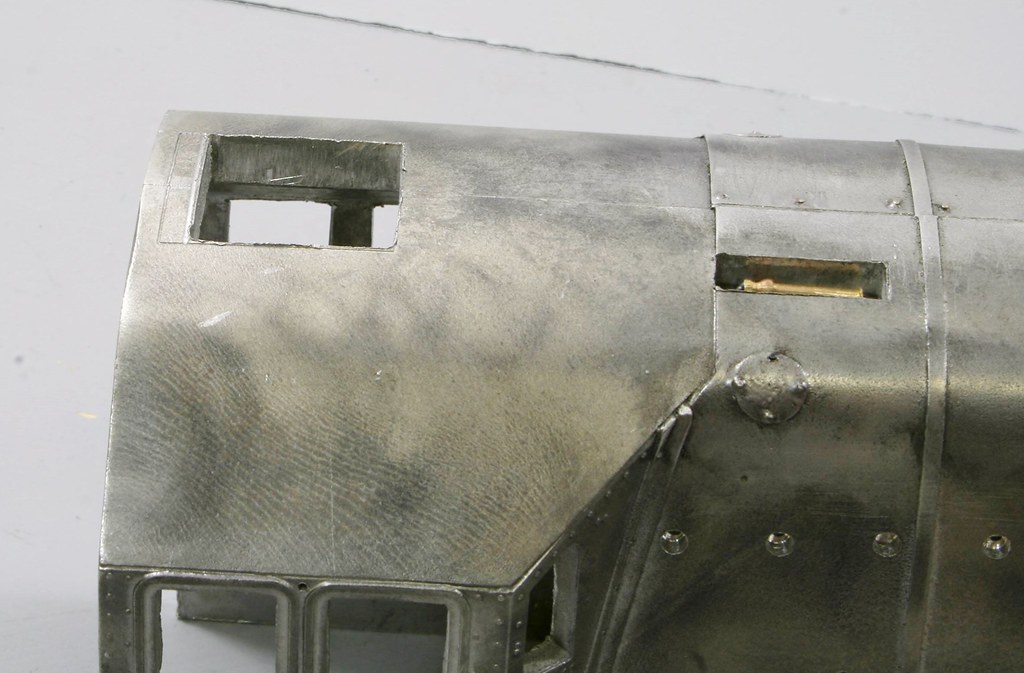
Having got the hiccups behind me, I have cracked on with the detailing of the body.
First up more wash out plugs.

Then even more washout plugs
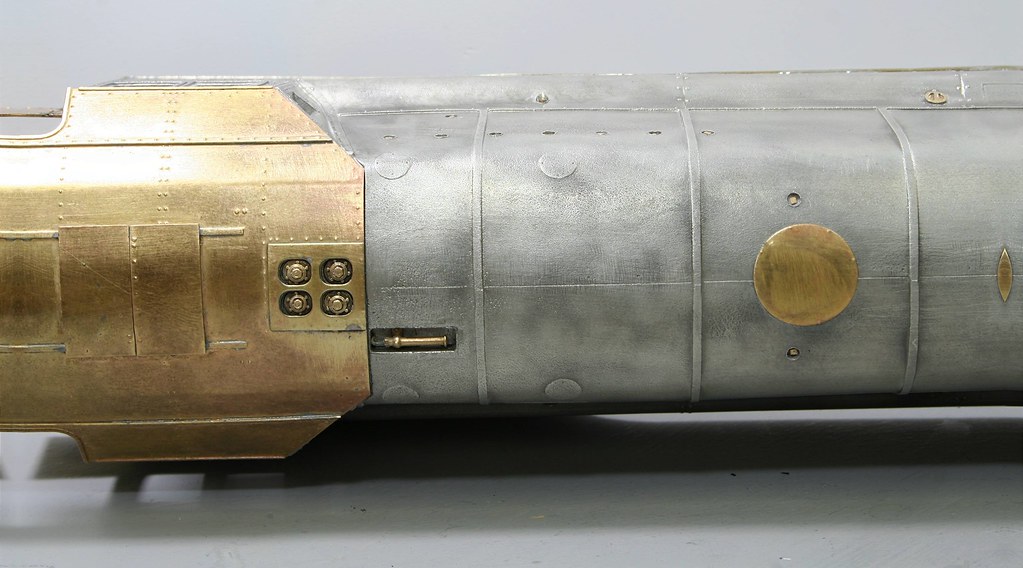
Then the final (I sincerely hope) pair
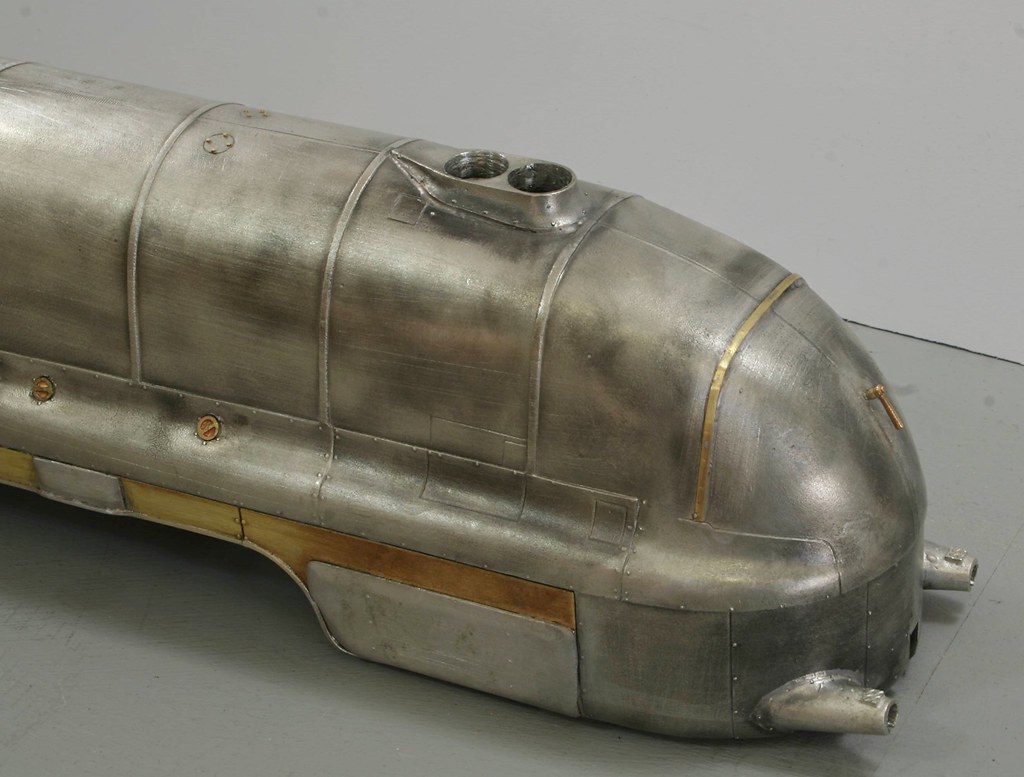
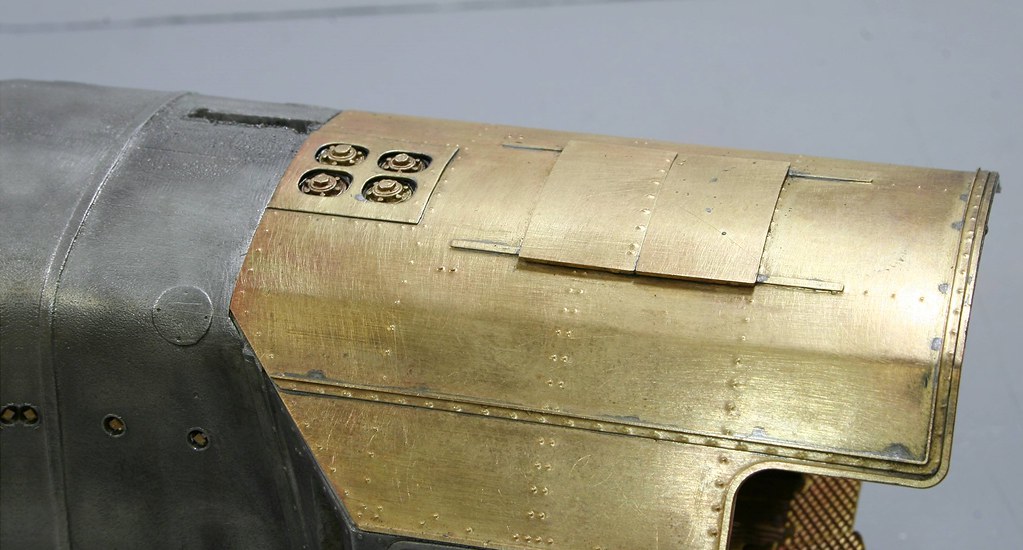
Finally I started to detail the front end.
First up more wash out plugs.
Then even more washout plugs
Then the final (I sincerely hope) pair
Finally I started to detail the front end.
Rob Pulham
Western Thunderer
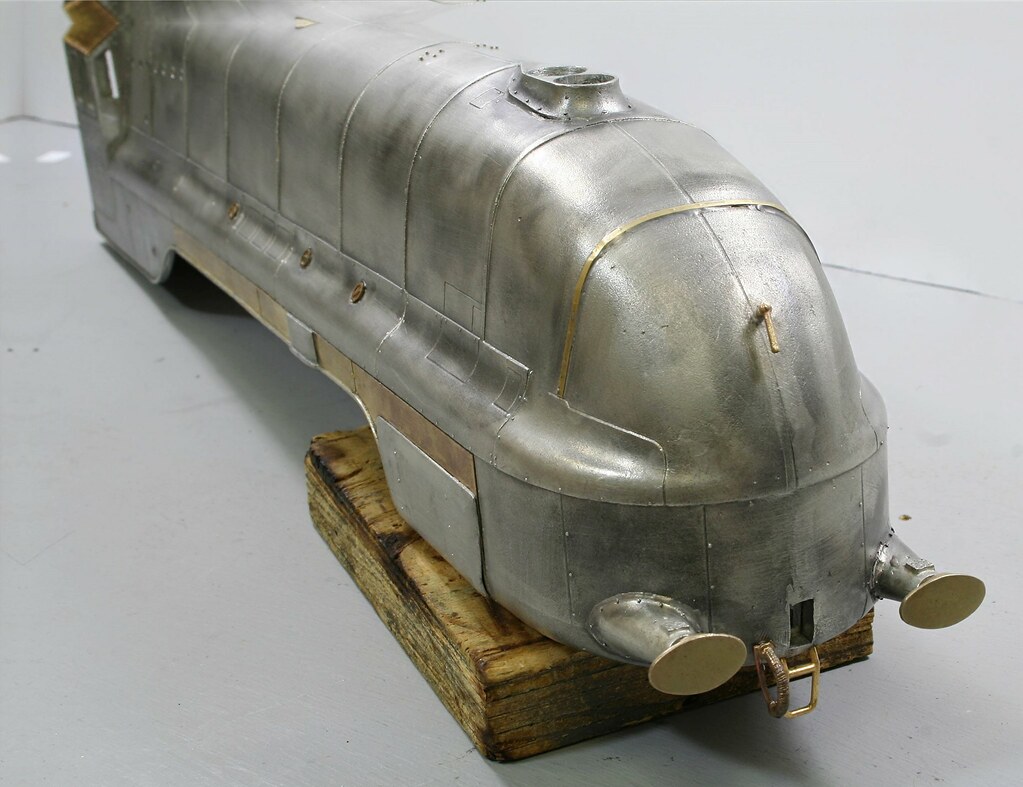
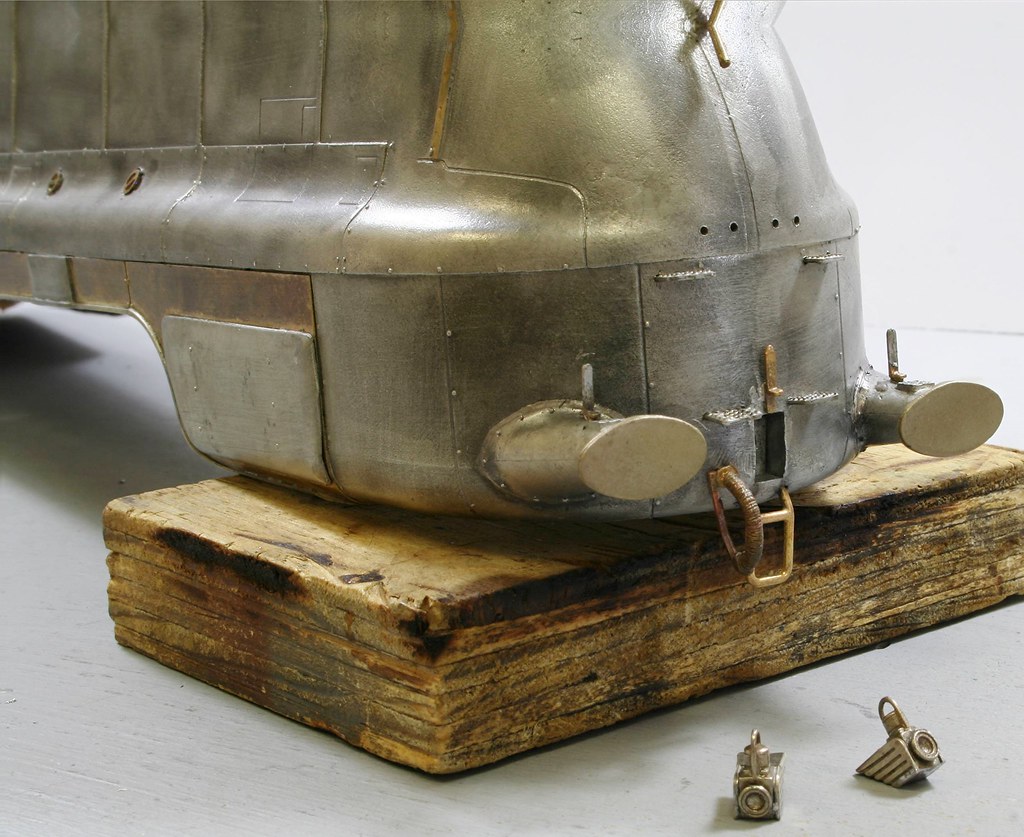
The end is in sight with the first one. The only things left to fit are the mounting blocks to fasten the body to the chassis and I need the chassis back from Warren for that.

The kit includes the superb "streamlined" lamps which are fitted in some photos and not in others so it seemed a bit rude not to make them removeable.
I have also made good progress on drilling out the many holes on the next one - I am detailing the body while it's fresh in my mind and should be a much quicker process.
Photos tomorrow but I was astonished at how thick the cast cab roof was - I broke 10 piercing saw blades cutting out the openings for the whistle and roof ventilators... It's a good job I bought 100 of each size when I got them.
Rob Pulham
Western Thunderer
Photos tomorrow
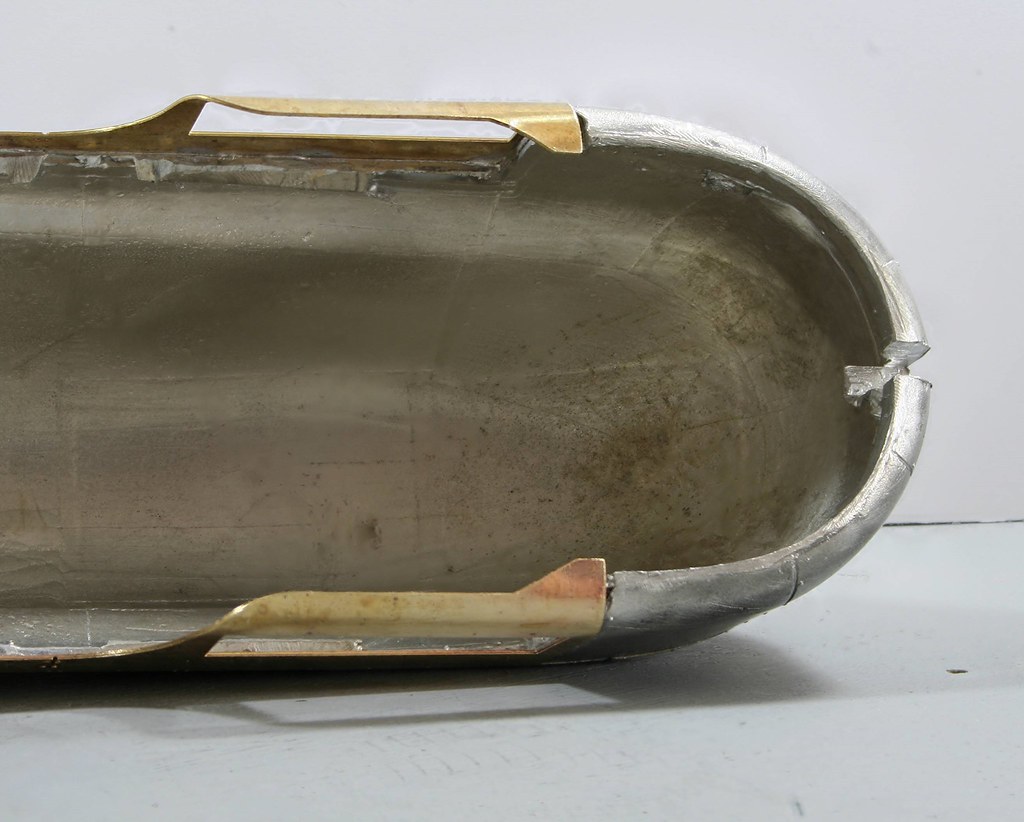
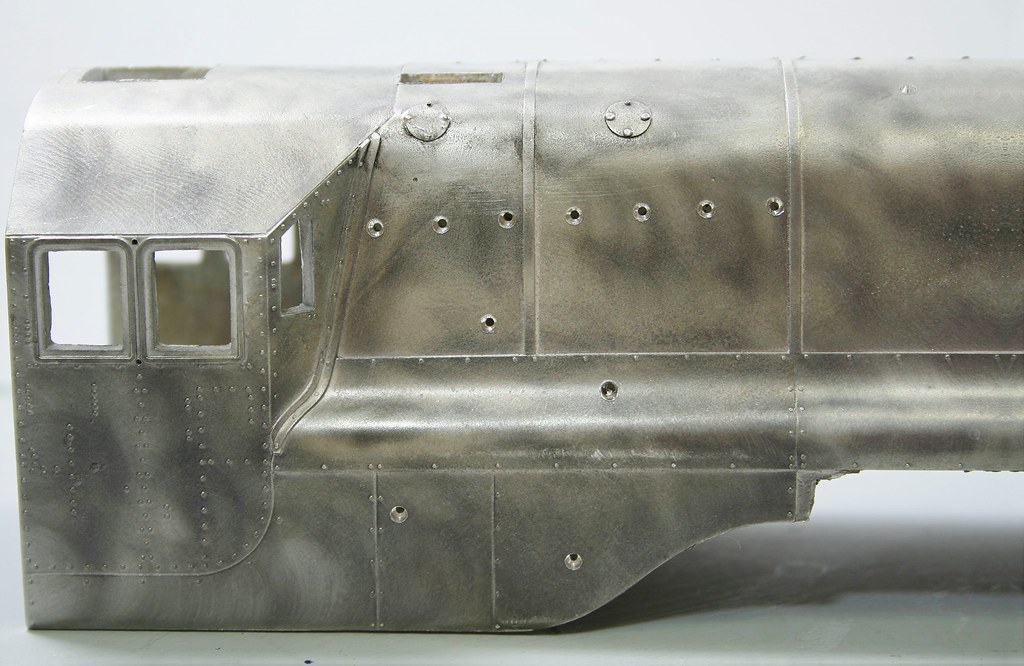
Okay not exactly tomorrow but here they are at last.
Just look at the thickness of the cab roof!!!
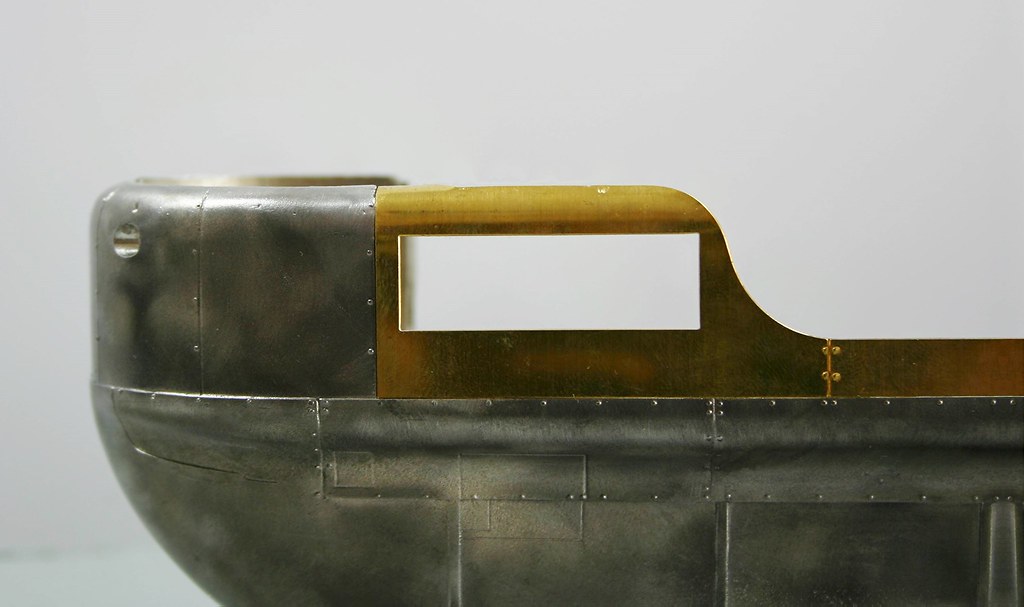
This is a high spec build than the last one so the rivets for the casing are added along the top
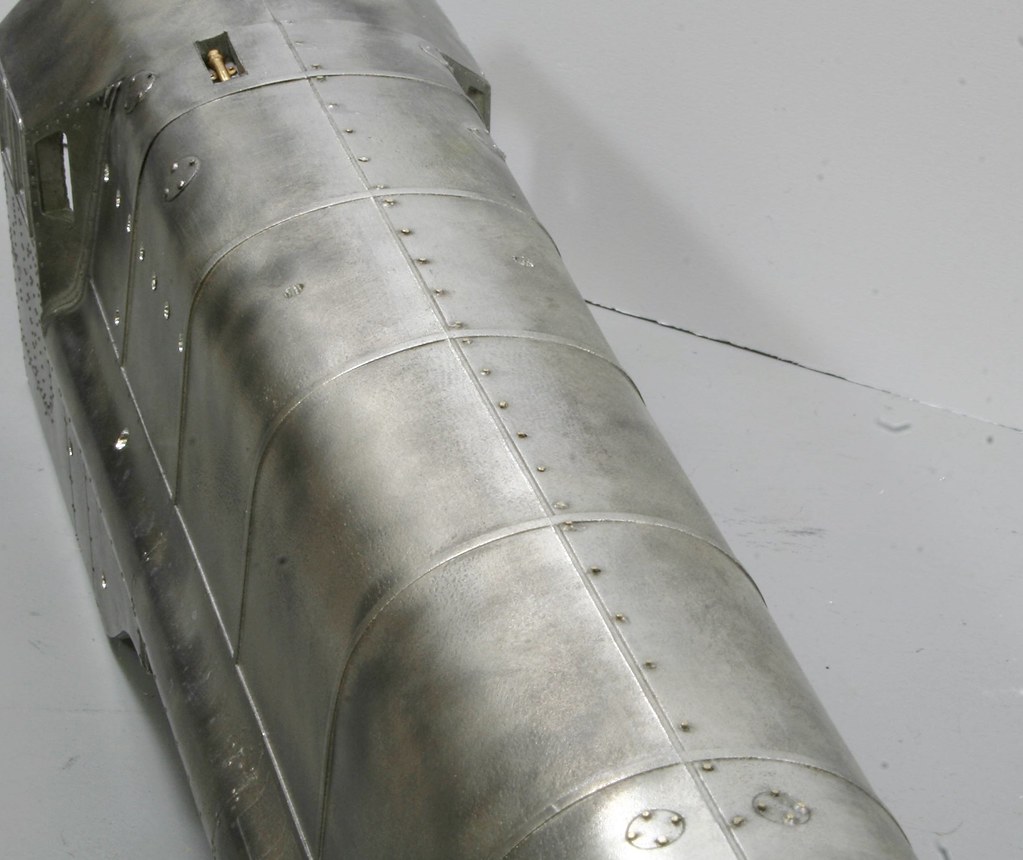
lastly for now the holes are all ready for fitting the washout plugs.
Rob Pulham
Western Thunderer
I only recently found out that this existed having conferred with a friend who is also building one.
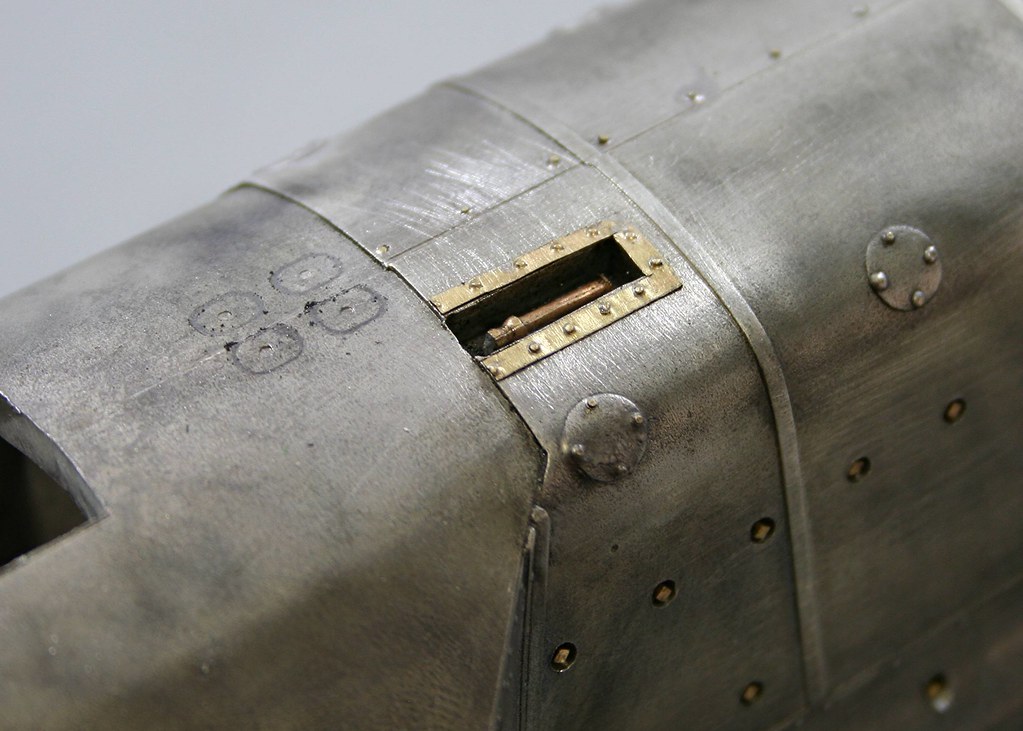
I managed to make it in one piece, cutting it from a sheet of brass shim that I bought from China for the purpose (making riveted strips in general not specifically this job).
I used my GW models rivet press to form the rivets and then I cut the slot out with a pair of topiary scissors that I use for cutting etches from the frets and removing tags from etched parts etc.
)")
