G scale Mk1 Coach

rjr

Western Thunderer
Okay so I have realised I am not very good at this sitting and thinking about things lark, so decided just to get on with my next project despite all my concerns about whether it would work !!!

After checking stock levels I found I had 5 sheets of 60 thou plasticard so that seemed a good place to start. When the rest of the country sat down to watch England get beat this afternoon I set to work in the shed. and here is how I got on.

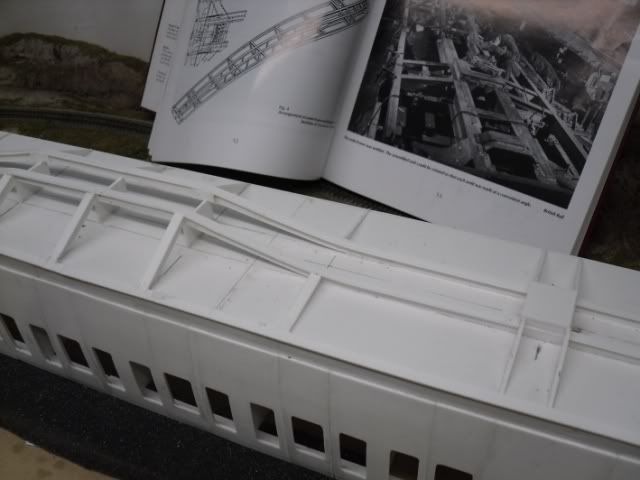
I couldn't work out how to support the shape of the sides as they are obviously not flat ! A look at a few prototype pictures and I realised there were dividers or bulkheads :) that was the spur I needed.

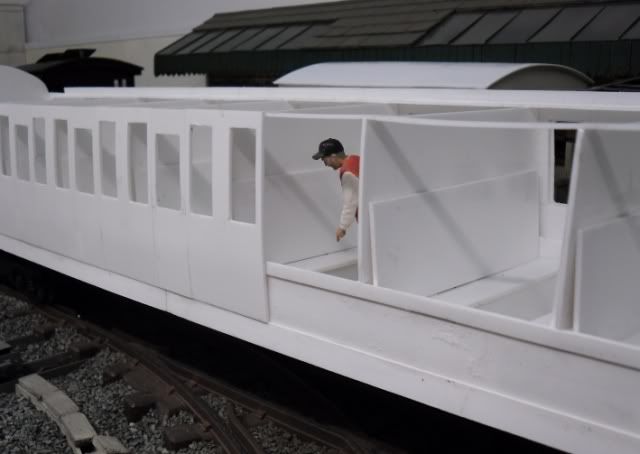
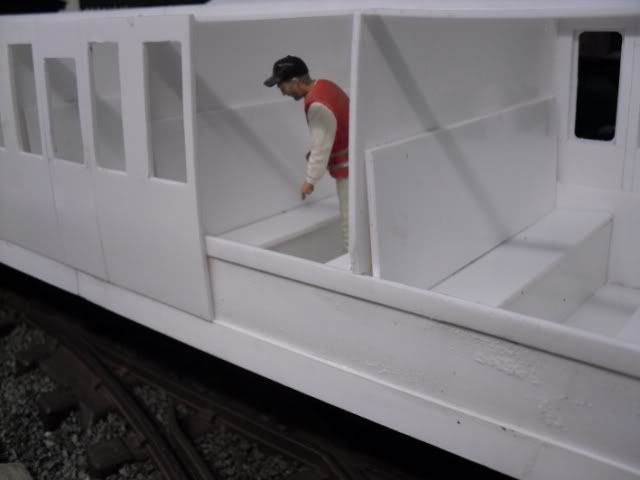
Step 1 was a rigid base, double thickness of 60thou on the base with side to stiffen and ribs where the bulkheads go.

SDC17042.jpg


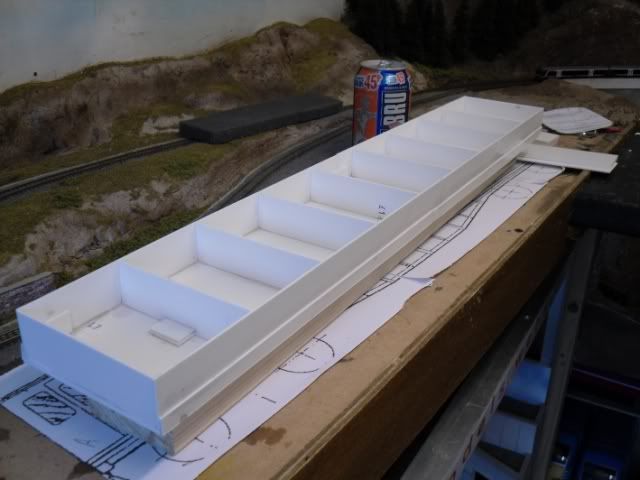
Then a bit of cutting to make the bulkheads using an scan of a book diagram enlarged to my chosen scale and drawn round. Once I had got one bulkhead right it was just a case of scribing round it several times.

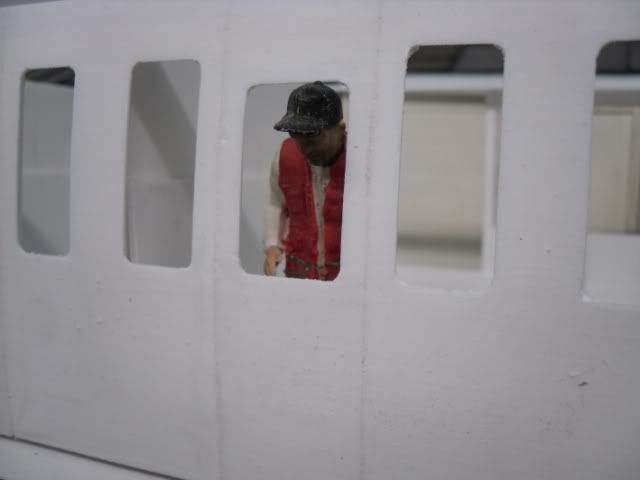
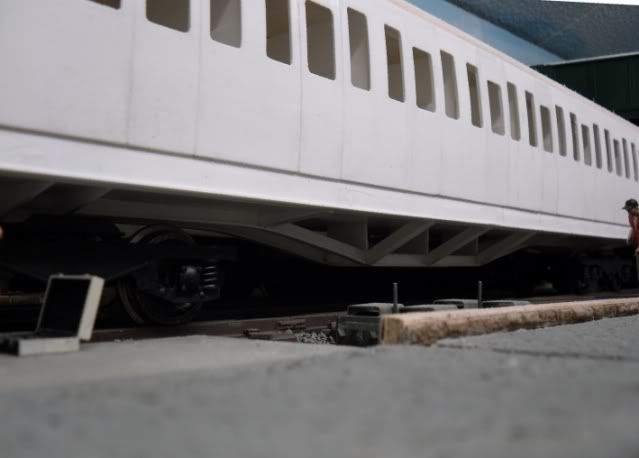
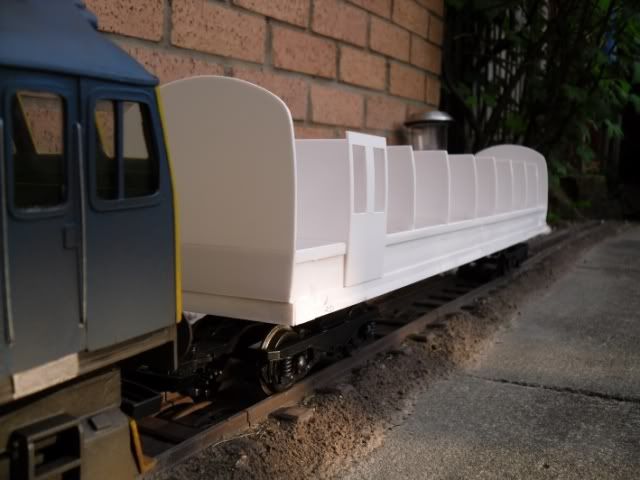
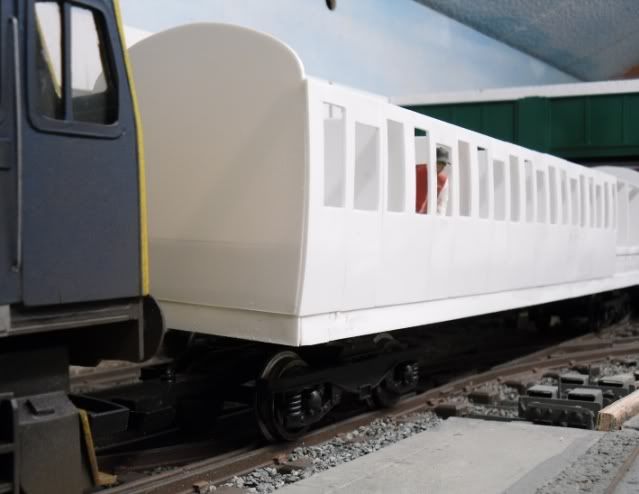
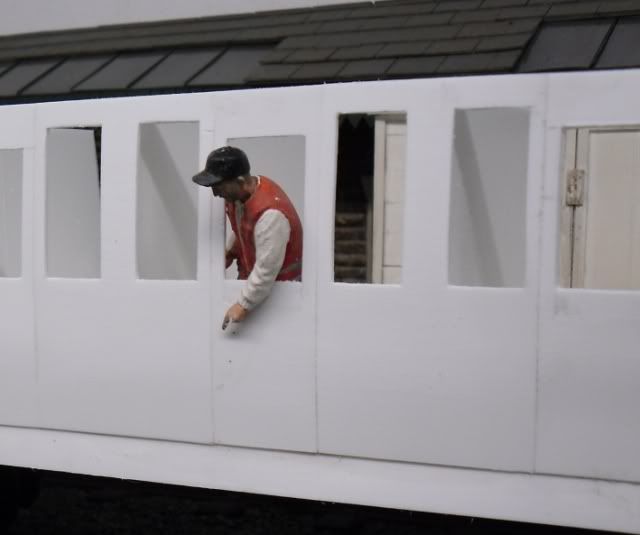
The plan is to make each window pair either side of the doors as a single unit the doors will be separate too. then they will be stuck together. I have stuck one side unit on just to get  my head round what I am doing.

SDC17045.jpg


SDC17046.jpg


SDC17048.jpg


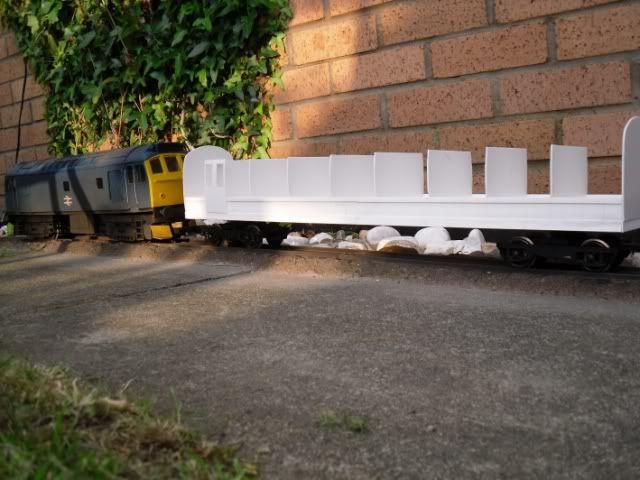
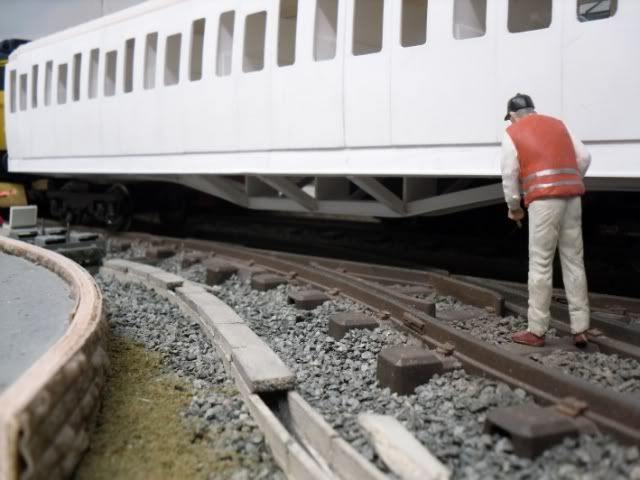
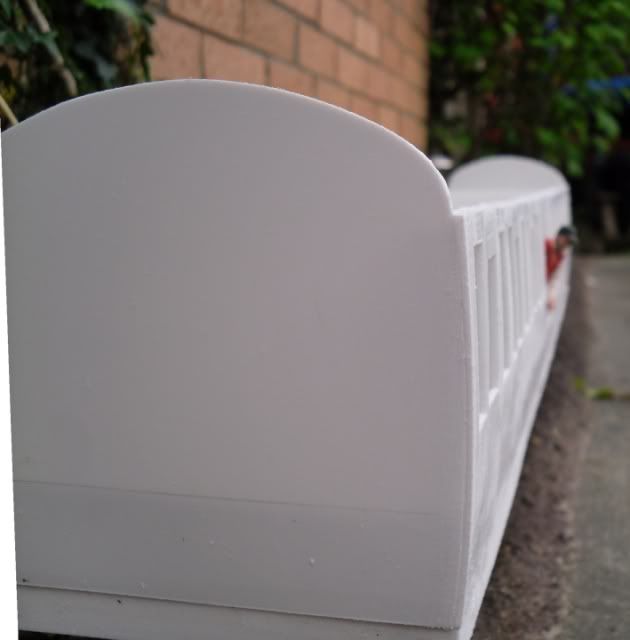
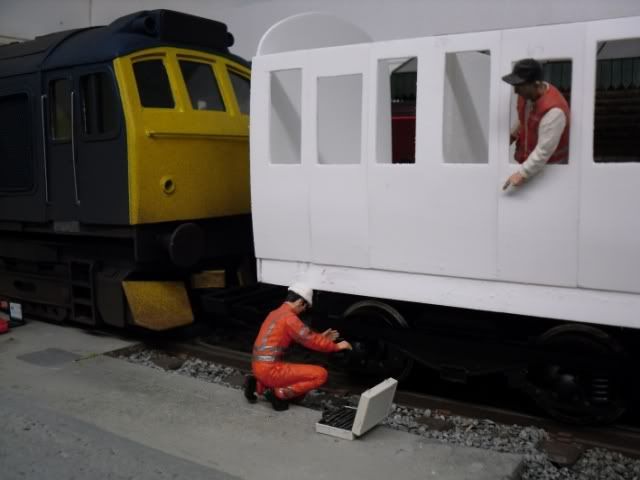
This next one gives an indication of size, the path is made from 2' flagstones..

SDC17049.jpg


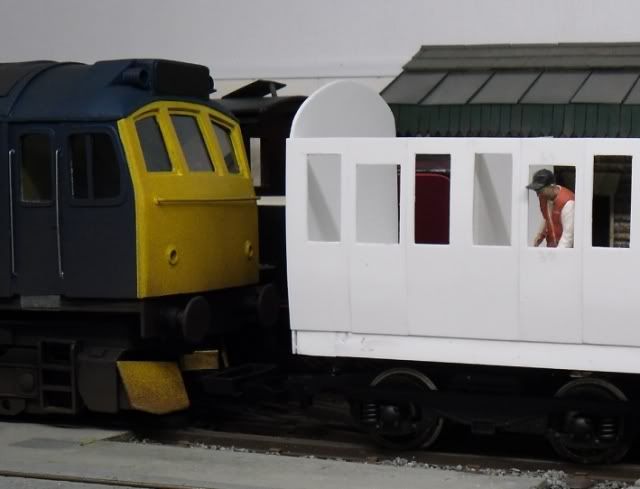
Probably the biggest single model I have made to date !

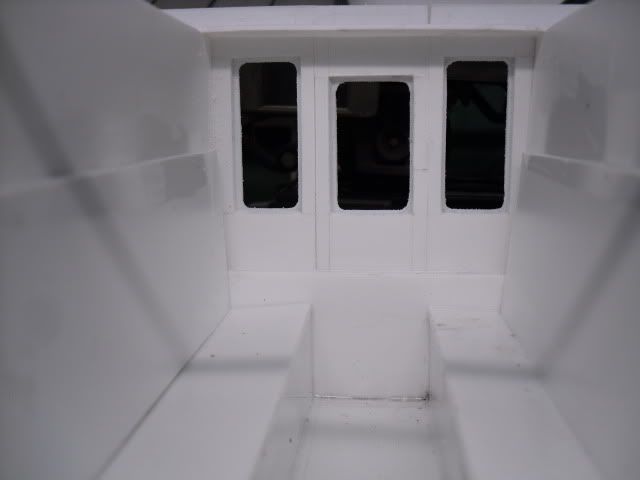
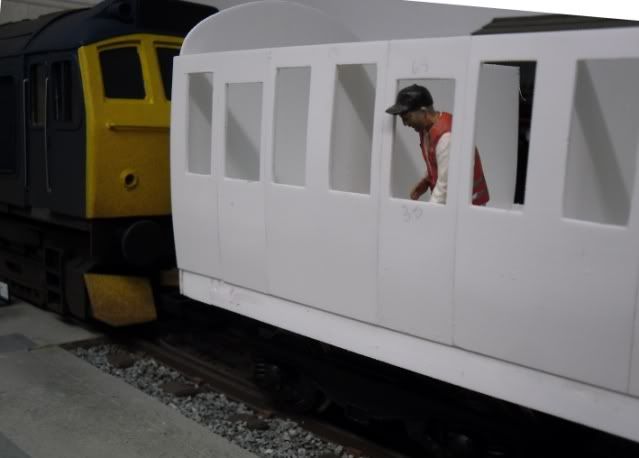
Looking at the way the windows sit on the side I'm assuming they are not made from curved glass panes so the frames the glass sits in must take up the body work curvature to to allow flat glass ?

Thoughts comment advice always welcome..

John
 

lancer1027

Western Thunderer
John, That is just incredible :bowdown: You work so quick,yet the end results are FANTASTIC :bowdown: Superb modelling well done :thumbs: please keep the progress pics coming.
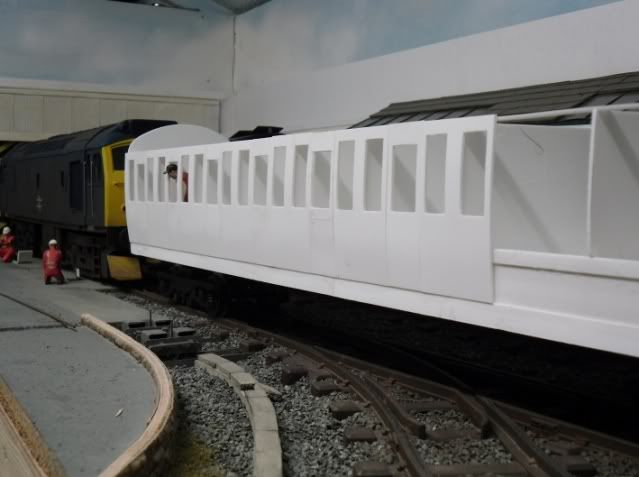
 :thumbs:

Rob :wave:
 

Ressaldar

Western Thunderer
Hi John,

just think ......if............................the football had gone into extra time (as all previous World cup final meetings between these two had) you would have had the coach finished, painted and with fare payers sat in it :thumbs:

great piece of work, yet again, please keep us informed of your (rapid) progress.

regards

Mike
 

rjr

Western Thunderer
thanks guys,

CME, the profile shape is done by scanning a drawing from Keith Parkins book "Mark 1 coaches" once scanned I used my photo editing software to enlarge the image to match the size I want and then printed it off. Print in hand I could then tac the paper onto a piece of plasticard and cut it out to make a template. The template was then used to make all the bulkheads.

Word of warning though, I'm not convinced the diagram in the book is 100% symmetrical, well its not when you enlarge it this much anyway, so I picked the best side and actually made half a template and flipped it over on the centre line to make a truly symmetrical 1st bulkhead which I then copied.

I did the same with the side view, printed it out to full size too, I can then just measure direct of the plan which is quicker than converting sizes all the time
 

rjr

Western Thunderer
I've run out of plastic card for the time being, but tonight was quite fruitful.  One side is starting to look something like.

SDC17060.jpg


SDC17058.jpg


SDC17059.jpg


But pointing man is complaining he cant get out .. no handles !

SDC17057.jpg


John
 

Jordan

Mid-Western Thunderer
CME & Bottlewasher said:
[quote=""rjr"":20pua01x]... the profile shape is done by scanning a drawing ... to enlarge the image to match the size I want and then printed it off. Print in hand I could then tac the paper onto a piece of plasticard and cut it out to make a template. The template was then used to make all the bulkheads.

Good for you - they're tricky to say the least, if you can it to look right (along with some drawings and prototype photos) then it probably is right! :thumbs:

[/quote:20pua01x]
Such a straightforward solution... you could teach Heljan a thing or two about getting Mk 1 coaches to look right, John... :p :thumbs:
 

rjr

Western Thunderer
Thanks for the encouragement,

I have to confess to being a plasticard-aholic, I have been routing in the scarp box for bits to finish of the shape on the first side (found enough !)

Tonight's pics include an end shot to help you decide if I have got the profile right.

SDC17064.jpg


SDC17066.jpg


SDC17068.jpg


Two reasons I have made the side up in sections,
1) they are easier to handle
2) I wanted to get the doors to look like they are separate.

SDC17072.jpg


Finally a potential caption competition ??

SDC17073.jpg


John
 

Jordan

Mid-Western Thunderer
rjr said:
I have to confess to being a plasticard-aholic,
There are warnings about solvent abuse, y'now... :p

Now we see the consequences!!! :lol: :lol: :lol:
 

rjr

Western Thunderer
:) the amount of plastic weld I get through, my local model shop probably thinks I have a "problem" :)

This afternoon I got home earlier than planned so i used the time to block up and sand the roof section with some Balsa wood

4752253968_937d78910c.jpg

4751616415_a505b5444b.jpg

4752255990_5b6bc0902d.jpg

4752256186_7432fa6708.jpg

This method was a lot quicker than the one I used to make the loco roof !!!

John
 

D1054

Western Thunderer
A bit of tissue and dope, and a good breeze...... you'll be flying with that ;)
Can see you're a bit of a craftsman... looking really nice again.

Actually, joking apart, tissue and dope would give you a very realistic finish for the roof once painted, but then you've probably already got that planned... :oops:

Great stuff! looking forward to the next update....
 

rjr

Western Thunderer
Today's update is a double day effort as I didn't post yesterday.


On the one side that had been seen previously I have now added the second skin made from 20 thou (0.5mm) plastic. In this' the window aperture's are 1mm smaller all round and have radius corners.

SDC17085.jpg


On the other side I have started the thicker first layer of side panels.

SDC17083.jpg


I have also fitted the seat backs and bases, which pointing man seems to find quite interesting.

SDC17081.jpg


This last picture shows the window step formed by adding the thinner second wall on the outside. The glazing will sit into this step. The seating will have "cushions" added to thicken them up

SDC17082.jpg


John
 

rjr

Western Thunderer
G scale Mk1 Coach underside

Both sides now have complete sides, only one side hase the top thin cladding though. I needed a break from cutting windows so I have started on the underside trusses.

SDC17094.jpg


SDC17095.jpg


SDC17096.jpg


SDC17098.jpg


John
 

Rob Pulham

Western Thunderer
looking good John. What do you use to stick your balsa together? Your roof making is giving me ideas.
 

rjr

Western Thunderer
Rob Pulham said:
looking good John. What do you use to stick your balsa together? Your roof making is giving me ideas.


I used mitre bond, basically a super glue which comes with a marker pen containing accelerator. You apply the clear marker pen to one side and the super glue to the other, put together and sticks in seconds.

This is the brand

http://cgi.ebay.co.uk/Mitre-Bond-Glue-a ... 500wt_1154

But I buy it from B&Q in the kitchen department, its designed for things like kitchen cabinet pelmets. I have had problems getting normal super glue to bond wood before but this sticks like mad. I considered PVA and then weighting it down till dry but I have had bad results with PVA and balsa as when wet balsa can be prone to warping !
 

Rob Pulham

Western Thunderer
Thanks John - by remarkable coincidence I have just had a new kitchen fitted and the fitter left me a half bottle after my enquiring about it. The worst is I never even considered it when looking at your post.
 

rjr

Western Thunderer
Thanks CME, it had me scratching my head for a while, due to floor thickness and ride height I only had room to model the bottom half of the frame work, which when the coach is on the rails is all you see. But when inverted it does look like half is missing. Never mind life is full of compromises. I was also fascinated to learn when studying the plans that the main ribs along the length do actually have a curve in them as they leave the under body and bend down to the lowest level of the truss. I guess they are bent from one length then welded at the sharper angle along the bottom.


From experience I have realised when scratch building its always a good idea to have frequent test runs, just in case you get something really wrong that renders the model inoperable. So last night after adding the thin skin top walls to the second side and also altering the bogie positions inwards to suit the underfloor framing a test was in order. I am pleased to report it ran first time no problems.


John
 

iploffy

OC Blue Brigade
You must be pleased at the outcome of your labours i would be if it were mine well done looks excellent

Ian
 

rjr

Western Thunderer
G scale Mk1 Coach livery

Thanks Ian, Ill be happier when it gets to the primer stage. I'm always happier when they are grey, they just look so much more solid !


COLOURS !>!>!

When I started the build I chose a 57' suburban because of its short length being suitable for my tight curves. My favourite coach livery is blue and grey, perhaps its an age thing ? After research if I have read correctly, suburban stock never had blue grey livery. Early years saw them in maroon with later life bringing on a solid blue look. So question.. what would be most appropriate to be seen behind a 25 in blue ??? My thoughts would probably be blue but more experienced advice would be appreciated.

John
 
Top