You are using an out of date browser. It may not display this or other websites correctly.
You should upgrade or use an alternative browser.
You should upgrade or use an alternative browser.
7mm Gladiator NER/LNER/BR B16/1 - Another North Eastern Workhorse
- Thread starter Rob Pulham
- Start date
BrushType4
Western Thunderer
Not just you....Is it just me or have all of the images from this thread disappeared? All I see is placeholders.
Dave
Rob Pulham
Western Thunderer
After an exciting weekend doing other things I got back to the B16 last night and cracked on with fitting the brakes.
I wound a few layers of masking tape around the wheels to both space the brake shoes away from the wheels and to help reduce the risk of rusting from soldering with the wheels in place.

I was forewarned by a gent on RMweb who has recently built a 4mm version of this kit that the length of the yokes that fit to the brake spreaders is a bit long and so it was with the 7mm version. I used a diamond disk in the Dremel to cut a slot in the brake spreader to allow the fork in the yoke to slip back and effectively shorten the rod. - see photo above.

I also need to shorten the rod that connects to brake the the link below the ab too. The plan is to solder a piece of scrap to the end with the boss on and file a second boss which will allow me to create a forked joint once I shorten the rod.

I wound a few layers of masking tape around the wheels to both space the brake shoes away from the wheels and to help reduce the risk of rusting from soldering with the wheels in place.
I was forewarned by a gent on RMweb who has recently built a 4mm version of this kit that the length of the yokes that fit to the brake spreaders is a bit long and so it was with the 7mm version. I used a diamond disk in the Dremel to cut a slot in the brake spreader to allow the fork in the yoke to slip back and effectively shorten the rod. - see photo above.
I also need to shorten the rod that connects to brake the the link below the ab too. The plan is to solder a piece of scrap to the end with the boss on and file a second boss which will allow me to create a forked joint once I shorten the rod.
Rob Pulham
Western Thunderer
I also need to shorten the rod that connects to brake the the link below the ab too. The plan is to solder a piece of scrap to the end with the boss on and file a second boss which will allow me to create a forked joint once I shorten the rod.
Which I duly did on Wednesday night. In fact I was feeling pretty pleased with myself until this morning when by chance I found a photo which showed me exactly how the brake gear should fit at the cab end.
It will be good news to David (Hill) that in fact you don't need to shorten the rod to the cab rear at all, you just need to connect it to the right lever from the cross shaft.
All being well I should have it corrected on Monday evening and I will post before and after photos to show how I got it wrong initially. In the hope that it will prevent someone else from making the same mistake. I have say that the instructions are lacking in this area being of the 'fit parts X,Y,Z,' styke and an email to Steve Barnfield although it elicited a response didn't help because he couldn't remember how it fitted.
To give Steve due credit he did offer to assist in person if I was in his area but I am a long way from him.
Rob Pulham
Western Thunderer
As described in the last post I made an error in the assembly of the brakes this was due to a combination of things that may not necessarily affect other builders of the kit - somewhat basic instructions, combined with my lack of knowledge of the prototype and struggling to find a photo of a B16/1 that shows how they fit. And finally because the kit had been started lots of the etches had been cut up and finding some of the bits has been a bit challenging - The second lever that I needed to connect the brake pull rod to was attached to a small scrap of etch that I found by chance in the bottom of the box.
Hopefully this will assist anyone when they get to this point in their kit.
NB my subscription to PhotoBucket seems to be retaining my images at present so I will continue to use it. If it goes pear shaped all the images are available on Flickr and I do have back ups so I can re-instate them on this thread at least.
This is where I had got to in my ignorance last week.


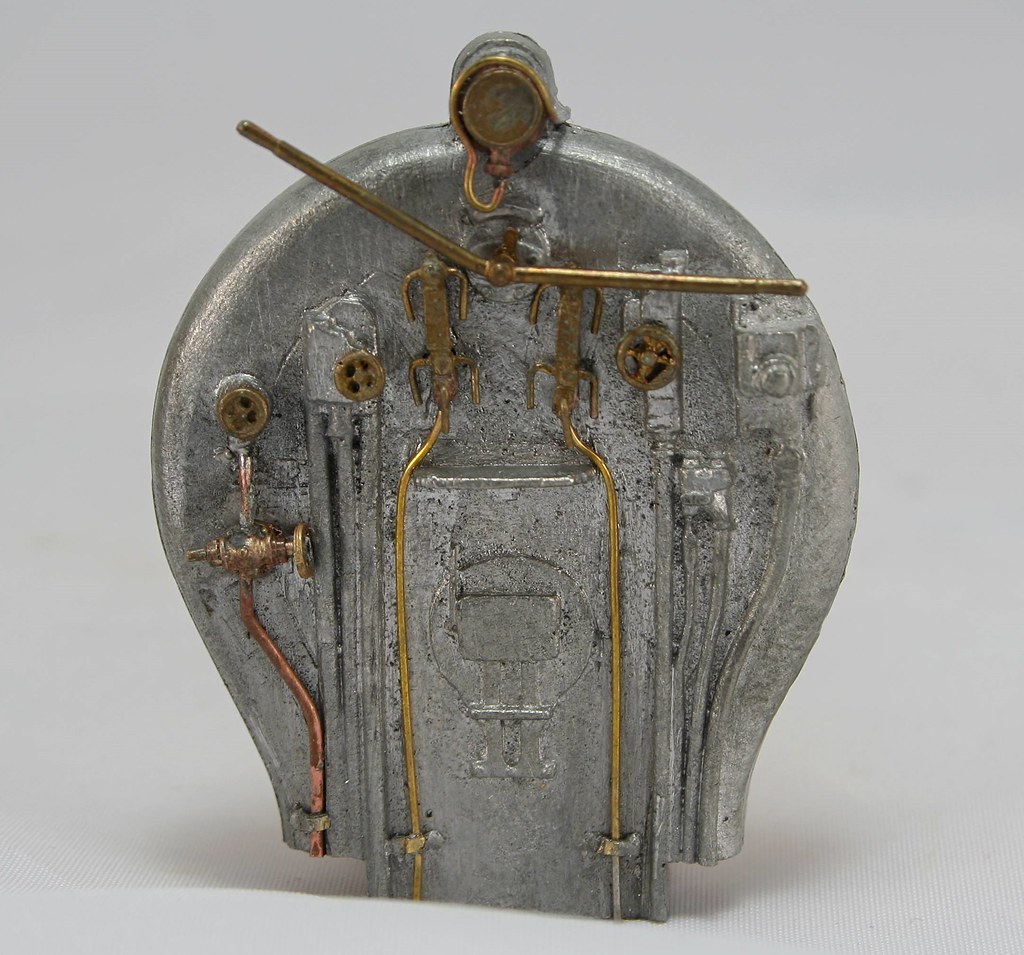
This is what it should have looked like - this is a crop from a photo of an NER V Class, which is referred to in the instructions as having the same backhead details as the B16 it was only after spending sometime studying the backhead that I realised that it also showed how the brake gear fits at the cab end.

Then this is the result of last night's efforts - I had to add a representation of a slack adjuster to make up for my shortening the shaft previously


Finally not the best shot in the world but it does look more like the realthing now

Hopefully this will assist anyone when they get to this point in their kit.
NB my subscription to PhotoBucket seems to be retaining my images at present so I will continue to use it. If it goes pear shaped all the images are available on Flickr and I do have back ups so I can re-instate them on this thread at least.
This is where I had got to in my ignorance last week.
This is what it should have looked like - this is a crop from a photo of an NER V Class, which is referred to in the instructions as having the same backhead details as the B16 it was only after spending sometime studying the backhead that I realised that it also showed how the brake gear fits at the cab end.
Then this is the result of last night's efforts - I had to add a representation of a slack adjuster to make up for my shortening the shaft previously
Finally not the best shot in the world but it does look more like the realthing now
Martin Shaw
Western Thunderer
Rob
I can't help thinking there would be a pull rod adjuster between each set of brake rods otherwise it's impossible to adjust the blocks relative to each other. However you may take the wholly pragmatic approach and just paint it dirty black, well it's what I would do under the circs.
Regards
Martin
I can't help thinking there would be a pull rod adjuster between each set of brake rods otherwise it's impossible to adjust the blocks relative to each other. However you may take the wholly pragmatic approach and just paint it dirty black, well it's what I would do under the circs.
Regards
Martin
Rob Pulham
Western Thunderer
Rob
I can't help thinking there would be a pull rod adjuster between each set of brake rods otherwise it's impossible to adjust the blocks relative to each other. However you may take the wholly pragmatic approach and just paint it dirty black, well it's what I would do under the circs.
Regards
Martin
Hi Martin,
I agree and if it was for me, I probably would have (now that you have mentioned it....) but....
daifly
Western Thunderer
NB my subscription to PhotoBucket seems to be retaining my images at present so I will continue to use it. If it goes pear shaped all the images are available on Flickr and I do have back ups so I can re-instate them on this thread at least.
I assume that you have a Plus Account but be warned! This is what PB are saying:
If you were a Plus Account subscriber in good standing as of June 1, 2017,
you will continue to have all the privileges you have enjoyed including 3rd
Party Hosting until December 31, 2018 as long as you maintain your
subscription.
So even those with a Plus Account will lose the third party hosting at the end of next year.
Dave
Rob Pulham
Western Thunderer
I assume that you have a Plus Account but be warned! This is what PB are saying:
If you were a Plus Account subscriber in good standing as of June 1, 2017,
you will continue to have all the privileges you have enjoyed including 3rd
Party Hosting until December 31, 2018 as long as you maintain your
subscription.
So even those with a Plus Account will lose the third party hosting at the end of next year.
Dave
Thanks Dave, that's good to know.
BrushType4
Western Thunderer
I so wish I could solder things together. Inspirational. 
Scale7JB
Western Thunderer
But I taught you once! LolI so wish I could solder things together. Inspirational.
JB.
Rob Pulham
Western Thunderer
It seems like a while since I updated this thread so it must have been a good holiday.
Time has been spent since getting back on the little things that take time and don't seem to evidence much progress but all add to the overall picture.
I have started looking at the upperworks starting with the cab fittings. A lot of the detail is cast on to the backhead and there are some castings supplied. Sadly a lot of the detail is a bit low relief so I suspect that I will remove and remake most of it.
I add some fine brass wire to the gauges
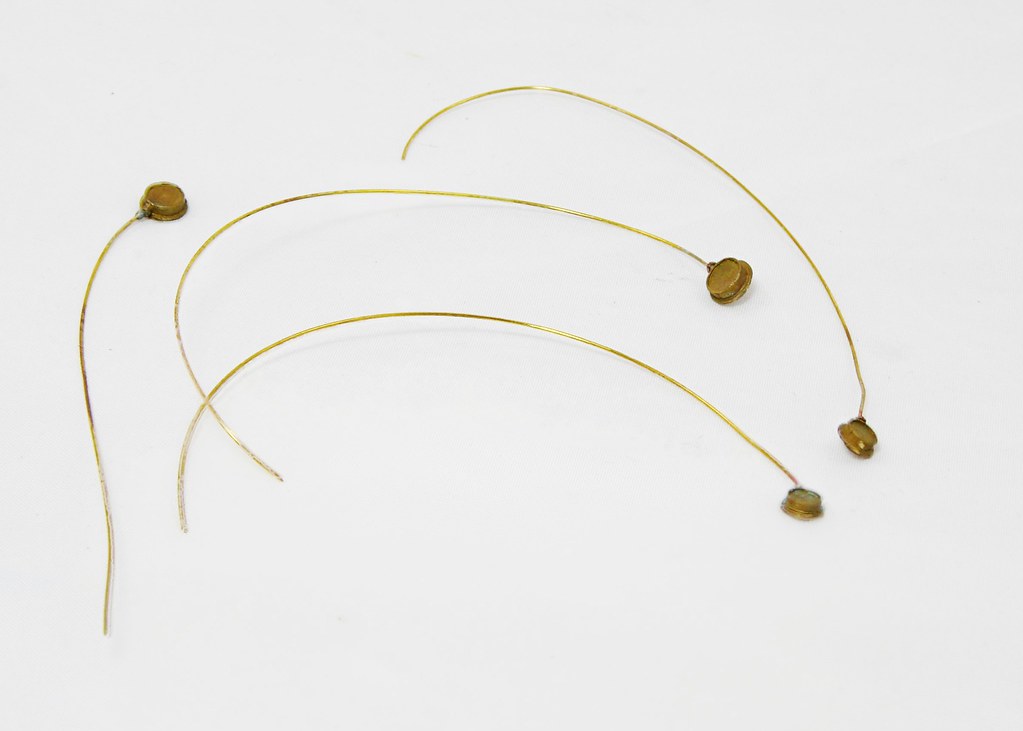
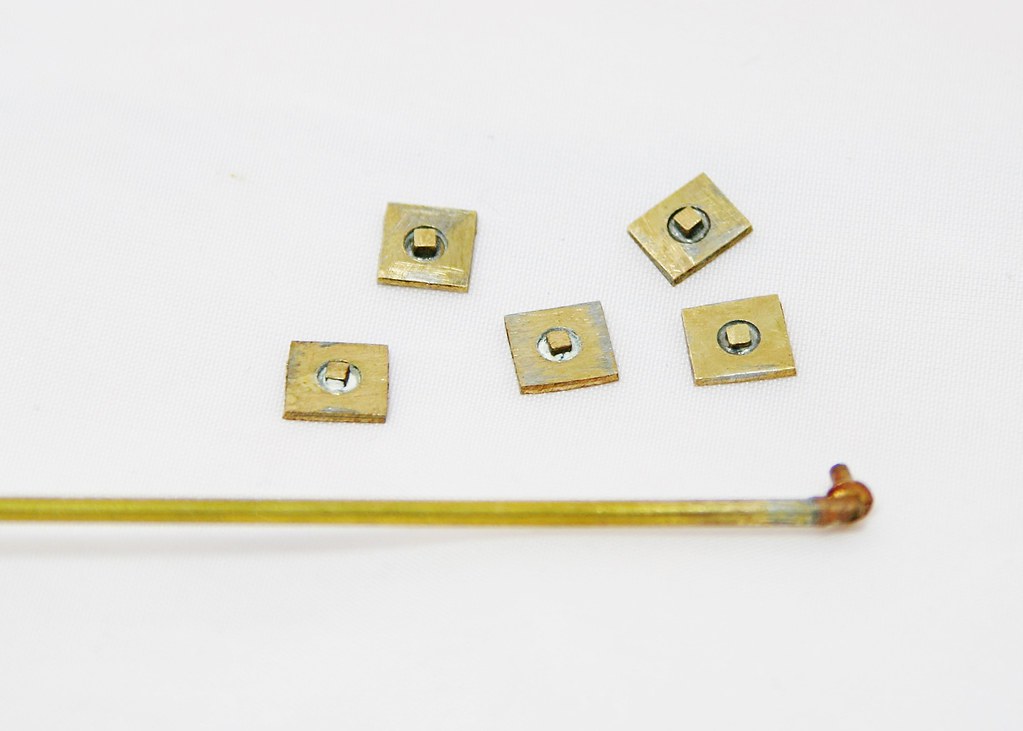
I also made up some washout plug bases these are two layers of brass with a stub of square section brass inserted. The plan is that this will be soldered behind the holes in the firebox and then half etched surrounds soldered over them. A length of square section was included in the box but I am unsure as to whether this comes with the kit or it was provided by the owner.
I also soldered the elbow provided onto a length of tube for the vacuum ejector pipe.
Time has been spent since getting back on the little things that take time and don't seem to evidence much progress but all add to the overall picture.
I have started looking at the upperworks starting with the cab fittings. A lot of the detail is cast on to the backhead and there are some castings supplied. Sadly a lot of the detail is a bit low relief so I suspect that I will remove and remake most of it.
I add some fine brass wire to the gauges
I also made up some washout plug bases these are two layers of brass with a stub of square section brass inserted. The plan is that this will be soldered behind the holes in the firebox and then half etched surrounds soldered over them. A length of square section was included in the box but I am unsure as to whether this comes with the kit or it was provided by the owner.
I also soldered the elbow provided onto a length of tube for the vacuum ejector pipe.
jonte
Western Thunderer
It seems like a while since I updated this thread so it must have been a good holiday.
Time has been spent since getting back on the little things that take time and don't seem to evidence much progress but all add to the overall picture.
I have started looking at the upperworks starting with the cab fittings. A lot of the detail is cast on to the backhead and there are some castings supplied. Sadly a lot of the detail is a bit low relief so I suspect that I will remove and remake most of it.
I add some fine brass wire to the gauges
I also made up some washout plug bases these are two layers of brass with a stub of square section brass inserted. The plan is that this will be soldered behind the holes in the firebox and then half etched surrounds soldered over them. A length of square section was included in the box but I am unsure as to whether this comes with the kit or it was provided by the owner.
I also soldered the elbow provided onto a length of tube for the vacuum ejector pipe.
Marvellous patience, Rob. Well worth it.
jonte
Rob Pulham
Western Thunderer
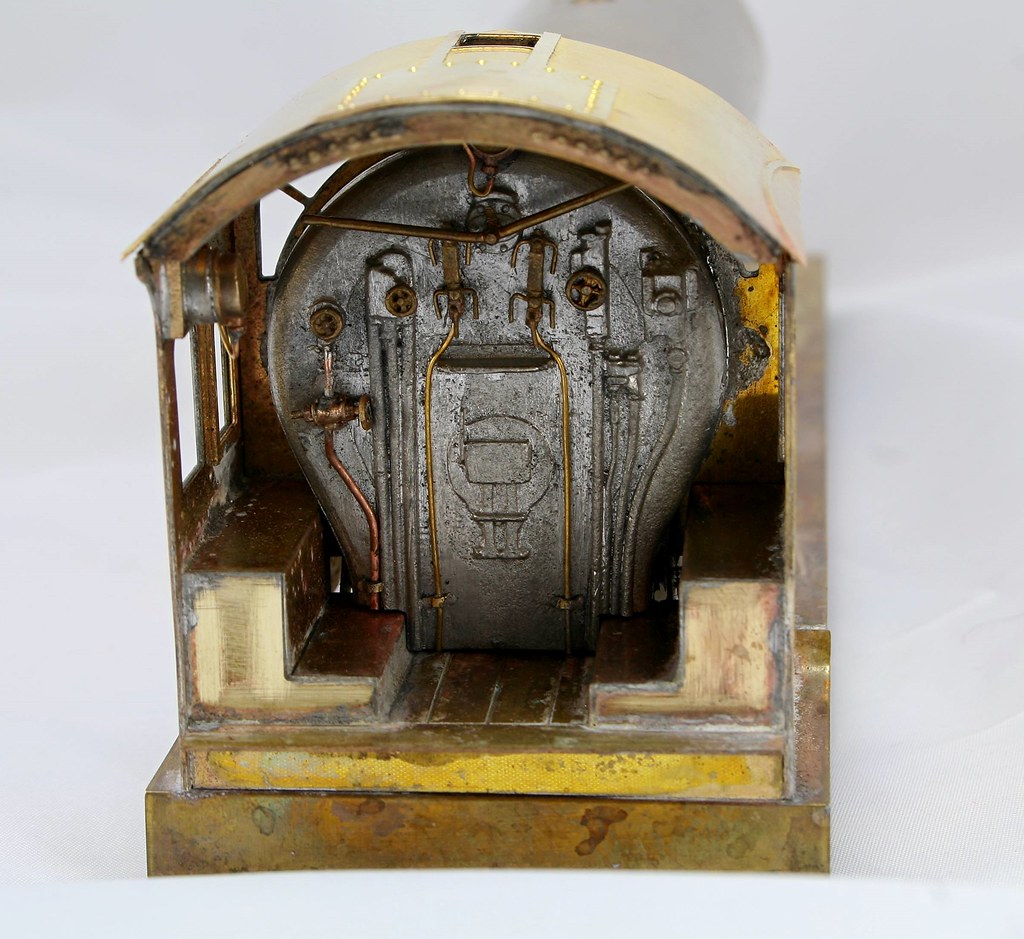
Although other things have been taking a priority at this busy time of the year (for us), the B16 has been ticking along slowly. After consultation with the gent that I am building it for, the plan is only to replace the detail that is supplied as brass castings in the kit.
I have added the lockers/splasher tops inside the cab and cut the backhead to fit. I have also done most of what will be replaced with just one casting to fit tonight. - shown below the cab rear. This will fit to the left of the backhead below the hand wheel and where the ghost of the cast pipe can still be seen - must do a better job of smoothing it of before putting the new one in place. The pipe work for the water gauges is very fine and a bit flimsy so I knocked up a couple of pipe clips from scrap and soldered them in place. I suspect that I will need to do the same with the final pipe when I have it in place.
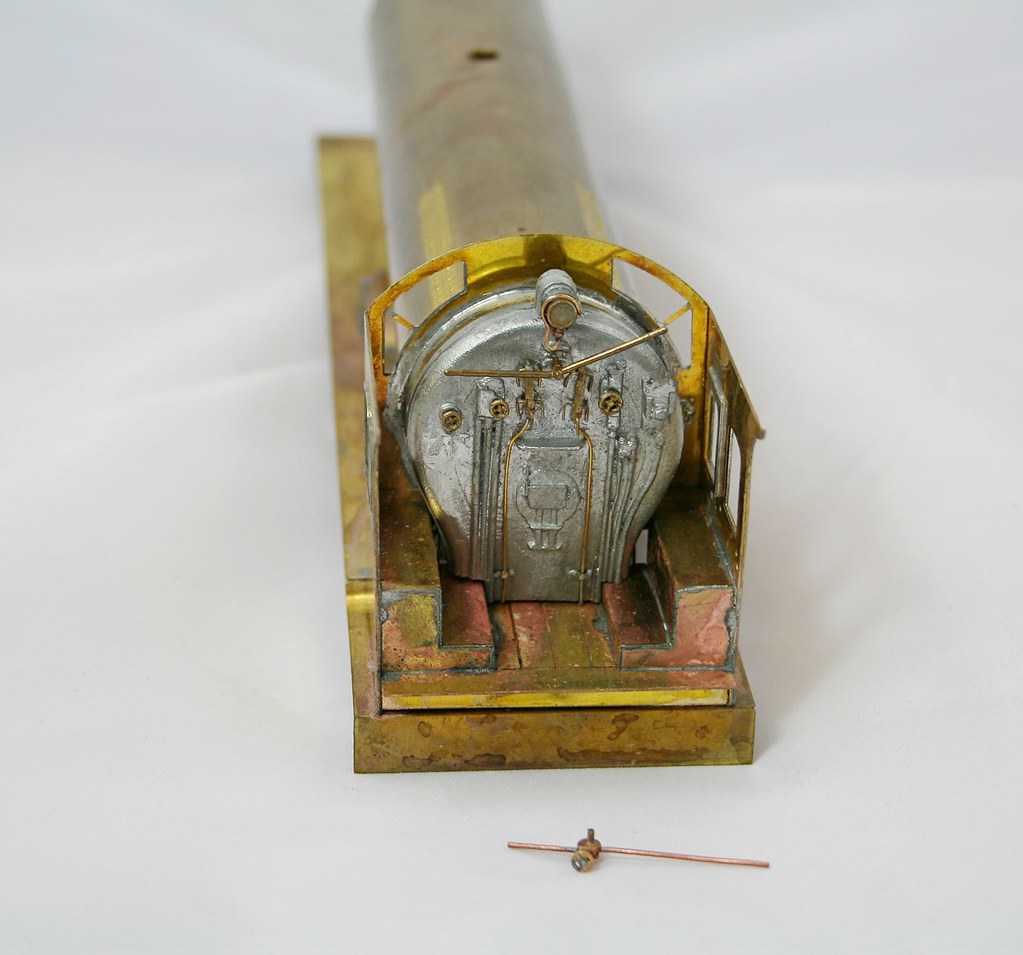
I have added the lockers/splasher tops inside the cab and cut the backhead to fit. I have also done most of what will be replaced with just one casting to fit tonight. - shown below the cab rear. This will fit to the left of the backhead below the hand wheel and where the ghost of the cast pipe can still be seen - must do a better job of smoothing it of before putting the new one in place. The pipe work for the water gauges is very fine and a bit flimsy so I knocked up a couple of pipe clips from scrap and soldered them in place. I suspect that I will need to do the same with the final pipe when I have it in place.
Rob Pulham
Western Thunderer
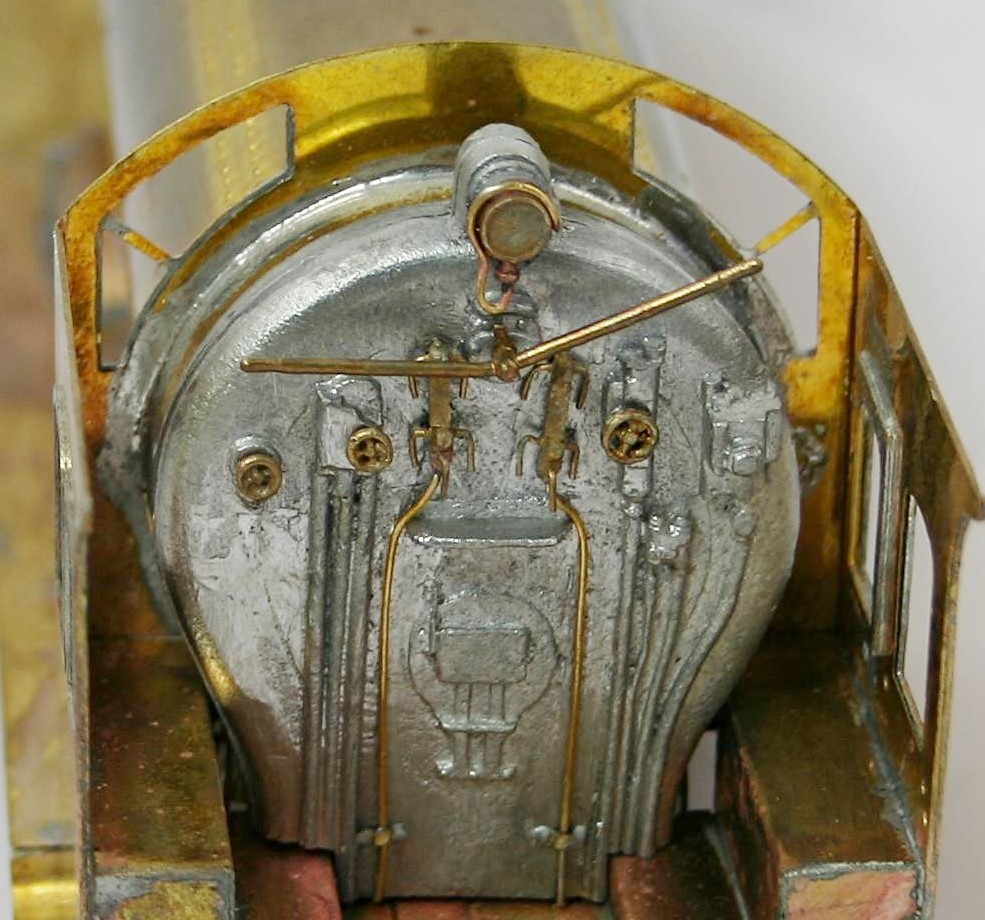
Moving on, the back head is now finished as far as it's planned and looking at the cab photo I have, there is quite a prominent dial on the rear of the left cabside. This was quickly replicated with a dial, a slice of brass tube and a strip of thickish brass bar (it's mounted on a thick wooden plinth). Sadly none of that invisible solder here. It is all pre clean up though.
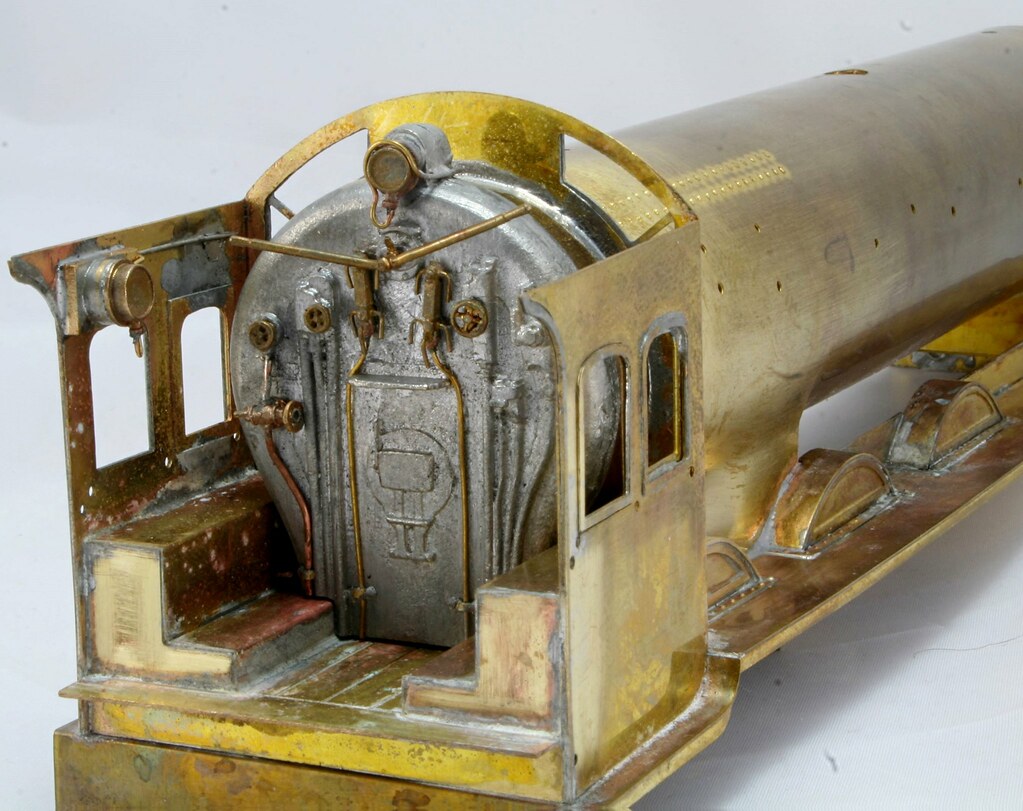
Then came the cab roof which was another of those jobs that I had put off a couple of times for no logical reason. It went to get well and the design makes it fit the cab very nicely and it's much better than some I have done. I still need to add the ventilator and I think the whistle but I will check that. I also need to adjust the feed pipe to the gauge everso slightly as it's a bit high up on the cab side making the roof rock ever so slightly.
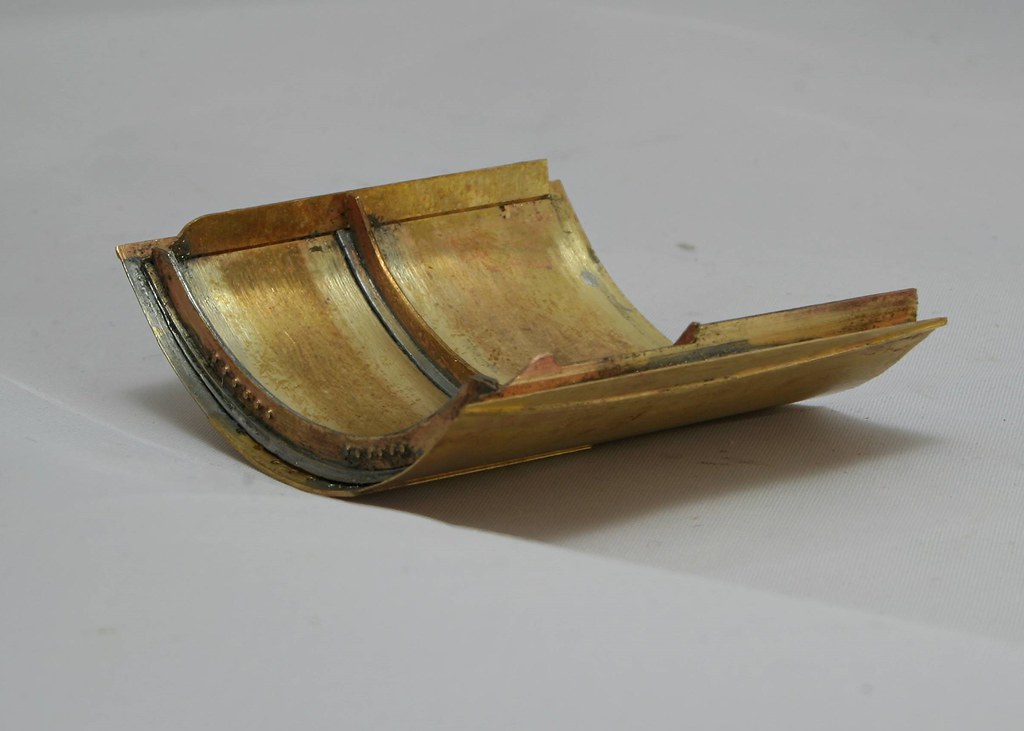
You can see where I had to make a cut out for the plinth to fit.
Then came the cab roof which was another of those jobs that I had put off a couple of times for no logical reason. It went to get well and the design makes it fit the cab very nicely and it's much better than some I have done. I still need to add the ventilator and I think the whistle but I will check that. I also need to adjust the feed pipe to the gauge everso slightly as it's a bit high up on the cab side making the roof rock ever so slightly.
You can see where I had to make a cut out for the plinth to fit.
Rob Pulham
Western Thunderer
Although I haven't posted much on this having concentrated on the caoches I have been making steady progress on the B16.
The tender is now complete with it's missing Vacuum pipe and axleboxes and just needs a good scrub before I take any photos.
From the previous photos I have fitted the cab roof and working back from the cab I have also fitted the cab side hand rails
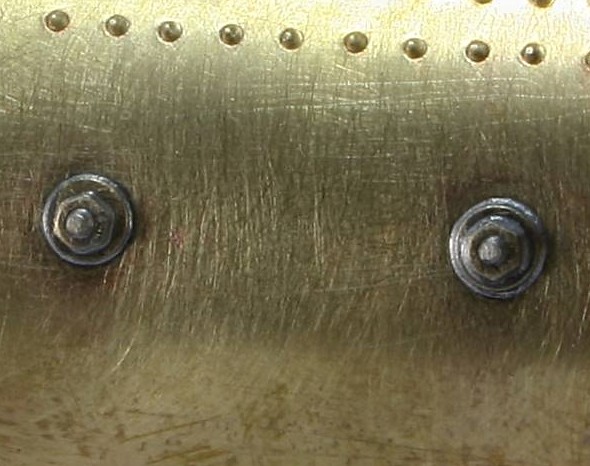
I also started work on the washout plugs, and for the upper part of the firebox in the timeframe of this model, the oval base plate had been replaced with a round one.

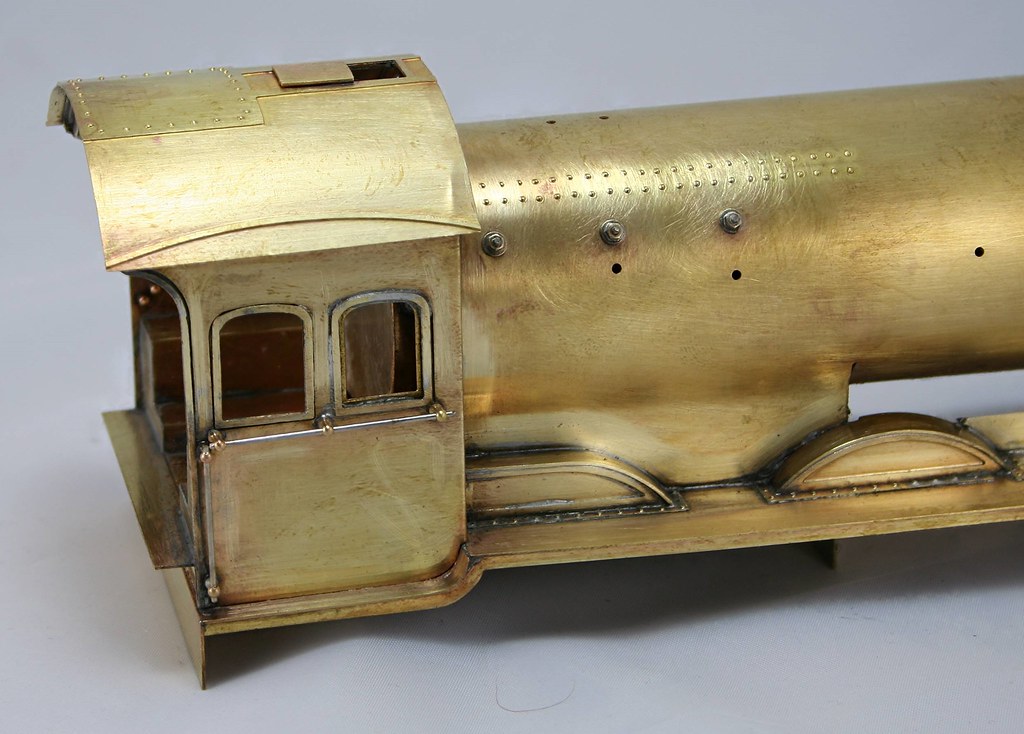
In the kit these are represented by a circular half etched overlay but those in the kit were a little over etched therefore a bit on the flimsy side. So I made some replacements from some nickel rod threaded 14ba to these I added some Markits Crankpin washers (my last so I need to get some more) and a 14BA nut to finish.
Last thing, I gave it a good clean up scraping off lots of the excess solder that had built up in various areas.
The tender is now complete with it's missing Vacuum pipe and axleboxes and just needs a good scrub before I take any photos.
From the previous photos I have fitted the cab roof and working back from the cab I have also fitted the cab side hand rails
I also started work on the washout plugs, and for the upper part of the firebox in the timeframe of this model, the oval base plate had been replaced with a round one.
In the kit these are represented by a circular half etched overlay but those in the kit were a little over etched therefore a bit on the flimsy side. So I made some replacements from some nickel rod threaded 14ba to these I added some Markits Crankpin washers (my last so I need to get some more) and a 14BA nut to finish.
Last thing, I gave it a good clean up scraping off lots of the excess solder that had built up in various areas.
Stoke5D
Western Thunderer
Rob
If these are wash-out plugs then they will be square ended like this:
Fig 5 BR1 Standard Washout Plug 1 from Heritage Steam Supplies
The square is typically 1 1/4" AF. So you should look to remove the 14BA nuts and file the rod square, although it would be a bit undersize. I think the washer is probably OK as they usually have a trim cover around them to make the cladding watertight. I'm not an expert on LNER related stuff though, so it may be different on this loco.
No offence meant and please feel free to ignore me, or shout at me if this input is unwelcome...
Andrew