7mm Gladiator NER/LNER/BR B16/1 - Another North Eastern Workhorse

mickoo

Western Thunderer
Cheers JB,

Do you know what they call the ones at the top?
Normally I'd go with JB and say washout plugs but the LNER seem to put mud ring doors up high as well, the A3 and A4 both have mud ring type doors up high with a bolted on cover.

Here's 60019 boiler and all the side openings are mud hole type with just washout plugs at the very base and rear corner of the firebox inside the cab, highlighted with a lighter paint.
o210.jpg
 

Rob Pulham

Western Thunderer
Washout Plugs, Proper

Not much modelling done this week due to not being at my best, but a bit of thinking in the lucid moments and looking at photographs of B16's. The conclusion that I reached is that washout plugs on B61/1's are a nightmare. Almost every photo you look at has different numbers in different positions - No Swindon standardisation here...

So I settled on the understanding that the loco that I am building '61450' had three on the right hand side and two on the left (looking forward from the cab). 61450, would also have to be one of these with the foremost washout plug on the front corner of the firebox. Working out how to do that took a bit of head scratching.

As I have said before, mostly those things that require most head scratching and trepidation prove to be simpler to just get on and do. So it was with this one. I marked off where each one would sit and drilled a small pilot hole. For the four that are sat square to the side I just kept using slightly bigger drill bits until I hit the size for the previously made backing plugs.

For the one at the corner of the firebox, I drilled a pilot quite close to the edge of the side of the firebox and again started to make it bigger. I stopped short two or three sizes smaller than I needed for the others and then using an oval diamond file, I filed the front of the firebox adjacent to the hole so that I had a 3/4 hole in either face of the firebox. I then used a round burr in my Dremel to ease it to final size.

Fitting the backing plugs and getting them in position was fun, it took at least three attempts on all but one of them. Once they were all soldered in place it was time to add the half etched overlays to the firebox sides around the holes. I tinned them all while still on the fret then cut them out and filed of the tag.

I decided to use the microflame to solder them in position because I reasoned that using the soldering iron (aside from the possibility of getting solder all over where I didn't want it), would possibly nudge them out of position too. This created the dilemma of heating the front face while making sure that the plug didn't drop off the inside of the firebox. to get around this I cut some short lengths of coffee stirrer and wedged them between the two washout plugs inside the firebox and away I went. - I did manage to set fire to one which gave Chris a bit of a moment....

On a couple I had to add the tiniest spec of extra solder to get them firm and the one folding around the front of the firebox took a few attempts to get it seated properly in both planes but I got there in the end. They still need cleaning up but not as much as they would have if I had attempted to use the iron to solder them on.

37356817102_32e91b86b2_b.jpg


37339665776_600be698ff_b.jpg


36717535563_92f4f57686_b.jpg


They are one of those details that will fade away once lost in the overall paintwork but which would be very noticeable if they weren't there. The plus point is that now that I have done them once doing them again on other locos will be quite straightforward.
 

Ian@StEnochs

Western Thunderer

37339665776_600be698ff_b.jpg


36717535563_92f4f57686_b.jpg


They are one of those details that will fade away once lost in the overall paintwork but which would be very noticeable if they weren't there. The plus point is that now that I have done them once doing them again on other locos will be quite straightforward.
[/QUOTE]

Rob,

You are correct, the first time you come up against a fiddly bit like the washout plugs, it can be quite time consuming and frustrating. Yes they might be insignificant but these little details all add up to the final effect.

I am not very familiar with your prototype but what are the two rows of rivets on the firebox shoulder for?

Ian
 

Rob Pulham

Western Thunderer
Rob,

You are correct, the first time you come up against a fiddly bit like the washout plugs, it can be quite time consuming and frustrating. Yes they might be insignificant but these little details all add up to the final effect.

I am not very familiar with your prototype but what are the two rows of rivets on the firebox shoulder for?

Ian

Thanks Ian,

I honestly don't know what purpose they server, but they are visible on the prototype.
 

Rob Pulham

Western Thunderer
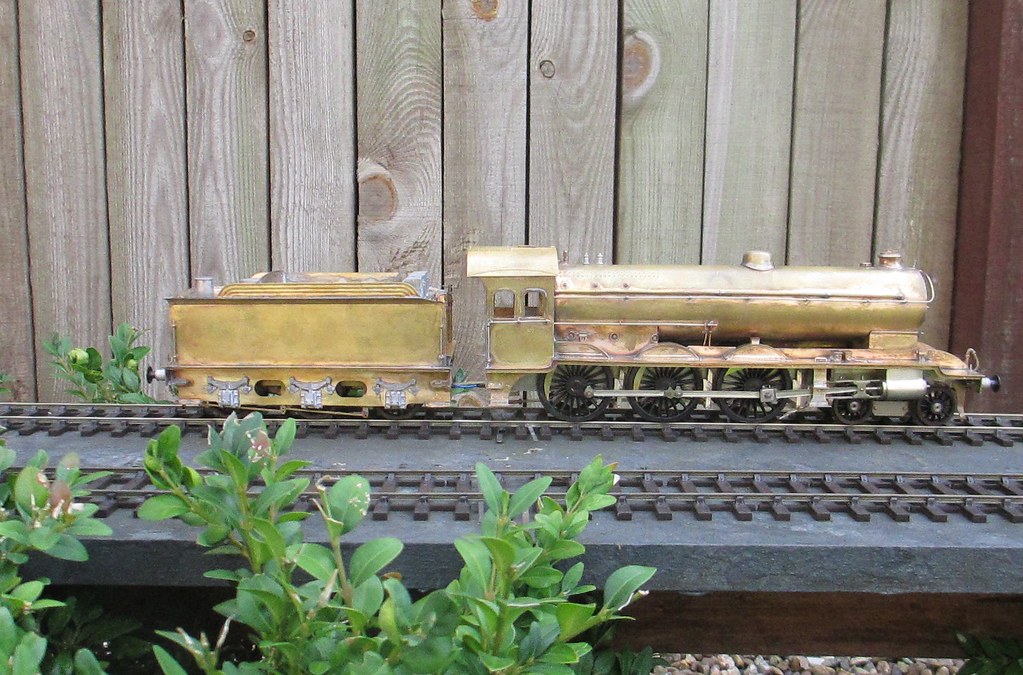
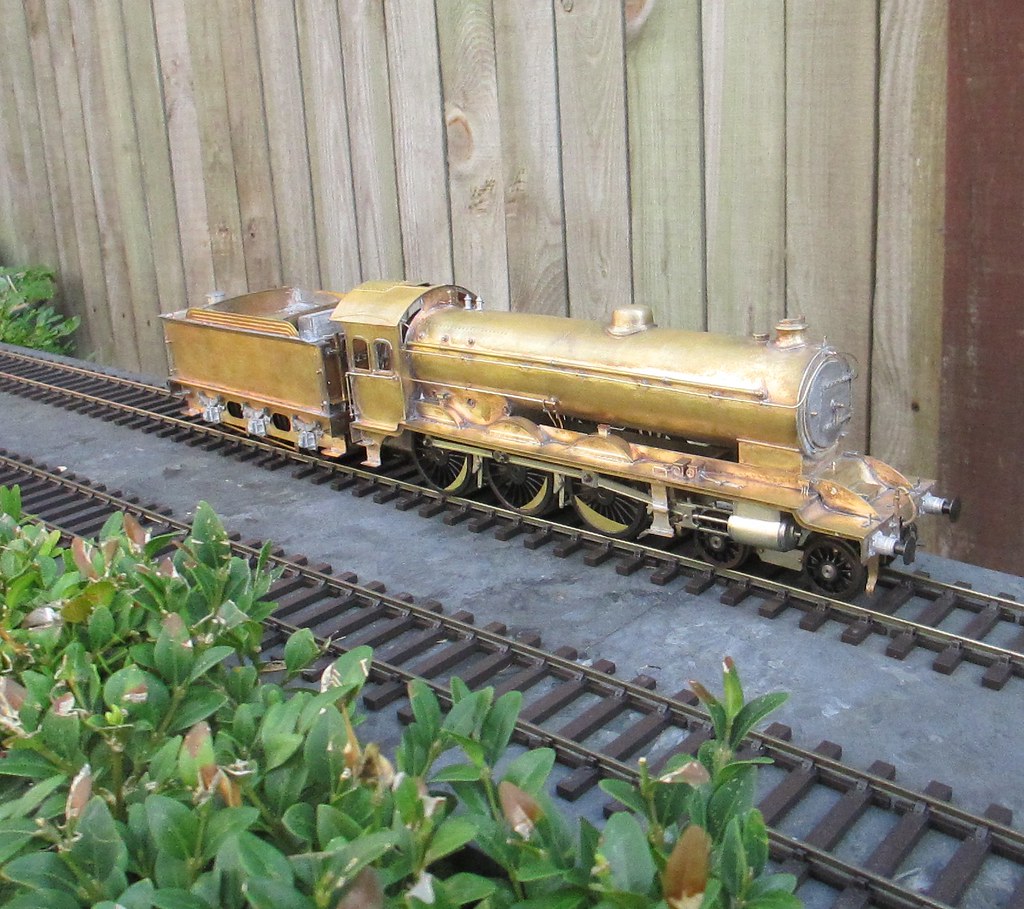
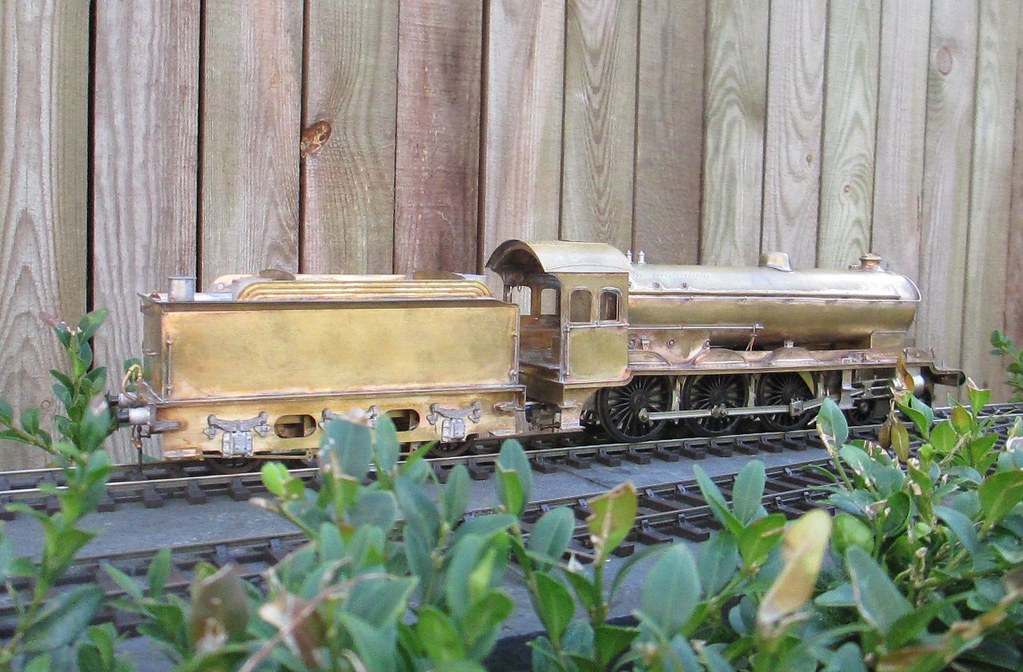
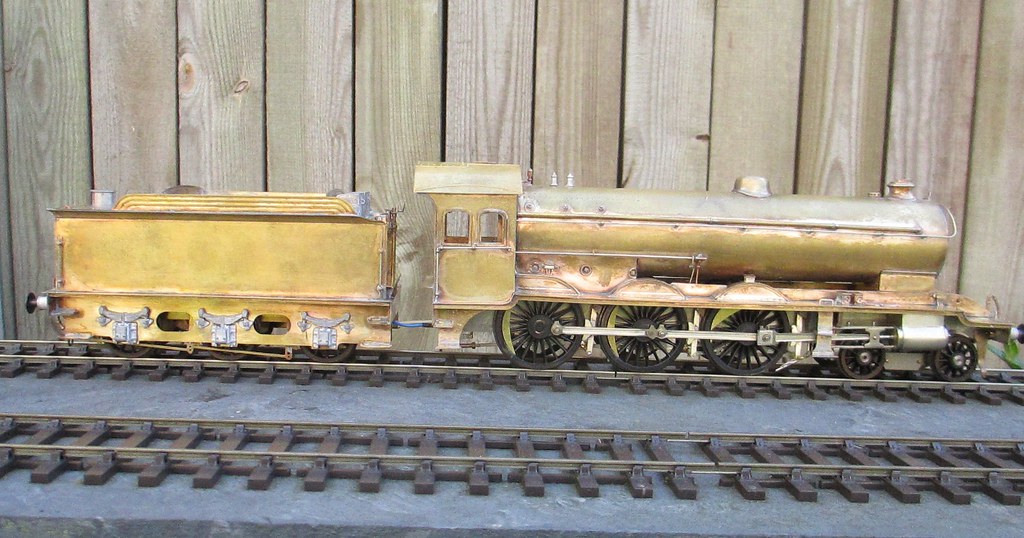
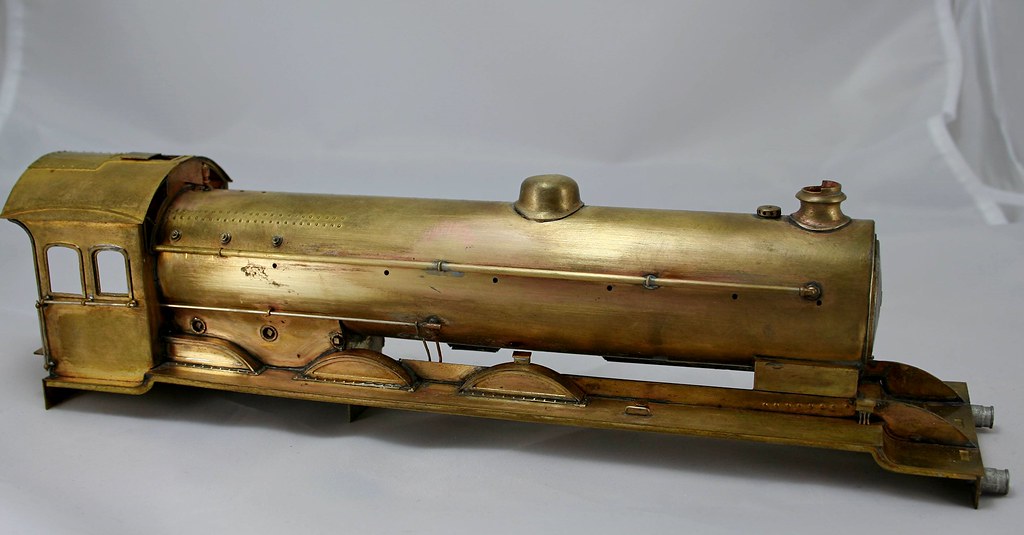
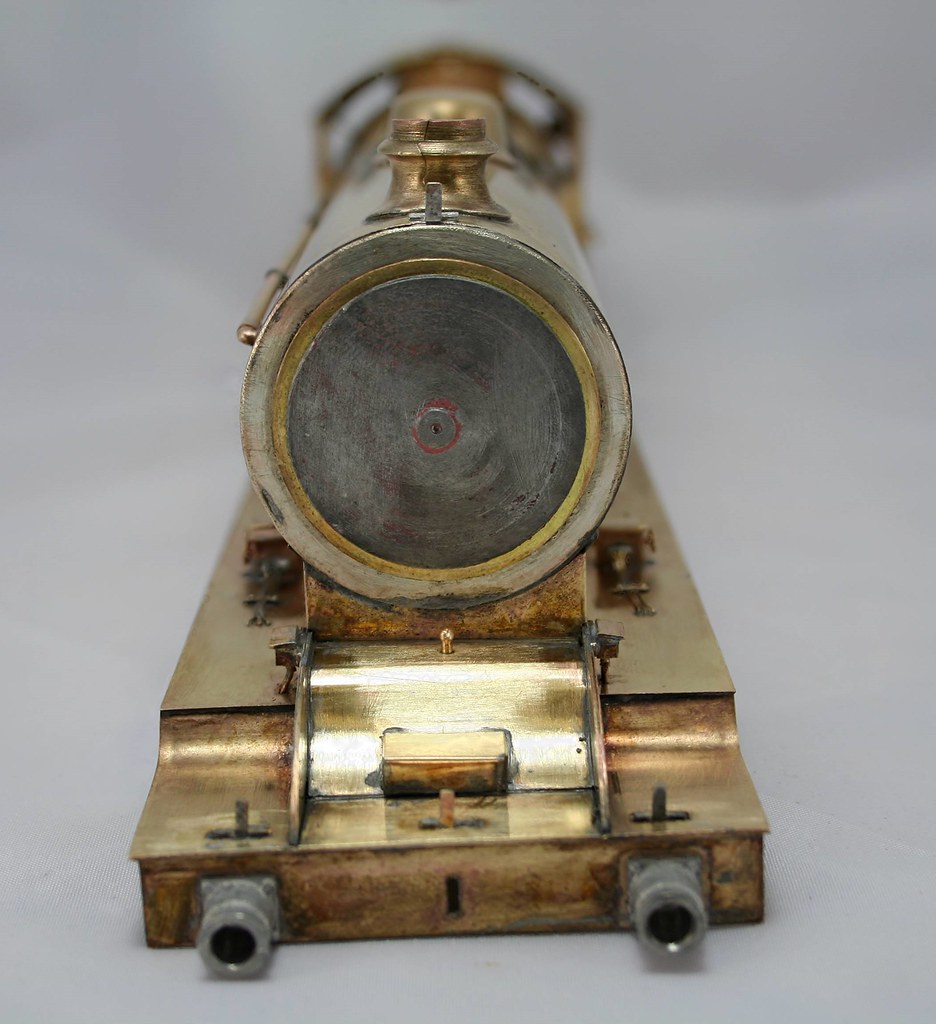
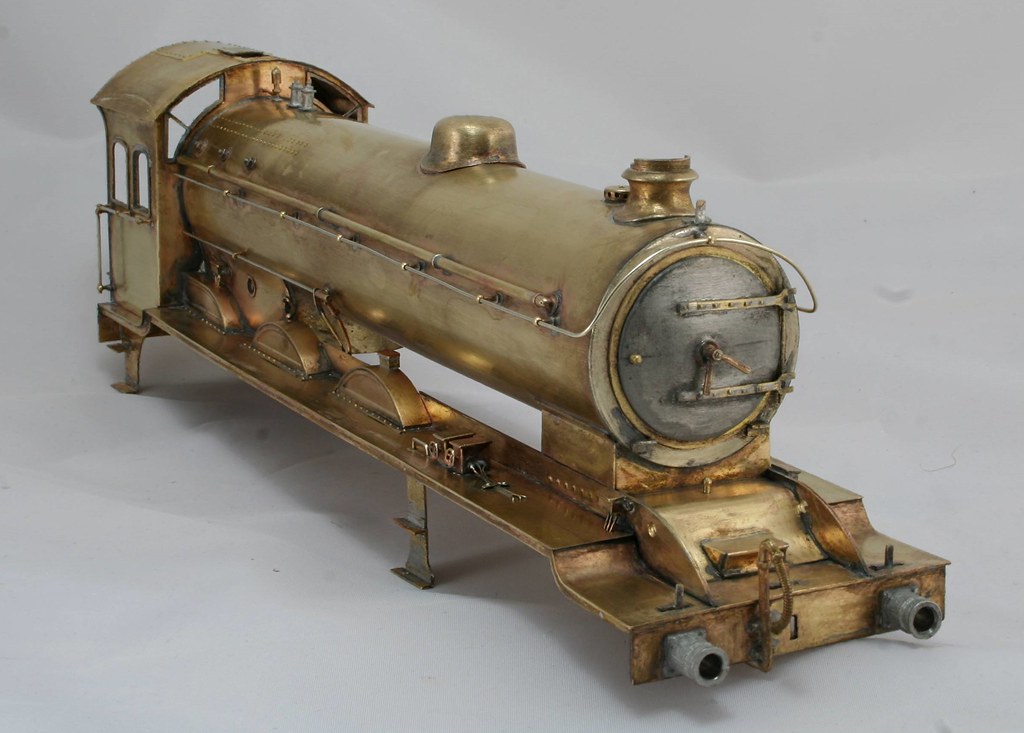
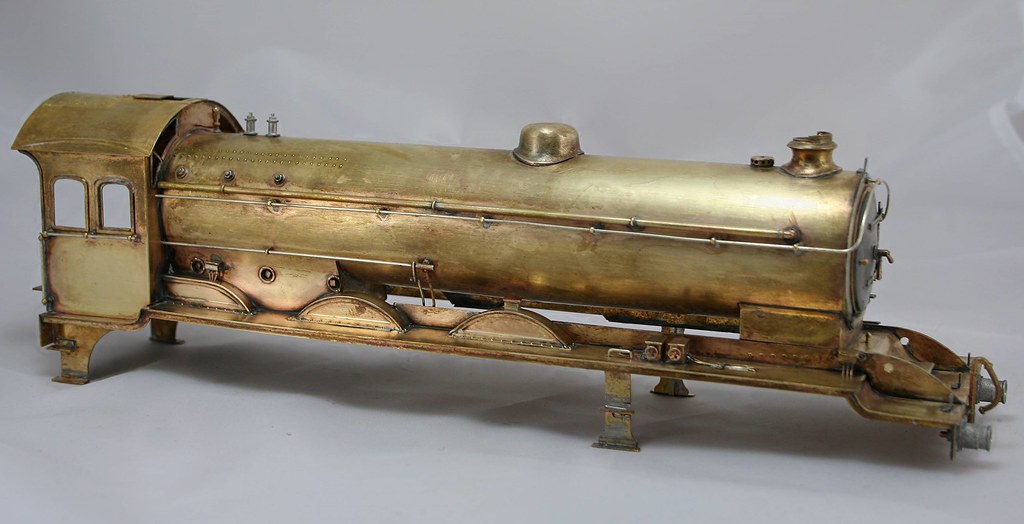
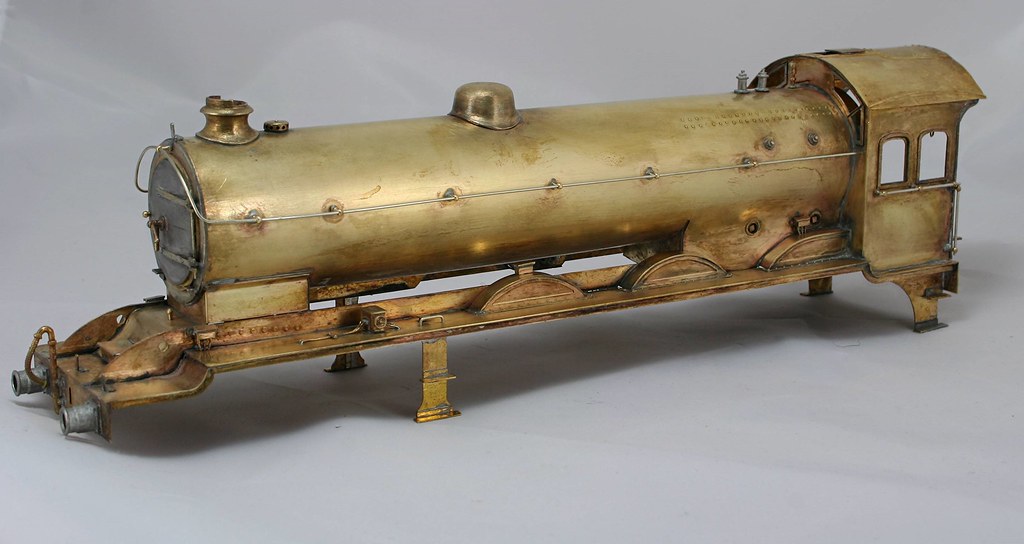
As mentioned briefly elsewhere the detailing of the B16 is coming along nicely but not without minor frustrations.

This is where I have got to so far -

37406512446_8792fb8099_b.jpg


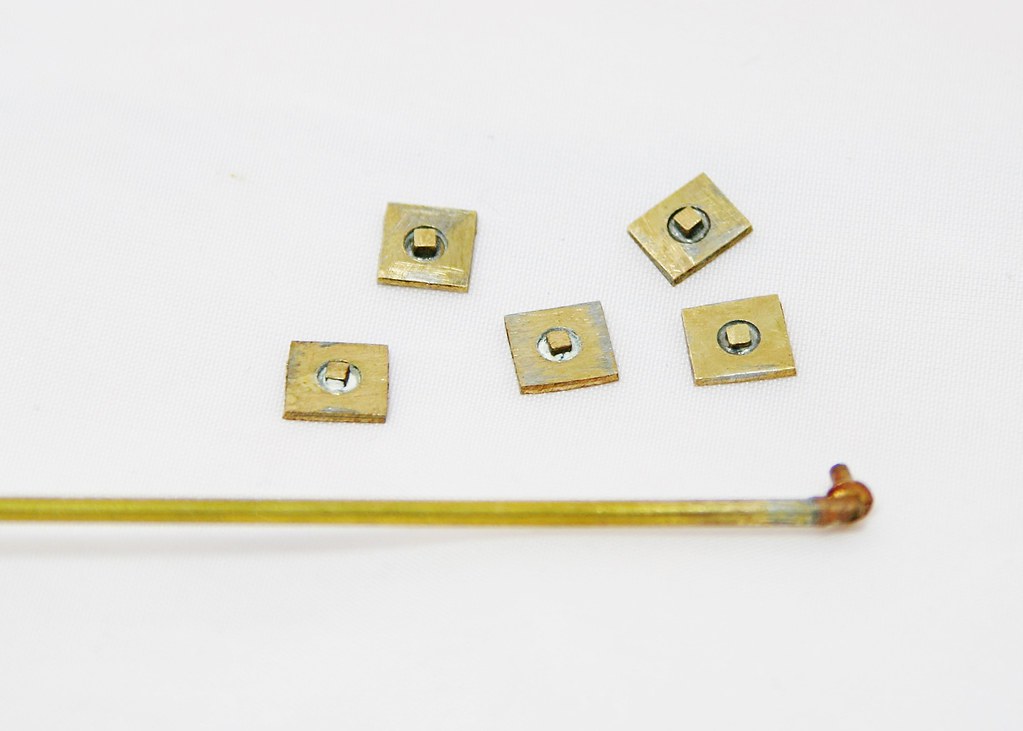
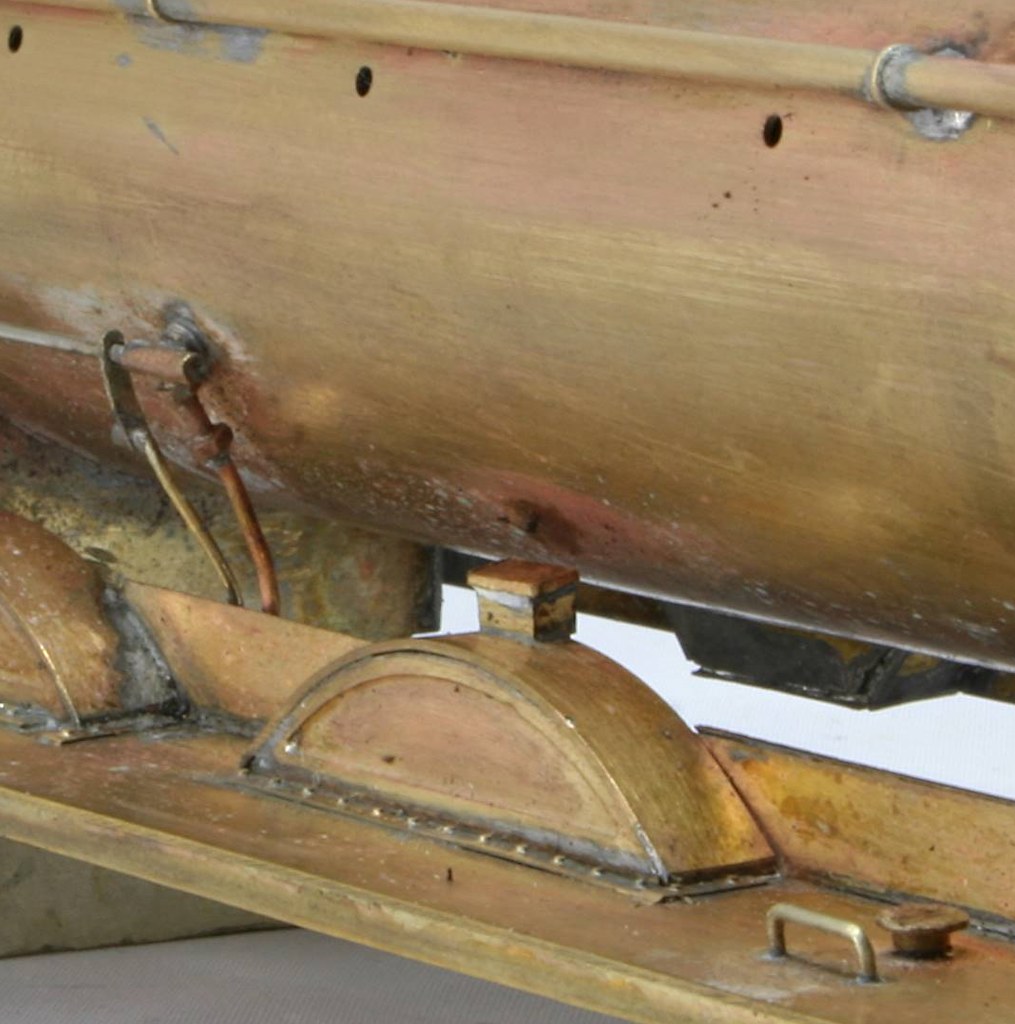
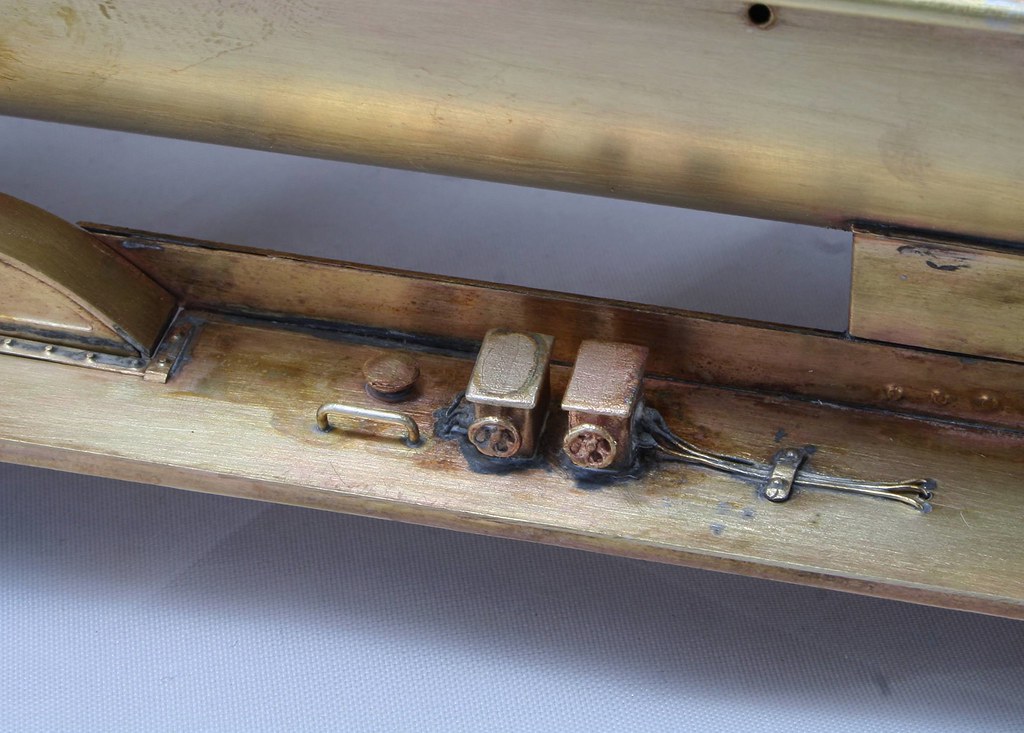
On to the frustrations, earlier I had made the oil boxes that sit on the front splasher tops, the first one on the right hand splasher too about 10 attempts to solder it on, I would get it positioned and then clamped with self locking tweezers but each time I reached for the soldering iron to solder it from the back the blessed thing either moved or fell off. Finally I got it soldered in place and decided to do the other one. This was even worse, after three failed attempts to solder it on, it flew off into space and despite a good grovel I couldn't find it. So I set to and made another, blow me if the same thing didn't happen again. A couple or three failed attempts then twang.....
With the third iteration I filed a slight hollow in the base front to back so that it sat better on the splasher top and I managed to solder it on first go.

37453871921_e0cef8848b_b.jpg


37453873221_d2346cfae9_b.jpg


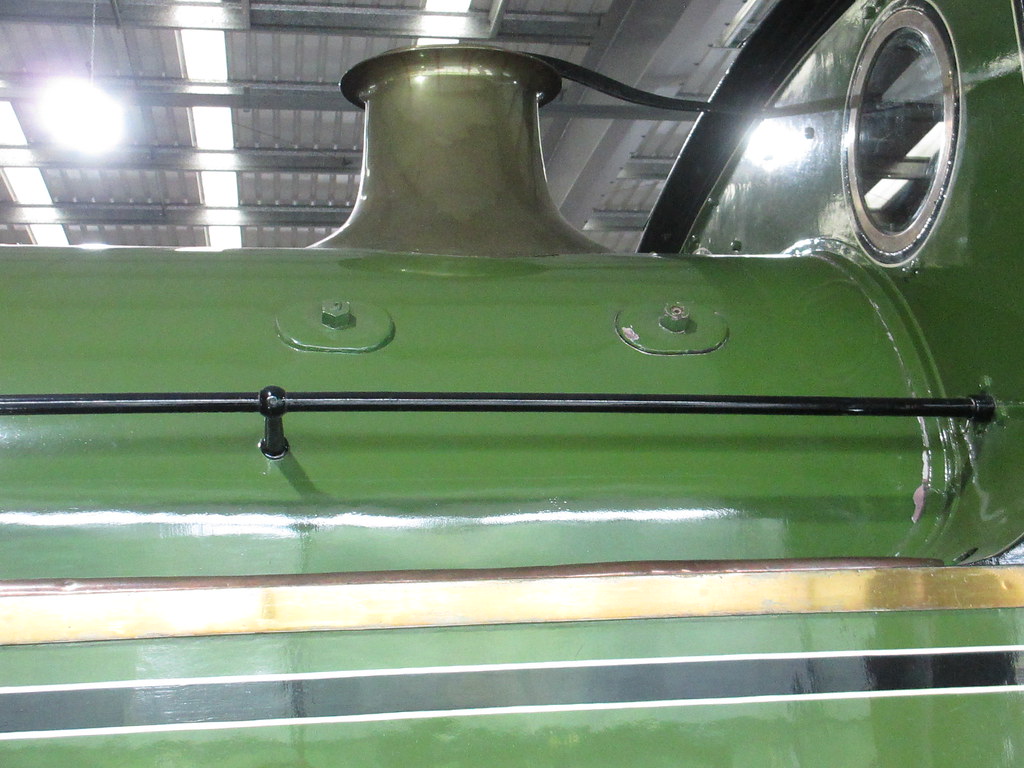
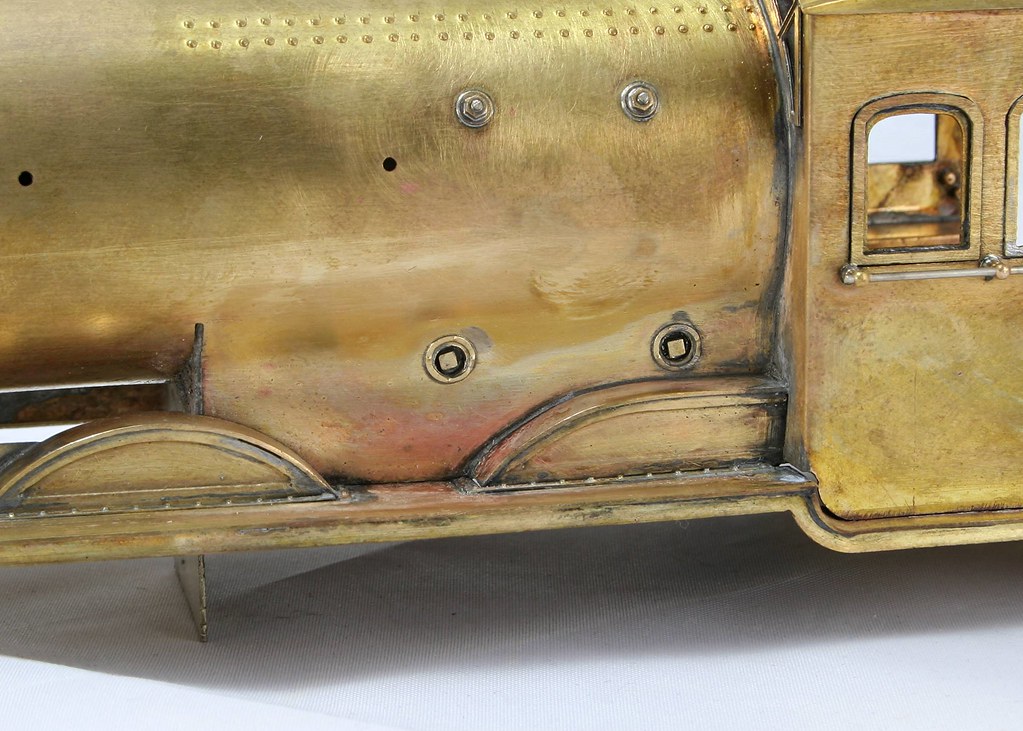
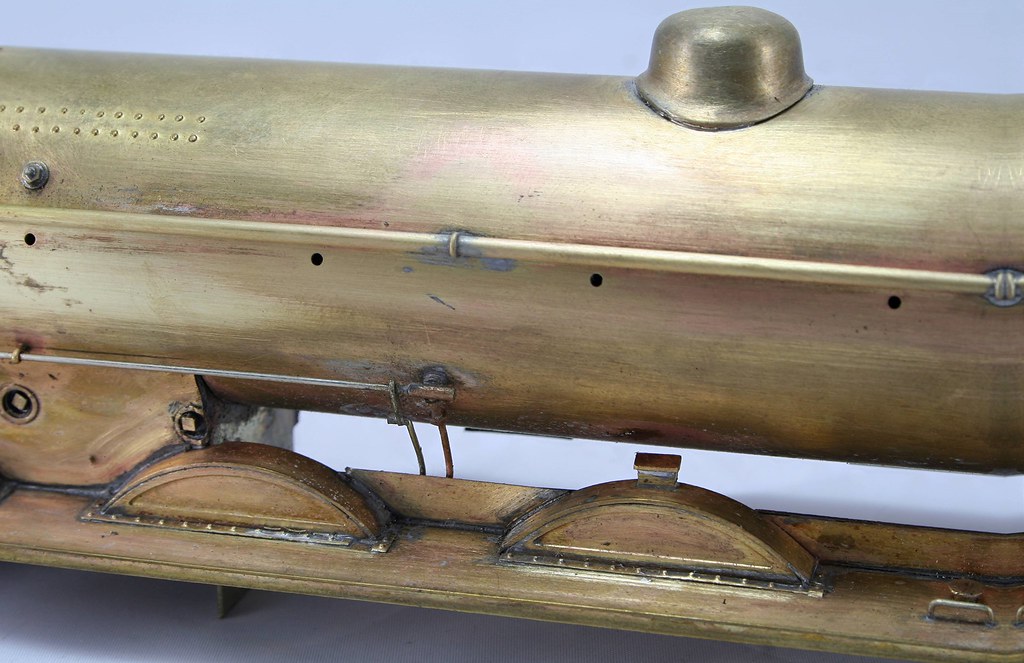
Next I made up and fitted the operating rod on the right hand side that was fitted to some locos. The casting was provided in the kit but I scratched the level from some scrap etch. This was all fairly straight forward as was drilling the foot plate and rear splashers and fitting the other oil boxes with the pipes. The boiler furniture again all went smoothly apart from the dome.

37453873791_008d5385fd_b.jpg


37453874211_b3e958f909_b.jpg


37406511986_83b42ec66e_b.jpg


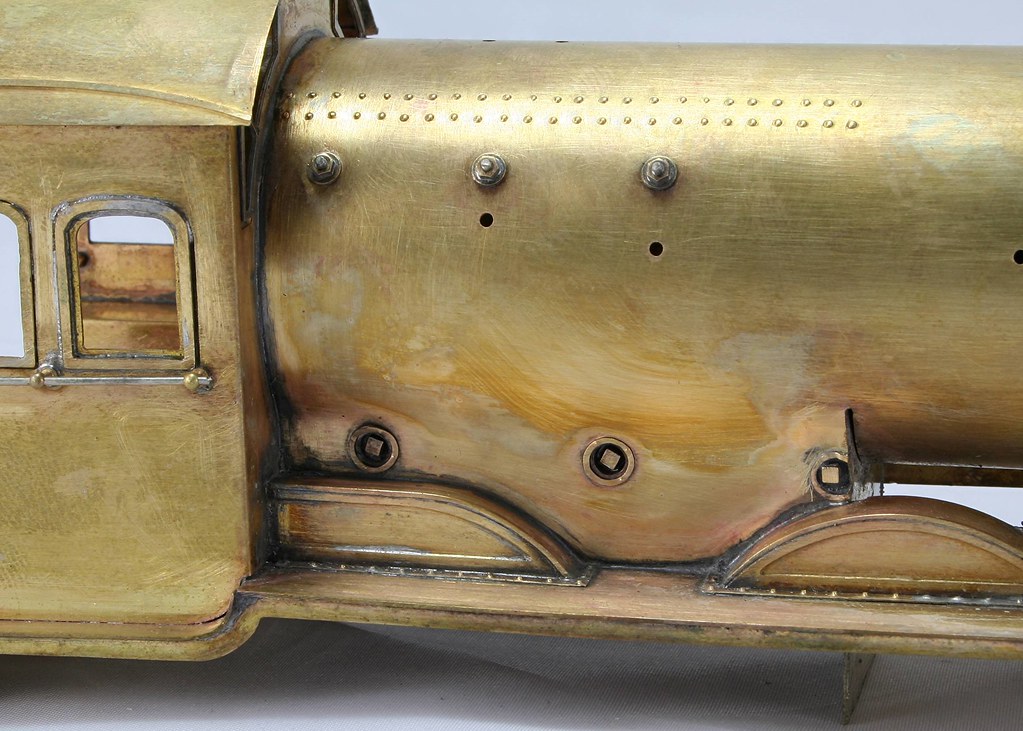
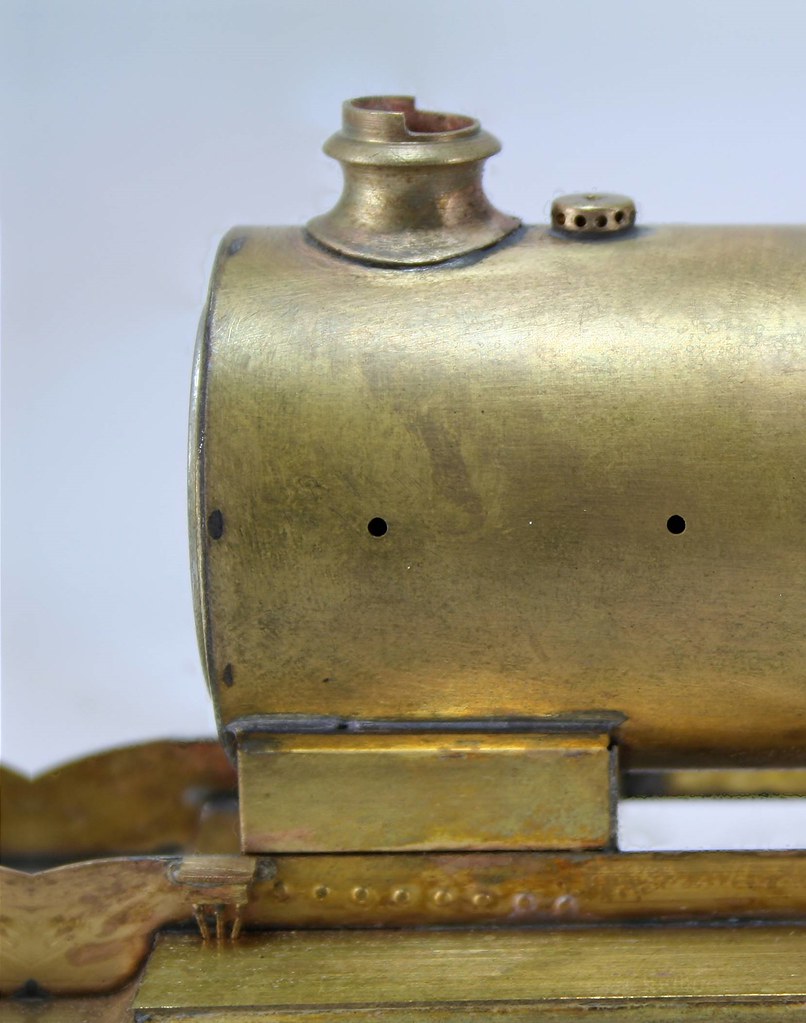
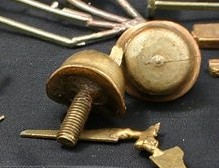
My dome casting was ever so slightly misshapen so that the oval of the dome when viewed from the top was at odds with the curvature of the boiler. As I said it was only marginally out but enough to make the dome sit slightly out of square (if a round object can sit square....) As it turns out it was a blessing in disguise because as designed the kit only caters for the earlier type of boiler. As I understand it the main visible difference between them being the position of the dome either astride a boiler band or between them.

To remedy the misshape I cut of the threaded spigot from the bottom and then using a ball shaped burr I ground out the remnants of it mounting and then I wrapped a strips of sanding belt around the boiler and twisting ever so slightly I rubbed away at the casting until it sat down 'squarely' the added bonus was that I was then able to move it back quite a way so that it only just covered the etched hole in the boiler. While ot 100% in the right place it's a lot better visually than had I just fitted it through the etched hole and moved on


23602757838_842b950596_m.jpg
 

Rob Pulham

Western Thunderer
This week work on the B16 has continued to flow.

The lubricators are on and although you get plain castings I drilled them out to add the pipework inside some microbore tube that I picked up earlier in the year from Barry of MetalSmiths fame(@lankytank).

36847543313_ddf397301d_b.jpg


There was a thread on the Guild site discussing drilling brass castings and one of the suggestions (besides buying proper drill bits) was to heat to a cherry red heat and let the casting cool naturally. I have used this method before and it has to be said without much success. I decided to try again and I have come to the conclusion that previously I just didn't get it red enough - this time the cheapo Microbox type drills went through it like butter. I did you my Proxxon Mini Pillar drill though.


37468497156_a29eb91c10_b.jpg


37468498746_2f3a6ce8e6_b.jpg


You know when something niggles at you that there's something not quite right? Well I had the feeling and finally pinned it down to the fact that the chimney was just not quite on square so I heated it up and attempted to nudge it. I must have been a bit vigorous because the next second it was on the floor. The good news is that in knocking it off I had spread the solder a little in the right direction and putting it on square was a simple matter of putting it in place and then heating it with the microflame until it sank down in the solder. A little cleaning up and I was happy
 

Rob Pulham

Western Thunderer
In between popping along to Keighley show where I had a great time chatting to many people I have made much progress on the B16.

Unless something else jumps out at me while working on the chassis, the body is finished. Now it's onto the electrics plus the final details on the chassis. At this rate I may have to change plans and take it for a run on the test track at Shildon On Saturday afternoon.

While studying the one photo that I have of 61450, I noted that I had missed an oiler on the right rear splasher. I had made it but can't recall why I didn't fit it when I fitted the others but it's corrected now.


37595726741_e3dce82ba6_b.jpg


36925639893_3ce1de261a_b.jpg


37595724651_3524f69106_b.jpg
 

Rob Pulham

Western Thunderer
After my mistake with the wheels on Saturday, I sorted them out and with the weather being not too bad we cleaned up part of the circuit on the garden line and gave it a try.

Sadly, the rigid chassis doesn't take well to my less than generous curves but it is alive and now just needs final detailing.


Chris also took a few photos of it in the sunshine. Just a few more details to add before it goes of to Warren for painting.

37493569340_7e9dd43876_b.jpg


37081667523_ab33b7cb92_b.jpg


37493568300_f8c3c933af_b.jpg


37752122901_fd6e8a63fb_b.jpg


37493567860_3f5e22e3e2_b.jpg


37493567540_f5863ec314_b.jpg
 
Top