You are using an out of date browser. It may not display this or other websites correctly.
You should upgrade or use an alternative browser.
You should upgrade or use an alternative browser.
LarryG's Wagon w.b.
- Thread starter LarryG
- Start date
LarryG
Western Thunderer
I've duplicated the SNCF 16T steel 'cupboard door' mineral wagon in 4mm. Both were Parkside kits, but the OO version lack the detail of its O gauge brother....

I built up the characteristic top corner capping plates with 5thou Plastikard and fined them to shape the following morning when hard. Rope rings were slices of sprue which when set were drilled in the middle. Other details were built up with Plastikard, then the model was spayed and weathered exactly as before. Buffers are on order...

I built up the characteristic top corner capping plates with 5thou Plastikard and fined them to shape the following morning when hard. Rope rings were slices of sprue which when set were drilled in the middle. Other details were built up with Plastikard, then the model was spayed and weathered exactly as before. Buffers are on order...

jonte
Western Thunderer
A ruse I’d like to have tried in replicating these wagons would have been to imitate the dents etc. that accompanied the flaking paint and rust patches.
What I had in mind was to remove the odd panel or two and replace with annealed brass ‘plates’ which had been subjected to a spot of ill-treatment with the odd tool or two.
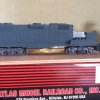
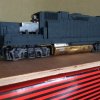
I had a bash at this several years ago during my dark-side days, but on a replacement brass fabricated fuel tank of a cheap Bachman GP38 in Ho gauge.


The dents look a little severe but the inspiration were taken from actual prototype loco sporting these deformities, which were gleaned from myriad photos of US locos I found on the web.
The tanks still needing finishing in the accompanying photos, including further detailing, and the body looks a little high on the chassis as it was just ‘plonked-on’ for the shoot.
Perhaps you might like to give it a go to see what they’d look like?
Jonte
What I had in mind was to remove the odd panel or two and replace with annealed brass ‘plates’ which had been subjected to a spot of ill-treatment with the odd tool or two.
I had a bash at this several years ago during my dark-side days, but on a replacement brass fabricated fuel tank of a cheap Bachman GP38 in Ho gauge.


The dents look a little severe but the inspiration were taken from actual prototype loco sporting these deformities, which were gleaned from myriad photos of US locos I found on the web.
The tanks still needing finishing in the accompanying photos, including further detailing, and the body looks a little high on the chassis as it was just ‘plonked-on’ for the shoot.
Perhaps you might like to give it a go to see what they’d look like?

Jonte
LarryG
Western Thunderer
As mentioned earlier, I plan to duplicate in 4mm all the 7mm wagons. Next up was the LNER Toad D using rtr Bachmann brake vans. The body was pulled from its base after first releasing the vertical handrails from the chassis. The duckets were then unplugged and the lookout windows protected with Mascol. The Bachmann model is a back-engineered BR version with a window in the door...

These panels were removed for conversion to LNER type. The internal partitions are in transparent plastic, which is hard, brittle and not to be messed with, and so I by glued a windowless door over the existing one. The PPC BR early red oxide makes a good base coat...

As with the 7mm brakevan, veranda floors were cut from 12 though brass sheet (I have two vans to adapt). They will be sprayed before fitting in place...

Additional lamp irons make from Plastikard...


These panels were removed for conversion to LNER type. The internal partitions are in transparent plastic, which is hard, brittle and not to be messed with, and so I by glued a windowless door over the existing one. The PPC BR early red oxide makes a good base coat...

As with the 7mm brakevan, veranda floors were cut from 12 though brass sheet (I have two vans to adapt). They will be sprayed before fitting in place...

Additional lamp irons make from Plastikard...

Last edited:
LarryG
Western Thunderer
A day of sunshine so I re-photographed the latest LNER express goods brake van. This one is representative of the small batch built for the Cheshire Lines committee After removing all the unwanted gear, two additional lamp brackets were made for each end. CLC Running numbers were 4471 - 4476, but I have no record of their BR number so I added 23000...

LarryG
Western Thunderer
I had intended repainting the second Hornby GWR Toad in BR Bauxite but I could find no decent details of 'fitted' versions. So it has become another short-haul grey van for Ruabon-Chester trips. Resprayed and Cambridge Custom transfers, but only slightly weathered on the chassis...

Inspiration...

Further miniaturizing of the 7mm wagon stock using rtr 4mm Bachmann wagons. The 4mm wagons had had its brakegear was removed from one side. Some of the private owner livery was retained while the other planks represent renewals painted grey or left unpainted...

An almost life-expired ex-private owner 13T wagon where most of the livery had simply worn off leaving the planks in a state. It had seen some repair work in the distant past...

The other side of P 90075....

Inspiration...
Further miniaturizing of the 7mm wagon stock using rtr 4mm Bachmann wagons. The 4mm wagons had had its brakegear was removed from one side. Some of the private owner livery was retained while the other planks represent renewals painted grey or left unpainted...
An almost life-expired ex-private owner 13T wagon where most of the livery had simply worn off leaving the planks in a state. It had seen some repair work in the distant past...

The other side of P 90075....
Last edited:
LarryG
Western Thunderer
After Nationalization, BR Decided that unfitted wagons would be grey, while fitted (piped) wagons would be Bauxite red.Larry first of all great modelling, I have a question please, I model 1930 to late 40s railways, so on reading your above post about a bauxite and a grey guards van, Does it mean that B,R Guards vans are different and identified by the colour. Thank you..Garry
These two colours covered all wagons be they pre 1948 or pre-grouping designs. It goes without saying that repainting took many years to complete and did not happen overnight. Those due for withdrawal went untouched except for the application of new lettering and black patches.
The LMS and LNER had adopted 'reds' before the war whether the wagons were vac fitted or not. BR's 'red' got darker in traffic and so there was little difference between a guards van in LMS freight wagon bauxite and one in weathered BR freight wagon bauxite........Except that one might be 'fitted' and the other not.
In addition, the LMS only painted the ironwork bauxite while timber was left unpainted. BR too put some wooden wagons into traffic with only the ironwork painted grey. Many ex-private owner wagons were never repainted.
Last edited:
LarryG
Western Thunderer
A slip of the pen....Red Oxide was only on LNER Fitted Wagons, unfitted were always Grey.
LarryG
Western Thunderer
AJC
Western Thunderer
I had two elderly Bachmann wagons; one rocked and both had wobbly wheel sets. It was a case of making one good chassis out of two and then fitting a vacuum cylinder etc. I was inspired by a Dapol O gauge van to spray it a matching shade as a recently out-shopped wagon...
View attachment 116909
I do like the point of running a newly released wagon, not enough modellers do. That said, it really needs a tiebar between the axleguards to counteract the force applied by the AVB. There should be a lamp iron as well, but I can excuse anyone for not including those on a vanfit as they're tiny an usually down just above the headstock. That and the solebar brackets are the kind of madness I go in for...
Adam
LarryG
Western Thunderer
I usually work of photographs, as we do, and the van I worked off had no tiebar between the W irons. As for lamp brackets, I don't know when these started to be fitted, but they were not in place on many vans in the 1950's. One might assume they were fitted when goods trains no longer required a brakevan (in the 1980's ?), but of course they must have had lamp irons long before then so that vans could be hung on the end of passenger trains. I made a strip of lamp iron in plastic and cut them off as required, so they are not a problem.I do like the point of running a newly released wagon, not enough modellers do. That said, it really needs a tiebar between the axleguards to counteract the force applied by the AVB. There should be a lamp iron as well, but I can excuse anyone for not including those on a vanfit as they're tiny an usually down just above the headstock. That and the solebar brackets are the kind of madness I go in for...
Adam
LarryG
Western Thunderer
To show that weathering wagons is easi-peasy, the van below was done just before I went to bed and took around 15 minutes. It was a straight out of the box Bachmann. I put small dollops of PPC P961 and P981 in a jam jar tin lid thinned with white spirit. It was brushed all over one side and after a minute was wiped off with kitchen tissue. It had made the bauxite darker and had remained in the plank courses and on strapping where muck collects. The ends and 'tother side followed one at a time.
PPC P977 was added to the mix plus more thinners and this was brushed all over the underframe and brakegear etc. including the wheel sides.
Even before the enamel was dry, I turned to Humbrol Dark Earth 16421 weathering powder to add the subtle bits such as under the roof and door hinges etc again worked in with a firm brush. It was also brushed over the entire underframe.
Finally, the lower axleboxes were dusted with Tiefschwarz No.5 deep Black.
A waft over with Testors matt Spray Lacquer completed the job.
Pictured beside an brandnew untouched van of similar colour...
Last edited:


