7mm Rob Pulham's Work Bench - Back (again) to the LNER 06 (MOK 8F)

Rob Pulham

Western Thunderer
Another day and a ray of sunshine in my saga. Following the various bits of advice offered having got myself into a mental state to look objectively I took the body of again this afternoon and looking at the underside of the footplate there were obvious marks where the wheels (the rear drivers as suspected) had been rubbing it also looked like the middle drivers had rubbed on the side of the splasher although this may have been due to my not having the body on square whilst trying various things.

I inverted the body in my cradle and attacked it with burr in my Dremel and this combined with reducing the length of the spring supporting the front bogie (which I had noticed was pushing the body down at the rear) seems to have cured the problem and she now runs smooth as silk. I have added some more lead strip to the cartazzi truck because despite having some attached to it, it kept bouncing off the track while I was testing it. I will reassemble this later when the glue has dried and hopefully take another video.

I would really like to add a heart felt thanks to Paul, both Mick's, Richard and Graham for the all messages of support and suggestions, offers of help etc. These along with Chris's support at home have helped me get through what I freely admit was quite a trying time.
 

Dog Star

Western Thunderer
Now that is good news indeed... and the promise of a video of a Green kettle to come!

I guess that we shall be reading a new installment on the Tadcaster Sidings topic soon as your A3 plus a growing rake of carriages shall need more track etc., etc..
 

Rob Pulham

Western Thunderer
Things really seem to be on the turn with this at the moment.

On another related note, while speaking to Graham this afternoon, I mentioned that the springs that I had found turned out not to be the right ones and he suggested that I contact DJH about the buffers. Which I did.

While looking up the part number for the springs I re-examined the instructions and the accompanying drawing and noticed that one side of the loco shows part of the assembly, while the other side shows the rest. Jeff was correct in his thought about the nut going on the outside.

The good news is that DJH will send me some of the correct springs if I send them through my details and the date of purchase.

Additionally a gent Pete, (who goes by the name of Greenglade on various forums) who is building a 5" gauge A3 posted on the guild site a section of his drawing showing the ashpan damper mechanism so I can now make the bit that I have made already even more complete.

I hope to take it along to Leigh show on Saturday to give her a run around the test track which should prove whether I have solved all the running problems or not.
 

adrian

Flying Squad
I hope to take it along to Leigh show on Saturday to give her a run around the test track which should prove whether I have solved all the running problems or not.
I'll be there manning the Scale7 stand, I'd be honoured if you could bring it past for a good look at in the flesh you seem to have made a cracking job of the kit.
 

Rob Pulham

Western Thunderer
I'll be there manning the Scale7 stand, I'd be honoured if you could bring it past for a good look at in the flesh you seem to have made a cracking job of the kit.


Hi Adrian,
I was certainly planning to introduce myself:) but I will have Papyrus with me - It will probably still be in loose pieces - I don't plan on screwing the body to the chassis until I have completed everything because the screws go into whitemetal and I don't want to strip them by taking them in and out too many times.
 

Rob Pulham

Western Thunderer
As I alluded to above more information has allowed me to make mark 2 of the ash pan damper lever.
IMG_6302_zps45eac123.jpg
Continuing last night's roll I made this, fitted it and while I had some epoxy mixed I smeared some on the tender buffer heads, the underside of the fall plate and the top of the tender inner chassis (with the thinking that if I use plastic screws to fasten the tender top on it's another potential short source eliminated. Whilst handling I noticed that some of the tender brake shoes had come loose to they got treated to some epoxy too.

I also worked on the reversing lever - a look in the spares box found me a milled nickel link that I reduced in size and tapped one end 12ba to take a former 4mm scale crank pin that I think came out of a Mainline B1 (never throw anything away!!!:))). I just need to cut the revering lever to final length now when the glue has dried (hopefully this morning).
 

Rob Pulham

Western Thunderer
I managed to shoot a couple more videos last night before stripping down and doing the work described above.


Again if you don't like classic Fm you might want to turn the sound off - the squeaking noise is the pick ups for the lights in the the BG.
 

warren haywood

Western Thunderer
Well done Rob, good to see you yesterday, glad it runs well, she's certainly put you through the mill!!!
One minor thing though, the reversing rod should run up against the footplate, yours looks to be drooping a bit.
All the best Warren
 

Rob Pulham

Western Thunderer
Well done Rob, good to see you yesterday, glad it runs well, she's certainly put you through the mill!!!

Thanks Warren,

One minor thing though, the reversing rod should run up against the footplate, yours looks to be drooping a bit.
All the best Warren

You mean like this? - it's movable and I hadn't noticed that it had pushed too far back as I swapped ends.

IMG_6313.JPG
 

Lacathedrale

New Member
Hi Rob, as per the comment on your most recent YouTube video I'm hoping to do almost exactly this (though I can't quite tell if it's S7 or 0F I assume the former from comments in the thread at various points).

If it was S7 did you have any specific issues converting the kit, or was it simply a matter of using longer axles and reprofile wheels (suspension and compensation notwithstanding)?

Might I please ask the specific wheels you purchased? I'm having quite the mare of a time establishing which to buy, from where and how much the wheels and reprofiling would come to!

Many thanks sir, and I wish you all the pleasure of your wonderful models.
 

Rob Pulham

Western Thunderer
Hi Rob, as per the comment on your most recent YouTube video I'm hoping to do almost exactly this (though I can't quite tell if it's S7 or 0F I assume the former from comments in the thread at various points).

If it was S7 did you have any specific issues converting the kit, or was it simply a matter of using longer axles and reprofile wheels (suspension and compensation notwithstanding)?

Might I please ask the specific wheels you purchased? I'm having quite the mare of a time establishing which to buy, from where and how much the wheels and reprofiling would come to!

Many thanks sir, and I wish you all the pleasure of your wonderful models.

Hi Lacathedrale,

It's finescale not F7. but if you think so then I have obviously done something right with it.

The wheels are Slaters and if you would like some reprofiling I can recommend Colin Dowling (@eastsidepilot) from the point of view of being a happy customer.
 
LNER J79

Rob Pulham

Western Thunderer
Now that the B16/1 is finished I thought I would share with a you a little distraction that I had a couple of weeks ago.

I had a few days off after my birthday and wanted to spend it working on something for me. I really should have spent the time working on my MOK 8F kit but I didn't instead I made a good start on the J79.

Jim's kits are great in that you can build them as supplied and have a lovely model or you can go to town and have an even better model. I chose to not only raid the spares box but to do some scratch building as well.

This is where I got to during the 4 days that I spent on it.

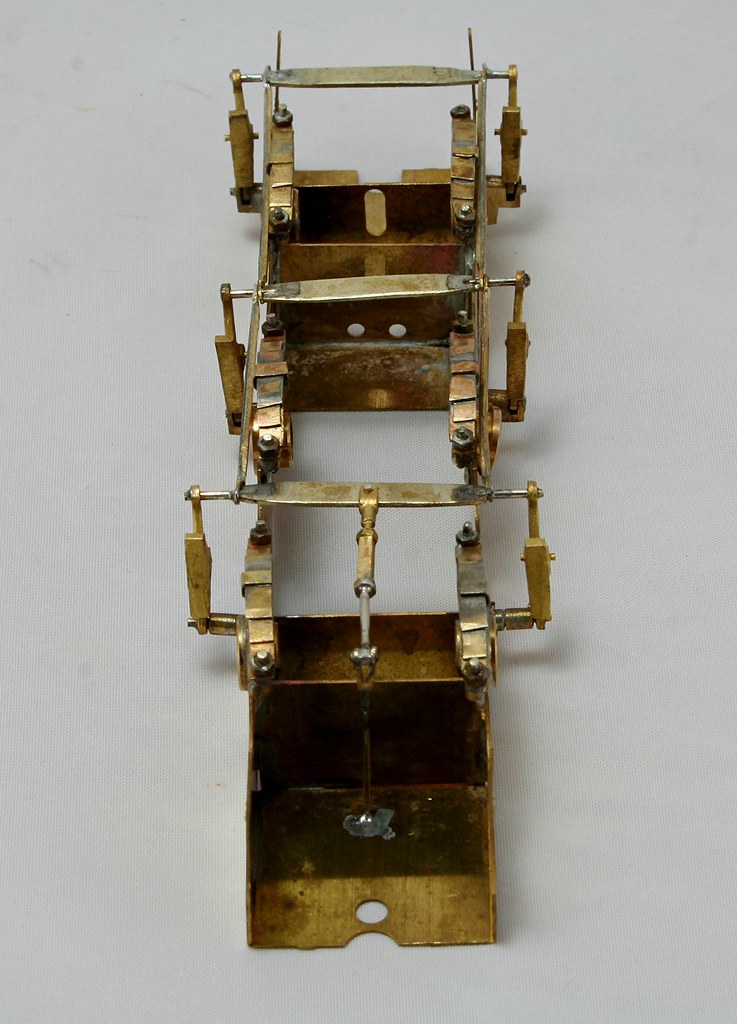
First of all I built the chassis. I decided I wanted something a little more 3D for the loco springs and after raiding a few of my kit stock to see if I could borrow anything that might be suitable I ended up making some from scrap etch, nickel rod and some 12ba nuts

38062046232_a3acc8dacb_b.jpg


38040206076_3f5fbd5b6c_b.jpg


The centre axle holes have been elongated downwards and sprung with a piece of 0.8mm piano wire which sits into a dimple drilled in the bearing.

The lovely brake castings are from Ragstone Models and were bought originally for my A3 but there wasn't enough clearance to use them so they were sat in the spares box and matched the etches perfectly so it made sense to use them.

38062044152_84bff8832b_b.jpg


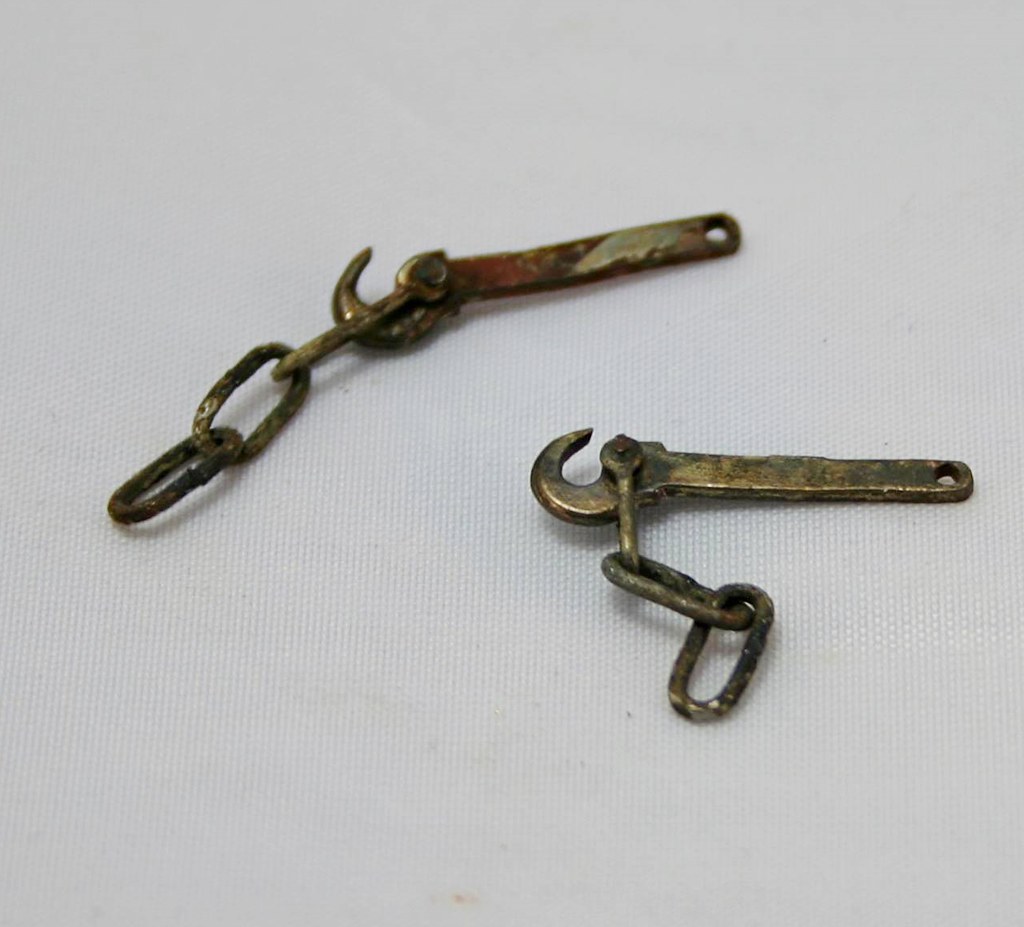
The J79 (NER H2) has quite distinctive couplings which again are made up from bits in the spares box


37383797944_5653871253_b.jpg


While at Guildex was enquiring as to the availability of coupling rods for the N2 etches that I picked up from the E&T and noted that they had a table at the side of the stand which had boxes of castings of various descriptions at quite silly prices. Apparently they had cleared out their workshop and they were all part used sprues of lost wax castings most were at £1 or £2 per bag and I got quite a few for about £12 in total. Some of these were lamp Irons.
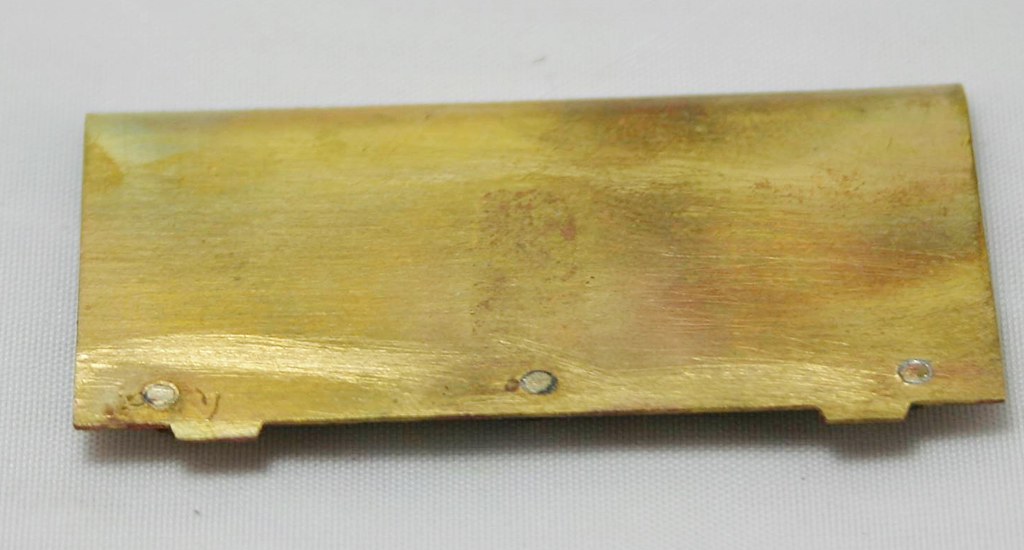
I made use of them on the bunker rear

38040203646_f3803ee4ec_b.jpg


To make them even more secure I drilled through and attached them via the spigots too.


37383798264_2e5e595a3c_b.jpg


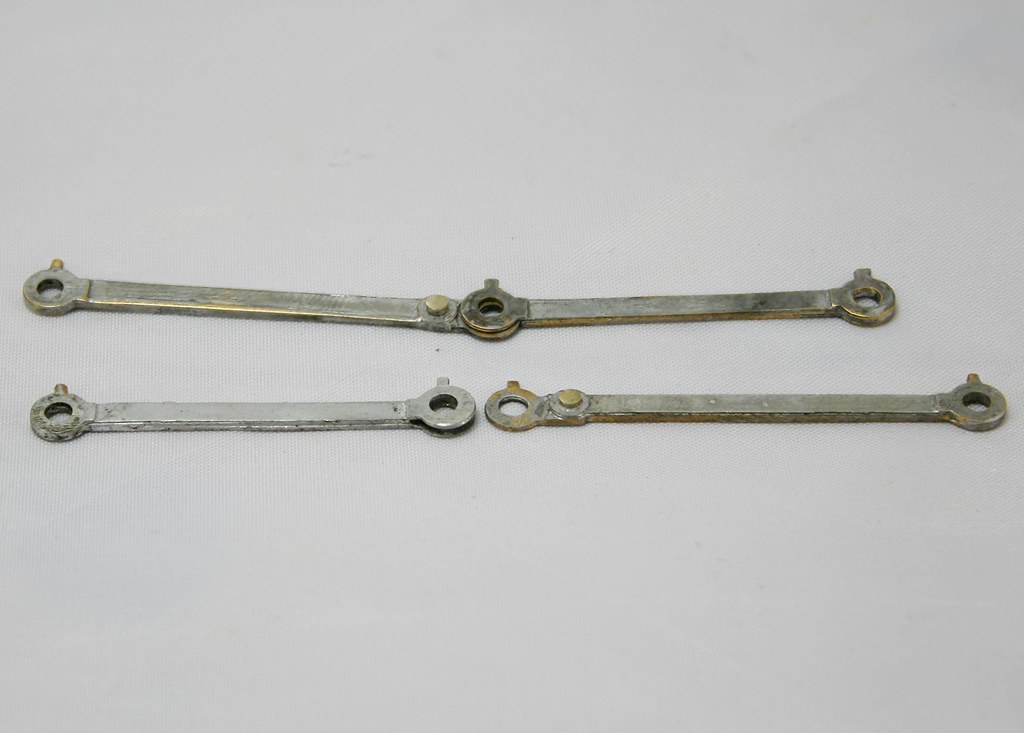
The coupling rods in this kit are brass etches and Jim helpfully suggests tinning them to make them look like dirty steel rods. I have used this tactic in the past and it does work.
38040205206_ba335b450f_b.jpg


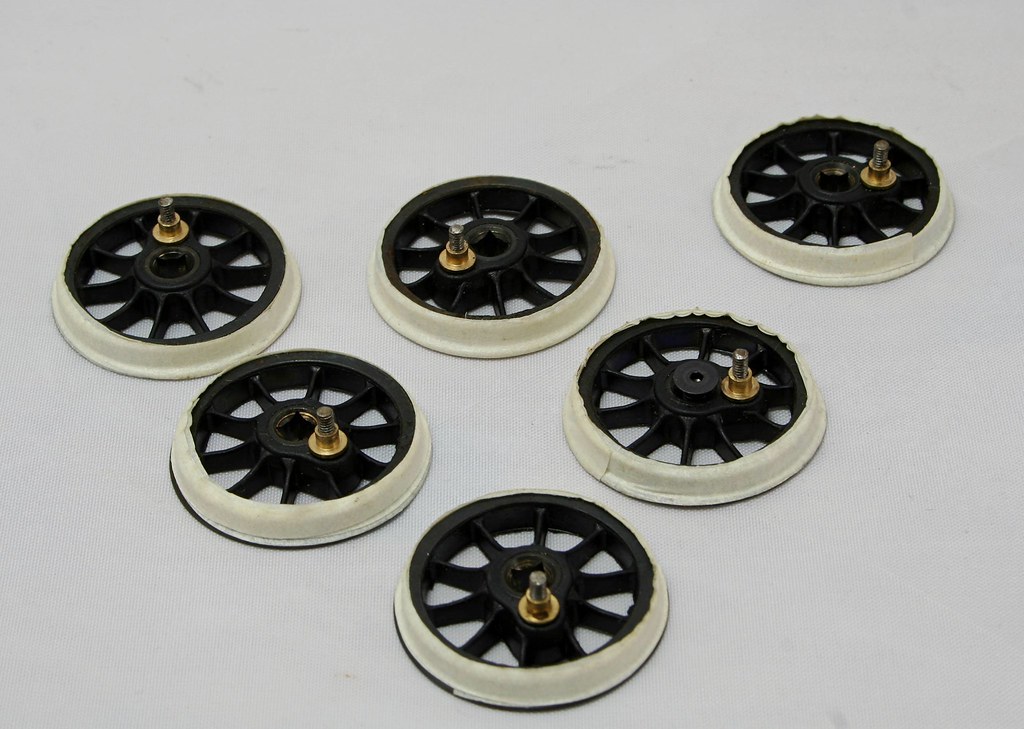
Finally I blackened the wheels, tapped the crank pin bushes 10ba and fitted 10ba steel Counter Sunk screws to the wheels.


38040204626_222346c00b_b.jpg
 
Top