You are using an out of date browser. It may not display this or other websites correctly.
You should upgrade or use an alternative browser.
You should upgrade or use an alternative browser.
7mm Rob's Rolling Stock Workbench
- Thread starter Rob Pulham
- Start date

Rob Pulham
Western Thunderer
Thanks Steve, yes I am getting there.
Rob Pulham
Western Thunderer
I must really be in touch with my feminine side when it comes to building wagons because I have been multitasking. In between sorting out bits for and building the KIRK BG I have also managed to put together one of two kits that I recently bought to build for sale.
This one being a Parkside Kit for a GWR Tevan. Not being a GWR/WR modeller I have relied somewhat on the historical info in the kit and one photo that I found on the net of a preserved example.
Apparently these were converted in the late 1930's from Mica Insulated vans by removing the interior hoppers for Drikold refrigerant and the roof hatches from which they were accessed. The were then used for the conveyance of tea and coffee from the Lyons Depot at Greenford.
Having said that, apparently there is photographic evidence that at least one of them retained its roof hatches and, me being me, I chose to model the unusual one. - Helped along by the provision of the hatches in the kit. Another plus is that they lasted in to the mid 1960's
At the minute the plan is to finish in BR WR livery as being the most attractive to prospective buyers.


Although you can't see it unless, (and to quote Jim Snowden saying recently) "it falls off" I chose to add the vacuum pipe run under the floor and the smaller pipe to the vac cylinder.


Apart from adding a pair of rather nice fold up etched steps it's ready for the paint shop.
This one being a Parkside Kit for a GWR Tevan. Not being a GWR/WR modeller I have relied somewhat on the historical info in the kit and one photo that I found on the net of a preserved example.
Apparently these were converted in the late 1930's from Mica Insulated vans by removing the interior hoppers for Drikold refrigerant and the roof hatches from which they were accessed. The were then used for the conveyance of tea and coffee from the Lyons Depot at Greenford.
Having said that, apparently there is photographic evidence that at least one of them retained its roof hatches and, me being me, I chose to model the unusual one. - Helped along by the provision of the hatches in the kit. Another plus is that they lasted in to the mid 1960's
At the minute the plan is to finish in BR WR livery as being the most attractive to prospective buyers.
Although you can't see it unless, (and to quote Jim Snowden saying recently) "it falls off" I chose to add the vacuum pipe run under the floor and the smaller pipe to the vac cylinder.
Apart from adding a pair of rather nice fold up etched steps it's ready for the paint shop.
NER Brake Vans
Rob Pulham
Western Thunderer
Last night saw more small steps - quite literally in that I made up the rather nifty etched steps for the Tevan

Then I did a bit more on the V4 brake van getting the floor cut and fitted ready for soldering in once I have fitted the brake gear etc. - I made the floor from a scrap etched part and I have yet to decide whether to fill the holes with rod or leave them. - There are only 5 and they are less than a mm in diameter and will they be seen with the roof on, I doubt it.

I also made a couple of inserts for above the veranda which once soldered in place will increase the gluing area for sticking the roof on once painted.

Then I did a bit more on the V4 brake van getting the floor cut and fitted ready for soldering in once I have fitted the brake gear etc. - I made the floor from a scrap etched part and I have yet to decide whether to fill the holes with rod or leave them. - There are only 5 and they are less than a mm in diameter and will they be seen with the roof on, I doubt it.
I also made a couple of inserts for above the veranda which once soldered in place will increase the gluing area for sticking the roof on once painted.
Rob Pulham
Western Thunderer
I managed a little more on the internals for the V4 brake van last night.
Being, by inclination and birth, a tight fisted Yorkshire man. I don't throw much away, and sometime ago I bought a thousand 10ba brass CS screws. The problem was that when I bought them they only had them in 1 1/2" lengths. This means that most of them that I have used so far, have needed cutting down. This has resulted in me having a few 1" lengths of 10ba studding.
Fast forward to my cleaning up one of Slaters' very nice cast Brake Standards for the V4 and I clumsily broke off the the spigot for attaching it to the floor. At first I was just going to solder it to the brass floor and be done with it but then I thought that having the floor removable for as long as possible would help with painting the inside.
So I drilled out the base where the spigot had been and soldered in a length of the aforementioned stud. A little of the solder wicked up the thread but a quick run down the thread with a 10ba die soon sorted that.
I then thought that with a bit of filing I could use a 10ba nut with some scrap etch to represent the lever for the brake cross shaft and although turning the handle doesn't actuate the brakes it still looks the part.
It wasn't a great leap to think that I may as well do the same with the stove to make it removable too.
Rob Pulham
Western Thunderer
In between doing bits and pieces on the Kirk coaches I have been making slow progress on the V4 brake van.
I have been fortunate to have been given a couple of GA's which show a hearth and heat shielding around the area where the stove sits.
A raid of the scrap etch box yielded this - the hole in the bottom it where the stove will bolt down.

And me, being me couldn't resist making the coat hook to go with a lamp iron that hung to either side of the chimney.


Now I mentioned that I have two GA's and this is where life gets a little odd. One of them shows 3'7" wheels which is what Jim recommends in the kit and the other shows 3'1" wheels. Even more odd is the fact that when trying to fit the 3'7" wheels they rub on the underside of the solebars. Plan B is to try some 3'1" wheels and check out the ride height.
I have been fortunate to have been given a couple of GA's which show a hearth and heat shielding around the area where the stove sits.
A raid of the scrap etch box yielded this - the hole in the bottom it where the stove will bolt down.
And me, being me couldn't resist making the coat hook to go with a lamp iron that hung to either side of the chimney.
Now I mentioned that I have two GA's and this is where life gets a little odd. One of them shows 3'7" wheels which is what Jim recommends in the kit and the other shows 3'1" wheels. Even more odd is the fact that when trying to fit the 3'7" wheels they rub on the underside of the solebars. Plan B is to try some 3'1" wheels and check out the ride height.
Rob Pulham
Western Thunderer
Rob
@simond and I had a conversation along similar lines with regards to GW loco Tre Pol and Pen where 3'8" had been misread as 38" and subsequently recorded (in an RCTS book!) as 3'2". Could this be a similar situation perhaps?
Dave
Hi Dave,
I wouldn't be surprised with regard to an error in the drawing. What does surprise me is that Jim hasn't picked up on it. Time will tell course whether I need to chop a little out of the underside of the solebars to fit the 3'7" wheels after all.
Edit,
While sitting replying to your post I had a flick through Ian Sadlers book on North Eastern Brake vans and although I haven't found an entry specifying wheel sizes, the photos of V4 vans does seem to back up the theory that there were indeed wheels of both sizes in use. The smaller wheels seem to be of the cushion tyred type.
Rob Pulham
Western Thunderer
I think that I have got to the bottom of why the 3'7" wheels don't fit. Jim certainly did discover the error but what I had forgotten was that I wasn't using a production etch. Sometime ago when I planned the second Birdcage Van with side cotes I asked Jim if he had any scrap etches that contained the wooden duckets from the V4 kit. He duly let me have some and while making up the two V1/3 vans I idly cleaned and folded up the remainder of the etches that Jim has sent to which I added the missing bit's from my V4 kit not really thinking too much about why the etches had been scrap in the first place because there was nothing obvious to see. Upon checking last night, the production etches have cuts outs to clear the wheels.

Rob Pulham
Western Thunderer
The V4 brake van came on in leaps and bounds over the weekend at home.


Having taken the photos above I realised that the screw for the brake column could really do with being a bit longer so I used the piece of studding left from shortening the screw to hold the seat/locker in.

Those that are still awake will note the hasp and staple fitted since the earlier photos


The long seat on one side is soldered in place, the one at the other side is screwed in from below allowing the floor and all the fittings to be fixed in after painting.


The only things left to fit are the brakes but sadly I think that I will need to temporarily remove one or both W Irons at one end because the wheel is rubbing and if I don't do it now it will only short when I try to run it.
Having taken the photos above I realised that the screw for the brake column could really do with being a bit longer so I used the piece of studding left from shortening the screw to hold the seat/locker in.
Those that are still awake will note the hasp and staple fitted since the earlier photos
The long seat on one side is soldered in place, the one at the other side is screwed in from below allowing the floor and all the fittings to be fixed in after painting.
The only things left to fit are the brakes but sadly I think that I will need to temporarily remove one or both W Irons at one end because the wheel is rubbing and if I don't do it now it will only short when I try to run it.
GWR/WR TEVAN - Parkside
Rob Pulham
Western Thunderer
The Tevan has passed the finish line - correction I still need to remove the paint from the wheel treads.
Here are some taster photos.


Here are some taster photos.
Rob Pulham
Western Thunderer
Just to finish off the Tevan story. I feel quite proud that it's new home is to be on Kevin Wilson's Buck Hill layout.
Rob Pulham
Western Thunderer
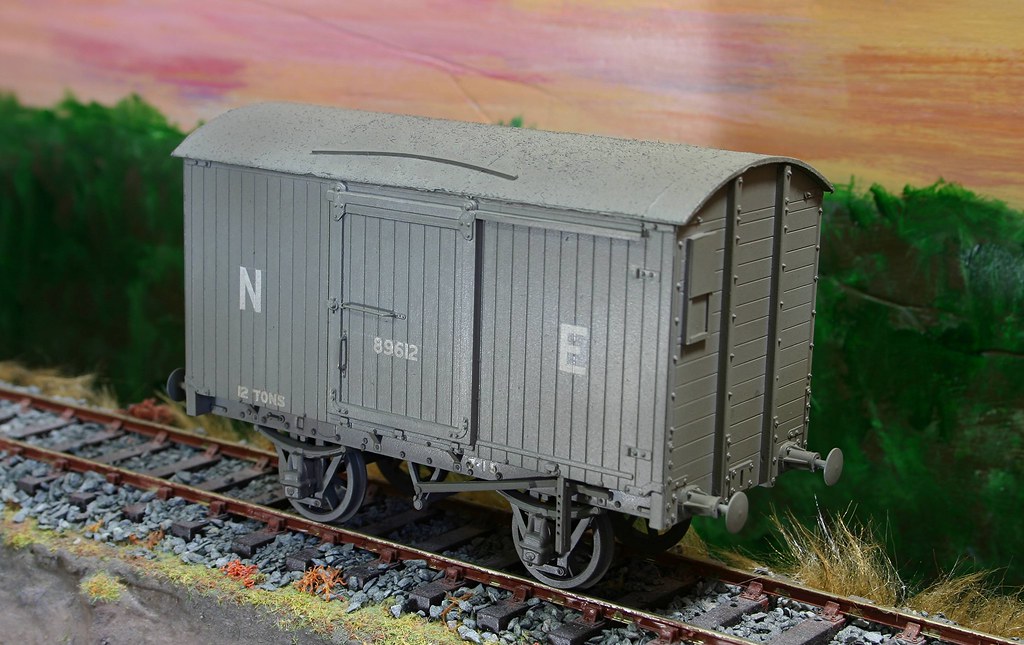
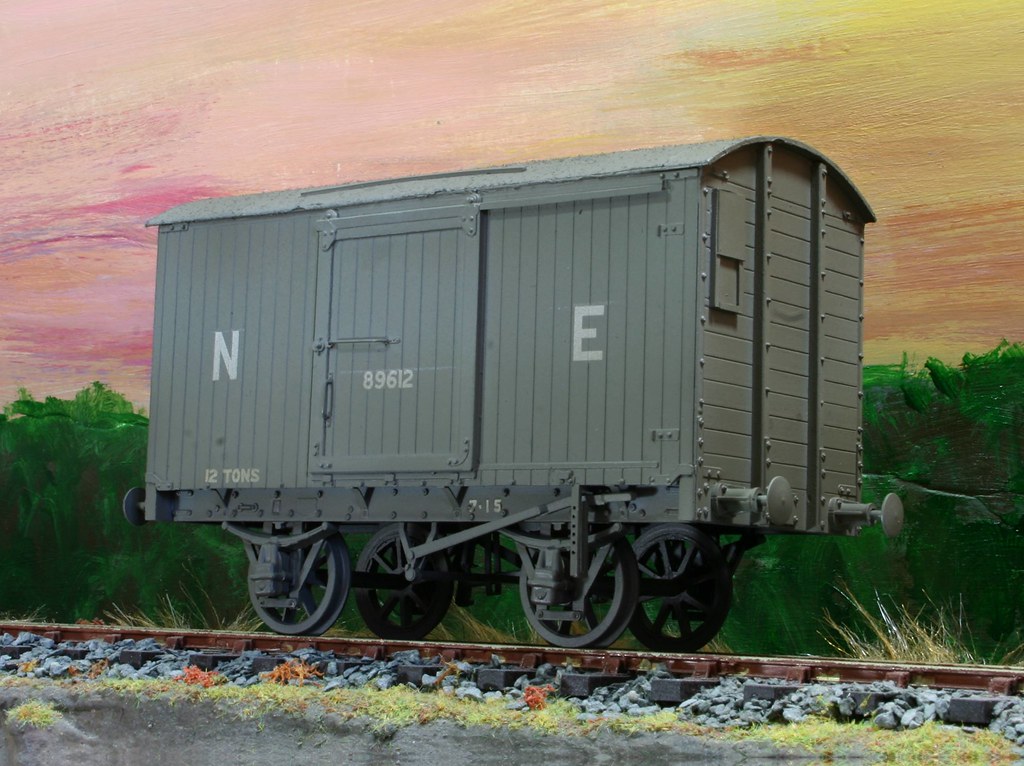
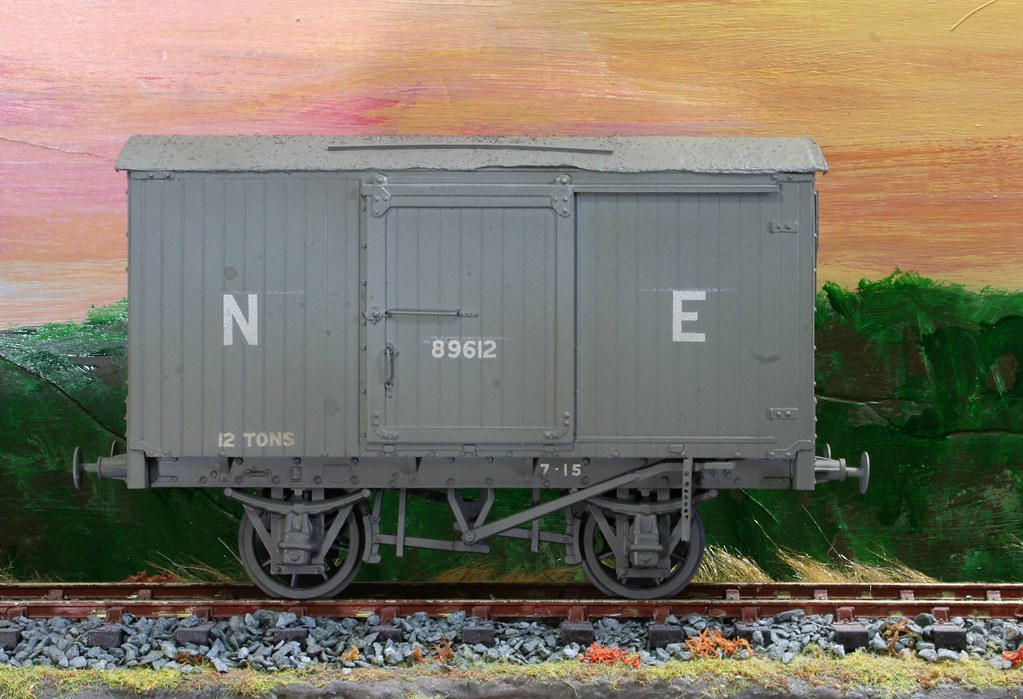
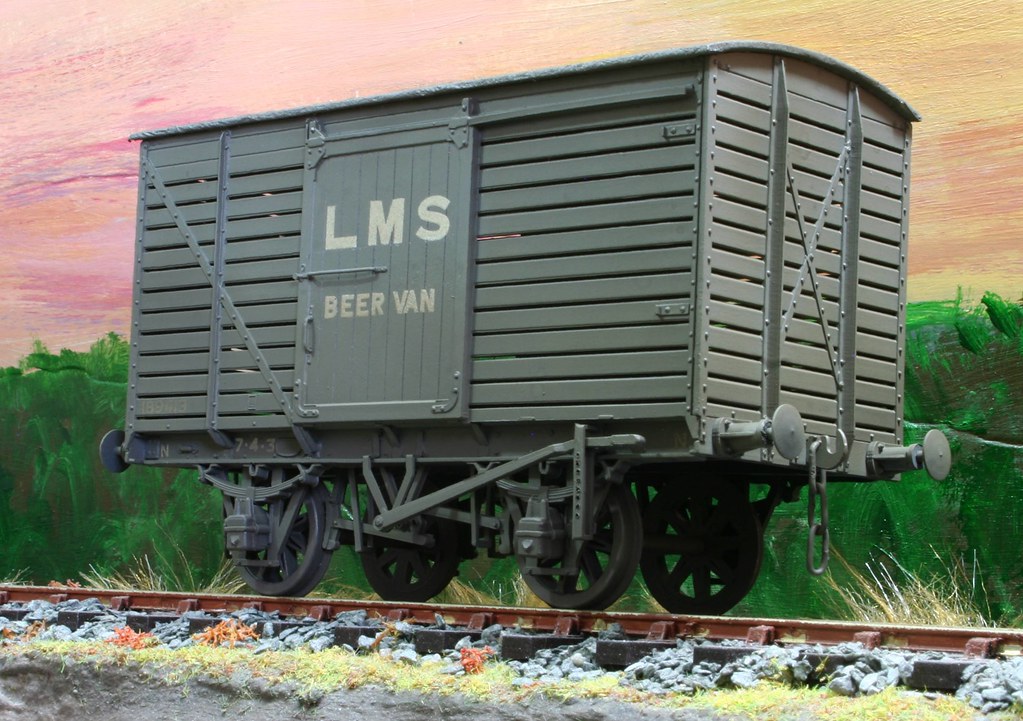
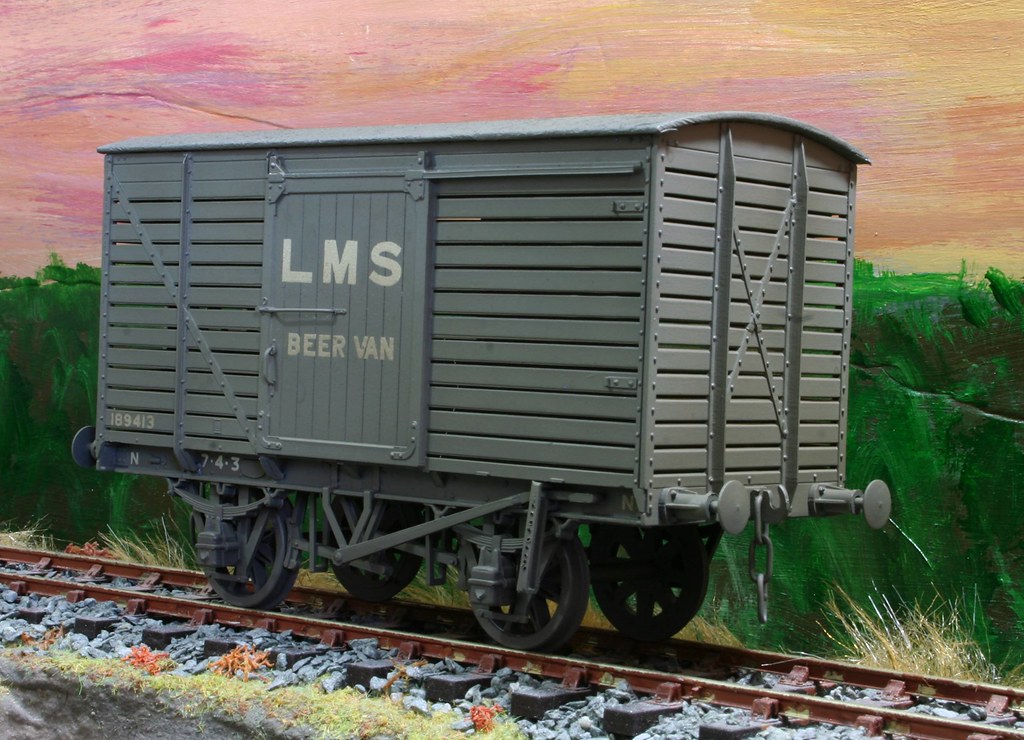
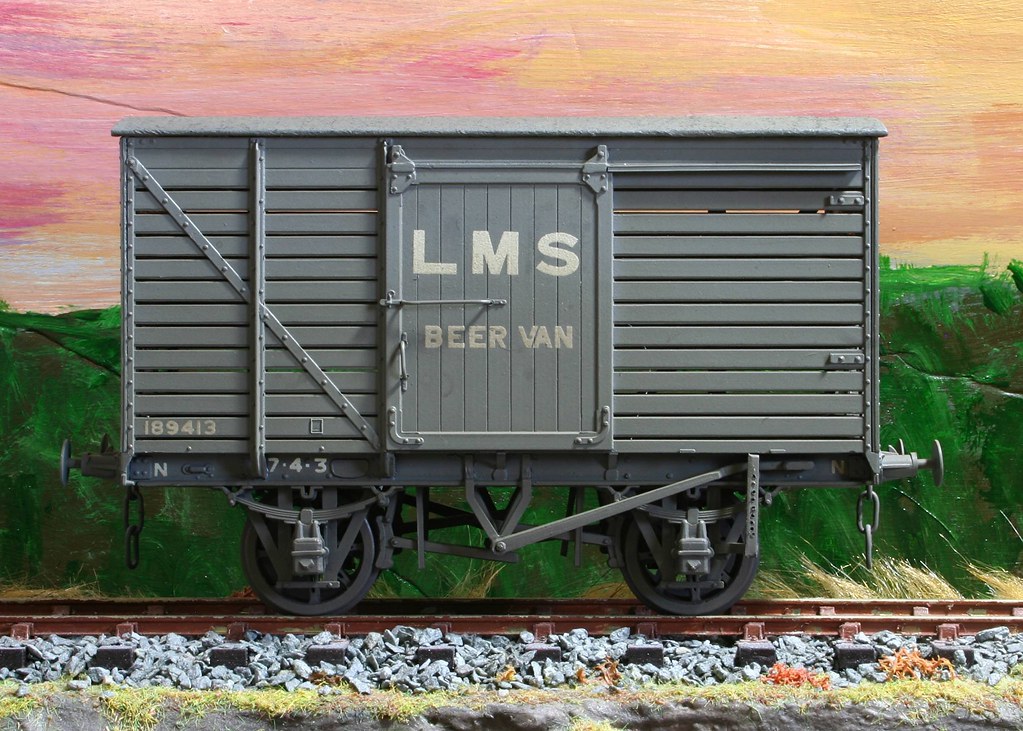
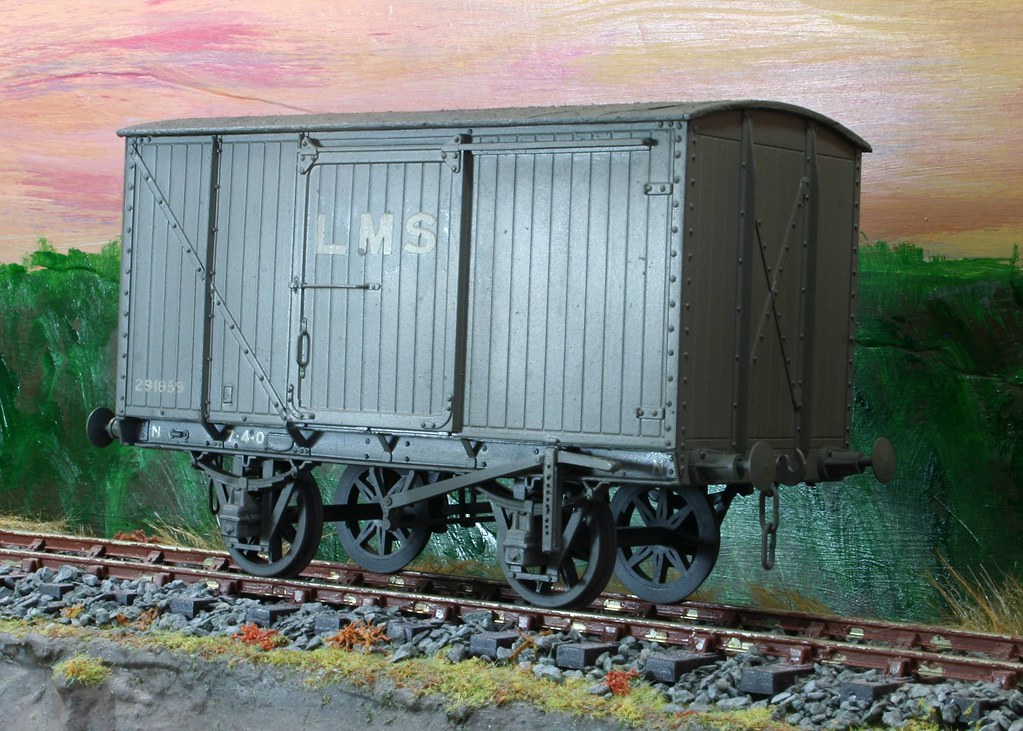
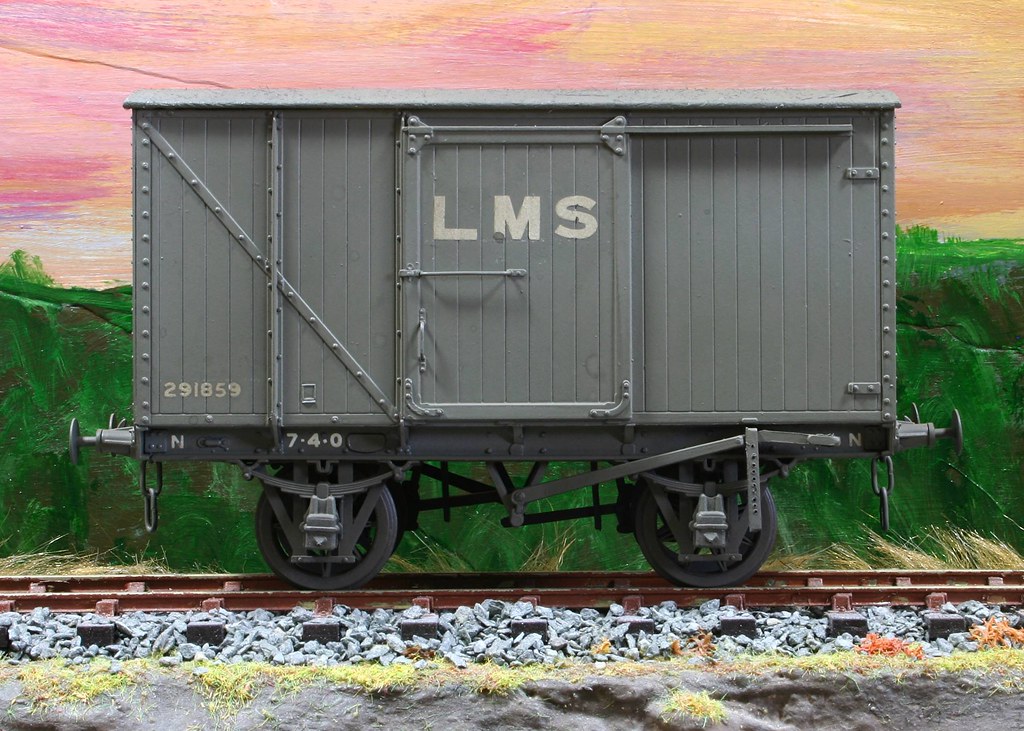
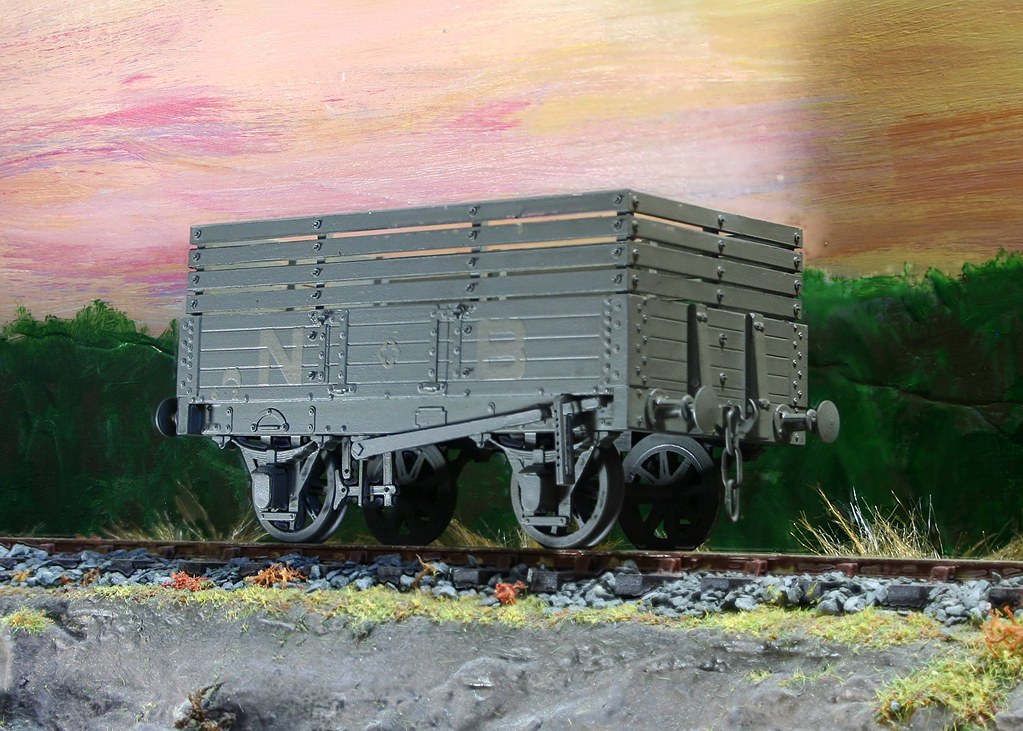
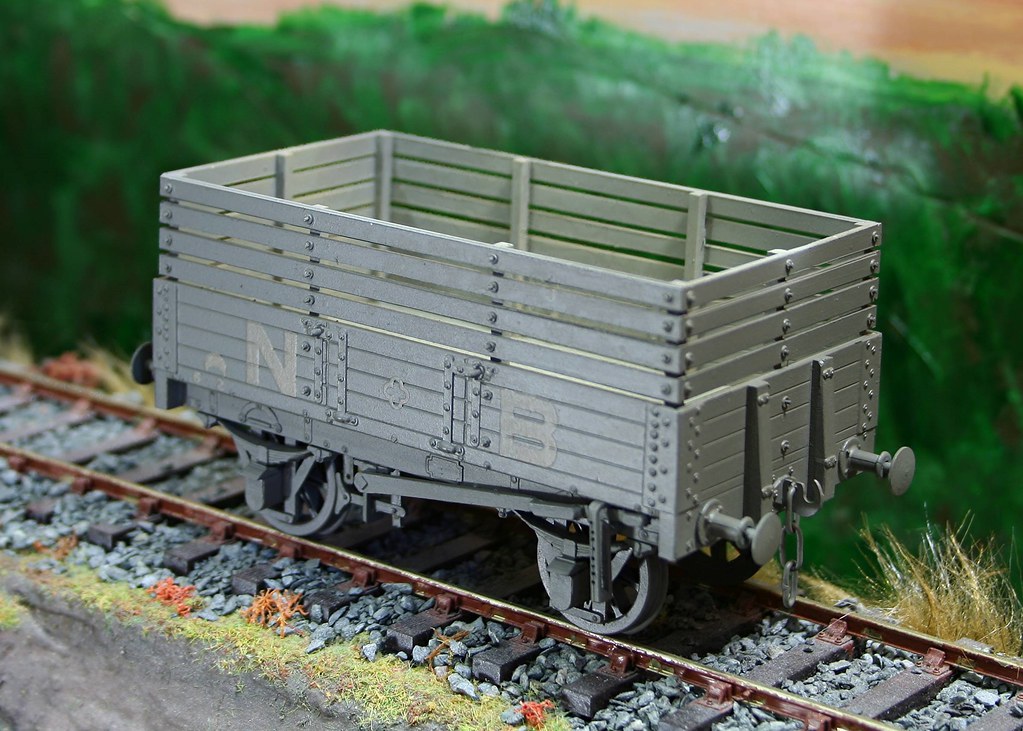
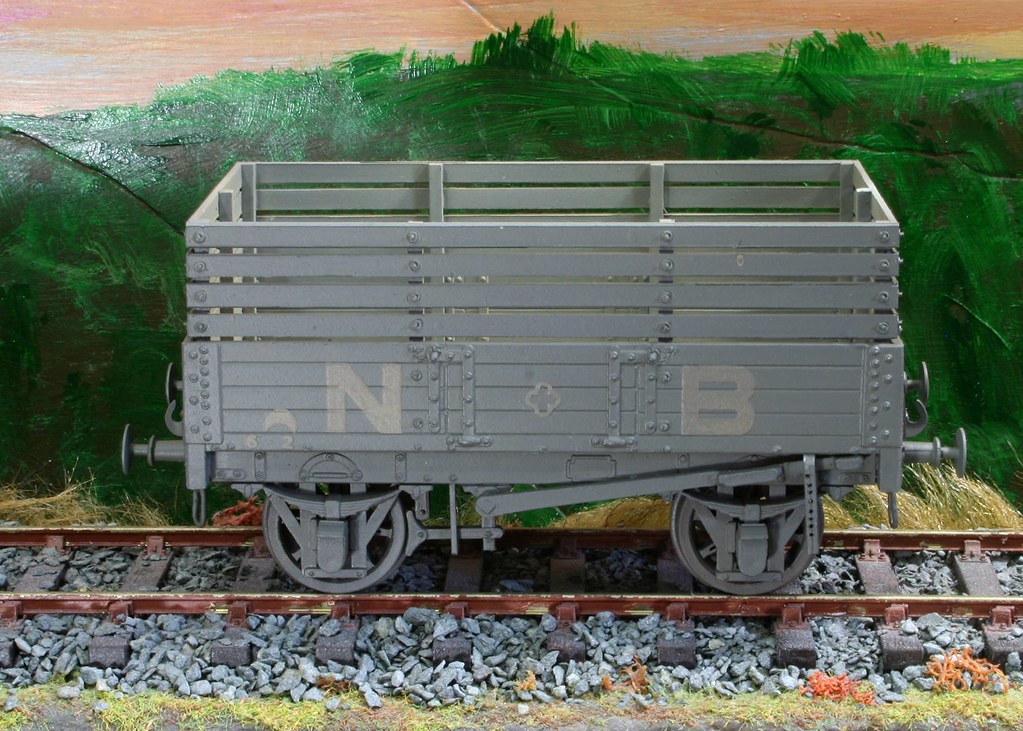
A while ago you may recall my building of a couple of LMS vans, an LNER 12 ton van and an ex NBR coke wagon? Well I finally made a start on weathering them. There is still work to do but I am pleased with where 3 sessions with the airbrush have got me to so far.
Rob Pulham
Western Thunderer
For the last few years I have entered some of my models in the annual modelling competition at Guildex and this year I did the same.
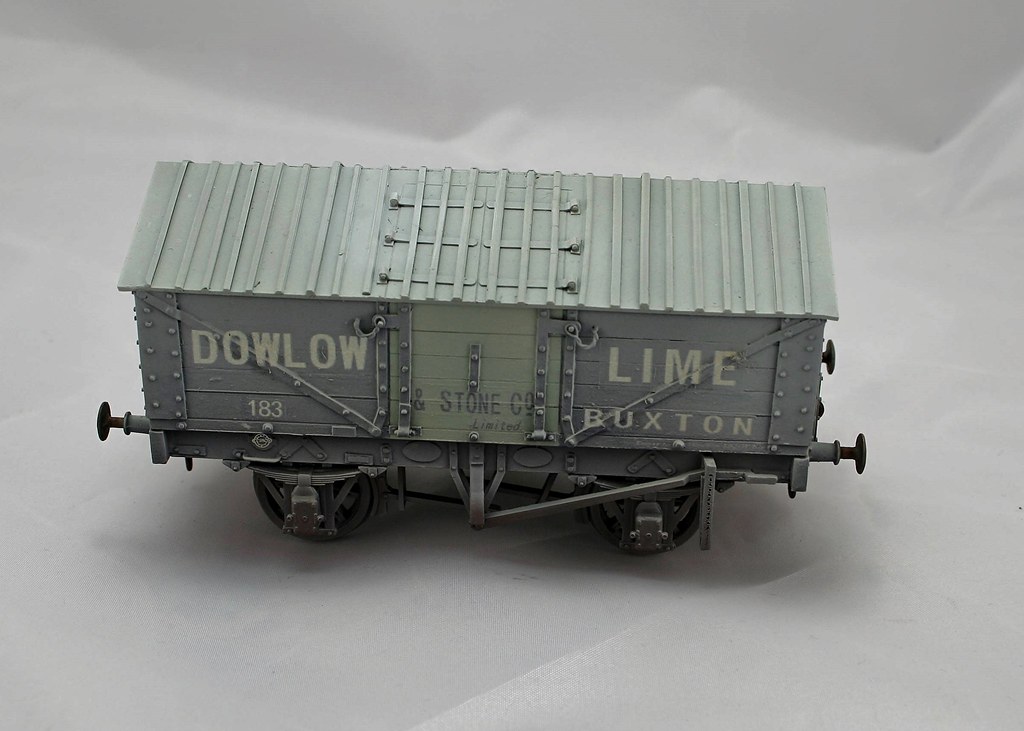
Starting off with the items that didn't get placed.
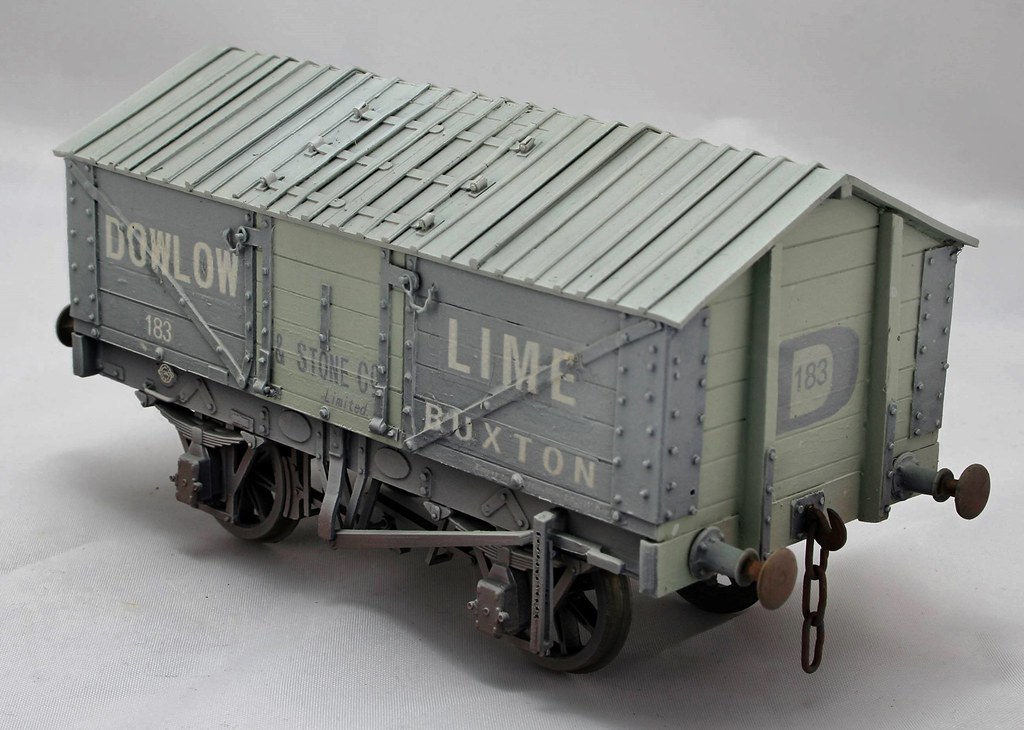
Scratch built Dowlow Lime Wagon - this was built before I got the Silhouette cutter but I weathered it a couple of weeks ago.
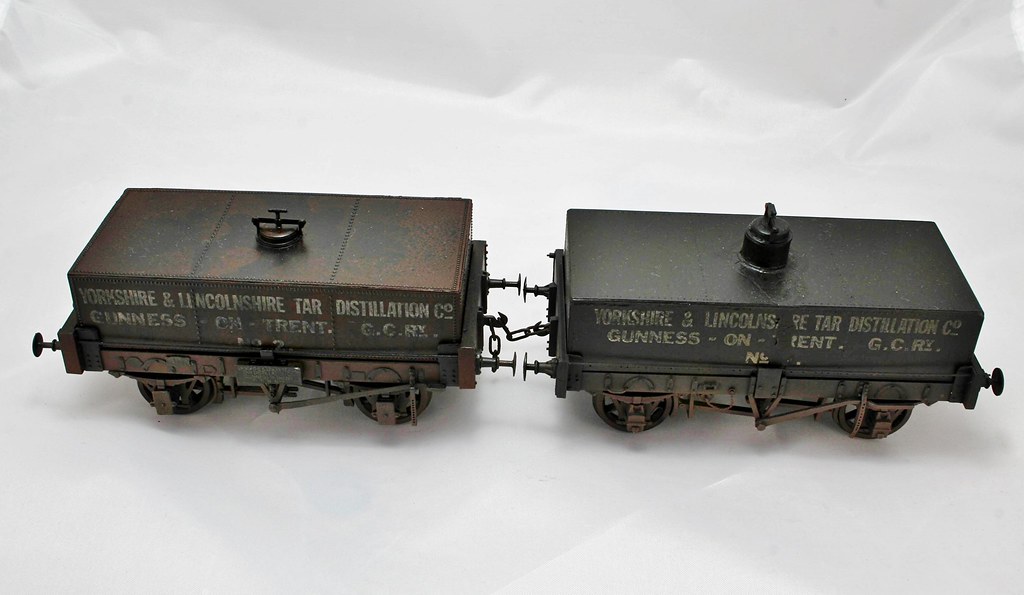
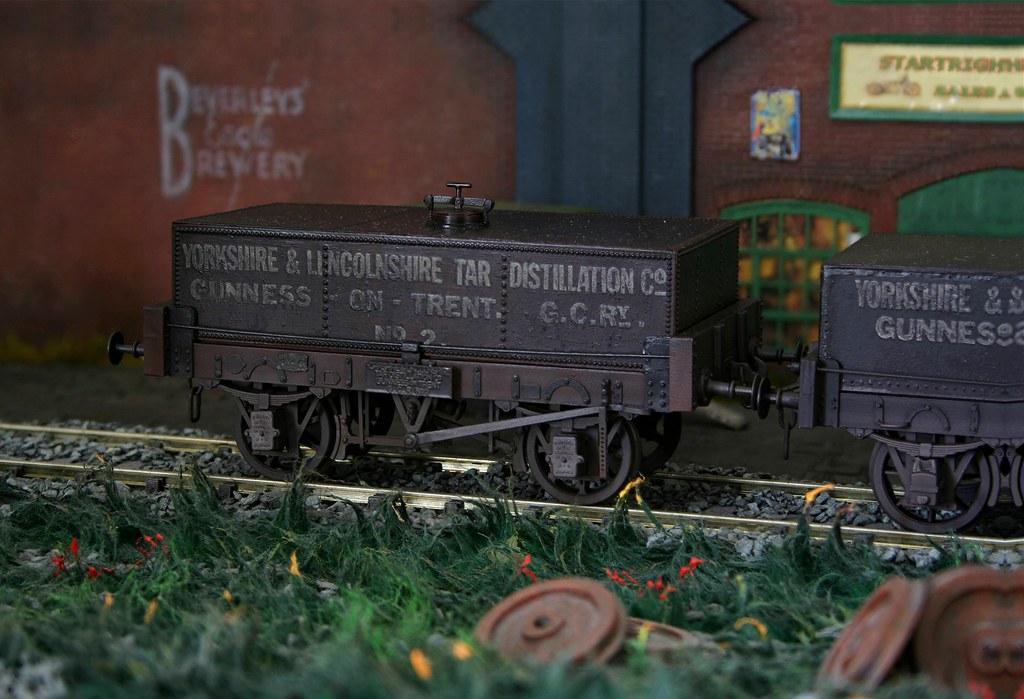
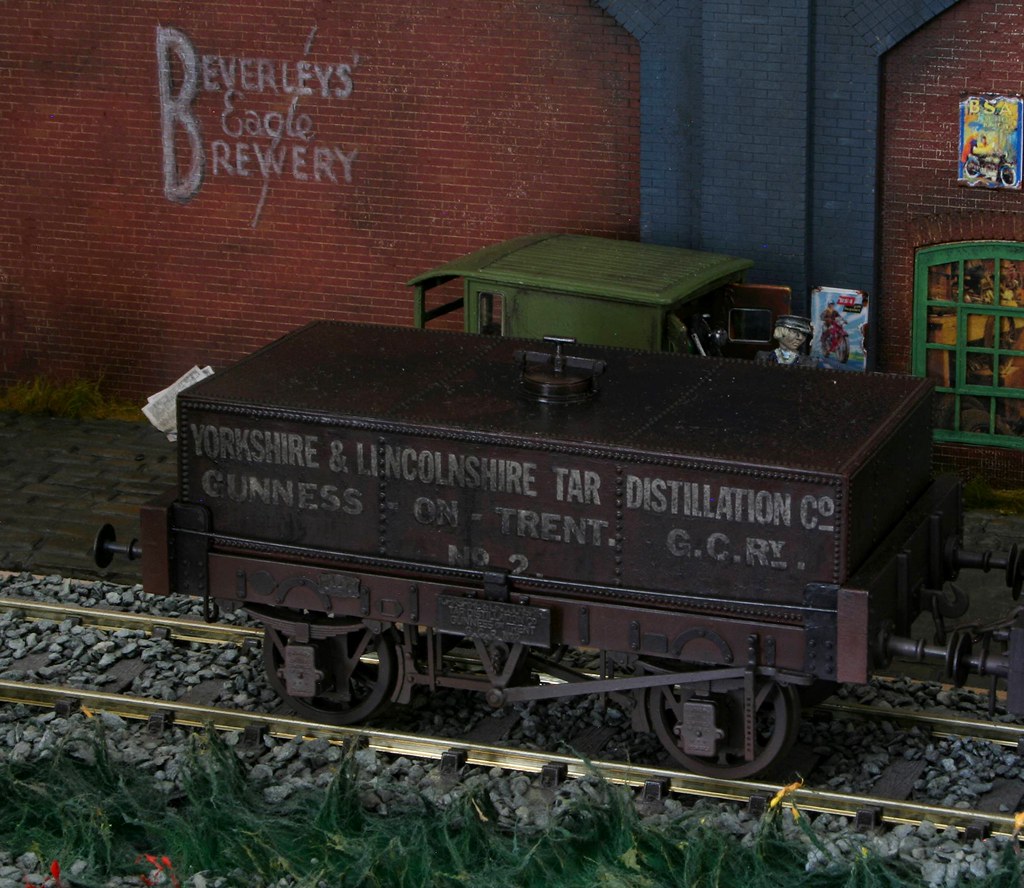
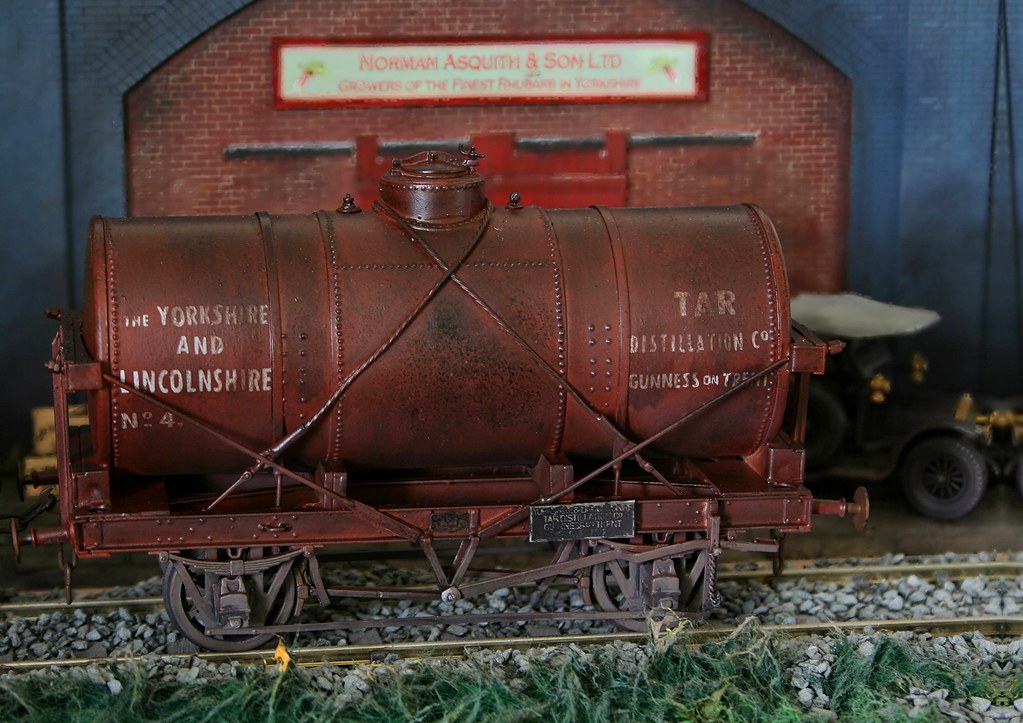
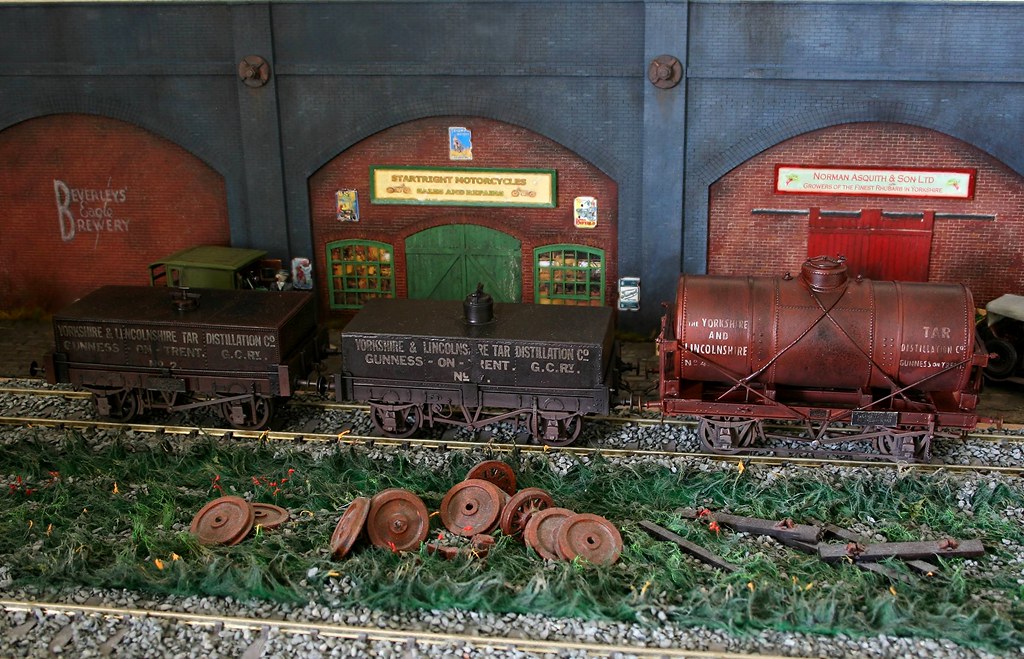
Next I entered my trio of Yorkshire and Lincolnshire Tar Distillers wagons. The two red ones being from Slaters kits and the black one built from parts cut on the Silhouette cutter. Again finally weathered in the last couple of weeks

Starting off with the items that didn't get placed.
Scratch built Dowlow Lime Wagon - this was built before I got the Silhouette cutter but I weathered it a couple of weeks ago.
Next I entered my trio of Yorkshire and Lincolnshire Tar Distillers wagons. The two red ones being from Slaters kits and the black one built from parts cut on the Silhouette cutter. Again finally weathered in the last couple of weeks
john lewsey
Western Thunderer
Very nice Rob
OzzyO
Western Thunderer
Rob,
wheels with no axles Wrong unless the middle of the axle and the journals have been gas axed off so no hole in the wheel, looking at the wheels they look quite modern compared to the wagons so would have gone back to the works for re-use.
Nice wagons by the way, good to see you both at the week-end.
OzzyO.

Rob Pulham
Western Thunderer
Rob,
If I may, the coupling links on the brake van seem a bit thin and not quite in keeping with the rest of it.
I do like the lime wagon.
Best
Simon
Thanks Simon,
You are not the first to make the observation re the coupling links, when I get back to it they will be replaced
Rob Pulham
Western Thunderer
Nice wagons by the way, good to see you both at the week-end.
OzzyO.
Thanks Paul,
It was good to see you too.