Scale7 JB Workbench.

Scale7JB

Western Thunderer
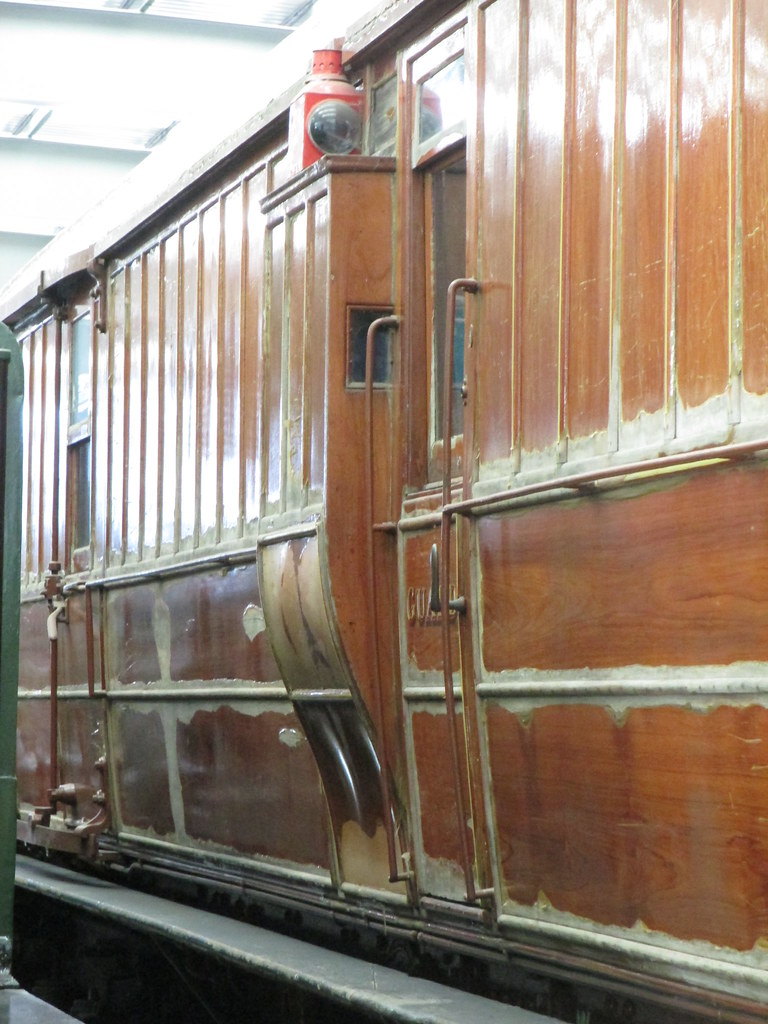
Thanks chaps. Looking at it now there are so many things that are missing or that I could have done better, however after finishing it around 5 years after I started it I had just lost all the mojo on it..

I'll hopefully get some more shots this weekend. Still need to find a 7mm/ft sandwich for the cab locker.

Mick, the quint is coming along a treat now and runs very nicely with the non-patented Bushell bogies. This has been a real group effort, and as it turn out quite an expensive one too, but no ex-GE line would be worth its weight without one, much like the push-pull set (which I really ought to finish very soon!).

I keep dropping the joke that we need a second set, but nobody laughs..

JB.
 
Last edited:

Rob Pulham

Western Thunderer
Hi JB,

I hate to chuck this in now that you have them assembled but wouldn't there have been some kind of window slot in either side? - I am struggling to see the purpose of a ducket that you can't see out of?

This is what I am thinking of on the GNR BG at Locomotion.
16575184960_a1975f7aa1_b.jpg
 
Last edited:

Scale7JB

Western Thunderer
Thankyou chaps.. Not finished yet of course, I need to do the lower beading so there's still a good chance to b****r it all up!

@Landy it would have been a lot quicker in plastic.

Still not a clue on how to make the two halves of the lower roof. I'm thinking of sticking a load of plasticard together and filing down to the correct profile.

JB.
 

Rob Pulham

Western Thunderer
That looks well worth the effort JB:thumbs:

I had a look in my kit earlier and thankfully I have a pair of duckets in mine. Mine has a wooden roof which I will need to shape at each end and then fit the clerestory into somehow. I can see my router table getting some use. - Being a tool junkie does have it's uses:cool:
 

Overseer

Western Thunderer
JB, next time you make this type of docket you could save some effort by only having one thickness of brass for the lower curved section, cut rectangular holes or slots (and add a separate top piece) in the top part of the full height panel then add a simple rectangle of brass behind the upper part after curving the shape. Not sure I have explained that clearly. It would make it easier to add the half round lower beading without it all coming apart as well.
 

adrian

Flying Squad
but you've missed the lamp!;)
and the ogee profile on the edge of the top plate. :)) :))

Still not a clue on how to make the two halves of the lower roof. I'm thinking of sticking a load of plasticard together and filing down to the correct profile.
noooo! A bit of soft nickel-silver, a rawhide mallet and a suitable former. In fact if it's quite a large radius just a rolling pin on a bit of rubber matting might do. At least if it's in metal you can solder it in place. :thumbs:
 

Rob Pulham

Western Thunderer
Same as mine Rob, is it a new kit straight from Danny? If so does it have any proviso for the lower two roofs?

JB.
Hi JB,

No, I have had it a few years and then I bought it second hand.

The roof provision is a profiled piece of wood which has the curves along the length but needs to be cut and profiled at the ends and then the etched Clerestory attached to it somehow. I think that I will probably route a slot in it.
 

Scale7JB

Western Thunderer
Thanks Rob.

I have done kinda the same thing, I found that Peter Hunts sleeper lengths are the exact same height on the long edge as the high point of the lower roof, so glued 5 lengths together on the long edge and carved them down with a scalpel. Looks pretty good. Plan is to overlay with some thin plasticard that I have.

@adrian I'd like to go the route of thin nickel sheet, but I just don't have the time before the Warley show.

JB.
 
Top