Spitfire's G3 Workbench

Spitfire2865

Western Thunderer
A bit of work tonight.
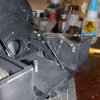
Ive managed to get the reverser rack and reachrod put on.
20190219_214037-1.jpg
The reach rod with an interesting assortment of bends and twists to navigate the incredibly tight tolerances between the firebox/cabsheet and along the firebox side avoiding the springs.
And into the cab
20190219_214110-1.jpg
I need to next make the locking latch. Hoping to get a spring in there to securely locate the latch in the pockets. Theres quite a bit of force against the reversing gear when running.
 

Spitfire2865

Western Thunderer
Its like Christmas today.
I come home from work to find 3 separate orders arrive.
A bunch of wheelsets for more American rollingstock, a book on Midland 2441 class locos to help draw up my 1377 class, and most interestingly...
20190301_171717-1.jpg
A Bing semaphore for the cost of $15USD found on eBay under the O gauge category. A single best offer later, and it was mine.
Now, at over 16" tall this most definitely isnt O. Least Id never consider it so. Its got the late Bing logo printed on the bottom so at oldest its only 1920s.

So guys, any information in the collective pool? What scale was this marketed towards? I can see Im missing a lamp, a handrail, and the coloured inserts, but beyond that and a couple nasty dings Ive half straightened out, its not that bad.
 

Spitfire2865

Western Thunderer
Its been a slow but steady month.
The cab of the American has been progressing slowly with almost all backhead parts added. Not much to photograph though. I had to modify the frame spacer above the eccentric because the arms were occasionally contacting and kicking the axle down. Quite nervous work with a motor tool near finished surfaces.

Ive also begun the Williams Models MR 3 plank kit with some more of my wood painting. 20190315_222612.jpg 20190315_222547.jpg
Which has now been stalled due to w iron confusion. Just have to wait on those. Though I should get the dropsides stuck on at least in the meantime.

And just today I began another project (because thats just what I need). A new piece of North American rolling stock, this time a flatcar. Using some regauged whitemetal G1 trucks to represent a 4' wheelbase archbar truck supporting a freelance 28' woodframed car. Based on a few drawings mashed together, I accidentally made the frame 10mm narrower than intended. I somehow always mark out 105mm instead of 115mm. Only realised long after the frame was together...
20190324_200216-1.jpg 20190324_200228-1.jpg
All using wood I had spare from other projects. But I do now need a bunch more wood just to plank the deck.
Might turn this one into an early low sided gondola.
 

Spitfire2865

Western Thunderer
Trevor
I like the painted floor of the three plank, well done. I have one of these and am changing the brakes to wooden ones to represent an earlier version.

Jon
Thanks
I considered making mine one of the older lots, but decided against it as I managed to break the whitemetal brake hanger and didnt feel like fixing it!
If its of any use to you, on the Slaters Midland wagon numberplate etch, there is at least one that is appropriate for an early D305! Was quite a surprise to me.
 

Paul Peterson

New Member
I have the 3D prints ordered for the boxcar trucks I designed, and Im thinking this will be my last Shapeways order for at least a long while. Not happy with their changes.
But I also received some 1/8" lasercut ply for the framework, so Ive built up the ends with what little superglue I had left. Need to get more.
View attachment 94065

And the lasercut steel parts arrived, so I now have two wrought iron link and pin couplers. Ive stuffed them with wood as I made a slight mistake during ordering and didnt give myself quite enough parts to do it as I wanted and the link needs a backstop so it doesnt slide too far into the coupler.

Im happy I was able to actually peen the coupler face onto the shafts rather than soldering. You may just be able to see the square flattened projections on the face. I do enjoy doing things prototypically when I can. View attachment 94064

And of course the coupler works as proper drawgear which is sprung in both compression and tension.

Should have the milled wood in the next 2 weeks. Just as the prototype, there will be almost no metal in the entire thing. Wheels, truck frames, truss rods, drawgear, and the minimum of strapping.


Trevor, I'm afraid I missed this when you first posted it and only just now saw these couplers. They look fantastic! Is there some way I can get some of these? I need quite a few, as I am slowly growing a roster of 1850s-era US style equipment. The later, solid-shank couplers can be had, but open-shank like this are not available--so far I've made up two pair from brass stock and even in simplified form they were quite a lot of work. Yours look far better, and they are sprung.

Your work is an inspiration!

Paul
 

Spitfire2865

Western Thunderer
And this is exactly why I hate resin.
20190331_160119.jpg
Scrubbed, cleaned, dried, primed, and painted with weeks for it all to cure and paint STILL doesnt stick.
 

Spitfire2865

Western Thunderer
As much as I love Mikes products, I just cant get on with resin.
Im making the damn thing out of wood.
Now I just need to draw up more etches...
 

Spitfire2865

Western Thunderer
Well I think this is a record for how quick I finished some drawings. (These are actually my raw drawings that didnt get the etch artwork treatment but its pretty easy to see what everything is.)
ironwork etch.png
Strapping etches for a Midland D305.
Just have to calculate the wood requirements.
I also want to build another D299 and LNW D2 as I have some parts for them already. But I might as well still finish the Williams kit for the D305, but how to make sure THIS time my carefully applied paintwork doesnt flake off by looking at it wrong?
 

Mike W

Western Thunderer
In case anyone with resin experience is pondering this one, it may help to know that these were made by CMACSL and were the first batch off the new mould, so there should have been no reason for excessive release agent.

I sometimes have problems like this, but not often. Would like to hear comments and suggestions though.
 

Steph Dale

Western Thunderer
Mike and Trevor,

You can clean it with a slightly evil concoction of white spirit and Persil non-bio (other non-bio laundry powders are available) worked into the surface with an old paintbrush or similar. It stinks but does work to remove the silicone from the surface and should certainly not go down drains!

Steph
 

geoff_nicholls

Western Thunderer
I've always used Tescos cheapest washing up liquid on Williams Models and other resin castings. It has always worked fine for me. Then a very thin spray of primer, especially on the open wagons, to avoid clogging up the cast wood grain.
 

Spitfire2865

Western Thunderer
I did a very thorough cleaning of the castings when they arrived and they then sat in their box until painting a few weeks ago.
I suppose I should give them a more vigorous scrub with stronger chemicals, though I want to avoid anything I cant wash down the drain.
Ive also gone over the whole floor with some coarse sandpaper to try and key the surface a bit more.
 

Mike W

Western Thunderer
CMA are one of the largest and respected commercial resin casters for the model industry, so I pointed then to Trevor's picture on this forum and they responded tonight. I am sure they won't mind me quoiting them:

"I've had a look at the picture and must admit I haven't seen that before.
Not sure what or if your customer cleaned it first, but we would recommend a quick wash with Fairy washing up liquid before priming and painting. We don't use release agents unless the mould is very old, so as this was from a new mould the only residue on it would be the oils from the silicone mould.
Dare I ask what paints are being used? There are some good paints around specifically for resin. A lot of paints around are for metal or plastic injection models rather than resin, might be worth just checking if suitable for resin.
<snip>
I've also just read someones advise to use white spirit, we would be cautious of using chemicals as they can often react in unpredictable ways !"

I know some will throw their arms in the air in horror that Fairly contains Lanolin which resists paint ..... but must admit I've used Fairly for 35 years.

Mike
 

Yorkshire Dave

Western Thunderer
I clean resin castings with CIF cleaner or similar.

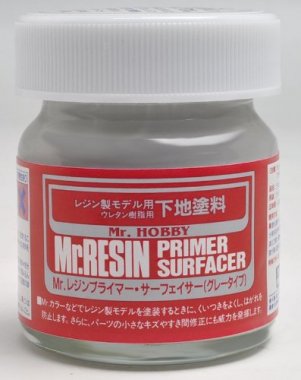
It slightly scours but it does leave a good keying surface. My preferred primer is either Vallejo acrylic surface primer or Tamiya filler primer. I have also the Mr Hobby resin surface primers.
d6034dac8760daaf78a6dd4d7695243e.image.301x380.jpg
 

unklian

Western Thunderer
I would be wary about using washing up liquid, especially the more expensive brands, as they contain Lanoline which is a known problem for paint adhesion. Cheap Tesco brand may be OK, better are the cream cleaners like Cif, or I scrub everything with Vim scouring powder and as hot water as the item will stand .
 

Spitfire2865

Western Thunderer
Mike,
My primer of choice ATM is Tamiya fine which Ive never had issues before with adhesion.

Anyone think a polishing compound might do anything? I just remembered I had a jar of Turtlewax in the misc bin for a few years now. It certainly cuts through anything after long enough. Used it a grand total of once to take off the livery on a Hornby pug!
 

DavidinAus

Western Thunderer
This is very interesting, as I am currently building one of Mike's D305s! I think I will try the (cheap) washing up detergent and then my favourite HiChem All-Surface Primer (possibly this is only available in Australia, though) when the time comes.
Trevor your original wood finish looked brilliant - could I have a brief tutorial on how you did this?

David
 
Top