4mm An EM Workbench: selection box

LMS Signalbox (Ratio/Scratch)
  • AJC

    Western Thunderer
    The civil engineers are working for S&T and are making one heck of a mess. Before they arrived, all was quiet, even though a train seems to be due.

    Before_the_first_incision.gif

    Such appearances may be misleading since not five minutes later:

    Ooops.gif

    A little later still, a chunk of plywood, some bits of mounting board to the good, some improvement may be discerned.

    Base_002.gif

    Base_001.gif

    Holes and gaps filled with DAS which turns out to be somewhat premature; another couple of layers of board will be necessary. At close of play, however, some sense of the eventual scene is visible.

    Trial_Fit.gif

    Still, a reasonable start.

    Adam
     
    LMS Signalbox (Ratio/Scratch)
  • AJC

    Western Thunderer
    Having mentioned the Taunton show, the inevitable examination, tidying up and corrections that no one has bothered with up until now. For reasons which escape me, some time ago an extra 2'6" of board was added and one of the consequences of this is that the junction on the operators right to a disused branch and controlling access to the up yard is a bit more than a scale quarter mile (and we know this because South Junction has appropriate quarter mile indicators at measured intervals). Always on the edge of the reach of mechanical rodding, it's now much too far and we need to address this. The site is immediately behind this Midland bracket which has lost the arm on its right hand doll with the closure and partial lifting of the branch - in fact, it is now wholly out of use having been replaced by a colour light. If it is to remain in situ, I'll need to add a couple of white crosses...

    Mis_Awst 052.gif

    So the obvious things required are the site to be cleared, fence moved, retaining wall constructed, and a 'box built to suit. That pill box* will also have to move, because its field of fire will be directly into the bobby's back (the entrance faces the field...). Under instruction from the Divisional Civil Engineer and chief Signalling and Telegraph planner - dad - I was informed that the new box should be something different to South Junction A cabin, a standard Midland Railway structure, recently refurbished. One of those (concrete) quarter mile markers can be seen by shiny new coal bunker. Some oaf has already knocked a couple of bricks out of the coping...

    * In fact it's been in totally the wrong place for thirty years: it will be redeployed to obstruct the road.

    South_Junction_Box_1.gif

    His initial suggestion was that it should be something with a flat roof - think Tri-ang - or possibly rebuilt Midland. The issue with that is that the Tri-ang one is probably a bit modern and we still run some pre-Nationalisation stock. So with some delving on the web and with reference to Graham Warburton's very useful tome on LMS signalling an LMS standard box (basically the Midland design, but with a simple pitched roof) allowing the use of Ratio's kit, suitably-modified. A second hand example without a roof turned up on ebay and the result thus far can be seen below:

    Platform_elevation_001.gif

    Three_Quarters.gif

    This is rather small for an LMS box - imagined as a replacement for an earlier Midland 'box destroyed in some forgotten accident - most seem to have been of two bays like the existing 'A' box but there were some of this halfway house size:

    3263344107_7509224de2_b.jpg

    Claydon L&NE Junction 850112 by Jonathan Hazan, on Flickr

    The small site and neighbouring embankment mean that the bobby gets an en-suite! I've ordered some etched windows from AMBIS and I've made a start on some of the ancillary structures; the coal bunker:

    Coal_bunker_001.gif

    Coal_bunker_002.gif

    And finally, for the moment, here's a sense of the complete scene.

    Full_scene.gif

    Adam
     
    Last edited:
    LMS Signalbox (Ratio/Scratch)
  • AJC

    Western Thunderer
    Pushing on, what I'm choosing to call Canal Junction 'box (the junction really is under the canal) has acquired a roof, or rather, roofs. The toilet roof is separate and built in which may cause a certain amount of fun later on as the toilet door was glazed and painting this neatly could be fun. Thankfully the glass was frosted so I can ignore any thoughts I might have about modelling the bowl and so on - the door will be made from clear plastic with some sort of overlay, probably made from self-adhesive label: watch this space. The main roof is removable and will remain so. What you can see is 40 thou' with a sub structure of 60 thou' - I did some roofs of similar size about a decade ago and these are still warp-free so I'm fairly confident this will survive just as well.

    Three_Quarters_SW.gif

    Toilet.gif

    In other news, you should note that the locking room door has gained a sill and a start made on the veranda rail. I probably ought to think more about the window-cleaning platform before going too much further: the fumble-fingered chaps in P-Way will do their damnedest to knock them off...

    My favourite scene from South Junction looks from a lineside scrapyard behind the existing 'box, but really needs a bit more in the way of junk to hide some of the more unlikely contents; a Foden steam lorry and bits of railway signalling equipment for a start! Hence this, idly imagined to be the gaffer's Ford Zodiac Zephyr mk 1 rolled in some unrecorded accident and dumped in a corner of the yard. This really is a bit of a modeller's cliche but one used unrepentantly here. It's a Pocketbond model, bought as a detailing project but unfinished owing to an indifferent paintjob. So, roof bashed in with a hammer, a dose of rust and a renewal of the two-tone paintwork and here we are: still with its whitewall tyres and chrome trim, you'll note.

    Zephyr_1.gif

    Adam
     
    LMS Signalbox (Ratio/Scratch)
  • AJC

    Western Thunderer
    Not a huge amount of time this week but some relatively small things have been done. The most significant thing is the steps - missing from the bits I got but no matter, they're pretty easy to make.

    Next_Steps.gif

    You can also see that I've added a walkway over the rodding (ok, where the rodding *should* be, but likely *won't*). The bargeboards and their beading have been added and the next step will be fascias and guttering.

    Front.gif

    From the front we get a better sense of the footway which ends where it does on the left because there's boarding across the tracks in order for the bobby to collect the single line token from trains which once came of the branch. I've knocked those boards up as well but you'll have to wait and see on those.

    Rodding_cover.gif

    The reason for the boarding is that the only available space for the water butt - standard issue - on this cramped site is at the far end of the box!

    More as and when.

    Adam
     
    Last edited:
    LMS Signalbox (Ratio/Scratch)
  • AJC

    Western Thunderer
    Today's sundries - the aforementioned water butt, together with guttering and downpipes (these from the Ratio kit). Note that the stoves in these LMS boxes were generally by the windows with the frame at the rear so the stovepipe pokes out from the front. The various interior bits are on order, despite the fact that most of them being will be more or less invisible when the 'box is eventually installed.

    Butt.gif

    Adam
     
    Last edited:
    LMS Signalbox (Ratio/Scratch)
  • AJC

    Western Thunderer
    Roof's coming on, half slated - normal office copier paper, in fact the last sheet of someone's copy - solvent-welded in place and sealed with diluted PVA.

    Slating.gif

    I'm very glad this is a small building! I'm still pondering ridge tiles; cock's comb were what was specified, but not what was always fitted. I'll probably go with the sort shown on the roof of Willesden no. 8, here:

    Willesden No8

    Onwards and upwards.

    Adam
     
    LMS Signalbox (Ratio/Scratch)
  • AJC

    Western Thunderer
    A few little steps; slates, ridge tiles and so on.

    Roof.gif

    Here's the completed roof, with ridge from 10 thou' as is the flashing around the stovepipe, welded in with solvent. I've managed to paint the roof today, but it's only dry now that it's dark! Also pottering onward are the small details that all 'boxes need. Here are the levers (Springside):

    Levers.gif

    Arguably somewhat crude, but the levers are painted according to the track and signals. Note the spare levers... Less crude are these cast iron signs, very nice etchings from AMBIS Engineering. The quarter mile marker will replace the existing one which is 2' 6" away from where it should be and, being plastic, won't survive being moved, while the Beware of Trains/Trespass notice will find a home somewhere near the yard - there's another couple to go with the 'box itself.

    Signs.gif

    Adam
     
    LMS Signalbox (Ratio/Scratch)
  • AJC

    Western Thunderer
    Some signal box sundries: the instrument shelf (I think that's about right for a junction box - instruments for up and down lines and one for the branch) which will be hung from the roof and, of all things, a swarm of scooters, one of which will be plucked out for use as the bobby's personal transport.

    Instrument_shelf.gif

    Bobby_transit.gif

    Both more or less straight from the packet, Springside and Dart Castings respectively.

    Adam
     
    Last edited:
    Peckett: The Marshal
  • AJC

    Western Thunderer
    A couple of little Bank Holiday jobs. First is revisiting a Wychbury Loco Works (latterly, Mercian - hand-drawn by Pete Stamper, I think) X Class Peckett. This came from a club member's estate and is built, in part, in memory of him: John wasn't really a modeller, but he was full of good intentions and, as a Bristolian, had a fondness for Pecketts, Avonsides and other products of Bristol's engineering companies. It's not bad, but is of its time and requires a bit of fettling to get a reasonable drive train inside and some additional detailing. In fairness, the extent of that will be relatively limited since most of it is there albeit with a bit of finessing. Soldering is, er, less than invisible...

    Peckett_002.gif

    Also on the go are a couple of wagon projects, one of which is this Parkside 24 1/2 tonner. It's an interesting observation on British Railways, the National Coal Board and Britain in the '60s in general that the last BR-built batch of these were built in '64* at exactly the same time and in the same works(!) as the Hop ABs, latterly HAAs. This (the large, steel-built, tippler discharged mineral wagon) is a design concept that really dated from the late 19th century...

    24_half_001.gif

    This is a representation of an early build of the 24 and a half tonner so it has plain bearings and will get one door spring for each door. There's quite a lot that's still good about this Parkside kit, the body in particular. The chassis needs work, however, but this is the minimal-intervention approach: new buffers, axleboxes and the brakes stretched to get nearer the wheels. The push rods have overlays from AMBIS Engineering etches and make a big difference. I should have finished the solvent work by later today and final detailing should be finished some time later this week: I really need to get a few of these things ready for paint; the workbench is getting crowded.

    Adam


    * The final examples were turned out by Pressed Steel in early 1965.
     
    Last edited:
    Peckett: The Marshal
  • AJC

    Western Thunderer
    Slightly to my surprise, I've done more on the Peckett; detailing stuff - laminating springs, replacing the reach rod for the reverser and adding the splashers and, importantly, buffer beams which, full-size, were enormous pieces of wood represented in the kit with rather shrunken whitemetal castings so I epoxied the supplied etches onto some thick copperclad which was then soldered to the ends of the footplate. Cab beading, spectacles and coupling hooks before I have to worry about making a sub assembly out of the boiler and saddle tank...

    Peckett_003.gif

    Peckett_004.gif

    In the meantime, the soldering iron has died, so until the new element turns up...

    Adam
     
    Last edited:
    Peckett: The Marshal
  • AJC

    Western Thunderer
    News from the miniature Altlas Locomotive works residing, not in Bristol, as nature intended, but in west London. Like many kits for smaller locos of a certain vintage, this kit is intended to have a body in one lump with a tiny motor mouthed vertically in the firebox: in 7mm that approach is more sustainable in 4mm so I've embarked on a touch of redesign in order to mount the motor in the boiler, possibly with a flywheel.

    The basics are well-established: the boiler/saddletank make one assembly, while the cab/footplate make another. As, deigned, there's no positive location at the front - hence the elongated hole in the footplate to accommodate the securing screw in the base of the smokebox. The bits of L section served to mount the boiler on the real thing but serve as location on the model, as will the piano front for the cylinders later.

    Peckett_006.gif

    The saddle tank is more problematic, but not really through fault in the design of the kit. The way it was supplied is an issue, however, since the pre-rolled wrapper would have to be flattened in order to rivet it before being re-rolled. I wasn't even going to try to do that and will, when the time comes, apply rivet transfers. Before that comes, though, I'll need to add a layer of shim to form the centre ring of the tank - this a characteristic Peckett feature. Note the somewhat battered bottom edge: this will be disguised...

    Peckett_007.gif

    Putting the two together looks a bit like this:

    Peckett_008.gif

    It does sit properly when screwed down, honest!

    Adam
     
    Peckett: The Marshal
  • AJC

    Western Thunderer
    Thanks again, Les. Back to the Peckett. Since the last update, I've knocked up the bottom half of the boiler - I managed to mangle the half-etched original which, in any event, wasn't quite long enough - from nickel silver sheet, and added the centre ring of the tank barrel from shim.

    Peckett_009.gif

    Obviously, I'll have to re-drill a couple of handrail holes, but the effect is far better than the half-etched grooves that represented the overlap originally. I have now straightened the wingplates...

    Here's the last survivor of the real thing. Lord Salisbury: Peckett 0-6-0 Lord Salisbury NCB Norton Hill colliery Somerset 1964 by John Wiltshire

    Adam
     
    Peckett: The Marshal
  • AJC

    Western Thunderer
    Bringing things together. I do wonder whether it's easier to do a neat job (and this really isn't one, at this stage) on neat kits? This is certainly true of plastic wagons - my efforts with modern Parkside productions tend to look better before the paint goes on than those from, say, Cambrian. With proper location designed in, I'd probably have splashed a lot less solder around and the result would be tidier. I am pleased that it looks properly 'Peckettesque' - the shape of the saddle tank and pattern of handrails are key to this.

    Peckett_010.gif

    This three-quarter view is pleasing since it demonstrates those features. The side on view is less so, since it shows up the somewhat squashed look of these locos. No matter, at this point it couldn't be the product of any other builder.

    Peckett_011.gif

    Adam
     
    Peckett: The Marshal
  • AJC

    Western Thunderer
    The Peckett now has a set of boiler fittings. Those supplied were fine, to an extent, but were very tall, showing up the late 19th century origins of the design. Several later X class Pecketts were fitted with chimneys and safety valves rather lower in height - and some locos, presumably reboilered, had Ross pops rather than Salter type safety valves; this was latterly Peckett's normal practice and that's my preference.

    Peckett_013.gif

    Peckett_012.gif

    The lower picture shows that the right hand corner of the cab needs to be reseated, though the left looks sound.

    Moving on. So how to achieve correct and convincing boiler furniture? The whitemetal chimney was distinctly oval in section and, though reducing it in height is possible, making a neat job proved impossible without a lot of filing and produced a less than happy end result. I wasn't even going to start doing anything similar with the valves so required a plan B. Plan B came in the form of spare sprues from Heljan, intended for their GWR 1361 available from Howes. This offers a neat plastic moulding in two parts, base and top, representing the composite nature of the real thing. I had to thin the rim a little and the base quite a lot, but the result is better than what it replaced. The safety valve cover was hacked from a dome in a similar way. Both are now epoxied in place, as is the chimney-mounted lubricator (from Branchlines). A suitable tank filer is on order and when I'm feeling brave, I'll think about the whitemetal smokebox door. Time for the big file?

    Adam
     
    Last edited:
    Peckett: The Marshal
  • AJC

    Western Thunderer
    Inching ever onward, and two sub assemblies are complete. One, admittedly, is the cab roof, but that's one less thing on the list. The overall impression, however, is nicely Peckett like, though pictures of progress to date does show up how relatively crude the kit is.

    Peckett_017.gif

    Having boiler fittings and a roof on does make a difference, however, and the remaining work - pipes for the injectors (supplied as etchings: hmm, but they are the correct size and Peckett injectors are hexagonal in section. No, still not using them!).

    Peckett_016.gif

    Peckett_014.gif

    The front end shows that there is a little more work needed - one side of the footplate needs a tweak for a start...

    Peckett_015.gif

    Still, we're heading to the point where the frames need to progress beyond the basic assembly, and soon. Well, maybe.

    Adam
     
    LMS Signalbox (Ratio/Scratch)
  • AJC

    Western Thunderer
    The other side of the move, thank goodness, and with a view to ensuring I know where everything is, the time has come to work through a handful of projects to completion. First up, Canal Junction 'box.

    Box_004.jpg

    Note that before reaching its current state, primed and with a first coat of cream applied by brush, I saw fit to add some foundations which will locate it in the baseboard - 60 thou' plastic sheet. The roof is in position for context and the toilet door will be added after painting as will the fire buckets.

    Box_005.jpg

    At the other end, the water butt has sprouted a stud of wire to represent the tap - since this will be at the bottom of the cutting constrained by retaining wall, I didn't see fit to go further, or to add rivets to the water bit itself. Even I have to draw the line somewhere!

    Meanwhile, I've added a retaining nut to the roof and drilled an accompanying hole through the floor. This isn't especially exciting but brings us up to date.

    Box_003.jpg

    Adam
     
    LMS Signalbox (Ratio/Scratch)
  • AJC

    Western Thunderer
    Raspberry ripple? Anyone? The fun bit - adding the contrasting colour to the framing - has now been accomplished and the general effect is to make it look as though it should be perched atop an ice cream cone! I've used Humbrol's matt wine, no. 73 for the red which looks about right to my eye. I've also fitted the lever frame and stove before I misplaced/damaged them. The interior treatment will otherwise be fairly minimal since so little of it will be visible.

    Box_006.jpg

    Weathering will tone this down a fair bit and I expect addressing the areas that should be a bare wood colour will make a difference as will attending to the fenestration. The next job to be tackled, I think, is to attend to the fire buckets and their rack.

    Box_007.jpg

    Adam
     
    LMS Signalbox (Ratio/Scratch)
  • AJC

    Western Thunderer
    Moving through the phases now and this time, I've completed basic detail painting, added fire bucket and name boards and made a start on the remaining interior details. More on the latter anon, but I will admit to being quite pleased with how it looks thus far. A week to harden off, afforded by going on holiday, and I'll come back to that though I may manage to sort the windows out over the weekend.

    Rear_clean_001.gif

    Canal Junction 'box, labelled:

    Front_clean.gif

    And - sort of - how a member of loco' crew coming to surrender the single line token from the branch might see it.

    front_thre_quarter_clean.gif

    Adam
     
    LMS Signalbox (Ratio/Scratch)
  • AJC

    Western Thunderer
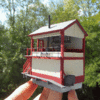
    Just before heading off to Norfolk on holiday, success! The 'box is now complete and ready for weathering (there are a few finishing touches needed - a bobby for a start). But for the mo' that'll have to do.

    Complete_001.gif

    The window frames started off as Midland Railway pattern and, with most of the glazing bars removed, work for LMS versions. Later LMS 'boxes had squared top corners, and these were seemingly more common. Modifying etched frames, however, made the job much, much quicker and for this job, speed was an important consideration. Next time I'm down in Somerset, it will be installed on the layout and I can cheerfully declare 'job done'.

    There are a few more South Junction jobs still to do, prior to its appearance at the Taunton Railex in October, but this was by far the biggest and perhaps the most satisfying.

    Adam
     
    Last edited:
    Top