4mm An EM Workbench: Mini-Signwriting (rough)

D&S GNR open

AJC

Western Thunderer
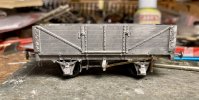
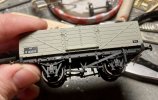
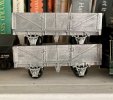
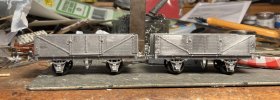
Thank you, Mike, and everyone. Since I don’t feel like painting, another project from the shelf, the D&S GNR opens, now back on their wheels, with coupling hooks and the last of the original paint consigned to history.
4BCB04D3-3EC6-447E-9E1E-298F5E67EFB0.jpeg

Just one buffer head lost, but that’s ok. I’ve replaced the horse loops with 0.3mm nickel silver wire.
E979134D-0D17-4BE7-8AAF-C0A0EEBB28B7.jpeg

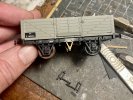
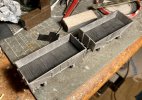
And floors, from hand scribed 40 thou’. The brakes will be mounted to these - soldering to the back of the solebars, as designed, would have been good for Irish standard gauge, I reckon.
0BD66935-9DC9-4272-9B2D-8529BB6253A6.jpeg

Adam
 
Last edited:
Rapido SECR van

AJC

Western Thunderer
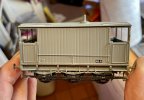
Oh, and there’s always one more thing, isn’t there? In this case, the appearance of Captain Cock-Up's detective cousin. I’ve re sprayed the SECR brake, but only then spotted that my chosen prototype had gained rainstrips. So out with the Evergreen and the Plasticweld.

AA0AD42A-F786-4412-A101-4ADD291FBFA5.jpeg

The tare weight is the masked up original, all the other lettering will have to be new.

Adam
 
Last edited:
D&S GNR open

AJC

Western Thunderer
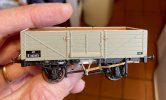
Both the GNR opens are at the end of soldering, capping strips from 5 thou’ will be added tomorrow and maybe, if the rain holds off, primer. Since they look exactly the same, one photo will suffice. Masokits provided the levers and guides, but I resisted weakening the already tired brake fittings by cutting the safety loops away.

2F655390-00B4-49CC-B252-D409C73FC5E0.jpeg

Adam
 

AJC

Western Thunderer
Couple more beers and I'll see them both.

Nice work recovering some retro kits Adam.

Thanks, and with two under fives in the house, tiredness can have the same effect... Given the rate these things go for unbuilt (c. £40 a go), these represent utter bargains, even for the work involved.

Adam
 
Oxford LNER open

AJC

Western Thunderer
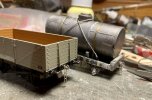
Looking around the workbench, it was obvious that I had a host of things lacking coupling hooks so I’ve assembled and fitted a batch to as an esoteric combination as a pre-group mineral, an RTR coil carrier, an etched LNER tube, and these two:

0C8B4229-8A33-4C14-90F8-0491798BB021.jpeg

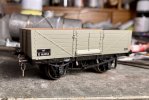
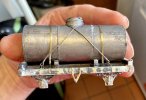
Geen oil tank (part of a selection acquired from eBay - this was worth what I paid for the lot), which is a long term project, missing, among other things, brakes, buffers and the usual domed ends. Second, a quickie, an LNER open from Oxford Rail. Not a bad body, shame about the brakes. These should have single-sided Morton, I think. The brakes are modelled as independent, so are the wrong way about, the levers aren’t right for independent brakes as they’re missing a vee hanger. The one that is there is inset too far (all this is well known) but should be easy enough to put right.

DA38B8FE-DFEE-4494-8438-14CCB9280F62.jpeg

81242C22-2109-45BA-A60C-570590617B4C.jpeg

Adam
 
Last edited:
Oxford LNER open

AJC

Western Thunderer
Hello Adam,
It's a nice moulding, that Oxford Open. And the representation of the brakes looks good. 'Tis a pity that one more ha’p’orth wasn't spent in the underpinnings.

Cheers

Jan

It's one of those things - I can't understand why they failed to do them right, but at least the brakegear as modelled is more or less workable (and the levers and guides are good) and I can simply turn the mouldings around, or I could, if all the detail wasn't on one side only. It's not a big deal, really, I have the bits in stock.

Adam
 
Oxford LNER open

AJC

Western Thunderer
Stripped out and on the way to being rebuilt. The new vee hangers are from Rumney Models and the chunk out of the solebar is a visit from Captain Cock Up: I tried to melt it into the gap between the body moulding and the chassis moulding using the soldering iron. This could have been more effective… Never mind. They’re in the right place now.

23ED1294-2739-4982-938C-581F501B68F2.jpeg

A note on regauging to EM and P4 - the axles are longer than standard and slightly shy of 2mm diameter. If you were to simply press the existing wheels out to EM back to back then it’s easy (they’re a bit wide over the treads for my tastes but the flanges are fine). If you replace the wheels then reusing the original axles is possible if you knurl them with a large file.

Door chains added, a decision about whether this is another ‘30s vehicle or one in BR condition needs to be made as the capping strips need clips for the latter.

The brake moulding needs a bit more detail because it’s been reversed. First, however, I’ve added a bit of 20 thou’ on the back in order that the tumbler can be drilled out to accept a cross shaft. Might take the safety loops off before reinstatement.

Adam
 
Last edited:
Oxford LNER open

Lyndhurstman

Western Thunderer
A note on regauging to EM and P4 - the axles are longer than standard and slightly shy of 2mm diameter.
Another - known - issue with Oxford products. Again, the question has to be asked; how did they let it become (their :) )standard?
I guess the 'edge of two files sandwich' is a good way to knurl these beasts. If I can pick one up cheaply enough, I may let my intrigue see what flows from it.
Thanks for sharing. Adam

Cheers

Jan
 
Oxford LNER open

AJC

Western Thunderer
Another - known - issue with Oxford products. Again, the question has to be asked; how did they let it become (their :) )standard?
I guess the 'edge of two files sandwich' is a good way to knurl these beasts. If I can pick one up cheaply enough, I may let my intrigue see what flows from it.
Thanks for sharing. Adam

Cheers

Jan

They're not even all the same... Anyway, I just use the one file and rest the axle on the cutting mat: the file need not be anything good (mine is a Draper no. 3 cut from the local hardware shop when I lived in Southampton which I use for levelling the tops of plastic solebars and so on: it's sped lots of modelling tasks up, but it's not the highest quality tool).

Adam

EDIT - PS: the wide treads of the original wheels have some advantages. It means that the brake gear moulding only needs moving outwards by about 0.5mm. I filed that much of the spigots and stuck a wedge of 20 thou' in to secure them in place.
 
Last edited:

AJC

Western Thunderer
The accumulation of small details now: capping strips (I still haven’t decided what period this one will be); horse hook loop; levers (from the same Rumney models etch) and reinstatement of the brakes the right way round.

8A21F3E1-B9A5-4573-9A0F-D07D883049CE.jpeg

Adam

EDIT - no prizes, but there's another error Oxford have incorporated: what is it? ;)
 
Last edited:
David Geen tank

AJC

Western Thunderer
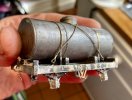
While I was waving the soldering iron about to fix brake levers, I did a little to start on replacing the brakes on the oil tank wagon. The original was 1. Battered; 2. Made from some sort of margarine metal; 3. Not awfully close to the wheels (and sort of stuck in with superglue).

D00AC11B-1D30-4943-87DC-CD7832484BE2.jpeg

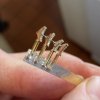
Masokits to the rescue. Just the vees so far, suitable for independent each side brakes, pinned through the solebars. The cross shaft shown here is very much temporary!

20046894-2D19-4AD5-ACE5-9A36FDD149B8.jpeg

I’m not sure whether the kit is meant to follow the 1907 or 1911 RCH drawings, but there’s plenty more to do, those flat ends, for a start.

Adam
 

AJC

Western Thunderer
I shall watch with interest. I’ve one of these in one of my stock boxes awaiting refurbishment

It’s a bit crude, really, but better for new axleboxes already. The big question, in my mind, is really what to do with it! Dad has one (with a steel underframe, hence this one being converted to wood), and that’s Shell BP. Given the huge variety in that fleet, I’m not sure that’s what I want to do. Possibly another - this time fictional - tar tank?

Adam
 

ullypug

Western Thunderer
Mines a Shell BP in black, axles are not parallel so great at going round curved track, straight less so!
 
David Geen tank

AJC

Western Thunderer
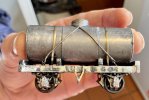
I’ve not - surprisingly - used Masokits bits for push rod brakes before. State of the finescale art 30 years ago! As with all of Mike Clark’s bits, the design is sound and the bits fit, even if not with ultimate scale fidelity. Obviously, this tank doesn’t have a ‘normal’ wheelbase, it’s 10’ 6”, so they’ll be a certain amount of bodging to get that.

So it’s all self jigging, using brake shoes and vees as fixed points. I’ve stuck the shoes to some brass strip, which is both a spacer and a locator. I’ve also filed off the ‘ears’ since I don’t think this spec’ allowed for reversible brake shoes.

FF65BA18-FC41-4C98-A9F7-62640FCDBBCE.jpeg

Tumblers added too, and here we are:

9DC73162-0A97-420C-ADD6-789C8F6B2264.jpeg

Adam

EDIT - the vees turn out to be in not quite the right place (vertically), so a couple of steps forward, backwards, and sideways…
 
Last edited:
Top