Phil Mortimer's 7mm builds

Good morning.

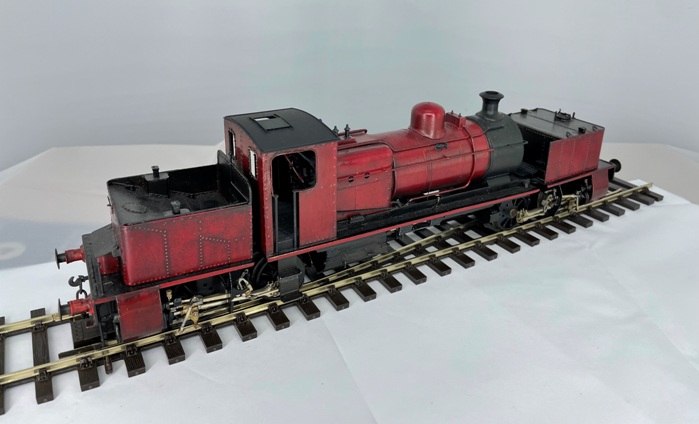
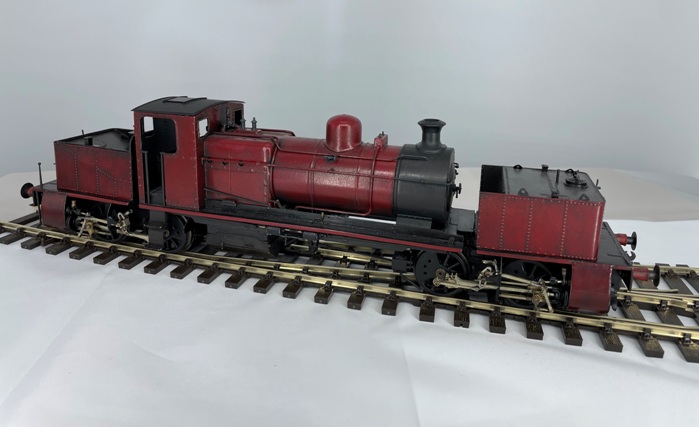
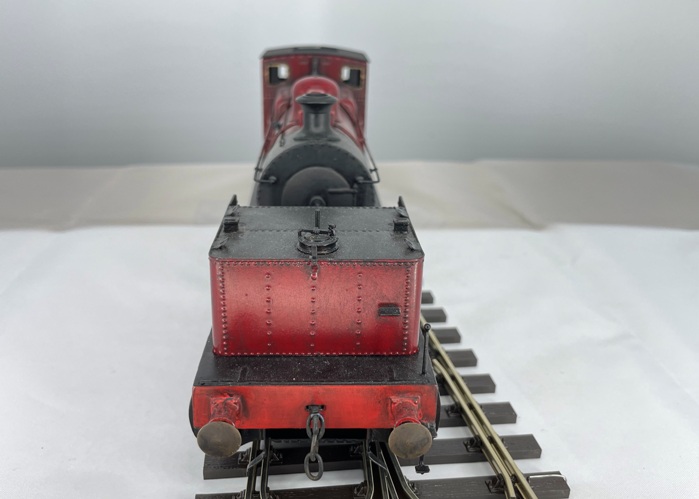
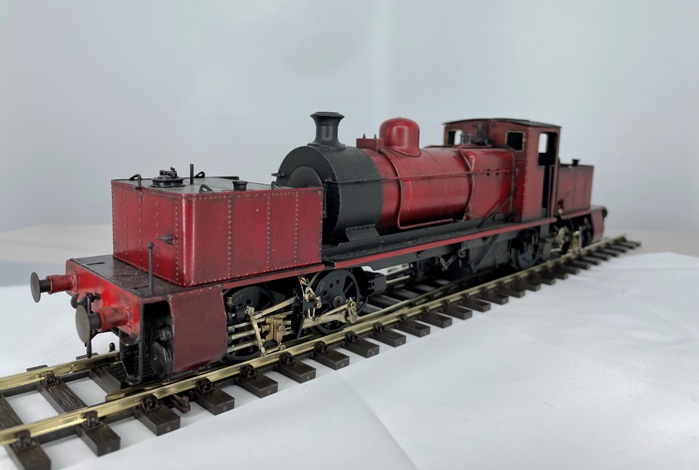
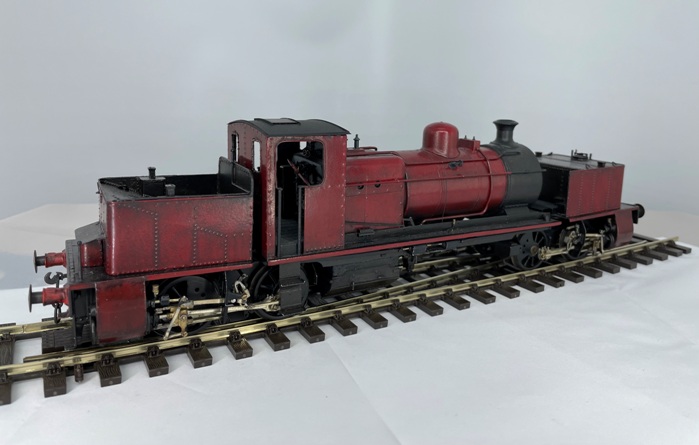
Long time lurker here, but thought I should post some pictures of my most recent work. Please be gentle with me. I've been building two "Vivian" style UK standard gauge garratts from Mercian models kits, though with quite a bit of replacement parts. The first was built as Sneyd # 2 and recently delivered to the owner in the UK, who remembered the real thing from when he was a boy. The second is not far off completion and will be built up as the preserved William Francis. The full build (which covers 24 pages and a load of photos) can be found in the RM web thread here as I don't have enough time to copy everything over. However, if you have any questions, I'd be happy to answer them.
HdYm6-XYOSYO7oeIEqzbFD4K-uV8JGEXQP01iChp


iRQR7okGMZHVk0PF8phQ5NlRNlpez_-U1JyaN37P


5RWQbLB9aXTSYO7dLgzbpTLis9NPsVBg4YW42-pF


KR0zI2nev7CebZ-rIRmxX2y7Z8q7xuKcqi6aWNZP


mJYWULia_U_H-HcConwSOH9JZQ6Ekwm_XjlDHnky


vyMV10IPYgShNOBe53Cg3nWqstEotoBAnPpVA4VU


r2sHQPaA0RlDs-3CiIQBLJwv4it3vDfNEXt_gyuf


x9NdzIH3uAnA_-Wkw-Ewp58tz6qc3LjkIRXynEda


VdCd48uK4IClPyyLDRBN_qbX6wAgVkqIvCaRbb_4


6Ii2Jh5SSnvtOvv25BrQk6uXWR82yu0gtgJrQwhh


ucXUQgWpOFSTHs_NgFHAbT7s5sxavGlAX6-GUObj


In company with its almost completed sister just before despatch to its owner in the UK.

AkdzNhvPOuTUb1lnKdyi4U5OYV2g0ppCjqU_t2ZT


A happy owner with his new acquisition.

pDgOAi8N0nHZvcz-QGb8ANHZeU5FeWvQpQZJrEij


kkC2XDHpqzsVNVswha25y6N5T_MZdIZsOvID0YMp


That's all for now.

Thanks for looking.

Phil
 
Last edited:

AJC

Western Thunderer
Those are lovely, Phil and I’m so pleased to see the finished articles: it looked like a huge battle and I hope you’re pleased with the end results!

Adam
 
Those are lovely, Phil and I’m so pleased to see the finished articles: it looked like a huge battle and I hope you’re pleased with the end results!

Adam
Adam,

Thank You for the kind compliments. Yes, I’m very happy with the way the red one has turned out and just hope that I can get the blue one to the same standard. I’m currently experimenting with how to weather that blue paint, which is more of a satin finish rather than the gloss of the red loco. I have various test strips at the moment being subjected to painting and weathering before I decide on how to proceed. I don’t want screw it up at this stage and have to strip and repaint the entire loco if I can help it!

I have to say that I prefer building to painting!
 
The trams belong to John, the commissioner of the Red Garratt build (It is he who appears in the photo), so unfortunately I have no further information on them. I should have asked when I delivered the loco, but forgot. Sorry.
 
I have to say that since I delivered the Red Garratt and returned back home, my mojo has been distinctly lacking. Maybe the final push to get the red Garratt finished for delivery was more stressful than I realised, or maybe visiting family and then getting back to work took it out of me, or maybe the thought of weathering the thing was not something I relished. Probably a combination of all of the above. However, I've been lacksadaisical about getting on with finishing my own Blue Garratt. Maybe I just needed a break from the darned thing!. Anyhow, over the past couple of weeks I've come back to it and progress is starting to be made again.

First, it was time to seal the boiler and glue the smokebox door in place. This gives the loco its distinctive face. The loco was secured with the boiler in the vertical position and the smokebox door glued into position with 5 min epoxy. You have to take care when doing this as the aperture in the smokebox front is just fractionally smaller than the smokebox door and so careful positioning is required. The loco was left like this for 24 hrs for the epoxy to fully cure.


dXg8k9_iy9o9EYM5OmZ815Tu0s1b0-1tLkTgNdMK


s8YVI48K-7fNa-u5gNl8oumb8EPd11oUp4XpzZu2


I then started to weather the boiler unit, using the same technique as used on the Red Garratt. This is the technique described by Giles Flavel when painting and weathering his own loco as described in his own build thread and his thread on weathering locos. He also describes it in his article describing the build in NG&IRM Review issue 103.

Anyhow, in brief, it involves rubbing down all the paintwork to get a really smooth surface. I use a combination of 2000 grit wet and dry, used wet, followed by polishing and buffing with ordinary kitchen towel. The loco paintwork is then brushed with small amounts of water soluble lamp black oil paint along cracks, panel lines, rivet lines, etc, immediately followed by wiping off most of the paint with a damp kitchen towel in the vertical direction. This stains the base paint and leaves residual black paint around raised detail, in the same way that washes do. It usually takes me a number of repeated applications and wipe downs to build up a convincing effect. The whole process can be quite time consuming to do (hence my reluctance to get started on it!) and for the boiler unit it required one complete evenings work to rub down the paint work to smoothness, followed by two or three evenings work applying the actual weathering. However, the result is that the oil paint darkens and "ages " the base colour. I can't claim any credit for the technique - I just followed the directions given in Giles's articles, but it does look very convincing. Because this loco was painted with a darker satin paint (unlike the Red Garratt, which was painted with a brighter gloss paint), I did first experiment on a couple of test articles painted in the same manner as the Blue loco, to ensure that the weathering would work without screwing up the paint job. The satin paint requires a bit more preparation, but with patience does yield a similar result to that seen on the first loco, though it is not quite as obvious due to the darker tone of the base paint colour. I still need to weather the frames and the footplating (for which I will also add in some burnt umber in the same manner), but I want to let the staining already applied to the blue paint fully dry and harden for a couple of weeks before I tackle that in order to reduce the likelihood of any staining being rubbed off by handling during the process. In the meantime, the tank and bunker are up for the rubbing down and staining treatment this week.


J46aXNFnMGVNRaafteReV1AeFa4Jbbqb_IQm7Fix


Its difficult to see the difference between the weathered boiler unit and the untouched bunker and tanks in the above photo, since the effect is subtle and the dark blue base colour hides the effect more. However, since the sun finally came out tonight, I took the loco out into the garden to get some "in progress" portrait pictures. These are seen below and the difference between the the weathered and non weathered parts is more apparent.


JDJlvKEIwLReUcCO6iK8Inh0VNopKVioRI92tfB5


785uEau_HhsX4vJ8MUzjNuEvf1xE3kRrsT-DQnwA


hi9Ieej3EjR1p1pLPYIAETaE_HfiQdD56GR6xsND


KJu-tzXvEEMLQOgOx5-lQFmU4sM_gIDD2u8_8-1C

In the meantime, I've ordered some parts for the next loco to be built and I'm enjoying some time with the "hot stick" working on some of my part completed OO9 locos to give me a break from painting and weathering (I prefer building!)
 
Last edited:

simond

Western Thunderer
very nice, Phil. The weathering looks really good.

my Garratt resides on the shelf, with no valve gear and little or no mojo to re-start on it.

You should be proud of what you have achieved, you've built and painted two loevely locos in the time that I haven't done one!!!

cheers
Simon
 
Top