Richard's Workbench

Richard Insole

Western Thunderer
Until now, I have almost exclusively only posted about railway-related bits and bobs I have been occupying myself with, in my downtime. Until now... So, What do I currently have on my workbench? I have dabbled in some aircraft in my time, some good, some not so good. As a wee lad growing up, in our bedroom we had a multitude of aircraft hanging from our ceiling, all of which were from airshows that we had been to. I am saddened to admit that as a nipper, I did not appreciate them. The hours that went into making them, the high level of detail and care from dad. The hours and money spent on each of the delicate wonderful kits. But, hey... That's childhood. We can never truly appreciate the small things until we have a bit more humility and life experience to appreciate truly how much effort goes into making our children's lives fulfilling, inspiring and ultimately happy ones.

Skip forward a couple of decades and I find myself fondly pondering on the memories of all the aircraft on a small excursion to our local hobby shop with dad. After putting the world to rights and catching up with the state of affairs, the conversation regarding this topic is brought up. My hope was to tell dad that, although I may have never taken the opportunity to thank him all those years ago as a lad for putting together these aircraft, and I am sure that he never put in all that effort for thanks, that I truly did appreciate it.

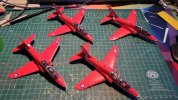
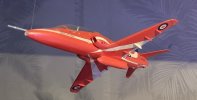
Often the case, I am inspired by looking at others' creations and kitbashing sessions on the internet and thinking to myself "that looks really good, I wonder if that kit is still about." It's only too easy nowadays to have a quick search on the interwebs and find a gem. A snazzy 1:32 scale red arrow had claimed its place on my heart and within a couple of clicks, it was on its way. Soon thereafter, the fear of ruining a perfectly good, getting scarce and somewhat expensive kit, I realised, I should probably get a nice cheap and cheerful 1:72, and have some practice first. After all, I probably should try to hone my skills on something less important. But, why follow some images or references from the internet when I remembered that we had some red arrows. I was sure that they would be safe somewhere and asked dad if they were available for my grubby mitts to have as a reference. A rummage through the loft into the depths of one corner (sorry again for that dad), revealed to us some fabulous memories all nicely packaged in one of mum's old washing baskets. Fear not, mum took the moment to remind us of the fact that they were her washing baskets.

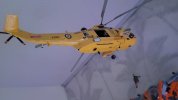
Ever grateful, and not trying to take the mickey, I came away with 3 red arrows and possibly one of my most loved childhood memories came home with me and I wasted no time displaying them. Somehow a Sea King with some light damage and included man at the end of his winch managed to find its way into the box too. How could I say no?
20220311_153056.jpg
20220311_153115.jpg

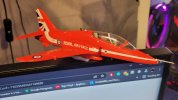
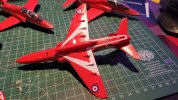
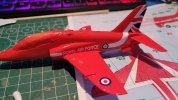
Sadly I didn't get much in the way of evidence of the progress, as to my surprise, it all went fairly well. So, without further ado, here is my 1:72 scale red arrow... there were some firsts in this build. I had previously got myself an 'entry level' airbrush. Something that I must admit, I am not very good at. However, I had upgraded my kit to a slightly better compressor that I could control the airflow/pressure of and wanted to try my hand at airbrushing Humbrol enamel paints. Mainly avoided through fear of getting it all wrong, I need not have worried quite so much.
20220312_130511.jpg
20220313_150840.jpg

So chuffed that I had actually not done too badly, and that due to the design difference from the older more 'classic' stylings of dads 3, What should I do with this one? Perhaps it could do with some accompanying aircraft?

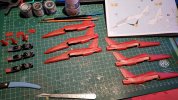
Yeeeaah... Why not!? Before you could say... "Ah bugger, I've caught this blasted virus" I found myself stuck at home with nowhere to go and the itch to do some more. 3 more to be precise.
20220324_213034.jpg

The production line was open for business and I got cracking. This time, remembering to take photos...

Cheers,
Rich
 

Peter Insole

Western Thunderer
Surely, that's three bugs you've caught now Rich?! Omicron, Airfix! and miniature railways!

The first one provides you with some degree of immunity, but the others (that you got from me) don't I'm afraid!!

I promise not to bomb this thread in the same way that I seem to have done with your garden railway ones, so will only say thanks, well done and that I am very much looking forward to seeing some more progress !!

Pete.
 

Richard Insole

Western Thunderer
I fear that it may be so many more than just three. A jack of all trades and a master of none? I jest.

Ah, by all means, feel free. I really don't mind you giving me hints and tips. I am so lucky to have a wealth of your knowledge!

Speaking of progress. Where were we? Ah yes... I know that I said yesterday, that I had remembered to take more photos. Well... I thought I did.
20220324_221439.jpg20220325_003031.jpg

I really must get better at taking photos along the way... With that said, I have got some more detailed images of one or two of them as they neared completion. I think I get/got so stuck in the journey, I forget that I have a camera and could take more along the way. I won't pretend that anything that I am doing is remotely educational of 'how to'. I seem to just trial and error in various different ways that feel right to me. There are many more talented and well-practised crafters and modellers on here who can tell you the right way.

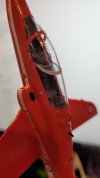
In the photo below, You can see my okay-ish attempt at painting the line on the glass that breaks up the front and aft sections of the canopy. Whilst the image highlights any imperfections I was rather chuffed that I managed to get a fairly decent line. My only real regret with the canopy is that I didn't lay down a black layer first. The red around the edges does somewhat glare at me. Nevertheless, a perfect learning opportunity to not do that again with the further three.
20220313_151629.jpg

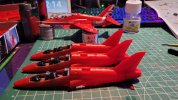
Jumping ahead again and with three mostly complete (missing some small details which still need to be added) a rather handsome set of arrows indeed. Strangely, whilst all of the kits were from Revell, the transfers in the second batch of 3 were nothing but difficult. Something about them just didn't want to come out as well as they did in the first kit. They seemed brittle and unwilling to stay stuck down often bubbling up.
20220418_002305.jpg20220418_002331.jpg

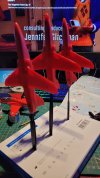
So, my plan, as it would be a bit odd to have 2 different designs, is to display the 4 a little bit different to the others that are currently flying in formation above my desk suspended by fishing wire. The plan is, to create a plinth that will affix to a wall and have them break away from each other. I will show this in a later post as I have not fully hashed out the final design of how this will be done. So far, a mock-up has shown to be rather exciting.

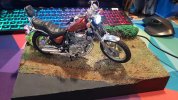
Additionally, a dear friend of mine received a Christmas present from me a couple of years ago of a Tamiya motorcycle I put together. Whilst this went down as an absolute treat, and naturally, I went overboard making it a small stand to sit on and wired in some small LED's to the front and rear lights. It also afforded his mother and father the thought of "oh, he could probably build that Vulcan that we have had in the loft for years, for us". Being the nice chap, that I try to be, I willingly said yes.
20201213_140350.jpg

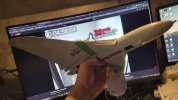
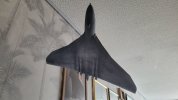
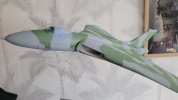
The Vulcan is a very old tooling Airfix 1:72 which has really put my limited skills to the test. I will say, it is amazing how far kits have come these days. The arrows have required so little filling, whereas the Vulcan must be mostly filler at this point.

20220221_190103.jpg

I have been given free rain on what the finished article will look like and in what configuration. Having recently acquired some fishing line, I have already taken the decision to hang her for ease of simplicity and their ability to have it displayed somewhere that doesn't require a place to put it down.

I will admit, that I have been a little on the lax side with this kit falling in and out of love with it. So, progress will, unfortunately, be slow with the Vulcan.

As I am sure you can see with these two posts already, my journey is not as linear as I would like. I do tend to find myself picking up and putting down various projects. This is in part mainly down to juggling work with family time and time to sit and play with the 101 other things I like to destress with and have a kitbashing sesh.

I hope that this isn't too archaic as a reader?

Cheers,
Rich
 

Richard Insole

Western Thunderer
Now that I have a bit of daylight in the living room, I can show a couple more shots of the 'state of play' with the various aircraft and more...

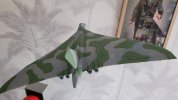
This is a shot of the top side of the Vulcan with the somewhat patchy and unfinished camo paint. It is of the XH558. Some difficulties on my part with getting the colours right, as I don't have my own reference of the actual aircraft and photos on the internet have way too much variance. In some photos, the green is looking more like a brown-green. I committed with the colours you can see in the image below but, stopped where I was with just the top as, when the paint dried, I was still unsure.
20220418_105242.jpg
20220418_105506.jpg20220418_105302.jpg

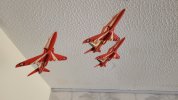
As previously mentioned by me, dads arrows fly in formation just as they did in our childhood bedroom...20220418_105335.jpg

The 1:32 scale arrow is still currently in its box waiting for the day that I get some of these projects finished. Although, fighting the temptation to get it out and start is overwhelming.

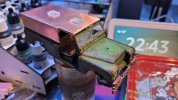
Moving onto something a little different. I have generally stayed away from cars and vehicles in the modelling world. I couldn't say exactly why but, from memory, I believe that I have only ever made one car and that was with Dad. James bonds DB5 Aston Martin. Often as I do, scrolling the internet, I came across a 1:35 scale LWB Series II Landrover. It was so well priced that I decided to give one a go. But, I wanted to challenge myself. The idea of making a pristine example of this 'Ambulance' Landy wasn't quite inspiring enough. What about dents and beaten up bodywork that we would expect to see of an old well-used landy?

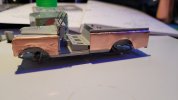
After thinking long and hard about how I could achieve this. I originally thought I could just file and sand away at the plastic to create some dents. I came up with the idea of using copper foil to achieve a more believable finish.

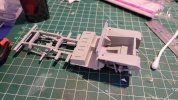
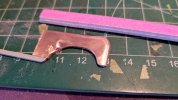
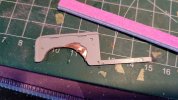
Off-camera, I was working on the bare bones of the vehicle and only really started taking photos from the first piece of bodywork using this method. Filled with confidence, I first cut a piece of the copper foil down to size and made a rough impression over the part. Once I was happy with the conforming of the foil, I then bit the bullet and hacked a chunk of the plastic out. No turning back now. And you know, It was actually pretty good!
20220407_172331.jpg
20220407_172007.jpg20220407_172031.jpg

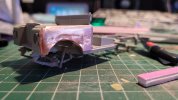
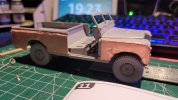
With the concept proven, I continued to the near side. I wanted more... So this time, I went a bit nuts...
20220407_183006.jpg

At this point, I had convinced myself that this had to be a 'post-apocalyptical' Landrover.
20220408_201851.jpg20220410_192307.jpg

I am not sure at what point this forum will stop me from uploading images in one post so, to save on any disappointment, I will leave this update there and follow on in another post.

Cheers,
Rich
 

Richard Insole

Western Thunderer
Thank you Mike, very kind of you.

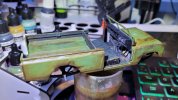
In the last photo of the Landy, this was the point just before I started with getting some colour down. I was a little worried about how well the paint would take on the copper foil. So to make doubly sure, I gave it all a good sand down to ensure that the first layer of paint would key into the copper. But, what colour would I like on this?

I started with a primer airbrushed on and thankfully after a couple of coats. The paint adhesion seemed to be good.

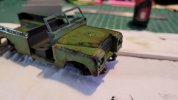
Sadly, I didn't take another photo until I had chosen the colour I wanted and had a good couple of coats on her. I had also started with some washes and dry brushing of some peeling paint. As you can see, the washes are still wet here.
20220413_135714.jpg

I wasn't totally happy with the dry brushing which was too splodgy. So, once the wash had dried, I had a quick hunt around for some sponge to use. Alas, I didn't have anything that fit that description until I remembered that I had some sponge-like face masks that might just do the trick. 20220413_154229.jpg
20220413_154116.jpg

That seemed to do the trick indeed. Suitably grotty, I was really pleased with the finish.

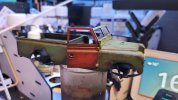
Moving onto the doors, I loved the idea that they had been salvaged from a different coloured vehicle. Although I really loved the green that I had chosen, it would certainly add some interest.
20220413_164052.jpg
20220413_190024.2.jpg

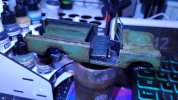
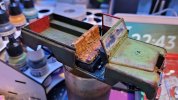
I was unsure of what else I could do with this Landy. The kit came with an injection-moulded tarp back but when I started putting it together, it didn't really fit. I would somehow need to work out a way to make it look torn and tattered. so instead, I would make something from scratch. You can see the start of this currently sitting under the Landy in the image above.
278132459_1167786724023265_8066302703332384390_n.jpg

Additionally, I was unhappy with having pristine seats and decided to paper mache them to look like they had seat covers over them that were equally as grotty as the rest of the vehicle.

277522118_1588369594852892_108725145663779748_n.jpg

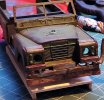
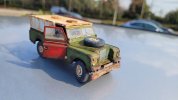
And here we have it. The final result.

20220415_145618.jpg

Overall, very pleased with the outcome of this. So, what's next. I would really like to have this in a diorama. The diorama is going to be in a post-apocalyptical setting of a zombie apocalypse. So, more to come on this one. It's a bit different and admittedly not something I would normally do but, so far has been a rather enjoyable one.

The wife is very into this style of thing, having played numerous games of a zombie nature. So admittedly, this is for her just as much as this is for me :)

Cheers,
Rich
 

Dog Star

Western Thunderer
Nicely grungy. Small point, though: body panels are aluminium. ;)
Strictly, not Aluminium rather an alloy of Ali known as Birmabright - the Magnesium content of the alloy makes the majority of the body liable to ignite when exposed to a naked flame.
Ah... showing my age here. Well, I think that means I need to do some tweaks to muddy, not rusty...
For the SIII, the chassis frame, front bulkhead and radiator panel are painted steel, the body capping strips are galvanised steel and the remainder is Birmabright (including the ventilation flaps fitted to the bulkhead.

Things change with the SIV.

regards, Graham
 
Top