Yorky D's Küchentisch - North Eastern - Boing! said the pantograph...

Weymouth Harbour
  • Yorkshire Dave

    Western Thunderer
    I took a photo of 1361 on the quay at Weymouth in August 1961. Clearly the first slide shows the back of a diesel loco so I guess I must have been on the cusp of the withdrawal of the steam locos and their substitution by diesels.

    The other photos of the Weymouth Harbour tramway I can lay my hands on immediately were these two of my dad's taken around the same time (scanned from prints). I also have my dad's negatives from this area in one of the three full boxfiles!

    Weymouth Harbour 08 1961.jpg

    Weymouth Harbour 09 1961.jpg
     
    Totternhoe Chalk Pit
  • Yorkshire Dave

    Western Thunderer
    These three slides in my dad's collection were taken by my mum..... in 1960.

    The first two were taken at Totternhoe chalk pit on the Dunstable-Leighton Buzzard branch.

    Totternhoe Chalk Pit 2 1960.jpg

    Totternhoe Chalk Pit 1960.jpg

    And the third is of some signals at Stanbridgeford on the Dunstable-Leighton Buzzard branch (my mum was a bit more artistic than my dad with photography)
    Stanbridgeford 1960.jpg
     
    Assoluta Follia
  • Yorkshire Dave

    Western Thunderer
    This is utter bonkers... as I do no have any 7mm Italian rolling stock for a layout :rolleyes: :).

    I started building a carcass from left over 2mm ply and card for another 7mm scale Brill branch style station building in order to make the creosoted shiplap variant as seen at Westcott.

    However...... the old neurons misfired and I built this instead to experiment with the Redutex textured building sheets.

    So I ordered some stone wall, red herringbone brick and pantiles and here is the result so far. I'm waiting on a delivery of pantile ridge tiles from Spain to complete the building. It is resting on it's foundations at the moment hence the gap.

    AS 01.jpg

    AS 02.jpg

    AS 03.jpg

    The doors do openAS 04.jpg

    For the station name board I found and downloaded a suitable Italian Art Deco font/typeface.
    AS 05.jpg

    Red herringbone brick used for the floor.
    AS 06.jpg

    And in keeping with the silliness I downloaded the Pompeii House of Mystery Fresco to decorate the interior walls.
    AS 07.jpg

    I did make up a later style of Italian station name board.
    AS 08.jpg
     
    Last edited:
    Siemens-Schuckertwerke
  • Yorkshire Dave

    Western Thunderer
    My primary railway interest is in electric traction and I've decided to build this little number for a small switching layout.

    It is a Judith Edge 7mm kit (rescaled from 4mm) of one of the small Siemens-Schuckertwerk BB 600v DC overhead electric locos used on the since closed Harton Colliery Railway since 1914. I was reading a bit of the history - rabbit hole #1 - of the Harton Coal Company and it turns out they had German shareholders - hence the Siemens-Schuckertwerke and AEG locomotives together with the DRG style catenary masts.

    I first thought it may have been a Siemens & Halske loco but Seimens & Halske moved their high voltage work to Schuckertwerke (who specialised in high voltage equipment) when they aquired them in 1903. Researching Siemens & Halske and Siemens-Schuckertwerke history was rabbit hole #2.

    Since my build of the Met Bo-Bo a couple of years ago I had forgotten how tedious the preparation of parts was - de-cusping. Anyway this is the state of play thus far. And apologies in advance for my 'back of the class' soldering :rolleyes: :).......

    I deviated from the instructions and replaced the cast resin headlights lights with some 4mm ID tube as I will make these working.... I was tempted to install additional central headlights in the cab fronts DB style! The bonnet covers, of which the hatches were made up from laminates, are not yet fixed as access is required to fit the buffers and make up the lighting circuit board.
    Siemens 01.jpg

    Siemens 02.jpg

    The coupling is a combination of the CPL SR screw coupling and plain links.
    Siemens 03.jpg

    The drive - as usual more experiments. The traction motor housings are made up from 1/8" and 1/2" ID brass tube soldered together and the coreless 12v 12 x 10 motors are from Nigel Lawton. The 1/2" ID brass tube gave me a 12.7mm ID as I couldn't find any 12mm ID brass tube. The gears are from a cheap 200 piece set picked up on fleabay. Again Alan Gibson 4mm scale hornblocks have been used which is another deviation from the instructions.

    I haven't tested it yet and know it will run fast which I should be able to control once I have fitted a DCC decoder. Slaters 2'6" wagon wheels are used which is 762mm - generally this type of werklok had 750 or 800 mm diameter wheels.
    Siemens 04.jpg

    This just shows how diminutive the loco is compared to a LT hopper wagon.
    Siemens 05.jpg
    I'm waiting for some buffers as the ones in the kit are cast resin (as are the axleboxes) and there is also the pantograph to build.
     
    Siemens-Schuckertwerke
  • Yorkshire Dave

    Western Thunderer
    This is a couple of evenings work.

    Building the pantograph....

    Siemens 06.jpg
    Siemens 07.jpg

    It is built up from nickel silver etch and wire - mostly as per the instructions but....:rolleyes:

    From working with pantographs in HO scale I added a height restrictor to prevent the pantograph resembling a witches hat in profile.
    Siemens 08.jpg

    Added a cross brace from brass tube - on the prototype this is just a bar. The ends of the upper arms clip into this.
    Siemens 12.jpg

    It is only temporarily mounted on the roof as is the roof on the model.
    Siemens 09.jpg

    The roof requires it's arc flattening to match the cab ends. The collector reaches a scale 17 ft above rail height with this small loco and when I get around to building a layout for this I'll have the contact wire at a scale 15 - 16 ft above rail height.
    Siemens 11.jpg
    Siemens 10.jpg
    It'll look a whole lot better with a green body, black demarkation line on the bottom line of rivets above the running plate, red underframe and pantograph....:)
     
    Siemens-Schuckertwerke
  • Yorkshire Dave

    Western Thunderer
    An update on the Siemens Lok.....:)

    I wasn't happy with the traction motor drive experiment as I could not fine tune the motor drive parameters in the decoder. Not to be deterred I made up a motor block from brass strip and scrap etch.

    A Mashima motor from my stock was used together with some cheapo Chinese gears and 2mm ball race bearing together with Slaters 2'6'' wheels and 2mm steel rod for the axles. Once the gear, 2mm ball race bearings and the Alan Gibson hornblocks were installed the Staters wheels were pressed onto the axles. This 'block' is suspended in the inner frame using Alan Gibson 4mm scale hornblock guides. One axle has a +0.5/-0.5 mm rocking movement to accommodate uneven track. This was achieved by elongating the holes in the frame to allow the ball race bearings some movement as they are friction fitted to the 2mm axle.

    Siemens 13.jpg

    It has been painted with AK Interactive Gen3 acrylic paints and glazed. The axleboxes supplied were, quite frankly, poor resin castings and to overcome this I filed some whitemental wagon ones I had in the spares box to the Siemens style.

    The cab fittings and lighting is yet to be installed and the lenses will be made up from slices of 4mm acrylic rod and utilise small surface mount LEDs....... and there's a few additional details to add.
    Siemens 14.jpg

    Siemens 15.jpg

    Siemens 17.jpg

    I'll be making up some tramway style catenary masts from sleeved brass tube....
     
    Br E69
  • Yorkshire Dave

    Western Thunderer
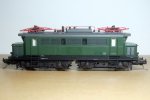
    Picked this up on a well known auction site as the only bidder.... (however my Elok of choice would be the E44).

    A DB Br E69 Bo Elok which was originally introduced in the Pola Maxi range in 1969.

    This extract is from the 1972 catalogue found in conrad-antiquario Katalogarchive who have a host of other early model and toy catalogues.

    The range passed to RaiMo then on to Biller-Bahn - available as kits and no longer produced.

    lb43.jpg

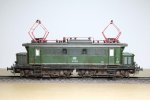
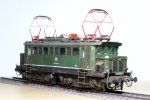
    And the model.... which I believe is built from either the RaiMo or early Biller-Bahn kit. Surprisingly the model has nice sprung buffers.

    E 69 01.jpg

    The drive is an original Albert Munz Modellbahnantriebe developed for the kit and is milled from a lump of brass with a brass side keeper plate to hold in the spur gears with a Faulhaber motor. Complete with traditional (then miniature) incandescent bulbs.

    E 69 02.jpg

    Alas the model has one fault :rant:- it's 20mm too long over the body and I think it was a scaled up version of the original Fleischmann HO model E69 (below). I cannot do a cut 'n' shut to shorten the bonnets as the body has been stretched over it's length resulting in a longer cab.

    4300.jpg

    Scale HO E69s were produced by Roco, Brawa and Märklin/Trix (E69 02/03); Piko and Fleischmann (E69 05) and Westmodell (E69 04) before rebuilding into a steeple cab. The original E69 04 was one of two similar locomotives rebuilt from one half of this prototype. As can be seen from this website the other rebuilt loco resides in the Technikmuseum am Anhalter Bahnhof, Berlin.


    However, the chassis and wheelbase are correct - the side came off in my hand, honest guv :rolleyes: (I scaled up a drawing I found on t'interweb).
    E 69 03.jpg

    What makes me believe this is an early RaiMo or Biller-Bahn kit is the Sommerfeldt Stromabnehemer. The head on the model (left) is flimsier than the later version (right).
    E 69 04.jpg


    What to do :eek:.... build a new body to scale.... and shorten the upper part of the chassis to suit....

    .....or leave the model as is for sentimentality since these were introduced by Pola while we were stationed in Germany and my dad (then attached to RAF Strike Command Meteorological Office) was on the verge of purchasing these O gauge models. Instead he bought HO - Märklin Hamo* Br 24, Fleischmann Br 70 and a Liliput Br 38. * Hamo was the Märklin 2 rail range at the time.


    Mmmmmm.
     
    Br E69
  • Yorkshire Dave

    Western Thunderer
    Carrying on with this....

    These recently landed - both by the same author with the GeraMond publication predating the EK book.

    E 69 05.jpg

    Although there were only five locomotives classed E69 all are different - rather like LBSCR Terriers! Upon further reading E69 02 and E69 03 were modified from their original LAG condition in 1936 and 1939 respectively. Later again in 1954 when they were converted from 5.5kV AC to 15kV AC by DB. The louvres appeared after 1936 (1939 for E69 03) which were subject to variance during works visits.

    It was also interesting to read the Murnau-Oberammergau electric power was supplied by a hydro power station built along the line in 1905 .

    Anyway with further faffing I removed the moulded handrails, steps and brake gear which will be replaced in due course along with air tanks, plumbing, etc.

    E 69 06.jpg

    At this point I removed the lower portion which makes E69 02 look like the original LAG lok before the 1936 rebuild increasing the overall height. ...looks better proprotioned in this state.

    E 69 07.jpg

    However, an Event Horizon beckons.... which I'll have to think about before crossing :rolleyes: :confused:.

    I have worked out with 8 cuts centred around the cab I can reduce the body length by around 10mm... (leaving the chassis and sill intact and without hacking the drive chassis block) - ideally I need to lose 20mm. Shortening the drive chassis will be difficult as the solid brass Albert Munz Modellbahnantriebe was designed to fit this model and would require sections lopping off each end to retain the sprung buffers and couplers.

    Loss of rivets is not an issue as I can replace these with the Archer Decal rivets or even easier - leave it as the pre 1936 LAG lok with no rivets.

    E 69 08.jpg

    A correctly scaled model would entail a new scratchbuilt body and drive chassis.

    While searching t'interweb for E69s and industrial electric locos this nice looking Postamt Berlin E-lok popped up among others....:)
     
    Br E69
  • Yorkshire Dave

    Western Thunderer
    Didn't take much convincing to step beyond the Event Horizon.....;)

    The E69 has duly been sliced and diced and managed to lose 9.5 mm from the overal body length - which is now 11 mm rather than 20mm too long. In addition the overall length of the chassis and buffer beams was reduced by the same amount.

    Paint has been applied to the wounds to see if any remedial work is required.

    E 69 09.jpg

    Here's the einst und jetzt.....
    E69 10.jpg
     
    Siemens-Schuckertwerk
  • Yorkshire Dave

    Western Thunderer
    I wasn't too happy about the running of this - not quiet enough, .... and the cheapo Chinese gears split on the axles.

    Siemens 13.jpg

    So I found some Tenshodo 14:1 gears in my stash and used these instead. It did mean a bit of dismantling and re-assembly. The opportunity was taken to utilise a Tramfabriek 10x20 coreless motor which has 1mm shafts, make a new motor mount and making the cab floor removable.

    Siemens 18.jpg

    Siemens 19.jpg

    Siemens 20.jpg

    It now runs a lot sweeter and quieter, in fact the only noise is from the wheels on the track. :)
     
    Last edited:
    AL1 Class 81
  • Yorkshire Dave

    Western Thunderer
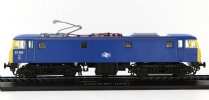
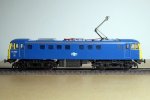
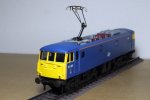
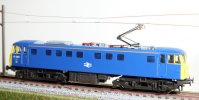
    Picked up one of these recently - an Atlas Editions HO scale BR class 81 (AL1).

    m6hblk6c.jpg

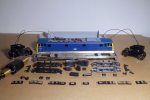
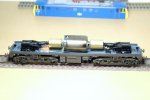
    No sooner it was delivered I stripped it down ready for motorising. The donor power bogies/trucks, motor and drive shafts are from a secondhand Hornby Class 67 - of which the trucks are spot on for a 10' 9'' wheelbase.

    AL1 01.jpg

    The power trucks were re-wheeled with Hornby 14.1mm coach wheels which scales out at 4' in HO. The pantograph has been replaced with a Sommerfeldt Faively type however the contact head is wrong and I'll be addressing this in due course. Glazing has had a black marker pen ran around the edges and the underframe detail has been made into boxes then filled with lead pellets. The thin cast underframe has been strengthened with 3mm brass angle.

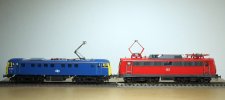
    This photo (taken on my mobile) shows how small the BR class 81 is compared to a DB Br141 (left) and DB Br110.1 (right).

    AL1 02.jpg

    The respective power was Br141 2,400kW, class 81 2,390kW and Br110.1 3,700kW with the class 81 being the BR equivalent of the DB Br110.1 for mainline passenger work as both were built around the same time. The DB Br 141 was built for branch line duty. (The Br110.1 is currently on my workbench hence being devoid of pantographs)
     
    Br 110.1
  • Yorkshire Dave

    Western Thunderer
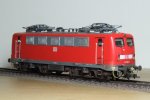
    For 30 pieces of silver of the Queen's realm I recently acquired this from a well known auction site advertised as 'Rocco electric diesel locomotive' :). Whether it was a runner or not it didn't really matter as it would have provided me with a spare Roco drive - providing there were no split gears - which there wasn't.
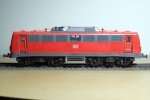
    110 01.jpg

    As it tuns out the loco was originally produced for a Roco Digital start set and not only do I have a working loco but also a Roco-ESU lokpilot decoder to boot. When I interrogared the decoder on Lokprogrammer 5 it was not supported, however, I was able to interrogate the decoder on old version of Lokprogrammer. I suspect this is a v2 lokpilot as it would have been read by Lokprogrammer 5 if it was v3.5.

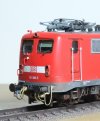
    Anyway, to bring it up to my standards I stripped down the body, placing aside the insulators, and started to carve off the moulded handrails. These were replaced with brass wire and I've also started throwing Weinert detail parts at it - so far new buffers and coupling hook socket from my spares box. The loco I'm modelling retained it's original handrails.
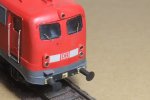
    110 05.jpg

    I also reworked the centre window in the electric compartment so it is flush and removed the centre glazing bar. In addition the moulded windscreen wipers were carefully carved off the glazing and then polished with manicurists nail buffers to remove any last traces.

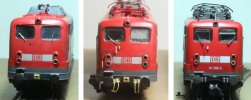
    The biggest hurdle was the front end and glazing as both the Br 141 and Br 110.1 are Einheitsloks. Althought the glazing is the same size in both models the 141 windows appear larger.
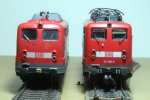
    110 03.jpg

    I wasn't happy with the cab window surrounds so I carried out a modification using a tool made up from a piece of scrap brass to add a rebate around the front frames as seen on the Einheits cab. It did take several attempts with some help from some Milliput and a styrene template to get it right.

    Not brilliant by any stretch of the imagination but an improvement from the original surrounds on the left, modified in the centre and on the right the Br 141 for comparison (I also used this for the measurements).
    110 08.jpg

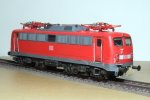
    And more parts have been thrown at the Elok, namely the waist level UIC sockets, front hand grabs, UIC buffer steps, air hoses and a relocated short antenna on the no.2 end. The low gutter is correct for version I'm modifying.

    Some finer roof insulators have been installed and there is further roof detail to add.
    110 07.jpg

    Should Roco bring out the re-tooled Br 110.1 in verkhersrot then I'll maybe snap one up - in the meantime this will do
     
    AL1 Class 81
  • Yorkshire Dave

    Western Thunderer
    Back to AL1 (class 81)......

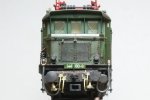
    The chassis has been put back together using the motor and trucks from the Hornby class 67, with the HO class 81 sideframes attached.

    .....and somehow I need to shoehorn in a decoder and speaker..... as well as some weight. The top of the motor is about 1-2mm below the sunken electric compartment roof, the latter being a feature of BR 25kV electrics..... loading gauge and all that jazz
    :)
    .
    AL1 05.jpg


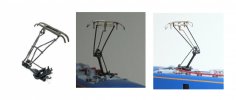
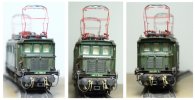
    I also messed about with the pantograph and replaced the Sommerfeldt SNCF contact head with one I found in my spares from an old Bachmann 4mm cl 85. The Original Sommerfelt einholstromabnehmer (photo from Sommerfeldt website) is on the left and the two on the right are after my tinkering to get it to look like a Stove Faively pantograph. Not all of them had the additional bracing.
    AL1 07.jpg

    And the state of play thus far. Windscreen wipers are from A-Line (found them in my spares box!) and I added the rainstrips over the doors. I also touched up the yellow and blue paintwork around the windows as the original factory masking wasn't too great.

    AL1 03.jpg
    AL1 04.jpg

    This just shows the BR and DB loading gauges - both locos are HO scale.

    AL1 06.jpg

    There is still plenty to do on the cl 81 namely replace the front handrails, add coupers, bufferbeam pipework and check out the headcode box as to whether it was yellow or black on this loco.
     
    Catenary
  • Yorkshire Dave

    Western Thunderer
    Taken up a new hobby - knitting.....

    In other words reaquainting myself with the hot stick, solder and some wire....

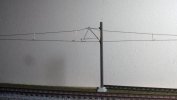
    I decided to add some catenary to the HO gauge test plank I've had for years so I purchased some Peco (by Sommerfeldt) catenary masts albeit based on the UK mk.3 25kV masts.

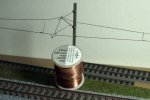
    The masts were installed and then the hot stick waved around, I couldn't find my 0.3mm tinned copper wire but found this on my workbench. .....Some 28 gauge (0.32mm) copper wire I aquired from a jewellery craft shop years ago.

    Cat 01.jpg

    This is a crude attempt at scratch building the contact and catenary wires since building them for a HO Swiss layout back in the last century (below) - not the best photo but I don't have many of this layout I built.

    IMG_0095.jpg

    And it shows, but with a bit more practice it'll become better.

    Cat 05.jpg
    Cat 03.jpg
    Cat 04.jpg

    This is the full length (almost) of the catenary.

    Br 420 01.jpg

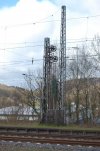
    The problem is the tension of the contact wire as I tied it off to a brass mast at either end. On the DB layout the catenary will be tensioned with sprung tensioner assemblies similar to the prototype (below) where both the contact and catenary wires are tensioned. This is one of many photos I took during one of my visits to Germany.

    DSC_00930087A1X.jpg

    And finally the AL1 has something to pose under....

    AL1 08.jpg
     
    Br 420
  • Yorkshire Dave

    Western Thunderer
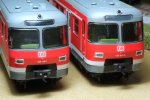
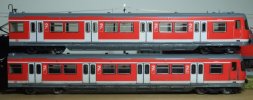
    My latest aquisition is this Roco Br 420 in verkhersrot, being the variant I've been after for a while. Again, I picked this up cheaply and is fortunately numbered and lettered for DB R Süd-Bayern, München :).

    Br 420 01.jpg

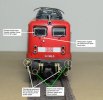
    And I have already started improving the model by removing the moulded windscreen wipers by my usual method of carving them off. Then polishing the glazing with manicurists nail files and buffers to remove any last traces.

    Here's the after and before comparison. Holes have been drilled for the new windscreen wipers and there's loads more to do yet to achieve the level of detail I require.

    Br 420 04.jpg

    This unit makes it the 7th DB item on the workbench - all of which are in various stages of detailing. I've yet to place orders with Wagenwerk and Roco for more detail parts.... :)
     
    Br 420
  • Yorkshire Dave

    Western Thunderer
    Some more...

    I had identified areas I could bring the model up to date into the 2020s.

    Br 420 03.jpg

    However, after some further research all it not as it seems. The later refurbished units received outward opening plug doors and to replicate this on the model means cutting out the doors and moving them outwards to be flush with the bodysides. A step too far as it would mean weakening the body and filling the gaps left by the saw, let alone the different type of door handles!

    Therefore, I've decided to leave as is for 2003..... but.....

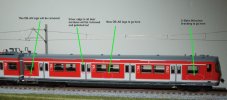
    ...in order to improve the look I took a panel line scriber (as used by aricraft modellers) to the door frames and scribed a panel line on the chamfer twixt door and bodyside (circled right). I also removed the silver/chrome rim on the door windows (left) and polished them to remove any trace of the rim/frame.

    Br 420 07.jpg

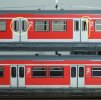
    A dark wash was applied in the new door panel lines giving the impression the door slides behind the bodyside. This shows the modified (bottom) and unmodified (top) steuerwagen. The bottom vehicle has also received washes of Industrial Grime and Black Brown on the lower half of the bodyside and underframe. Just enough for the clean 'in service' look

    Br 420 05.jpg

    These are the Items I've used. The panel scriber is in the silver handle and the washes are from Modellers World - a Polish modelling supplier.

    Br 420 06.jpg
     
    Br 144 (E44)
  • Yorkshire Dave

    Western Thunderer
    Another day another loco....:)

    This started out as a Roco model and I had prepared it for renumbering as 144 090-8. A BD München, Bw Rosenheim Wendezug lok which retained it's SBS 11 stromabnehmer and original panelling.

    144 090-8 01.jpg

    Decals duly arrived and now renumbered, re-lettered and a white stripe decal. I have also applied some road dirt commensurate with the period I'm operating - late 1970s.

    144 01.jpg

    In addition Weinert detail parts were thrown at the buffer beams and on the front of the lok - air brake lines, Wendezug (push-pull) equipment and electric train heating plugs and sockets.

    The brass representation of the cables were cut off from the wendezug and electric heating castings. A 0.3mm hole drilled in the ends of the plugs and 0.3mm brass wire was soldered into the holes to provide a fitting for the silicone tube. The tube is 0.3mm ID carp fishing rig silicone tube - slightly overscale but serves its purpose as can be seen later. I also made up some small brackets from scrap nickel silver etch to mount both the wendzug and electric train heating plugs on the sill.

    144 02.jpg

    This montage shows the BR 144 on a left and right curve and on straight track (centre) and the flexibility of the fine silicone tube.
    144 03.jpg

    Just needs the detail touching up with paint - then ready for the road.
    144 04.jpg
     
    Schrankposten
  • Yorkshire Dave

    Western Thunderer
    Something I've completed over the last few weekends to see if my building weathering techniques could be scaled down from O to HO.

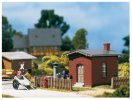
    It's an Auhagen HO scale plastic kit of a Schrankposten (crossing keepers hut).

    The roses (of the non-chocolate variety :)) are from Busch scenics.

    Auhagen 3.jpg

    This has a very Königlich Sächsische Staatseisenbahnen look which is not really in keeping with my proposed München area based layout - not surprising really given Auhagen emanated from the former DDR. On the other hand it could pass for a Preußische Staatseisenbahnen Schrankposten.

    This model may end up being a shelf queen rather than used on a diorama or layout.

    Started off like this (Auhagen catalog photo).....
    Augahen 3 Track inspector’s house.jpg
    I
     
    Mk2B
  • Yorkshire Dave

    Western Thunderer
    Where work has allowed I have been reworking these Lima HO BR Mk2b coaches over the past month or so.

    Mind you they are definately not nor come anywhere near the elevated levels of @LarryG masterclass of coach building and finshing.

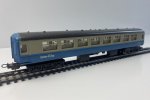
    The Lima 1970's HO models are of ther era and I acquired five (three TSOs, one FBK and a FK) for the princely sum of £25. They are dimensionally accurate and require some work to bring them up to a reasonable standard.

    Firstly the moulded paint demarcation line (TSO, BFK and FK) and the raised beading for the first class stripes (BFK and FK) were removed. The Lima paint finish was removed as far as possible and the coaches reparayed BR blue and grey. Once painted they were lined lettered and numbered using 4mm Fox decals.

    Original coaches looked like this. (except mine were not missing any gangways)...

    s-l1600.jpg

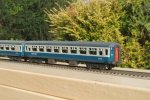
    By the time I had fiddled, messed, faffed :) around they are looking like this so far... the grey and lining does wrap around part way around the door ends.

    Mk2b 01.jpg

    The coaches will be flush glazed and I've yet to sort out the brake blocks on the bogies to move them in line with the wheel treads. Also Symoba close coupling units have been fitted, the ride height adjusted and new RP25 wheels installed.

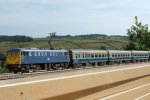
    At the end of the day it makes a late 1970's early 80's train for the HO class 81 (AL1)

    Mk2b 03.jpg

    Mk2b 02.jpg
     
    Top