Hi again,
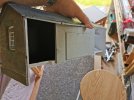
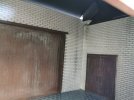
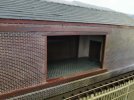
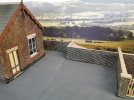
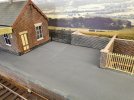
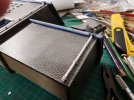
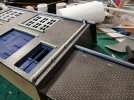
Next update is the platform surface. I used some green abrasive paper from a roll, not really sandpaper, I thin it is referred to as oxide paper? The platform edging was some paving sheet I had cut through the middle of the slabs to creat long thin stones.
View attachment 192712
View attachment 192713
I then mixed some grey and black acrylic to make a variable grey surface.
View attachment 192714
View attachment 192715
Regards
James
You are using an out of date browser. It may not display this or other websites correctly.
You should upgrade or use an alternative browser.
You should upgrade or use an alternative browser.
7mm KNIGHTACOTT - 7mm BLT
- Thread starter jamest
- Start date
Richard Gawler
Western Thunderer
James, I do like the effect of the green paper on the platforms. I think it is aluminium oxide paper. It looks the part and it is not going to shed loose bits 

jamest
Active Member
Thanks Richard,
Its probably a bit over-scale ‘rough’ even in O gauge, but I like the look of it.
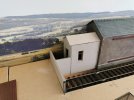
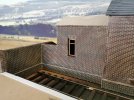
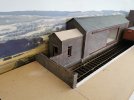
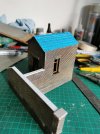
On to the goods shed in the bay. You saw the basic shape in an earlier post and I hinted at a change and lengthening the siding a little. I added an office with a wall and entrance against the back scene. It is the same brick sheet and painting technique used on the bridge. This time I have used windows from L Cut creative. The building shell is 2mm card laminated to double thickness in certain areas.
The siding was extended by approximately the length of the office. This also gives me enough room past the shed opening for two 12t vans.
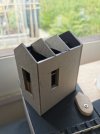
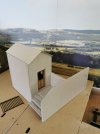
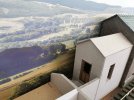
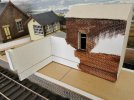
I used thin card for the tiles….to be painted grey!
Regards
James
Its probably a bit over-scale ‘rough’ even in O gauge, but I like the look of it.
On to the goods shed in the bay. You saw the basic shape in an earlier post and I hinted at a change and lengthening the siding a little. I added an office with a wall and entrance against the back scene. It is the same brick sheet and painting technique used on the bridge. This time I have used windows from L Cut creative. The building shell is 2mm card laminated to double thickness in certain areas.
The siding was extended by approximately the length of the office. This also gives me enough room past the shed opening for two 12t vans.


I used thin card for the tiles….to be painted grey!

Regards
James
Joe's Garage
Western Thunderer
I like the use of the green oxide paper James, what grade is it? Around here we have an outlet called "Properjob" and they sell this quite cheaply. Multi uses as you can use it for carpentry and other Sanding jobs. As you say it does not shred either.
Julian
Julian
jamest
Active Member
Hi Julian,I like the use of the green oxide paper James, what grade is it? Around here we have an outlet called "Properjob" and they sell this quite cheaply. Multi uses as you can use it for carpentry and other Sanding jobs. As you say it does not shred either.
Julian
I‘ll check the grade and let you know….at a guess I’d say it was 200 grit.
I tried using fine sand on glue but it was messy and not as flat…I was wary of painting it as I’ve used printed texture sheets in OO, but Im pleased with the results.
Cheers
James
jamest
Active Member
Hi all,
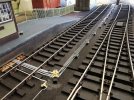
Next is the point rodding. I’m sure it’s not 100% prototypical but is a representation that is necessary for visual interest I feel. I have used the wills OO kits in the past and have seen them used in O gauge as I understand they are a little over scale, but I have gone for something different in O.
I have used the components available from Wizard Models. I feel doing it pre ballasting is crucial so the components are raised on cut up pieces of sleepers. Under the track I have used plastic rod so as not to experience problems with shorting.
I can’t remember if I mentioned this before but I have opted for a longer platform and A signal box mounted on the platform. This means i have committed to the point and signal rods and wire emerging from under the platform.
You will also see I have installed the peco spear fencing along the back of the bay platform.
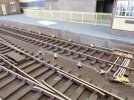
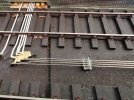
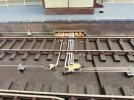
The rodding goes off scene to control the points off scene.
Cheers
James
Next is the point rodding. I’m sure it’s not 100% prototypical but is a representation that is necessary for visual interest I feel. I have used the wills OO kits in the past and have seen them used in O gauge as I understand they are a little over scale, but I have gone for something different in O.
I have used the components available from Wizard Models. I feel doing it pre ballasting is crucial so the components are raised on cut up pieces of sleepers. Under the track I have used plastic rod so as not to experience problems with shorting.
I can’t remember if I mentioned this before but I have opted for a longer platform and A signal box mounted on the platform. This means i have committed to the point and signal rods and wire emerging from under the platform.
You will also see I have installed the peco spear fencing along the back of the bay platform.


The rodding goes off scene to control the points off scene.

Cheers
James
jamest
Active Member
Hi all,
Next up is a warehouse for the left hand end of the layout. I went for a fair price models kit as a base. You get the basic structure and the doors and windows - and you add the finish of your choice.
I have gone for more brown brick! I will add the smaller building on the side but plan to make it a plain brick extension with no windows.
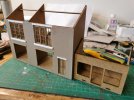
The basic brick colour added.
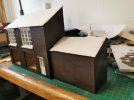
Mortar applied. I have used wills OO corrugated sheet for the extension and my own thin card slates for the main roof.
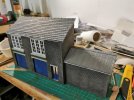
I try to pick out slightly different tile colours before washing over to blend it.
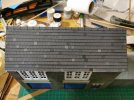
This is how it will sit on the end of the layout. The wall extends out from the building and up onto the platform. I’ll explain the ballasting and yard covering later!
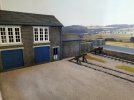
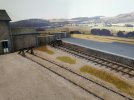
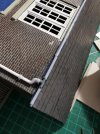
I used Modelu guttering products….they are very good.
Regards,
James
Next up is a warehouse for the left hand end of the layout. I went for a fair price models kit as a base. You get the basic structure and the doors and windows - and you add the finish of your choice.
I have gone for more brown brick! I will add the smaller building on the side but plan to make it a plain brick extension with no windows.

The basic brick colour added.

Mortar applied. I have used wills OO corrugated sheet for the extension and my own thin card slates for the main roof.

I try to pick out slightly different tile colours before washing over to blend it.

This is how it will sit on the end of the layout. The wall extends out from the building and up onto the platform. I’ll explain the ballasting and yard covering later!


I used Modelu guttering products….they are very good.


Regards,
James
jamest
Active Member
Hi all,
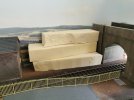
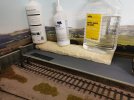
Before ballasting could commence I wanted to get the basic terrain in place. First I added the front fascia out of 6mm ply so I could have a hard profile for the front embankment. I then glue in some insulation off cuts I have with no more nails adhesive.
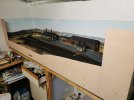
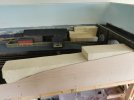
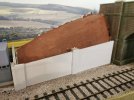
I have played with the wall around the right hand side of the station as can be seen below. This will allow a shelter to sit better in this space over the board join. The break in the walls will be hidden by said shelter…..
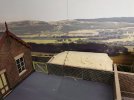
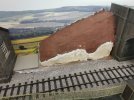
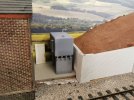
I then cut the foam to shape (the platform bit was cut before gluing) and cover with a layer of plaster cloth. I then paint it with an emulsion brown tester pot. For the ground between the road and the goods shed at the back I decided to add a retaining wall to hide the steep slope. I also cut the hill short of the goods shed (it was going to taper out to the shed) so I could insert a oil tank (mudmagnet models 3D printed one) and gated wall against the back-scene…
Regards
James
Before ballasting could commence I wanted to get the basic terrain in place. First I added the front fascia out of 6mm ply so I could have a hard profile for the front embankment. I then glue in some insulation off cuts I have with no more nails adhesive.


I have played with the wall around the right hand side of the station as can be seen below. This will allow a shelter to sit better in this space over the board join. The break in the walls will be hidden by said shelter…..

I then cut the foam to shape (the platform bit was cut before gluing) and cover with a layer of plaster cloth. I then paint it with an emulsion brown tester pot. For the ground between the road and the goods shed at the back I decided to add a retaining wall to hide the steep slope. I also cut the hill short of the goods shed (it was going to taper out to the shed) so I could insert a oil tank (mudmagnet models 3D printed one) and gated wall against the back-scene…


Regards
James
jamest
Active Member
Hi all,
An update on ballasting.
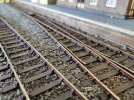
I raised the level around the sidings with 2mm card as this area was planned to be covered with chinchilla dust or wood burner ash. I started off using Javis medium scatter but it didn’t look quite fine enough so after a brave friend pointed out it didn’t look quite right I decided to wet and dig and hoover it all up and use some woodland scenics medium grey instead.
Here is the javis stuff
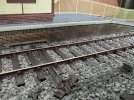
After the reworks!
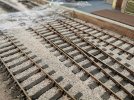
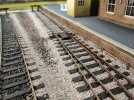
In the yard area I’ve used a combo of a chinchilla dust base and a rubbed in wood ash top.
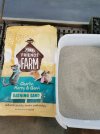
Base coat flooded with PVA
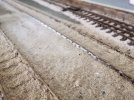
Dried out
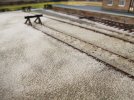
The wood ask top coat applied. I tend to brush on scenic glue and dust it with ash.
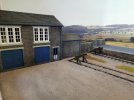
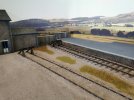
It will get weathered later.
Regards,
James
An update on ballasting.
I raised the level around the sidings with 2mm card as this area was planned to be covered with chinchilla dust or wood burner ash. I started off using Javis medium scatter but it didn’t look quite fine enough so after a brave friend pointed out it didn’t look quite right I decided to wet and dig and hoover it all up and use some woodland scenics medium grey instead.
Here is the javis stuff


After the reworks!


In the yard area I’ve used a combo of a chinchilla dust base and a rubbed in wood ash top.

Base coat flooded with PVA

Dried out

The wood ask top coat applied. I tend to brush on scenic glue and dust it with ash.


It will get weathered later.
Regards,
James
jamest
Active Member
Hi,
Double updates today!
Off on holiday for a week so there will be a gap.
Here is the first green, and how I changed the front embankment. First here it is after shaping to the front fascia and sloping to the trackside, then plaster cloth, brown paint and World War Scenics static grass.
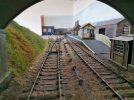
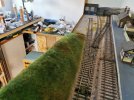
But I decided I preferred the idea of having a small retaining wall along the track edge. So out with the wife’s bread knife and a slice was cut out.
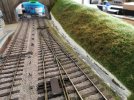
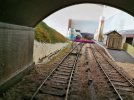
Then a wall added with 2mm card doubled up and faced with brick sheet. The remnants of the previous grass line serves as weeds and vegetation between the wall and track.
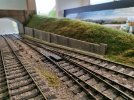
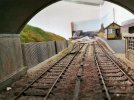
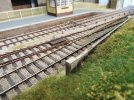
I have also painted the other wall. Added a rear wall with a gate against the back-scene and painted the tank. I have applied the same basic layer of grass here too. Will blend with the back-scene later.
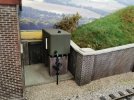
Regards
James
Double updates today!
Off on holiday for a week so there will be a gap.
Here is the first green, and how I changed the front embankment. First here it is after shaping to the front fascia and sloping to the trackside, then plaster cloth, brown paint and World War Scenics static grass.


But I decided I preferred the idea of having a small retaining wall along the track edge. So out with the wife’s bread knife and a slice was cut out.


Then a wall added with 2mm card doubled up and faced with brick sheet. The remnants of the previous grass line serves as weeds and vegetation between the wall and track.


I have also painted the other wall. Added a rear wall with a gate against the back-scene and painted the tank. I have applied the same basic layer of grass here too. Will blend with the back-scene later.

Regards
James
jamest
Active Member
Hi all,
Next update…..the construction of a shelter for the goods shed.
Most seem to have a way of keeping things dry while unloading, and this is based on various examples I’ve seen.
The basic structure is I section plastic strip and flat section. The roof has a card underside and corrugated top.
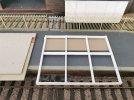
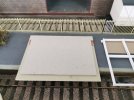
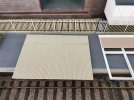
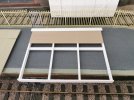
Here it is mocked up against the shed.
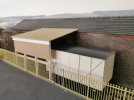
I then cut into the tiles on the main roof to bed in the canopy.
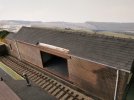
And then painted, weathered with powders and added guttering.
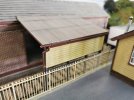
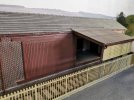
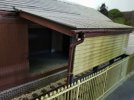
Regards
James
Next update…..the construction of a shelter for the goods shed.
Most seem to have a way of keeping things dry while unloading, and this is based on various examples I’ve seen.
The basic structure is I section plastic strip and flat section. The roof has a card underside and corrugated top.


Here it is mocked up against the shed.

I then cut into the tiles on the main roof to bed in the canopy.

And then painted, weathered with powders and added guttering.


Regards
James
jamest
Active Member
Hi again,
Getting close to catching up with my actual progress now.
Time for next, and hopefully final, change of signal box. My planning skills have been found out here as I was originally was going for a signal box off the platform, and then switched to a peco platform one.
Now I have gone for a goods shelter/canopy, and already set the box position with the point rodding, I have a problem. The box needs to sit forward to avoid a clash with the canopy and someone pointed out it was not allowed to have structures on the platform right on the edge like this……
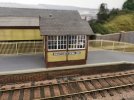
With the restrictions I placed on myself I decided another box purchase was the lesser of the evils involved! So I went with a kit based on Staverton from York modelmaking. It is a very nice kit and very good value for money. Here it is in place with a self adhesive sign from scale model scenery. I’ve also added some modelu guttering and used the door from the peco kit as I liked it a bit more.
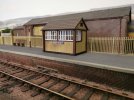
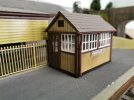
Getting close to catching up with my actual progress now.
Time for next, and hopefully final, change of signal box. My planning skills have been found out here as I was originally was going for a signal box off the platform, and then switched to a peco platform one.
Now I have gone for a goods shelter/canopy, and already set the box position with the point rodding, I have a problem. The box needs to sit forward to avoid a clash with the canopy and someone pointed out it was not allowed to have structures on the platform right on the edge like this……

With the restrictions I placed on myself I decided another box purchase was the lesser of the evils involved! So I went with a kit based on Staverton from York modelmaking. It is a very nice kit and very good value for money. Here it is in place with a self adhesive sign from scale model scenery. I’ve also added some modelu guttering and used the door from the peco kit as I liked it a bit more.


jamest
Active Member
Hi all,
An update on the track weathering.
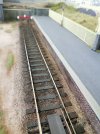
For this I painted some ammo track wash (really meant for tank tracks) within the width of the sleepers. I then used a mix of brown and black humbrol powders. I loaded the brush and brushed along the track. It dirtied up the track and worked underneath and I’m quite pleased with the results. I think the trick is to keep going with multiple layers until you are happy. I then used a big make up brush to generally blend it all in. Finally sealing it with Matt varnish from a can.
I’ve tried to make it heavier where engines would sit in the headshunt.
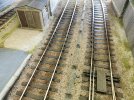
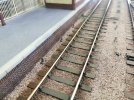
Regards
James
An update on the track weathering.
For this I painted some ammo track wash (really meant for tank tracks) within the width of the sleepers. I then used a mix of brown and black humbrol powders. I loaded the brush and brushed along the track. It dirtied up the track and worked underneath and I’m quite pleased with the results. I think the trick is to keep going with multiple layers until you are happy. I then used a big make up brush to generally blend it all in. Finally sealing it with Matt varnish from a can.
I’ve tried to make it heavier where engines would sit in the headshunt.


Regards
James
Joe's Garage
Western Thunderer
This is coming on very nicely James. I do like the simplicity of the whole layout.
Thanks for posting
Julian
Thanks for posting
Julian
DougT
Western Thunderer
Hi James, I’m really enjoying this thread, it’s great to see a layout come together so quickly and effectively
I haven’t been on here for some time and my mojo upped sticks and left even longer ago, your thread has given me a lot of inspiration that my own effort of a layout really ought to be progressed. What’s helped is that they are of similar(ish) dimensions so I can easily relate the effort and progress to what I need to do! I’m looking forward to the next instalment.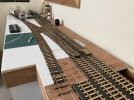
I haven’t been on here for some time and my mojo upped sticks and left even longer ago, your thread has given me a lot of inspiration that my own effort of a layout really ought to be progressed. What’s helped is that they are of similar(ish) dimensions so I can easily relate the effort and progress to what I need to do! I’m looking forward to the next instalment.

Last edited:
Dan Randall
Western Thunderer
That looks interesting Doug. Do you have a layout thread, or any other pictures to share? Speaking of pictures, any chance you could post them full size, rather than as thumbnails please?Hi James, I’m really enjoying this thread, it’s great to see a layout come together so quickly and effectively
I haven’t been on here for some time and my mojo upped sticks and left even longer ago, your thread has given me a lot of inspiration that my own effort of a layout really ought to be progressed. What’s helped is that they are of similar(ish) dimensions so I can easily relate the effort and progress to what I need to do! I’m looking forward to the next instalment.
Regards
Dan
DougT
Western Thunderer
Hi Dan, thanks for that! I think I’ve amended the picture size in the previous post. I haven’t got a layout thread, one for the future possibly. DougThat looks interesting Doug. Do you have a layout thread, or any other pictures to share? Speaking of pictures, any chance you could post them full size, rather than as thumbnails please?
Regards
Dan
jamest
Active Member
Hi James, I’m really enjoying this thread, it’s great to see a layout come together so quickly and effectively
I haven’t been on here for some time and my mojo upped sticks and left even longer ago, your thread has given me a lot of inspiration that my own effort of a layout really ought to be progressed. What’s helped is that they are of similar(ish) dimensions so I can easily relate the effort and progress to what I need to do! I’m looking forward to the next instalment.View attachment 194910
Hi Doug,
Thanks for that, and to Julian too.
Great to think I’ve helped somehow with your mojo. You definitely need to finish as the layout looks great so far…..right up my street.
The trackwork looks very well done, and I see you have some Halfords brown camo paint too.
I echo Dans comment above, do you have a layout thread for it?
Regards
James

