Scattergun 3.5” King Arthur ‘Sir Sagramore’

Tim Watson

Western Thunderer
That would be closer to prototype, Simon.

However, the dogs need to have quite a lot of backward - forward freedom (on the model) to allow them to free off the door. I’m not sure separate nuts would survive the hurly-burly of maintaining a functional 1/16 scale steam engine. It has highlighted the need to turn in a false thread on the end of the bolt heads though…

Thanks
Tim
 

simonr

Member
Tim,

One of the dilemmas of making working scale steam is the compromise between fidelity and functionality. In many ways things have not improved since LBSC days of the last century. Squirting oil all over the motion and axleboxes in the hope that it finds its way onto bearing surfaces still prevails. Of course it's ruinous for paintwork and attracts dirt making cleaning challenging.
All part of the fun I guess!

S
That would be closer to prototype, Simon.

However, the dogs need to have quite a lot of backward - forward freedom (on the model) to allow them to free off the door. I’m not sure separate nuts would survive the hurly-burly of maintaining a functional 1/16 scale steam engine. It has highlighted the need to turn in a false thread on the end of the bolt heads though…

Thanks
Tim
 

Tim Watson

Western Thunderer
The straps have now been screwed / riveted with steel bolts, the ends curved and the finish improved.

I have also modified a couple of the (longer) bolt heads with a representation of the nut and bolt. I think the use of a long shouldered bolt will suffice, with this minor visual modification. The two brass handrail knobs will need to be replaced with steel, as these will be in a bright finish.

Tim
 

Tim Watson

Western Thunderer
I had a very productive day in the garret (small scale) workshop yesterday, but worked far too late into the night. The spectacle plate on Sir Percivale was made from relatively thin brass and so wasn’t very rigid.

As suggested by Ian, I therefore soldered together two pieces of 4mm right angle brass section and bent them into the correct curve between fingers and thumbs: Yuri Geller eat your heart out!

These were tinned, 12BA-bolted together with the spectacle plate and soldered to the top with a whiff of heat from a blow torch.

The whole front end is much more sturdy now. The next job will be to roll the roof from steel with the front section bolted to the T section with probably a string of 16BA bolts. The rear section will be removable for hand access to the controls.

Tim
 

oldravendale

Western Thunderer
I've used them as well, Jim. Good service indeed. For some reason they don't stock 6BA but as the requirement here is for 16BA.......

B
 

Mike W

Western Thunderer
Blimey. Surely G.P.Keen must have died at least 50 years ago? They really are old stock! Really super workmanship on that engine Tim. Are you really going to put a match to it when done?

Mike
 

Tim Watson

Western Thunderer
Blimey. Surely G.P.Keen must have died at least 50 years ago? They really are old stock! Really super workmanship on that engine Tim. Are you really going to put a match to it when done?

Mike
The bolts appeared at Keen House about 40 years ago. They needed a good home.

I always make engines that have to work for a living - not wall flowers. Our local North London SME track is a really challenging track to drive on, so it should be fun with Sir Percivale. My previous engine, Hyperion, was always a bit of a shy steamer, but I reckon this one will be on the nail and at least I’ll know what has gone into it.
There does seem to be a national shortage of 16BA brass nuts. I need some for the Australian 12 class.

JB.


How many do you need?

Tim
 

Tim Watson

Western Thunderer
It is very satisfying when you have the correct instrument for the job. The flexibility of my John Stevens watchmakers mill / drill really is invaluable for this sort of work: drilling 1mm diameter for 12BA.

The front of the cab roof is held in place with 3x 12BA and 2x 10BA bolts. The 12BA are countersunk and blackened so should hide quite well. This bit of roof has to be removable when required for maintenance, the rear portion will slide in and out for driving.

The roof has a passive fit and so fixings can be quite minimal (no need for multiple 16BAs)

Tim
 
Last edited:

Tim Watson

Western Thunderer
The cab roof on Sir Percivale has made some progress over the last two days. It is held by a tab at the front and the rear beam, as well as some 2mm diameter 1mm thick rare earth magnets. I may add a few more as they work quite well. The fit will improve when the rear beam is soft soldered to the roof and stiffens the corners where it engages.


The rear section slides out and is held by the magnets whilst doing so.


The rear beam has some brass brackets silver soldered to it to allow it to be bolted to the roof. I’ll soft solder it on when I’ve made the rain strips. I have some brass right angle strip but I think it’s too small.

It begins to look like a Maunsell cab now and should transform the appearance of the engine when re-assembled.

Tim
 

Tim Watson

Western Thunderer
The back of the cab retaining beam has been stiffened and fettled a bit more so the removable roof is now settled down in the correct place.

The cab roof has some subtle little eyebrows on the front corners so adding these has also tidied-up this area.

The window frames probably need thinning down a bit, but Sir Percivale won’t get the Dennis Healey eyebrows which were later fitted to the King Arthurs.

(photo courtesy Derek Pollard)
It’s very noticeable that the handrail stanchions and rain strips are quite fine. There are also an awful lot of bolts, but the engines were generally smoother when built.

Tim
 
Last edited:

Tim Watson

Western Thunderer
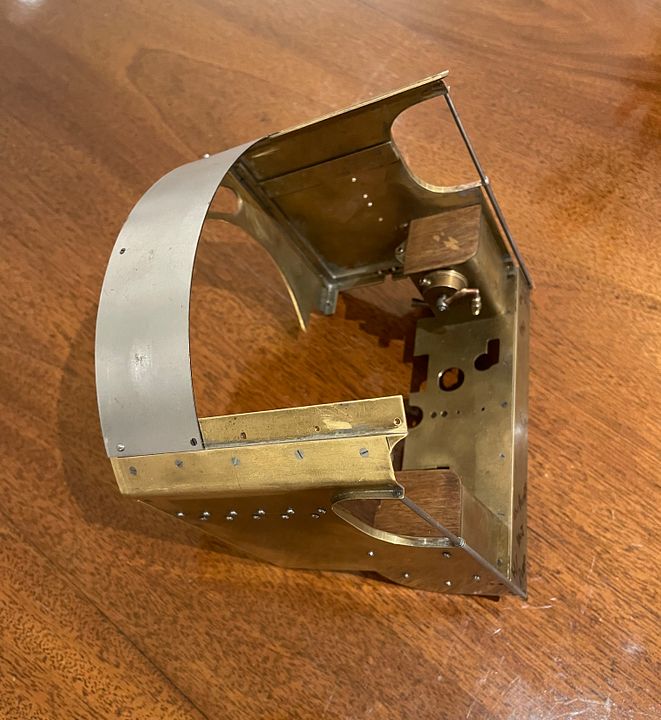
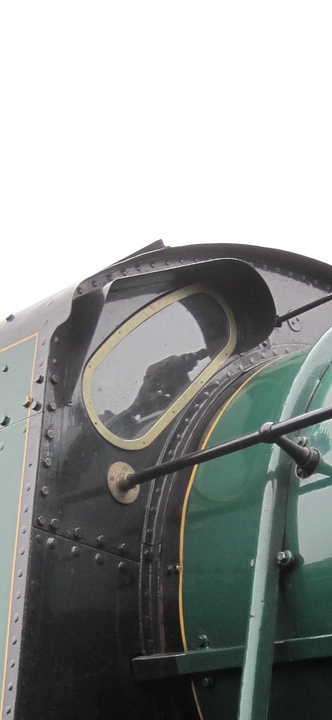
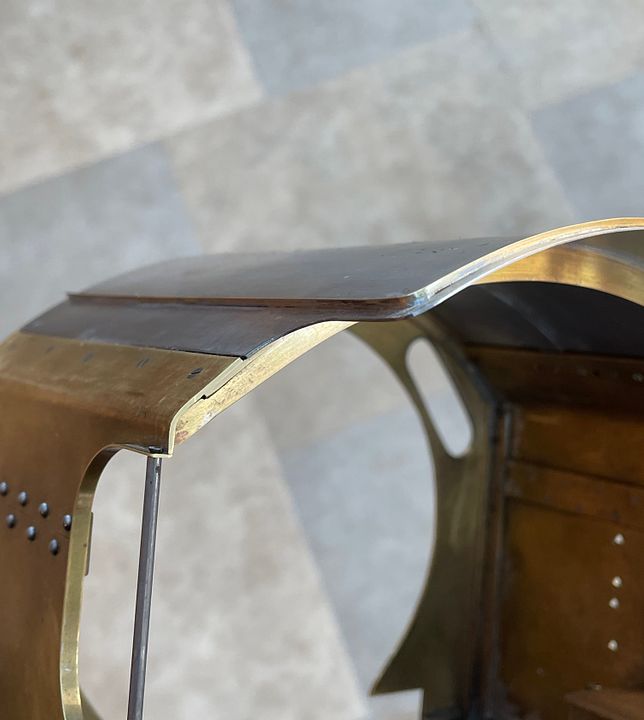
The rain strips on the cab roof have now been made from 1.5mm angle brass. One of the challenges is that they have quite a sharp curve at the rear end where they change direction. After bending up the vertical curve of the cab roof between fingers and thumbs some fine slots were cut in the bottom of the strip using a very fine cut razor saw.

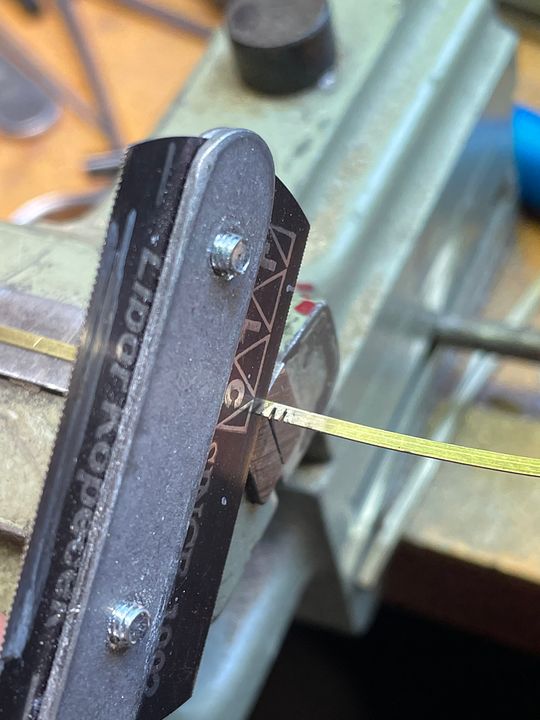
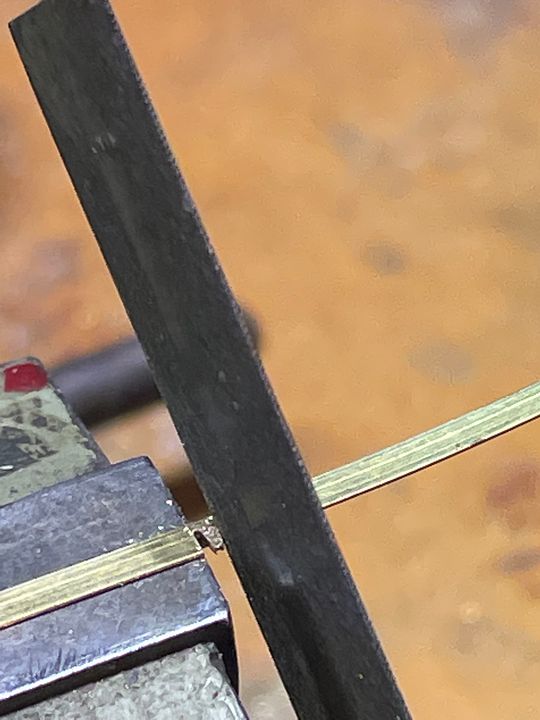
These slots were then opened out to a more triangular shape using a slotting file.

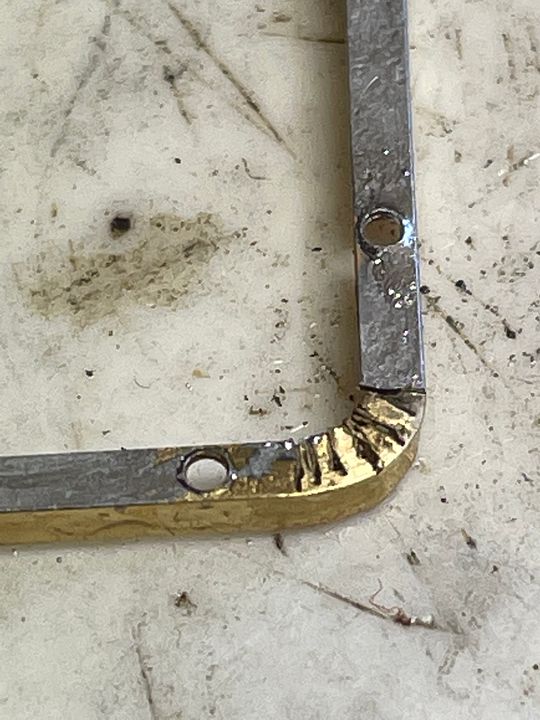
The corner was then bent up and pilot (tapping size) holes drilled in the brass angle where strategically required to keep everything in place. The underside was also tinned.

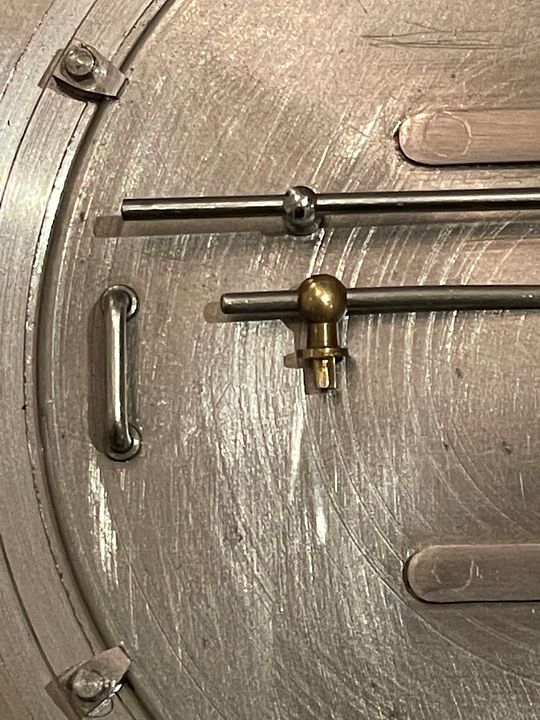
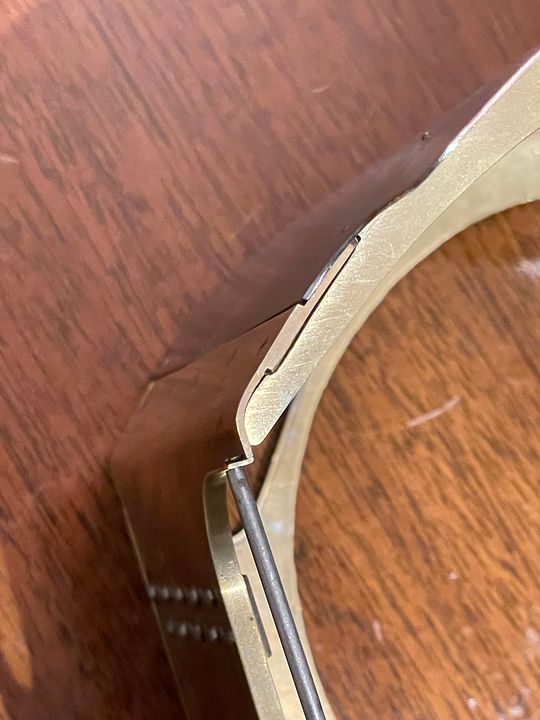
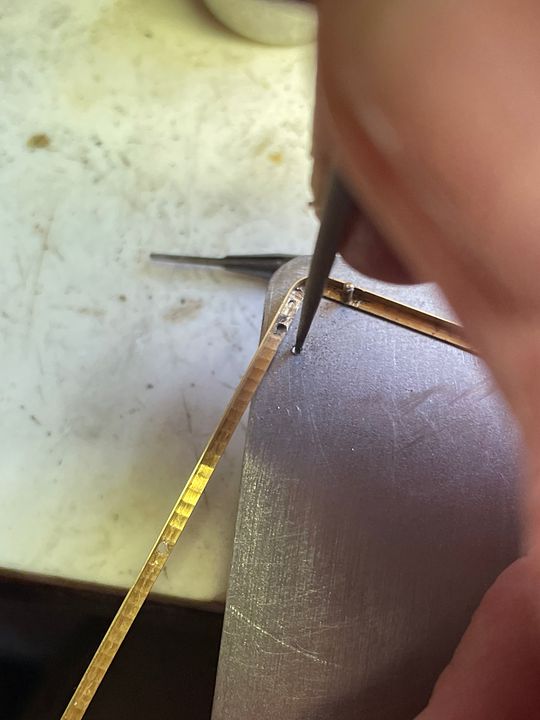
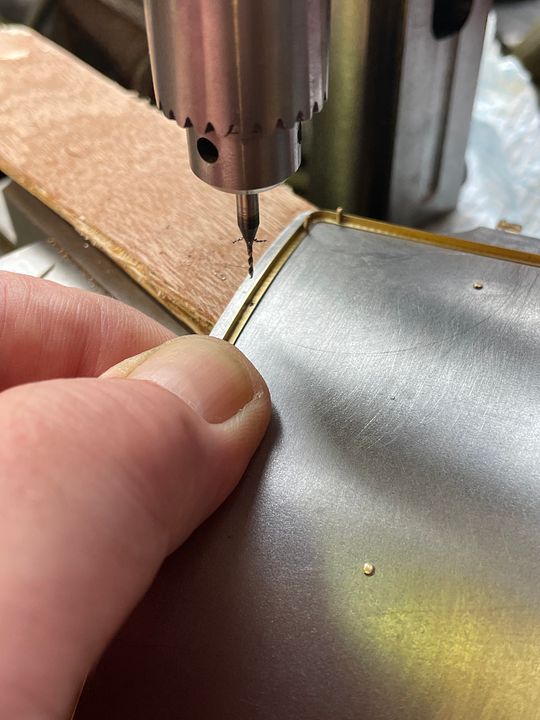
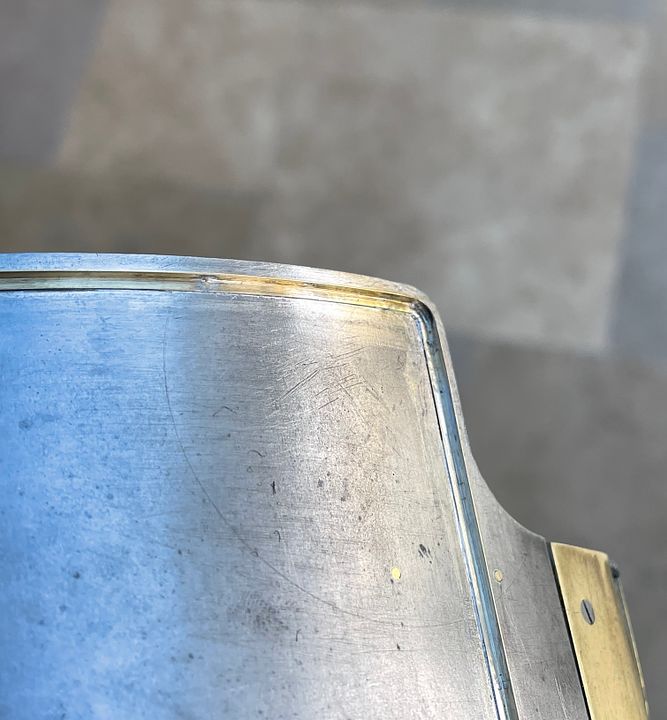
The corner was located on the cab roof and one hole drilled through the steel at clearance size through the steel roof. The brass was tapped 14BA and the rain strip located with a suitable bolt. After this stage, the second hole was drilled at tapping size and if required for alignment ‘stretched’ in the right direction using a needle file, as seen in this image:

After the alignment was OK, other holes were drilled at tapping size and then tapped through the brass and steel together.


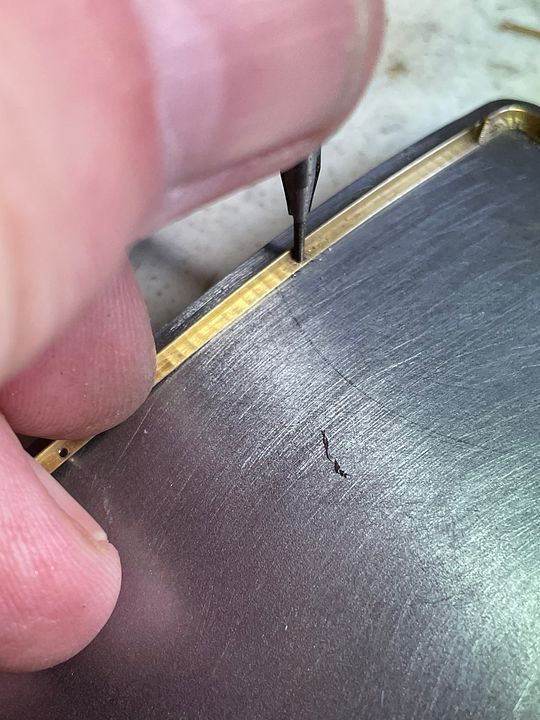
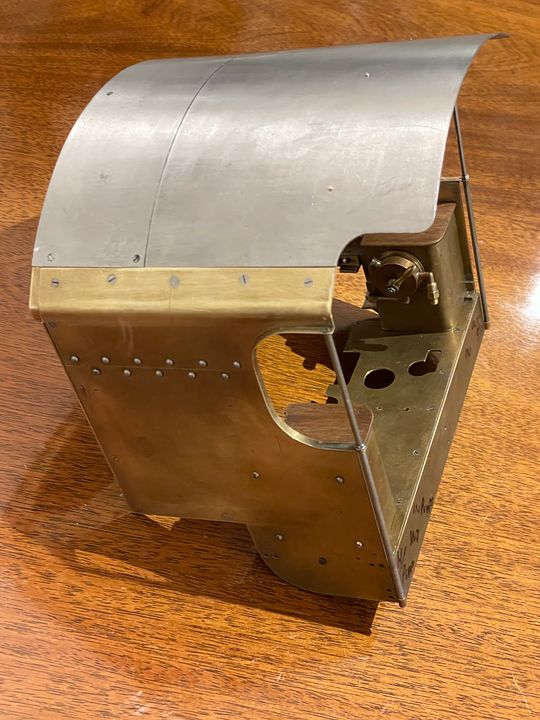
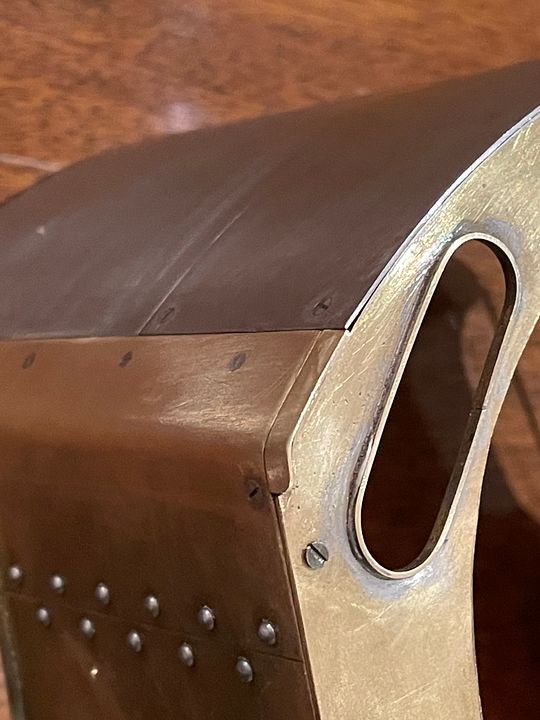
Any slight errors in alignment could be accommodated by ‘moving’ the hole in the steel roof, when it was being opened up for clearance. Once the whole lot was in place a very hot soldering iron was used to sweat everything together. With the rain strips soldered in place the bolts heads and shanks were cut off and tidied up with a riffler file. This also helped to get rid of the machining marks on the brass.

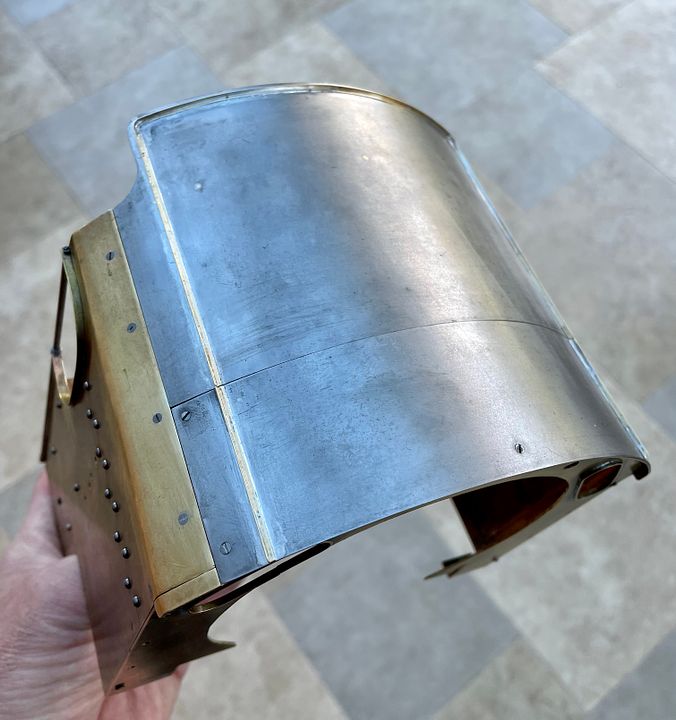
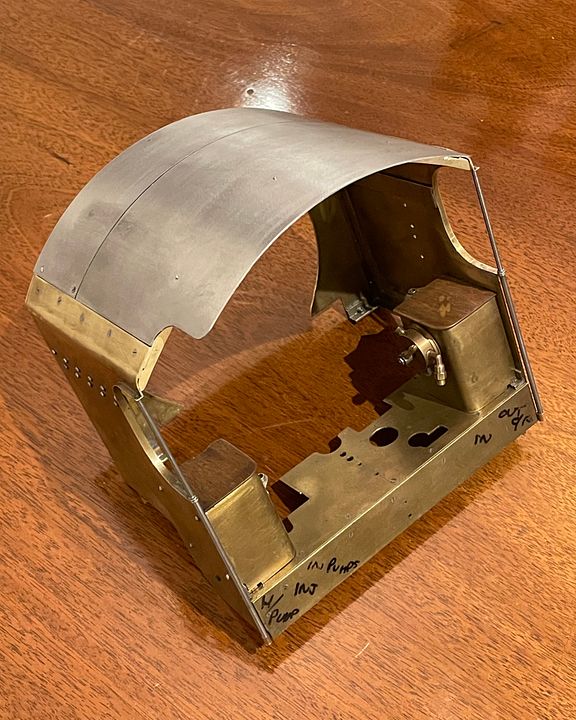
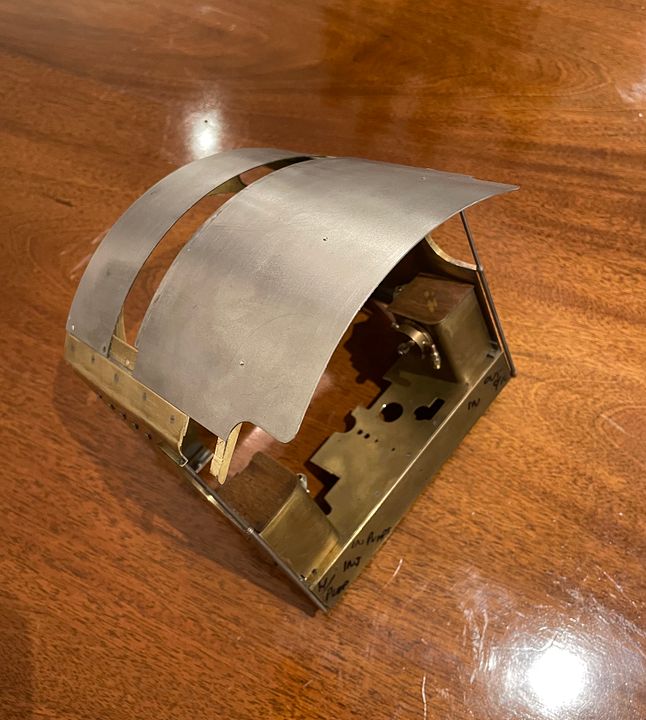
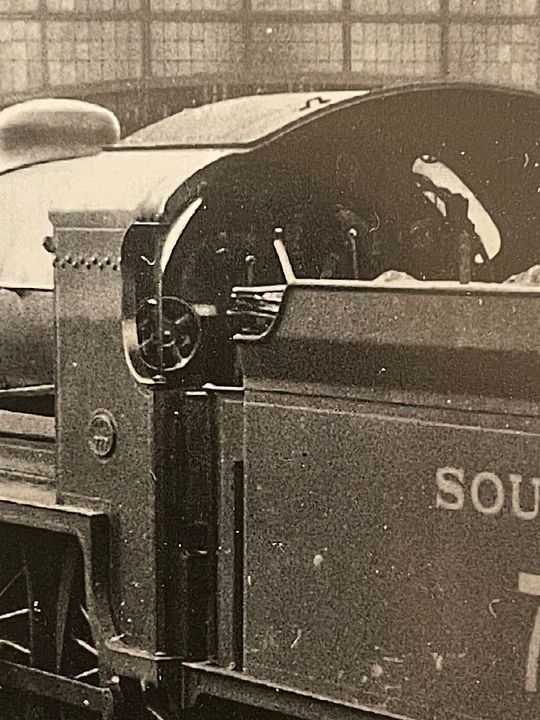
The rain strips are suitably subtle and the little tongues in the corners inconspicuous once cleaned up.


Last thing to do on the roof will be two little handles.


Tim
 
Top