You are using an out of date browser. It may not display this or other websites correctly.
You should upgrade or use an alternative browser.
You should upgrade or use an alternative browser.
47xx
- Thread starter Sandy Harper
- Start date
Sandy Harper
Western Thunderer
Oh err! Give me a clue? Don't go by the markings, they were wrong first time!!
Sandy
Sandy
Last edited:
simond
Western Thunderer
ah, I was, the MR looked out of place between the LF & LR!Oh err! Give me a clue? Don't go by the markings, they were wrong first time!!
Sandy
Sandy Harper
Western Thunderer
My age confusion Simon!!ah, I was, the MR looked out of place between the LF & LR!

Last edited:
Sandy Harper
Western Thunderer
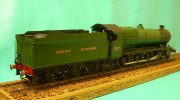
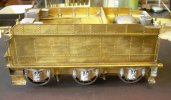
Ok, it would appear there is some interest in this particular build so I'll go back to the beginning with some photos of the tender.
The first thing to say is that Martins kits are not difficult to build as long as you follow the instructions. True, there are some bits that will make your brain hurt, but it will all eventually make sense.
The tender builds up into three units, chassis, footplate and tank. The photos are, I hope, self explanatory.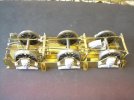
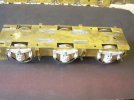
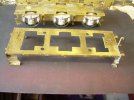
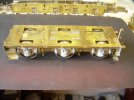
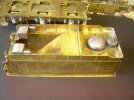
Sandy
The first thing to say is that Martins kits are not difficult to build as long as you follow the instructions. True, there are some bits that will make your brain hurt, but it will all eventually make sense.
The tender builds up into three units, chassis, footplate and tank. The photos are, I hope, self explanatory.


Sandy
Sandy Harper
Western Thunderer
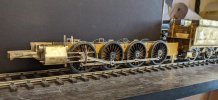
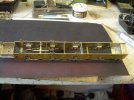
The loco chassis, as with the tender, goes together without difficulty. I did use my Hobby Holidays jig to set up the hornblocks as I have used Premier Rods rather than the etch version, only because the client supplied them.
I also included Martins compensation beams as you can see on the photograph. The rear two beams require the hornblocks modifying which will need a piercing saw and a large cutting disk in your drill to remove the required metal.
Next will be the cylinders and brakes and modification to the front crank area to obtain the necessary clearance behind the crosshead.
Sandy
I also included Martins compensation beams as you can see on the photograph. The rear two beams require the hornblocks modifying which will need a piercing saw and a large cutting disk in your drill to remove the required metal.
Next will be the cylinders and brakes and modification to the front crank area to obtain the necessary clearance behind the crosshead.

Sandy
Sandy Harper
Western Thunderer
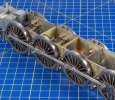
Cylinders and slide bars. Always a cause for concern, for me at least, but the design of these and the method of building were simplicity itself. Even the cross heads, which are normally cast in most kits, are flat etches but build up into excellent representations of the prototype. And with very little effort, a smooth sliding crosshead is achieved.
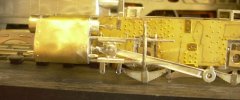
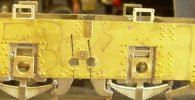
So far so good but, first little issue I have come across is my choice of fitting PFS plunger pickups. I had drilled the holes in the N/S chassis sides before assembly but when I added the brass overlays for the chassis sides, the holes had disappeared! They took a bit of getting back but we got there in the end. I also found that the middle, brass, chassis spacer is designed to fit exactly where the upper brake hanger rod crosses the chassis. The spring etches also trap the bearings in the hornblocks. That's going to be a pain when it comes to painting!!
Sandy

So far so good but, first little issue I have come across is my choice of fitting PFS plunger pickups. I had drilled the holes in the N/S chassis sides before assembly but when I added the brass overlays for the chassis sides, the holes had disappeared! They took a bit of getting back but we got there in the end. I also found that the middle, brass, chassis spacer is designed to fit exactly where the upper brake hanger rod crosses the chassis. The spring etches also trap the bearings in the hornblocks. That's going to be a pain when it comes to painting!!

Sandy
mickoo
Western Thunderer
Sandy Harper
Western Thunderer
Yes, not a huge issue but something to watch out for.
Deano747
Western Thunderer
Duly noted for the future, thanks Mick!Temporarily place the spacer in location, mark where the brake hanger pins poke through, remove spacer and cut small notches to clear the pins.
View attachment 167114
I have to confess, but am not 100% sure, that there are notches in the etch.
Or, as I suspect, I spotted this early on and notched the stay before fitting.
Sandy Harper
Western Thunderer
Compton castle
Western Thunderer
Fantastic
34091 Weymouth
Western Thunderer
It's a very nice looking build so far Sandy,
I'm following with interest, I've not built a finney kit yet but I have a 61xx 4mm Kit to build & I'd like to make a hall too. It looks a lovely set of etches. I'm glad the crosshead was straight forward to build. That's one part I was not looking forward to as I am used to castings for such parts.
Look forward to seeing more, I'd be interested to know more about how you roll the boiler, again something that I've never done before.
Regards
Si

