4mm An EM Workbench: Mousa printing and Oxford moulding

Roads Reconstruction T4

AJC

Western Thunderer
After a very long wait an envelope from Australia dropped onto the doormat on Friday. Thanks to @Overseer I now have two fully lettered tar tanks (and more letters for a third when I can lay hands on a Slater's kit). Here's the pair straight from the coat of matt(ish) lacquer and prior to weathering.

Butler_Tank_014.jpg

What was William Butler's no. 74 as it was in the hands of Bristol & West Tar Distillers, pictured at Swindon in 1953. All very simple, though like the original signwriter, I found that there wasn't quite sufficient room to space the 'Bristol' (bottom right) properly so had to cut all the letters out and apply them separately. This actually makes the model look more like the real thing...

Tar_Tank_pair_002.jpg

Fleet numbers on the ends - the red drop shadow on T4 is just visible.

Roads_Reconstruction_Tank_006.jpg

The red shading is more apparent side on, but still quite subtle. I think it'll show slightly better once weathered with less sheen. That's for another day, however. Thanks again, Fraser.

Adam
 

AJC

Western Thunderer
I've always admired the way you weather your stock, lovely work.

Mike

Thank you, Mike, the aim is to bring the things to life and in this case, at least, I think I’ve succeeded. If the sun stays out I’ll take some daylight snaps later.

Adam

PS - the general treatment is straight out of Martyn Welch's book - a mix of metalcote gunmetal and matt leather (Humbrol 62) with variations in orange and grey. He uses an airbrush, I take more of a watercolour approach. In this case the 'tar' spills are satin black; I think gloss would be a bit overpowering in this scale.
 
Last edited:
Roads Reconstruction T11

AJC

Western Thunderer
I've managed to secure a Slater's kit for a Chas Roberts Tar tank and so Roads Reconstruction T. 11 is on the way. Apart from having oil axleboxes, T.11 is as close to the Slater's kit as one might wish so this should be relatively simple.

DSCN6451.JPG

I've put the tank together. Looking at the top, I wonder whether Slater's simply forgot to mould the manhole assembly as what you get looks for all the world like a location pip. Going on some of the drawings in Tourett's big book of railtanks I determined that the assembly should be around 2' 6" diameter and 9" tall (so I've made a new one for T. 4, I'd had my doubts about that bit for a while). The tube for the job was a slice from a dead promotional pen - the relic of a conference long past - welded on and filled with Miliput. Once all this has set, we can get its wheels on.

Roads_Reconstruction_Tank_007.jpg

Adam
 
Roads Reconstruction T11

AJC

Western Thunderer
A bit further on. I've added a 10 thou' disc cut with the compass cutter and on top of that a 20 thou' disc (5.5mm diameter) and another 10 thou' disc (6mm diameter) to represent the basis of the lid. The latter discs were cut freehand: I cut an appropriate strip, took a square off the end, cut the corners off to make an octagon and then finessed those corners round. The black bit in the middle is a stub of tension lock coupling mount, roughly rounded off and then bedded in with Miliput to represent the pressing.

Roads_Reconstruction_Tank_009.jpg

While that's setting, thoughts turn to the chassis. The problem with having such a clear prototype picture is that you have no excuses about not making a decent fist of copying it. As is usual with these things, what you get is almost, but not exactly the same as the kit. So here's the starting point: note the plates (none quite in the right place), the old type of label clip, the headstock brackets (different, you'll note), and the tension bracket in the middle which is ok, but could be better. I've already made a start on modifying the axleboxes from a grease type to the flat-fronted oil variety in the pic'.

Roads_Reconstruction_Tank_008.jpg

Ten minutes later:

Roads_Reconstruction_Tank_010.jpg

I've cut away the last of the top of the grease 'box and welded a bit of 20 thou' in so that's where we stop for now. More later.

Adam
 
Roads Reconstruction T11

AJC

Western Thunderer
This one is gradually coming together. It’s now in one bit at least but I’m kicking myself for not adding a bit of ballast on the inside. Still, this is the interesting bit of the model where the kit is tweaked to better represent the real thing. Different corner plates, axle boxes and a new filler at the top.

AF6ADAAE-03F3-424B-8129-3559298E12DC.jpeg

Next to it is a more complex project, reworking a Parkside Grampus to its earlier incarnation. Are all those door chains worth it?

EF2CBAA2-6C3F-4C84-AB20-6AB3438FDB74.jpeg

Adam
 

AJC

Western Thunderer
They will be once you work your magic on it!

Thanks - your weathering effects have a similar result (arguably more noticeable, for less effort!), but work has been irritating today and this sort of thing helps me unwind. What I'm really looking forward to is having the three tar tanks all complete, weathered and running in a train together. All ostensibly similar, each different.

Adam
 
Oxford Rail 12 ton tank

AJC

Western Thunderer
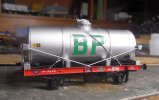
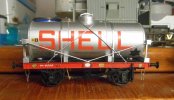
Happy New Year! Having been away over Christmas, including introducing the small person to Granddad's small trains (and the frustrations of the centre off switch on Gaugemaster controllers - a bit much if you're two). There's quite a few wgon projects now on the go and more of these anon, but first, a Christmas present. This is an Oxford Rail tank, a 12 ton RCH design from the early 20th century lettered for Shell/BP (to the 1907 spec's). It is certainly the best RTR railtank (for the steam era, anyway) that's yet appeared in 4mm.

The problem (ok, oversight) on this one is that the lettering is a straight copy of a 1952 image taken by A.E. West (at Axminster). All that lettering down to the solebar plates is crisp and legible and, unfortunately, based on an interwar 14 ton tank which is not quite the same. No problem, the fleet also included some of these 12 tonners. For all I know, the records may still be around, but I have photos showing a couple (nos 2601 and 2794) which show tanks that are nearly identical to the model.

Anyway, here's the model with the wheels popped out for conversion (the star on the tank is too small, btw - a proportion error, I think, easily sorted):

Shell_BP_002.jpg

The conversion to EM (and probably P4) is simple. The axles are a slightly funny length so I swapped a set of Gibsons onto the original axles. The brakegear is a plug-in unit and mine at least was simply levered out with a jeweller's screwdriver. The mounting blocks (under each brake hanger) are thinned at the front by about 0.5mm, the hole on the chassis packed out with a bit of 15 thou' and the brakes reinserted, in line with the treads.

Shell_BP_001.jpg

Because I had a few more to do I replaced the safety loops, but that's an indulgence. At the same time, I took the numbers off and added 3D plates to the solebar (mostly from Rumney Models). The one thing left to do is to revise the axleboxes to make them plate fronted and then renumber and weather. All very straighforward and, while pretty, commonplace.

Adam
 
Last edited:
Unfitted Project: SECR open

AJC

Western Thunderer
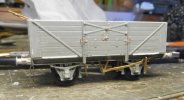
While exciting things like tank wagons have taken the stage, one of the ongoing projects alluded to above breaks the surface. Looking through what I've done over the last few years there are a few basic types notable by their absence. Most notable are open highs of any sort, especially unfitted examples. So 2022's wagon projects will go some way toward rectifying that. First is one of those wagons I've always rather liked, the precursor of the standard SR 8 plank (another favourite). This is the SECR version of that format from the Cambrian kit. It's 9'6" wheelbase and lifting link brake mark it out from the run of the mill as well as those nice X-braced cupboard doors. All that means my usual extra detailing is more laborious.

So what of the kit? It's to the usual Cambrian quality (decent body mouldings, workable chassis, could-be-better buffers and accurate brakes) and the brakeshoes in particular are nicely close to the wheel treads which saves the chore of stretching brake assemblies. Here's where it is today:

SECR_Open_001.jpg

SECR_Open_002.jpg

Inside, however, it could be better: the planks are represented with ridges which had to go and, along with them, all the bolt heads. So I've added them again...

SECR_Open_003.jpg

So this is the first, more on the rest as and when.

Adam
 
Unfitted Project: Ex-PO high

AJC

Western Thunderer
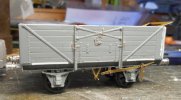
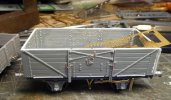
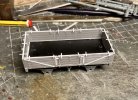
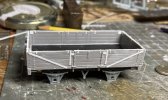
I’ve been pottering away with the unfitted project this week. Here’s the second, culled from the spares box and a model of a four plank open originally owned by Wickwar Quarries Ltd and captured by the late Don Rowland just prior to withdrawal in 1962.

The body started out as a Parkside RCH five plank which has had the top plank removed and the strapping remodelled to suit. At some point it gained capping irons so I’ve added these (strips of 5 thou’ superglued in place) and the securing clips. These are also strips of 5 thou’. The method I’ve settled on involves tacking them in place with superglue, as seen here:

1E0648EE-6FC4-4C8F-A68E-4D92FD6B0327.jpeg

After half and hour or so, I bend the strips over with tweezers and apply solvent, tidying up a few days later.

B9826316-287D-4538-A738-AFD9AC591CEA.jpeg

The original floor and chassis went under the Bristol & West tar tank you’ve seen before, so this one has some spare Cambrian mouldings from the box of surplus wagon sprues (every modelling home should have one).

Adam
 
Last edited:
Top