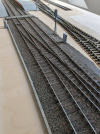
7mm Bromwick: late-green/early-blue diesel layout

jonte

Western Thunderer
I agree with Simon: looks very neat :thumbs:

The Scalescenes product provides a very good likeness indeed, having used it several years ago now. I think I may have washed over a dark wash to tone it down, but how and what with has escaped me. Probably powders would do the job quite well to save getting the paint pots out. Still, they look good as they are :)

Simon’s suggestion about the Earth blocks is also a good one, having just purchased a couple of each variety (4 and 8-way) for my latest project.

Here they are on a previous effort:
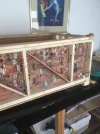
D81EBBED-D46A-446C-9B1F-E341F8FCE68E.jpeg09F265C9-8621-4644-B4F8-07F7609CC1C4.jpeg

Thankfully, this time the layout’s a little smaller.

jonte
 

pricei

Western Thunderer
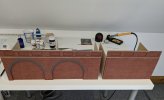
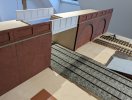
Slow progress at Bromwick this year although I have recently completed a disused viaduct to act as a scenic break for the station end of the layout. The front walls were constructed from several KS Laser Designs low-relief arch kits joined together and painted using a selection of Omen Miniatures acrylic paints.

PXL_20230321_174624156.jpg

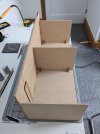
A base, rear walls and internal supporting structure were added using 3mm MDF.

PXL_20230319_171140450.jpg

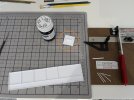
The panels for a girder bridge linking the two viaduct sections were scratch built from styrene card and strips. A plasticard guillotine that I purchased many years ago proved invaluable for cutting the many small strips required to a consistent length. I also made up a square template from spare styrene (circled in the photo below) which helped ensure the correct separation and alignment of the vertical strips whilst gluing everything together.

PXL_20230321_173547471.jpg

Nearly done - a quick check to ensure the bridge panels fit correctly into position.

PXL_20230331_173831265.jpg

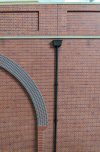
ModelU downpipes help obscure most of the joins between the arch sections.

PXL_20230628_104313324.jpg

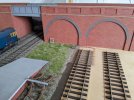
The viaduct finally in situ along with my first attempt at using static grass for a small area of scenic work. I did find the basing glue I used frequently left a visible sheen around the edges of the grass fibres. After some experimentation, I switched to matt Mod Podge and achieved better results.
Ian

PXL_20230626_122446821.jpg
 

pricei

Western Thunderer
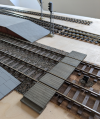
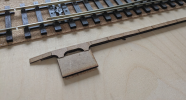
Before starting the ballasting around the station throat area, I took the opportunity to install a laser-cut barrow crossing at the end of the platforms.

PXL_20231123_101725208.png

This was followed by assembly and fitting of the remaining Intentio cable troughs along the up line into the station.

PXL_20230930_122727476b.png

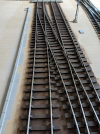
After my previous issue with enamel paint and latex adhesive (see post 256081), I decided to play safe and use the acrylic version of sleeper grime paint for the Peco trackwork.

PXL_20231128_143307819.png

Having often seen cable trough covers left off on the prototype, I wanted to try modelling the same. To represent the cables inside the troughs, I used black decoder wire - it was the thinnest I could find. The wires are probably a little overscale but, to be honest, unless you're really close and the lighting is good it's difficult to see them anyway!

PXL_20240124_143117382.png

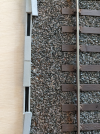
No issues with the latex adhesive pooling on the sleepers this time and, thankfully, the point blades and tie bars all still operate fine. Some 3D-printed relay cabinets were installed and a light dusting of weathering powders helped to tone down the sleepers and ballast.
Ian

PXL_20231221_143735870.png
 

Dog Star

Western Thunderer
Looking back over the last three years, what changes might you consider in regards to the design / build of the baseboards? Or the design / installation of the wiring?

thank you, Graham
 

pricei

Western Thunderer
Hi Graham,
I hadn't realised it was over three years since I started the layout! In answer to your questions, there's very little I'd change. The baseboards have stood the test of time well - there's been no warping or shrinkage and the two traverser sections still operate and align perfectly. I think using 9mm and 12mm ply was certainly the right decision (especially for O-gauge). Whether it would still be cost-effective to make your own baseboards given the huge increase in the price of ply since the pandemic is a question you'd need to research. Sadly, the company I bought the wood from (Woodshop Direct in Cornwall) ceased trading earlier this month.

I've had no problems with the wiring either. The small PCB screw terminal blocks I made up for connections under the baseboards have worked really well and I actually ended up using them not just for the DCC bus but for 12v accessories, lighting and turnouts as well. In retrospect, I should probably have spent a little more time deciding the optimum placement for the servo and accessory decoders as I did end up with some long cable runs but I've not suffered from any interference or voltage drop issues. All of the Digikeijs DCC equipment is still working well although the company itself went bankrupt a year ago so I may need to look for a different DCC supplier at some time in the future.

Hope that helps,
Ian
 
Top