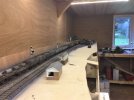
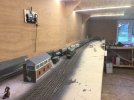
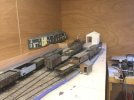
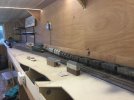
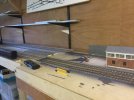
7mm Ebbw Vale North Inlet

Dog Star

Western Thunderer
Twentieth century builds at Swindon had joints in the handrails along the sides of the smokebox. The section over the smokebox door runs along each side of the smokebox to the first handrail knob where there is a joint between the tube of the handrail and a circular bar running through the handrail knob - all held together with 1/4" taper pins.

regards, Graham
 

SimonT

Western Thunderer
Well the foams and UHU eventually arrived; the local sorting office had 14 delivery staff off due to Covid and around here the Royal Mail deliver for Parcel Force. I have tried both materials and techniques on a couple of small test pieces.

First up was the Depron a soft foam used by aeromodellers to make light weight airframes. Firstly it cuts easliy. I tried scribing some typical Welsh stone work, a look out of the window provides inspiration in the form of the kitchen wall. I tried a variety of tools, including one's recommended on web sites extolling the use of this material. To be brief I did not get on with Depron althought there others who obviously relish working with it.
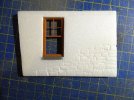
DSC03370.JPG
I will try out it's curving properties as a method of making the lie of the land. Otherwise it's not for me.

Now for Foamex. It is is a denser and more rigid material than the Depron. It cuts and carves well. The UHU Por works well if used as a contact adhesive applied to both mating faces and allowed to partially harden; it has great grab. The test piece.
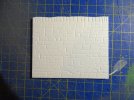
DSC03371.JPG
The scribing was done with my metal work scriber and then with a modified dental tool that was ground the give a wider mortar course. Distressing with 180 grit Abranet works well. However, it still remains what it is - a flat sheet material. To see if I can get away with a minimum amount of carving, I gave the test piece an attack with the artists acrylics.
DSC03372.JPG

This photo was taken before flooding in a lighter mortar colour. The wall is at the back of the layout and the test piece is in place on it for consideration.
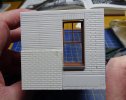
I will need to build three buildings that were brick, so I next started another test piece to try scribing GW style brickwork.
DSC03374.JPG
To be honest, I will not be scribing the brickwork! It is such a boring activity that me brain soars away to far more interesting places and as a result the scribing is a wasted activity. I have instead glued a couple of pieces of South East Finecast brick sheet at the corner and yes, I know it's the wrong bond. I can just get away with my 3D printed windows and doors that push into the wall from the inside as the combined thickness of the Foamex and brick sheet is 3.6mm, just 0.1mm too thick. I won't tell if you won't.

I have already started on the platform and will report back in due course.

Simon
 

SimonT

Western Thunderer
Well Folks, it's been a while, as was pointed out by a couple of WTers at Fred Fest. So here goes a little more of the EVNE story - it is definately not a journey as EVNE is staying in the same place!
Starter for ten.
EVNE9.JPG
I had two options in mind for the signal box. First a place holder for a small platform mounted box. The real Ebbw Vale Low Level (EVLL from now on or there will be more taping mistoks) had a different, taller design.
EVNE10.JPG
The alternative is to reuse the marvelous box from Aberbeeg built by Peter Kibble. To the left will be the road bridges and in front the platform and station building all close to the bridges. Much as I wanted to use Rule 1 to justify this scene I knew that less would be more and this box is far too big. The box is now on a shelf in a bookcase behind my desk.
EVNE11.JPG
A first look at the goods yard. The goods shed is a foamboard mock-up of a 'typical' small country shed. I think it is too small to do the view blocker job and the job of making you want to look into the corner scene. The small brick shed has been on a load of my previous trainsets.EVNE12.JPG
A typical move at EVNE. The loaded coal was in the mileage siding by the wall. The 37 arrived with the Coil train and set it back into the inlet, came out and put the van at the top (right) and then positioned for the outbound coals. The pilot set back onto the coils and then onto the coals. The coal is now being set back onto the van and in due course the pilot and coils will disappear into the works. Something like 24 wagons moving at the limit of the 3.7v battery in the 08!
EVNE13.JPG
Finally the fiddle yard with the cassettes with my home brewed aligning blocks.

Next time, scenary and new plastic materials.
Stay safe and happy!
Simon
 

Overseer

Western Thunderer
The dragon looks a bit disappointed, maybe he thought you had Ebbw Vale Intermediate Level planned.

Peter’s long signal box looks like it fits in well with the length of the layout, suggesting it’s part of a larger location or somewhere the track has been rationalised. A small box might look twee.
 

SimonT

Western Thunderer
Fraser,
The dragon is mournng for the rocks he used to stand on.
As will become evident in a future post, the chosen platform box is about twice the size of the place holder and is a model of the one at Ebbw Vale Low Level. Because the site is squeezed between the retaining wall and the river there is no room for any track to have rationalised. The Aberbeeg box is huge and will form a diarama with some track from Aber for me to display stuff on. My inner rebel did put up a fight for going down the Rule 1 path and to start wearing a beret.
 

SimonT

Western Thunderer
Thanks Richard. I still have two, the split headcode in blue and centre box one repainted into green for the early '60s approach. This has the authentic yellow hand painted warning panels, done without masking to match the photo of it in the early 60's.
 

SimonT

Western Thunderer
Goodness, where has the year gone? There is progress on EVNI but I have neglected to take any photos, so a session is required with the camera in the shed.
However, I can illustrate a little of the progress on the platform.
20221220_102852.jpg
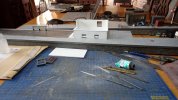
It was inevitable that the platform would span a baseboard joint. To the rear is the down end of the platform and in front us the up end (don't forget this is Wales where Up is up the hill). The cutout is where the station building will sit. You are looking at a view that cannot be seen when the platform is on the layout. I''ve started on the signal box and I am using windows that are printed on my Form 3. There are some test sash windows for the station building on the mat. I'll try to remember to return to them in the future.
I hope you all have a very happy Christmas.

Simon
PS. For those who like such stuff - built from 3mm Depron with a flagstone surface of 1mm Depron. Wills 4mm random stone sheet for the slate wall. This will be the last time I use it as it now stupidly expensive. UHU Pur glue, water soluble oil paints. Mike Williams man hole covers. 17 cups of tea.
 

mickoo

Western Thunderer
It looks impressive...ly big, expensive as the stone wall is, it does look good :thumbs:.

I wonder if it's possible to draw something up in CAD and then print it, you might not get the distressed stone look but the variable size and relief of the stones is possible (but time consuming, though a once only activity), perhaps a steel bristle brush to get some surface texture post curing might help. If you print the back direct onto the build plate then it'll reduce the tendency to warp when curing, the elephants foot is easily sanded off. You'll need to bevel/chamfer one corner where it meets the build plate to allow the scraper in and flip if off the build plate.

Alternatively print in the same orientation you have on the model, that'll reduce the risk of warping but quadruple the print time, you'd also get more wall sections on the build plate so the total time might be close to the flat on the back print orientation.

There are surface tools you can use to add the texture in CAD, not tried it in Autocad....if they're even available....but you might have them in your package. Not sure if 3D would be any cheaper, maybe not on the Form as resin is hellish expensive.
 

adrian

Flying Squad
There are surface tools you can use to add the texture in CAD, not tried it in Autocad....if they're even available....but you might have them in your package. Not sure if 3D would be any cheaper, maybe not on the Form as resin is hellish expensive.
It's on my list of things to try and see what happens. I was looking a having a go at printing a couple of lithophanes to see how they turned out from some family photo.
I was wondering if you created and edited a photo of a stone wall, maybe play around with the contrast what would you get out of one of the lithophane generators for 3D printing?
 

mickoo

Western Thunderer
It's on my list of things to try and see what happens. I was looking a having a go at printing a couple of lithophanes to see how they turned out from some family photo.
I was wondering if you created and edited a photo of a stone wall, maybe play around with the contrast what would you get out of one of the lithophane generators for 3D printing?
Lithophanes are something I can't quite get my head around if I'm honest :cool: but it may be possible to use a photo of a stone wall or texture and overlay it on the 3D model. whether Autocad is capable of doing that is another matter. I know in 3DStudioMax (3DSM) you overlay all sorts of textured finishes, really good for aircraft with non slip surfaces or a chipped paint finish for canopy interiors. A lot of it wasn't generated on the 3D model but on the texture applied to the model, each layer specific to a certain part of the game engine.
When (if) I ever get to a layout status there's lots of stuff I want to 3D print, so surface textures will be important, it's nothing new and being done elsewhere, just new to me.

The problem for me is my inner canine, ball, stick, squirrel, rabbit environment.
 

adrian

Flying Squad
Lithophanes are something I can't quite get my head around if I'm honest
That's why I want to try it to see what happens. My simplistic take is that anything white/bright will be thin in the print and then as it moves through the grey scale to black then it will get progressively thicker to block the light.

So if you have a black and white image of a stone wall and if necessary reverse the image to get a negative, as long as the mortar is white and the stone work various shades of grey/black then the stone work should print thicker in greater relief to the mortar. That's my theory but yet have to test it!!
 

SimonT

Western Thunderer
I use Rhino and I believe it is capable of such things. But it is like photo-rendeing - pure whitchcraft. I have mused about it while loafing in a comfy armchair but stop musing when I consider the time to be lost while learning how to do it,. I have tried DAS but not quite acheived the standard I want, Foamex failed as it was too 2D and the foam dragged.
I found the web site of a professional modelmaker (davidneat) and I intend to try using KAPA-line board. It is similar to foam board but uses a different foam and you can remove the paper covering off the foam. I have a suitalble amount of 5mm and 10mm board.

as resin is hellish expensive.
At the moment I have no intention to buy Form resin from Form. The Saraya alternative is available to buy in $ and Eu but not, at the moment, in £. I cannot buy it in Eu and have it sent to the UK. I have two thoughts on this, either it is another benefit of Brexit or it is the common Americans view of having no idea how the rest of the world works. The Saraya customer experience makes me feel it is a combination of the two.
Photos of the KAPA stuff to follow.
 

LarryG

Western Thunderer
I find Wills stone more than adequate and it is suitable for 4mm and 7mm buildings. The stone blocks can be aligned with care but where they can't I set too with a knife and chisel! Its a darn sight faster to work with even when glued to a plastikard former than scribing.
 

SimonT

Western Thunderer
Larry,
I agree that it is good stuff but the price is rather high. Multiply the price by the 6m long stone wall that frames the station and you can see my need to find a cheaper alternative. If I have my anorac on, I must also point out that the masonary on the real wall is cut slightly differently to the Wills sheet. The Wills sheet was perfect for most of the walls on Aberbeeg but isn't right for the masonary of the wall at Ebbw Vale.
Western & Eastern Valleys. 170.jpg

Google Earth shows that there are some bits of the wall that survived and should I go down the 3D printed route I will visit the site for good photos. I will need a yellow jacket as the track bed is now a busy A road!
 
Last edited:

SimonT

Western Thunderer
Geof,
thank you, much appreciated. For a change I'm enjoying a slow build without an exhibition deadline! Of course this gives the time to try different ways to do things.

The card walls are a new thing to me, have you tried them? It looks to me that the daylight photo of the real wall has been used by e-bay.

One of the things I am going to try with the KAPA board is to carve the coping stones on top. Presently the walls are the 4mm ply support with Foamex on top with no coping stones; the point operating Tortoise are behind. I might look at the whole design of the wall and the bank above and behind. Behind the layout is the the ply cladding of the wall and I intend to use it as a neutral back scene by painting it a light coffee/grey colour, an idea pinched from one of your early photos which showed how well it could work.
All the best
Simon
 

Geoff

Western Thunderer
I came across the embossed sheets whilst looking through Larry's Llanfair Road thread Simon, but haven't used them myself. Scroll down to post 632 and onwards. 4mm & 7mm Llanfair Road

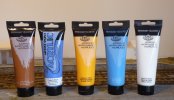
Glad that my backscene has given you a few ideas, these are the acrylics that I used...

P1170981.JPG

Geoff
 
Top