Hayfields work bench

Hayfield1

Western Thunderer
John,

Re the solder, good to hear, I was surprised by Ken’s suggestion.

re the threadlocker, be careful, it can be just as bad. David LO Smith published an article about repairing threadlocked wheels, he had to re-bore the crankpin holes using a milling machine. Possible, but a load of unnecessary work! I don’t have threadlocker on any of mine, if they’re nipped up, they should stay put. If they don’t, it’s probably worth fixing the source of the problem rather than the symptom.

Your little 0-4-0 is a nice bit of work!

cheers
Simon


Simon

Thank you, its been great fun building it, sadly in the repair shop waiting for a new (correct) set of gears. Its getting nearer the paint shop, but also waiting for the steps. I have another Manning Wardle on eBay very cheap as its missing lots of parts, but if I don't sell it soo I will keep it and do a bit of kit bashing. I put as many parts that I could find from the lot I brought. I could raid my own spares which would reduce what's required to build it

The 45xx (which this discussion is about) is proving just as enjoyable and interesting I have not had the time to read up but did these early 45xx's have short or tall funnels please
 

Hayfield1

Western Thunderer
203.jpeg

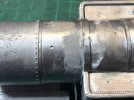
There was a bit of a gouge in the boiler, I used thinned Grey Squadron filler and let it dry over night

209.jpeg

Sanded back this morning and had a second fill. All sanded back to a nice curve this evening

206.jpeg

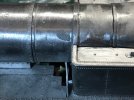
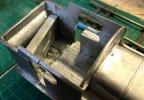
I removed the botton rear wall this morning as it was badly fitted at the bottom. Ten stuck back in the correct position

210.jpeg

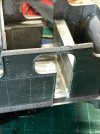
It left a bigger gap so I filled it with Milliput. Also the cab sides are in 2 pieces, soldered from inside and again filler the gap on the inside, yet to be sanded

The loco seems to glide over the track, so thinking of fitting a flywheel to aid deceleration
 

Hayfield1

Western Thunderer
Nice work, John.

Phil

Thanks but most of the work was done by someone else

211.jpeg

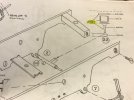
Parts 112 were missing, I found the piston which had been built, but was missing most of the piston rod, the brake crank had also been broken off and lost

213.jpeg

A piece of brass rod was fitted and a piece of scrap whitemetal found and cut to length

215.jpeg

Painted dull dirty black, once dry will merge. May be both the wrong size and shape in places. But wont be seen anyway

Now to rewrite my shopping list for Alley Pally
 

simond

Western Thunderer
Be a wee bit careful there. I think the brake cylinder rod goes through the triangular hole in the pony truck.
 

Hayfield1

Western Thunderer
Be a wee bit careful there. I think the brake cylinder rod goes through the triangular hole in the pony truck.

Simond

Thanks for pointing out the obvious, whilst waiting for parts I was trying to get ahead of myself by fitting it and I totally forgot about fitting the pony truck, I have a few thoughts on what I want.

216.jpeg

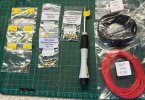
My trip to Alley Pally was fruitful, as you can see, new pickup wire. Then new nuts, bolts and washers for the crankpins and bolts and nuts for the pony trucks, the old ones were very stiff as the nuts were steel and the bolts were brass. Also the nuts need soldering to the chassis, re the brake cylinder I need a system where the pony truck can be moved

I am waiting for two missing chassis parts one of which is important for the Cylinders (G bracket support) so its still a case of not being able to finish the chassis properly

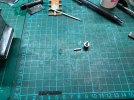
Coupling rods can now be fitted permanently, but not the connecting rods, note the 12ba nut spinner

At Alley Pally I noticed an unused Mashima 1833 motor for £10 which I snapper up. There were also gears and a motor mount, but it had a plastic worm, similar to the one which failed (Oldbury ?) so I left it there. The question is why did the previous builder swap the gears ?
 

Hayfield1

Western Thunderer
I have been busy on other things this past week, happily Springside emailed me to say the parts I ordered are on the way, so work can recommence once all the spuds have been planted

Another interest is trackwork and I am involved in starting to use the Templot plug track, most of the development is for 4mm, but some are modelling in 2mm/TT and S gauges and was asked to try it in 7mm (32mm gauge).

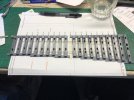
238.jpeg

As the print table is 180mm square this A6 has to be printed in 3 sections, in 4mm and larger the track based are printed in FDM. I just need to print the last section. These track bases cost about just over £2 for the 3 sections. I have not yet used my resin printer and plan to start to use it within the next 2 weeks. if the 7mm resin printing is like the 4mm costs the bespoke chairs will cost about the same as the bases or less

The plug track system is in development at the moment around 4 mm scale and for instance there is no need in 7mm scale to have the timbers so thick, this along with the length of the plugs can be altered. This is really just a prototype print to see what needs altering. Looking at the costs of both RTR and turnout kits this is a very much cheaper alternative with the benefit of prototypical chairs. I can even print bespoke and reusable V and switch filing jigs at whatever angle/size required.
 

simond

Western Thunderer
Interested to see this. On my train ride back from the Alps a few weeks back I read most of the plug track story on the Templot forum. We have an FDM (Ultimaker) at work and I have a Saturn resin printer and a 40W CO2 at home so I’m certainly equipped to have a go, I think I favour plywood timbers, but will have to give the laser a bit of a service first.

As an economic proposition, I think it is probably cheaper than copperclad, and certainly looks much better. There are all sorts of other advantages in having “drop in” rails in complex formations, and if it can be made to work reliably, it’s very likely to take over as the preferred means of building track.

And with all the advantages of the smooth formations of Templot too.

atb
Simon
 

Hayfield1

Western Thunderer
Interested to see this. On my train ride back from the Alps a few weeks back I read most of the plug track story on the Templot forum. We have an FDM (Ultimaker) at work and I have a Saturn resin printer and a 40W CO2 at home so I’m certainly equipped to have a go, I think I favour plywood timbers, but will have to give the laser a bit of a service first.

As an economic proposition, I think it is probably cheaper than copperclad, and certainly looks much better. There are all sorts of other advantages in having “drop in” rails in complex formations, and if it can be made to work reliably, it’s very likely to take over as the preferred means of building track.

And with all the advantages of the smooth formations of Templot too.

atb
Simon

Simon

The plug track system is under development. I think I am correct in saying all development work is in 4mm scale, but there are users in 2mm, TT, S and 7mm scale. My print is a test piece to see what happens when we increase the size to 7mm scale, in short we need to alter the timber and chair plug sizes, as they do not need to be this thick in 7mm scale.

As for cost, the bases cost 70p per section, you need 3 and if produced thinner the cost will reduce, in 4mm scale chairs cost about the same as the base they fit, at worst the bases and chairs will cost about £4.50 in materials. Just over 2m of rail are needed £8 ish at C&L prices, so you are looking at about £12.50 for an A6 turnout

C&L sell packs of copperclad at £33, Peco points £45, C&L or Exactoscale parts ? 250 chairs alone £25

James Walters (Bexhill West fame) is the guy to turn to with ply laser cut bases

Also both Vee and switch rail reusable filing jigs are automatically available to print from the plug track turnout template, these can be used with any building format. The vees go down to two decimal places (eg 6.38-1)

Even better are the correct chair details, at the moment turnouts are available, obtuse chairs in development. Last night in a zoom meeting Martin showed how to manually alter the chairs available to fit a scissors crossing (partially curved), a bit above my paygrade but I understood most of it

James Walters has made some super video's on plug track/ 3D building, last one laser cutting bases soon to be released resin printing chairs
 

Hayfield1

Western Thunderer
Over the past 2 weeks the missing parts have arrived from Springside, The Manning Wardle has come back to the bench

240.jpeg

The rear step has been built, fitted to the body and after the photo Primed

The correct gears have now been fitted, as the motor mount was set up for an alternative make of gears a little fettling is now required.
 

Hayfield1

Western Thunderer
A quick update, the gears are now meshed reasonably well, the main issue is the drag on the second set of wheels from the sprung pickups. I may have accidently made the springs too strong, causing needless friction. I will think it over tonight and perhaps will alter the rear pickups regarding spring strength
 

Hayfield1

Western Thunderer
Well its been a long time since I up dated this build, simply nothing happened. Firstly Templot COT track came into existence, leading to experimentation, plus demonstrating at Scale forum. Certainly for 31.5 & 32 mm gauges COT track in my opinion is a real winner. Turnouts only at the moment, but Templot is always evolving one way or another. Then I had a rest from model railways

Anyway back to locos

1956.jpeg

I had an issue with the crankpins, mainly through both my inexperience in 7mm scale and the kit had already been started and worked on

1957.jpeg
I still have a slight intermittent meshing issue, but whilst there are still parts to fit it needs painting first. As I paint in my garden shed this will have to wait for dryer weather

So into its box and on the the next unfinished builds
 

Hayfield1

Western Thunderer
A very bitty week with little time to sit down and do anything, at the beginning of October I won on eBay a Roxey Mouldings Terrier part made kit, wanting a change from track building I thought I would make a start on it. The body and chassis are part built so I thought I would start with the chassis

1958.jpeg

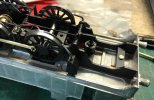
Everything there but the Roxey gearbox was not built, so I made a start, it runs as sweet as a nut

s-l500.jpg

Well the previous weekend got in the way, all the week before I had been thinking about this lot, the Slaters wheels first drew me to this (I need wheels for an ACE H15), but the chassis and a few of the other shots started to think I had unearthed something and when it arrived I was proved correct

1959.jpeg

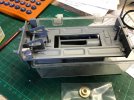
Whilst at the workshop* on Tuesday I made these two build jigs, the top one is to hold the locos footplate upside down to solder the valances in place

* I am a member of the L&B East Anglia group where we make the coaches

1960.jpeg

The bottom one to hold the footplate flat whilst the body is built up

The previous owner seemingly was copying the kits parts, and fabricated the footplate and chassis (plus several other mainly chassis bits in a thicker grade of brass) Strangely enough the seller never mentioned the two locos by name or clearly showed the two stock boxes.

Well my bid was on what I could see and thought in the worse case what I could recoup by selling on everything, whilst none of the wheels were suitable for the H16 I got it for half of my maximum bid, and the hidden loco was exactly what I thought and whilst I am still waiting for the instructions to arrive it looks to be mostly there plus quite a few extra additional bits.

Well it happened to be an ACE SECR J(1) class loco. From the same seller I also brought a MSC models motor, 25-1 gearbox and flywheel for £39. This is one of the reasons I have been asking about sprung hornblocks

I also brought another Roxey Terrier, this time built but untested for £95. Needs a repaint and as the motor is attached to a chassis member I may need to buy a gearbox, but it just needed the wheels cleaning and a spot of oil here and there

John
 

Hayfield1

Western Thunderer
1961.jpeg

A bit of extra work yesterday, firstly the axles were cleaned up with what I know as flour paper (very fine abrasive paper) and then motor and gearbox fitted. As can be expected the center wheel ran perfectly.

Next up (later) is to fit the coupling rods and test, wheels need cleaning prior to connecting up the electrics
 
Last edited:

simond

Western Thunderer
Apologies for saying... "Flour" rather than "Flower", something to do with colour and texture.
I’d have said “flour paper” too, and so would Cookson gold


I think the term has fallen out of common use, my dad certainly referred to it.
 

Hayfield1

Western Thunderer
Apologies for saying... "Flour" rather than "Flower", something to do with colour and texture.

Thanks. Cant even blame that one on predictive text
I’d have said “flour paper” too, and so would Cookson gold


I think the term has fallen out of common use, my dad certainly referred to it.
Shows how old I am !!

1962.jpeg

Small steps, mainly due to doing everything other than railway modelling. I have just spent my time making sure the coupling rods run freely in their bushes and the bushes and rods are lightly lubricated. Now minus a few 12ba washers and nuts, (where do they go !!)

I will not cut the crank pin bolts until I get the sprung plunger pickups working.

I must admit this Markit nut spinner is a real boon in fitting the crankpin nuts, whilst a bit pricey the spanner is hollow so works on extended crankpins/bolts, which other makes I have don't

Next up the electrics
 

Hayfield1

Western Thunderer
1980.jpeg

My wiring is not a thing of beauty, but the Slaters sprung plungers are very effective, whilst fiddly attaching connectors to the wire first, then bolting them in place certainly works and no damaged plastic plunger holders.

Without cleaning the wheels the chassis easily runs up and down the test track to my surprise.

Now to finish the chassis, not only the crank pins but all the other details

John
 
Top