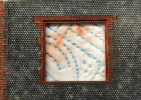
High Wycombe Broad Gauge Station 1854-64

david bigcheeseplant

Western Thunderer
Wycombe 75.png Wycombe 77.png Wycombe 73.png I am currently drawing up in Fusion 360 the old broad gauge station at High Wycombe from when it opened in 1854 to 1864 when is closed and became a good shed, it still stands today and is being renovated.

Once I am happy with the design I will export the files to the laser cutter to create a kit of parts. I have a number of official GWR drawings plus the 1:500 1875 town plan plus the CAD drawings of a survey on the building made about 15 years ago. So I hope what I have created is pretty accurate, as I have been counting brick etc, as the flint and brick pattern I want to get right.

David
 

Joe's Garage

Western Thunderer
Interesting........but I am biased being from Maidenhead! The flint was typical of the stations from Maidehead to High Wycombe.

Julian
 

AndyB

Western Thunderer
My home town station!
I remember it mostly as a tyre & exhaust fitting set-up (latterly ATS). But was it used by National Carriers Ltd before that?
I would have been primary school age then.

Andy
 

Dog Star

Western Thunderer
My home town station!
I remember it mostly as a tyre & exhaust fitting set-up (latterly ATS). But was it used by National Carriers Ltd before that?
I would have been primary school age then.
This does make me feel my age... I used to walk around the goods yard of High Wycombe station, circa 1962-64, when there were still 16T mineral wagons coming and going.

regards, Graham
 

david bigcheeseplant

Western Thunderer
HY14.PNG HY16.png HY12.png HY11.png HY14.PNG HY16.png HY12.png

Some more work on the renders and adding more detail, There are a few things I have had to have educated guesses on like the planking on the engine shed end walls being vertical or horizontal, as Thame station which is a twin Wycombe Railway design shows vertical while Aylesbury Engine shed is horizontal, then again maybe these were not built to the drawings as is the case.

Oddly there are only windows for the engine shed on the wall between the train shed and engine shed and not on the outside wall. Also flint panel infill is on the inside of the engine shed and not on the wall that can be viewed from the platform.

David
 
Last edited:

Yorkshire Dave

Western Thunderer
I need to experiment the best way to do the knapped flint, I may laser cut it or use DAS and scribe it in.

This will be an interesting texture to replicate. If it's for 4mm scale you may be better off photographing various flint walls and stiching them together (to avoid an obvious pattern repeat).

For a 3d effect it might be worth looking at materials away from the model railway world. This is a sort of hollow core plastic foam which came around some electrical goods I recently purchased. I've drybrushed the surface to highlight the randomness of the pattern and each cell is roughly 2 to 3mm which equates to 6'' to 9'' for 4mm scale. Possibly this could be used as a stamping pattern on a Das type of surface however I feel it would require spraying with a release agent to prevent the Das from clogging the cells.

DSCF4307.jpg
 

david bigcheeseplant

Western Thunderer
The flint is quite flat but is more squared off and coursed on the public side of the station and more random on the engine shed side.
Each wall of the building is built up of layers of Romark so I can do the brick and flint elevations laser cut on one sheet or recess the flint areas by .5 ot 1mm and fill them ith DAS and hand scribe them.
 

AJC

Western Thunderer
The flint is quite flat but is more squared off and coursed on the public side of the station and more random on the engine shed side.
Each wall of the building is built up of layers of Romark so I can do the brick and flint elevations laser cut on one sheet or recess the flint areas by .5 ot 1mm and fill them ith DAS and hand scribe them.

So it's a form of what's usually called 'flushwork'? I.e., the faces knapped to reveal the interior of the nodules? All except the very best has a degree of unevenness (the wall of the Bridewell in Norwich or some of that city's many medieval churches, or the famous chequerboard effect in the abbot's lodge at Castle Acre for example). I've always thought that it's possibly one of the most difficult architectural surfaces to model so good luck!

Adam
 

Phil O

Western Thunderer
Dave, looking forward to seeing it in 3d, rather than a screen shot, I do lik Brunellian overall roofed stations.
 

AJC

Western Thunderer
Hello David,

I like the paint effects which are very reminiscent of flushwork walling from memory. Without having seen the real building at first hand, I wonder whether the course lines should be finer - a pronounced feature of these sorts of walls - and, in some way, made less even? The evenness draws the eye is a way that it shouldn't (it makes me think of '60s tessarated surface finishes on half the university campuses I've worked on!

Adam
 

david bigcheeseplant

Western Thunderer
I may try and make the coursing a bit more random or even fill in the mortar courses with a fine plaster wash. it is just working out the way to get the best result.
 
  • Like
Reactions: AJC

Osgood

Western Thunderer
The mortar joint thickness appears to be around 30% of the brick height on your test piece - so a scale 20mm.
In reality with squared flint I'd have thought the joint would be more like 5 to10mm (around 8 to 16% of brick height).

The small height of the flint compared to the brick exaggerates the apparent oversize of mortar course - as does the very dark colour of the joint.
If the mortar course was finer and its colour lighter I reckon it would look mighty fine - and I'm sure any uniformity would be less noticeable too.
 

david bigcheeseplant

Western Thunderer
I can turn down the laser power so the thickness of the cuts are thinner, at this point it is all about experimenting to get something that looks the part. If anyone has achived a good looking flint finish can you let me know how you did it.
 

adrian

Flying Squad
I've not tried a flint finish but I have been experimenting with laser cutting oiled manilla card so I can apply it on a curved surface, it works quite nicely. Being card maybe you could emboss a texture on it before painting.
 
Top