HYFIT simple dimples

Overseer

Western Thunderer
One of the wagons on my informal build list has been the BR HYFIT based on a LNER design. BR built quite a few thousand in the early 1950s to several diagrams. The characteristic feature of these wagons were the pressed dimples in the body sides to make space for rope rings to be fixed inside the body without reducing the available space. I had been thinking about all sorts of complex methods to form the dimples but decided over the weekend to do a quick trial with a simple press tool. The tests were promising so I cut out a few pieces of 0.25mm brass and this is the result so far -
Dimple 4.jpg
Dimple 5.jpg
I think it captures the look of the prototype dimples.

This is the simple tool in pieces. Two scrap pieces of 3mm thick brass had three holes drilled, all 3mm diameter except for one 4mm diameter in the bottom plate. Two studs were cut from some 3mm did silver steel rod and a longer piece cut to be the punch. The shape of the end of the punch does make a difference, too sharp and it will tend to cut through the brass instead of deforming it, so round the edges off slightly. The short studs were fixed into the bottom plate with Loctite 601 (not critical) so they didn't get lost. Sorry if the unfinished edges cause offence but the tool only had to form 12 dimples. I use a small press to apply the pressure but a hammer would do just as well. The final refinement was a piece of brass tube cut to length to provide consistent depth to the dimples, only about 0.6mm.

The simple dimple press tool in pieces -
dimple 1.jpg
And assembled with a piece of brass in place. I marked the centres of the dimples and set up the position by eye but it would be easy to add some guides to ensure consistency.
Dimple 2.jpg
And the depth control tube in place -
Dimple 3.jpg

Dimple 6.jpg
The wagon will end up as a Diagram 1/041 HYFIT, probably with RCH brakes though I might do one with 8 shoe clasp brakes.
 

Overseer

Western Thunderer
A bit frustrating not having any spare time at the moment but I have made another end and soldered a few parts together to see how it will look.
dimple wag1.jpg
dimple wag2.jpg
I think I have the dimples a bit lower than they should be and they look a bit big but that seems to be due to light reflecting off the slopey part of the dimples, but I will finish this one as I think it will look OK once painted.
 

mickoo

Western Thunderer
One of the wagons on my informal build list has been the BR HYFIT based on a LNER design. BR built quite a few thousand in the early 1950s to several diagrams. The characteristic feature of these wagons were the pressed dimples in the body sides to make space for rope rings to be fixed inside the body without reducing the available space. I had been thinking about all sorts of complex methods to form the dimples but decided over the weekend to do a quick trial with a simple press tool. The tests were promising so I cut out a few pieces of 0.25mm brass and this is the result so far -
View attachment 58569
View attachment 58568
I think it captures the look of the prototype dimples.

This is the simple tool in pieces. Two scrap pieces of 3mm thick brass had three holes drilled, all 3mm diameter except for one 4mm diameter in the bottom plate. Two studs were cut from some 3mm did silver steel rod and a longer piece cut to be the punch. The shape of the end of the punch does make a difference, too sharp and it will tend to cut through the brass instead of deforming it, so round the edges off slightly. The short studs were fixed into the bottom plate with Loctite 601 (not critical) so they didn't get lost. Sorry if the unfinished edges cause offence but the tool only had to form 12 dimples. I use a small press to apply the pressure but a hammer would do just as well. The final refinement was a piece of brass tube cut to length to provide consistent depth to the dimples, only about 0.6mm.

The simple dimple press tool in pieces -
View attachment 58570
And assembled with a piece of brass in place. I marked the centres of the dimples and set up the position by eye but it would be easy to add some guides to ensure consistency.
View attachment 58572
And the depth control tube in place -
View attachment 58571

View attachment 58573
The wagon will end up as a Diagram 1/041 HYFIT, probably with RCH brakes though I might do one with 8 shoe clasp brakes.
Nice application of simple technology and tools, I wouldn't worry about the unfinished edges, it's the dimples that matter.

MD
 

Overseer

Western Thunderer
Thanks mickoo, I agree it is all about the dimples, or making them look as right as possible with the least effort.

The HYFIT has progressed a bit since the last post. One of the things needed was holes for the buffers. Usually I would drill them but drilling thin sheet metal with larger drill sizes can make a mess of things very quickly. It struck me that drilling another hole in the dimple press tool would add the capacity to punch holes out as well. With both parts of the press tool together a 3mm diameter hole was drilled right through. The size was just so I could use the same piece of 3mm rod as the punch. Any size is possible and it works very well. Holes can be punched right near the edge of a sheet without distortion and it produces nice little brass discs as well. I used the silver steel rod the other way up for punching holes - the non rounded end produces a cleaner cut.

dimple punch.jpg
dimple wag4.jpg
dimple wag5.jpg

Sorry about the colour rendition. The camera is a bit confused by the warm white LED desk lamp. The large holes in the coupling hook location were the result of lack of concentration while punching, I had marked the buffer centres and coupling location and ended up aligning the centre mark by mistake. I then thought it didn't matter as it saves making a rectangular hole for the coupling and the plate on the outside will cover it anyway.
 

AJC

Western Thunderer
I like this very much Fraser. In 7mm this is a type that really benefits from being produced in sheet metal (it probably would in 4mm, come to that) and this is a lovely neat bit of work.

Adam
 

Stoke5D

Western Thunderer
Good work.

Has anybody got a photo or drawing of the rope ring/cleat that should be on the inside of the aforementioned dimples?


Andrew
 

Overseer

Western Thunderer
Good work.

Has anybody got a photo or drawing of the rope ring/cleat that should be on the inside of the aforementioned dimples?


Andrew
This is a question I was going to ask as well. I have been looking at photos and so far have not managed to make out anything conclusive but the look like cleats rather than rings so far.
 

Stoke5D

Western Thunderer
This is a question I was going to ask as well. I have been looking at photos and so far have not managed to make out anything conclusive but the look like cleats rather than rings so far.

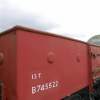
In a rare example of foresight on my part and after a bit of searching, it seems I can answer my own question - see below photo's taken by me at Chappel & Wakes Colne station of their restored B745522:

upload_2016-9-17_13-0-31.pngupload_2016-9-17_13-1-35.png

Rings then, for this example at least.


Andrew
 

pakpaul

Western Thunderer
Peter Tatlow in LNER Wagons 4A, pages 52 to 56 covers these wagons.He refers to the dimples containing rings to secure the loads, dimples in the bodyside to accomodate securing rings inside, and dimples pressed in the sides, within which internally were ring bolts for securing loads. Unfortunately no photos inside a wagon with dimples. In his original volume on LNER wagons from 1976 these wagons are mentioned on page 23 and again mentions the dimples were made to accomodate rings for securing ropes. (Written while Andrew was posting)

Paul
 

Stoke5D

Western Thunderer
Peter Tatlow in LNER Wagons 4A, pages 52 to 56 covers these wagons.He refers to the dimples containing rings to secure the loads, dimples in the bodyside to accomodate securing rings inside, and dimples pressed in the sides, within which internally were ring bolts for securing loads. Unfortunately no photos inside a wagon with dimples. In his original volume on LNER wagons from 1976 these wagons are mentioned on page 23 and again mentions the dimples were made to accomodate rings for securing ropes. (Written while Andrew was posting)

Paul

My original photo. is a high definition digital image and you can blow it up to see it's actually a staple welded on to the body side within the dimple that retains the ring, rather than a bolt. Perhaps the LNER ones had a bolt through the body:

upload_2016-9-17_14-38-59.png

Hope this comes out clear in the post.


Andrew
 
Top