John57sharp
Western Thunderer
Welcome to my workbench thread. I’ve been prompted into writing by a series of events which I hope you will enjoy, and by some actual progress on my foray into 2mm finescale which remains very slow but relatively steady.
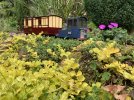
My “layout” is the Ness Garden Railway, a SM32 (16mm/ft) single line that runs through most of our garden in Little Neston in Cheshire. The emphasis here is a garden which has a railway through it, so that the railway blends into the surroundings. We can also run 7/8ths scale stock and often do.
Much of our SM32 stock is Rugga skip based, with both Binnie skips and ModelEarth wagons which use the same chassis. Sometime last year one of the skips lost a wheel set during a derailment and as the wagon had travelled a few metres before I could get to it, an axlebox was lost. The skip was removed from the train and put aside after an extensive search (of the wrong area) failed to produce the axlebox. That’s how it was until last week when some attention was being given to the trackbed and the errant axlebox discovered laying between the sleepers. Aha! I thought and picked it up, turned around to deal with something else, forgot about the part (it’s about the size of a Scrabble tile) and lost it again, just dropped it somewhere I guess. You’ll excuse this easier if you understand that I was perched on the trackbed, which is only 4” wide, trying not to damage plants, and turn around 180 degrees and the something else I had to deal with was further down the line… Well, that reminded me to order some spares from Peter Binnie which came very quickly thank you, and that skip is now back in service.

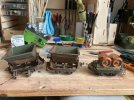
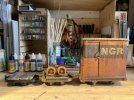
The second incident involves Skip #1 (above), an open sided flat with ends produced for a limited period by Simon Harris of ModelEarth. This vehicle became one of those wagons that slowly vanished from the network. It was photographed in service throughout the year, but the line’s Management slowly realised that it was no longer running in trains, and nobody knew where it was or why it was missing. TOPS revealed nothing, and a VERY extensive search of the house, garden and sheds was made at the start of this year when we moved everything around preparing to accommodate a returning fledgling, but to no avail.
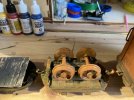
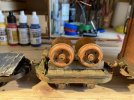
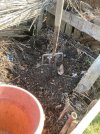
The end of this story came yesterday when I was digging out compost from our allotment and noticed a familiar wheel set and a Rugga chassis in amongst the hummus. Careful exploration revealed most of the remaining parts, though some of them have become unglued and one end support is toast. However old #1 has made it back onto my workbench and will soon be placed back in service on the Railway. I can only assume that the skip was collected up during the annual leaf removal festival and made its way through the composting bins. It will have suffered some heat along the way, but seems to have coped, the damage was probably done by my fork….
If only the carpet monster was as forgiving?
My “layout” is the Ness Garden Railway, a SM32 (16mm/ft) single line that runs through most of our garden in Little Neston in Cheshire. The emphasis here is a garden which has a railway through it, so that the railway blends into the surroundings. We can also run 7/8ths scale stock and often do.
Much of our SM32 stock is Rugga skip based, with both Binnie skips and ModelEarth wagons which use the same chassis. Sometime last year one of the skips lost a wheel set during a derailment and as the wagon had travelled a few metres before I could get to it, an axlebox was lost. The skip was removed from the train and put aside after an extensive search (of the wrong area) failed to produce the axlebox. That’s how it was until last week when some attention was being given to the trackbed and the errant axlebox discovered laying between the sleepers. Aha! I thought and picked it up, turned around to deal with something else, forgot about the part (it’s about the size of a Scrabble tile) and lost it again, just dropped it somewhere I guess. You’ll excuse this easier if you understand that I was perched on the trackbed, which is only 4” wide, trying not to damage plants, and turn around 180 degrees and the something else I had to deal with was further down the line… Well, that reminded me to order some spares from Peter Binnie which came very quickly thank you, and that skip is now back in service.

The second incident involves Skip #1 (above), an open sided flat with ends produced for a limited period by Simon Harris of ModelEarth. This vehicle became one of those wagons that slowly vanished from the network. It was photographed in service throughout the year, but the line’s Management slowly realised that it was no longer running in trains, and nobody knew where it was or why it was missing. TOPS revealed nothing, and a VERY extensive search of the house, garden and sheds was made at the start of this year when we moved everything around preparing to accommodate a returning fledgling, but to no avail.
The end of this story came yesterday when I was digging out compost from our allotment and noticed a familiar wheel set and a Rugga chassis in amongst the hummus. Careful exploration revealed most of the remaining parts, though some of them have become unglued and one end support is toast. However old #1 has made it back onto my workbench and will soon be placed back in service on the Railway. I can only assume that the skip was collected up during the annual leaf removal festival and made its way through the composting bins. It will have suffered some heat along the way, but seems to have coped, the damage was probably done by my fork….

If only the carpet monster was as forgiving?

