You are using an out of date browser. It may not display this or other websites correctly.
You should upgrade or use an alternative browser.
You should upgrade or use an alternative browser.
4mm Life in a Northern Town - Ever more York
- Thread starter Neil
- Start date
simond
Western Thunderer
Neil
Western Thunderer
Neil
Western Thunderer
I think I've mentioned earlier on in this thread that I have a group of friends who live locally and meet up most Friday evenings to operate (play with) each others layouts. I'm atypical as the rest are wedded to the world of witchcraft that is dcc while I'm with the Luddite tendency. However my mates have a few dc locos that they bring to my layout and I have a few that are equipped with chips to run on 'foreign' metals. One such is this Patriot which I took to have a run out a week last Friday, but refused to budge when placed on the tracks. Yesterday I replaced the chip with a blanking plate and gave it a run out on my layout to check that it would go on dc. All is fine and I'm mightily tempted to leave it this way as I rather like the look of it; here it is on a parcels working off the midland region.
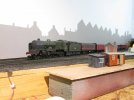

Thank God I am not the only one left on the planet who can't be arsed with DCCI think I've mentioned earlier on in this thread that I have a group of friends who live locally and meet up most Friday evenings to operate (play with) each others layouts. I'm atypical as the rest are wedded to the world of witchcraft that is dcc while I'm with the Luddite tendency. However my mates have a few dc locos that they bring to my layout and I have a few that are equipped with chips to run on 'foreign' metals. One such is this Patriot which I took to have a run out a week last Friday, but refused to budge when placed on the tracks. Yesterday I replaced the chip with a blanking plate and gave it a run out on my layout to check that it would go on dc. All is fine and I'm mightily tempted to leave it this way as I rather like the look of it; here it is on a parcels working off the midland region.
View attachment 167426
steve1
Western Thunderer
I’m with you, entirely happy with DC.Thank God I am not the only one left on the planet who can't be arsed with DCC
steve
John Ross
Western Thunderer
Very happy with DC control, the true home of only two wires required.I’m with you, entirely happy with DC.
steve
All the best
John
jonte
Western Thunderer
I’m currently building a Minories layout with Peco Streamline and medium radius electro frog points. It was wired for DC including isolated sections at the end of the three roads, and traditional Peco point switches.
Two wires, indeed, lead from the (Gaugemaster) controller to power the track; the AC from same controller powers the points of one board, a separate Gaugemaster AC transformer powering the uncouplers on the second.
Running with the Gaugemaster wasnt satisfactory, thus a separate controller - also DC (AC fed) - recommended by another British guy on a North American forum, was purchased (Black Cat?). It gives excellent running, especially with the mechanisms of older models, as the guy suggested.
However, I’d unintentionally purchased a DCC ready loco sometime ago, which prompted me to buy a Bachmann DCC controller (offered at a very reasonable price) to power it: some day, which never seemed to come.
Thus, having wired up the layout I bit the bullet and went for it (DCC), and with the help of a couple of benevolent forum members, it was soon up and running, and using the same wiring again, using only two wires.
I wrote in my thread, that I shall never look back. It really is that good!
I’ve no intentions of adopting an all singing, all dancing, fully computerised system: I like flicking switches, thus the method of point changing, and eventually signalling will remain in the Stone Age
However, control of the trains will be forever more DCC at Monks, which requires no additional wiring to that of conventional DC as I’ve found, and with just its two wires.
jonte
Two wires, indeed, lead from the (Gaugemaster) controller to power the track; the AC from same controller powers the points of one board, a separate Gaugemaster AC transformer powering the uncouplers on the second.
Running with the Gaugemaster wasnt satisfactory, thus a separate controller - also DC (AC fed) - recommended by another British guy on a North American forum, was purchased (Black Cat?). It gives excellent running, especially with the mechanisms of older models, as the guy suggested.
However, I’d unintentionally purchased a DCC ready loco sometime ago, which prompted me to buy a Bachmann DCC controller (offered at a very reasonable price) to power it: some day, which never seemed to come.
Thus, having wired up the layout I bit the bullet and went for it (DCC), and with the help of a couple of benevolent forum members, it was soon up and running, and using the same wiring again, using only two wires.
I wrote in my thread, that I shall never look back. It really is that good!
I’ve no intentions of adopting an all singing, all dancing, fully computerised system: I like flicking switches, thus the method of point changing, and eventually signalling will remain in the Stone Age

However, control of the trains will be forever more DCC at Monks, which requires no additional wiring to that of conventional DC as I’ve found, and with just its two wires.
jonte
Neil
Western Thunderer
Very happy with DC control, the true home of only two wires required.
All the best
John
.... Thus, having wired up the layout I bit the bullet and went for it (DCC), and with the help of a couple of benevolent forum members, it was soon up and running, and using the same wiring again, using only two wires.
I wrote in my thread, that I shall never look back. It really is that good! ....
Very much a personal choice, I couldn't honestly say that one was intrinsically better than the other. I trained as a sparky many years ago and I like that I can see and understand all the stuff that makes trains go and that fault finding has fewer components to worry about.
jonte
Western Thunderer
Absolutely, Neil.Very much a personal choice, I couldn't honestly say that one was intrinsically better than the other. I trained as a sparky many years ago and I like that I can see and understand all the stuff that makes trains go and that fault finding has fewer components to worry about.
Whichever you feel more comfortable with

jonte
Neil
Western Thunderer
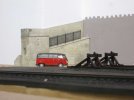
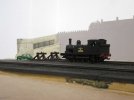
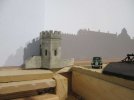
I've mentioned that friends come round roughly once a month to play with the layout. As they bring stuff with them we end up with a less focussed stock list. Here's an indication of what can happen.
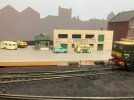
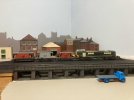
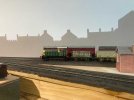
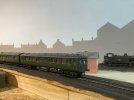
Now while this is all horrendously un-prototypical it does have the benefit that the layout gets a thorough run through with stock not tailored to the layout. It does throw up the odd fault, the most in need of attention being the microswitches used with the six points which are motored. Fortunately I have replacements and about three weeks to swap them before it's my turn to host another session.


Now while this is all horrendously un-prototypical it does have the benefit that the layout gets a thorough run through with stock not tailored to the layout. It does throw up the odd fault, the most in need of attention being the microswitches used with the six points which are motored. Fortunately I have replacements and about three weeks to swap them before it's my turn to host another session.
Neil
Western Thunderer
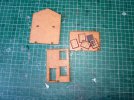
Having finished the short section of Bar Walls the next candidate for the workbench is a laser cut kit of a shop. It's by Fair Price Models, who can be found here on e-bay. While not the most complete kit it does give you quite a leg up towards a finished model and at a very keen price. You can take the man out of Yorkshire etc. I got a bit of the way through the build before the camera came out, perhaps no bad thing as it gave me some time to work out what order I needed to put things together in.
The kit doesn't have brickwork or any finish for that matter, incised into the walls so I needed plasticard overlays, best marked out while the walls were flat. Also because it has solid ground and first floors I would need to get the windows and any interior gubbins in before assembly. In turn this demands that the window reveals are painted and therefore front and rear walls had to be clad. Here are some photos of how things stood this morning.
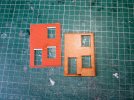
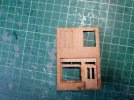
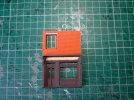
I realise that this all sounds like a bit of a faff but in reality you would have to do all these things to bring a model to completion, it's just that in this case the order is critical and not quite what you might expect. My assessment? I'm enjoying the build and I have my eye on some of the other offerings depending on how the layout shapes up.
The kit doesn't have brickwork or any finish for that matter, incised into the walls so I needed plasticard overlays, best marked out while the walls were flat. Also because it has solid ground and first floors I would need to get the windows and any interior gubbins in before assembly. In turn this demands that the window reveals are painted and therefore front and rear walls had to be clad. Here are some photos of how things stood this morning.


I realise that this all sounds like a bit of a faff but in reality you would have to do all these things to bring a model to completion, it's just that in this case the order is critical and not quite what you might expect. My assessment? I'm enjoying the build and I have my eye on some of the other offerings depending on how the layout shapes up.
Yorkshire Dave
Western Thunderer
Now while this is all horrendously un-prototypical it does have the benefit that the layout gets a thorough run through with stock not tailored to the layout. It does throw up the odd fault, the most in need of attention being the microswitches used with the six points which are motored. Fortunately I have replacements and about three weeks to swap them before it's my turn to host another session.
And having fun playing trains.
michael mott
Western Thunderer
I am guessing that the suburban is just coasting along in between the sections without the electrified rails, or is it being pushed by something off screenI've mentioned that friends come round roughly once a month to play with the layout. As they bring stuff with them we end up with a less focussed stock list. Here's an indication of what can happen.
View attachment 167736
View attachment 167737
View attachment 167738
View attachment 167739
Now while this is all horrendously un-prototypical it does have the benefit that the layout gets a thorough run through with stock not tailored to the layout. It does throw up the odd fault, the most in need of attention being the microswitches used with the six points which are motored. Fortunately I have replacements and about three weeks to swap them before it's my turn to host another session.

I to like simple DC or batteries with simple switches.
Michael
Neil
Western Thunderer
The shop build continues:
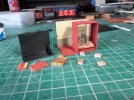
The main shop window needed some semblance of an interior so I flung together this internal partition and shelf combo. As it's to be a grocers shop I painted a load of resin trays I cast years ago from 'use up' moulds when I was making rolling stock kits. The fruit and veg inserts are experimental castings in five minute epoxy from moulds made by pressing shapes into plasticine.
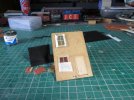
The other windows needed less dressing, nets from tissue and curtains from coloured paper out of the Sunday paper (Observer) colour supplement.
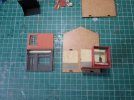
The interior decor (!) was v carried over from the internal partition to the matching side wall.
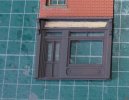
The glazing has been sawn from a clear CD case. I expect that these will eventually be hard to find. If you look closely you might be able to discern the hammered glass finish to the top lights and door windows; the front of the case was clear, the rear textured. I have some coloured CD cases too, the transparent blue and amber ones may have uses as glazing.

The main shop window needed some semblance of an interior so I flung together this internal partition and shelf combo. As it's to be a grocers shop I painted a load of resin trays I cast years ago from 'use up' moulds when I was making rolling stock kits. The fruit and veg inserts are experimental castings in five minute epoxy from moulds made by pressing shapes into plasticine.

The other windows needed less dressing, nets from tissue and curtains from coloured paper out of the Sunday paper (Observer) colour supplement.

The interior decor (!) was v carried over from the internal partition to the matching side wall.

The glazing has been sawn from a clear CD case. I expect that these will eventually be hard to find. If you look closely you might be able to discern the hammered glass finish to the top lights and door windows; the front of the case was clear, the rear textured. I have some coloured CD cases too, the transparent blue and amber ones may have uses as glazing.

