7mm Lochmaben, a new layout.

OzzyO

Western Thunderer
Hello all,

as Kev was persuade (OK press ganged) in to making the signals, he's the only one of us to have made a working co-acting semaphore signal and that was in 4mm.

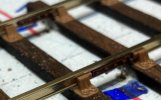
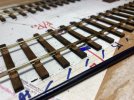
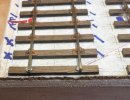
So I thought it would be nice for me to fold the lattice work up for him. I've got some hold and folds to help make the job a bit easier.
Signals 10.JPG

WELL the instructions say not to take the tabs off so I was tempted to have a look at what the 20' post would look like.
Me like!
Signals 11.JPG

ATB

OzzyO.

PS, the lattice work is 20', 10' & 7'.
 

OzzyO

Western Thunderer
Hello all,

back onto my last four lengths of rail to fix in place, what can possibly go wrong?

Getting ready to fix the chairs down on the L/H rail I'll do it my normal way get one chair stuck down every five sleepers working from both ends. The problem with this bit of track is that it has to fit between two lengths of track that are fixed down.
BB 117.JPG

The same bit of track photo'd from my drone, the blue dashes that you can see remind me which chairs are fixed down. Sometimes it's one on each side of the track sometimes it's two on one side. Means the same thing to me. The next photos are about where there is a big step in the Templot plan.
BB 119.JPG

Then it was what the **** is going on here, so it was a quick call to Euston saying we have a problem (see what I did there).
BB 120.JPG

It looks a lot worse in this photo but not that big a problem to sort out, all I had to do was chop off about 1mm of rail clean up and refit. I think that I got it first time! (make them door frames a bit wider so I can get my head out). After that it was just sticking down chairs and a quick check around, before I drop one of these two boards and start on the cosmetic fishplates and bits in the points.
BB 121.JPG

How many people are now complaining about the rain? We need the rain, but I also like the sunshine.

OzzyO.
 

OzzyO

Western Thunderer
Hello all,

a short update on the trackwork on the layout, it's not much to show. But this photo shows the droppers and the cosmetic fishplates in place.
BB 123.JPG

Then it's on to the BBJ to show how we do the first fix. It's onto a brass screw,
BB 125.JPG

Then it's to cut the sides of the screw head away (forgot to photo that). After that it's fix the two half chairs in place. This photo really does show the difference between C & L and Exactoscale chairs. I may remove the L/H side of the L/H chair just to use a glue that will fill the gap under the chair.
BB 126.JPG


ATB

OzzyO.
 

Attachments

  • BB 122 - Copy.JPG
    BB 122 - Copy.JPG
    248.3 KB · Views: 9
  • BB 122.JPG
    BB 122.JPG
    214.1 KB · Views: 7
  • BB 124.JPG
    BB 124.JPG
    236.8 KB · Views: 8

3 LINK

Western Thunderer
The C&L chair moulds are way past there best, and your basically buying a blob of plastic . I’m glad you have put the photos up to show the difference between Exactoscale chairs vs C&L offering.. Hopefully it will save a few modellers from wasting their money.

Martyn.
 

OzzyO

Western Thunderer
Don't forget the razor saw cut through just the top of the rail above the cosmetic fishplates - easy to do and marks the track panel ends.

Regards.

The problem is it adds more noise to the layout, you don't get the didley dum didley dee. it just makes a lot of noise for the sound in the locos to overcome.

OzzyO.
 

OzzyO

Western Thunderer
Hello all,

this is for our layout Lochmaben based around the mid 80s. I remember the telegraph post with the multiple wires on them, now they went before our time base. But I seem to remember a thick wire running along where the old wires used to run but on shorter posts. The question is when did they come into use and then fall out of use, to be replaced by concrete troughs.

TFAH

OzzyO.

PS. this question is also in the questions section.
 
Top