7mm Lochmaben, a new layout.

OzzyO

Western Thunderer
Hello all,

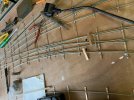
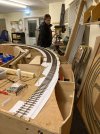
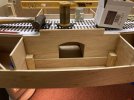
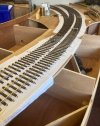
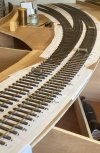
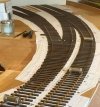
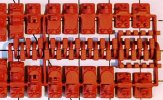
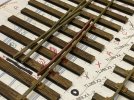
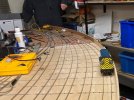
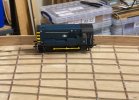
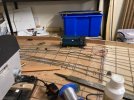
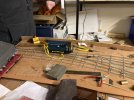
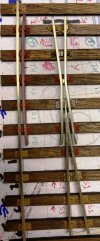
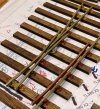
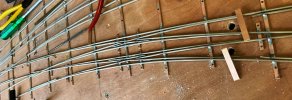
a bit of an up date on the trackwork for Lochmaben, we had to partly vacate the big club room as Swiss Pass needed to be erected for testing and making ready for Preston show 5th & 6th March. But we are still plodding on. Rick as been working on the tie bars on the points and is trying to work out the best way to do the double slip, for the point motors we're looking at using servos' to power them along with a micro switch for switching the power to the point vees.
BB 84.JPG
BB 85.JPG

When (if) he gets his sanity back he can start on these, two curved three way points at the station end of the fiddle yard then it's plain sailing with about five or six points to follow on with.
BB 77.JPG

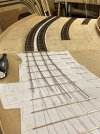
The same BBs from the other end showing some of the track that's in the platforms and in the yard. Yard to the left.
BB 78.JPG

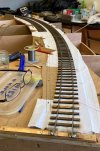
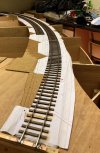
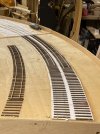
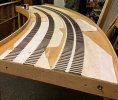
The trackwork is progressing towards the country end.
BB 83.JPG

We were going to use these fishplates for most of the main line but the cost became prohibitively expensive. If you want to know the cost PM me.
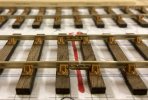
BB 80.JPG

So we decided to use these from scale 7 stores at approx. 83p each a much better proposition. To the left of the fishplate is a C & L chair I must remember to have the key showing away from the fishplate .
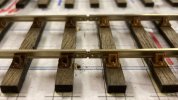
BB 81.JPG

More to follow soon,

Keep safe

OzzyO.
 
Last edited:

OzzyO

Western Thunderer
The second up date in a week (has the man gone mad) please don't answer that one.
First off a photo from December from the fiddle yard at the country end. Before we had to drop the boards for Swiss Pass.
bb 64.JPG

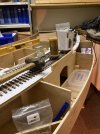
The same BB on Monday (14/2/22) in my new workshop (the library/ N gauge room). As we can only get two BBs up at at time, as I was over the BBJ it was time to drop this board and fit the next one in place. You can just make out the bridge parapets, these and more cross braces are a retro fit to stop these deep board and all the scenic boards from flexing. Some of the cross braces couldn't be fixed in place until we had the Templot plan and sleepers in place.
BB 86.JPG

BB 91.JPG

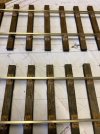
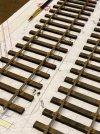
A couple of photos showing the chairs that I'm using, on the main line (bottom & R/H side) it's 3 hole chairs and on the head shunt & yard it's going to be 4 hole chairs and 9' sleepers. You can make out the 9' sleepers by the way they overhang the sleeper positions on the Templot plan. Will anyone notice these? Spot the C & L chair.
BB 88.JPG

BB 89.JPG

Keep safe from a snowy Barrow,

OzzyO.

PS. threading chairs on rail is not therapeutic, it's mind numbing. But it has to be done.
 
Last edited:

OzzyO

Western Thunderer
Hello all,

nothing much to say over the last couple of weeks, apart from more chairs going onto more rail. But I do have some information for you all. We are using these on each section of track most of the time we use two per section but some times it could be only one (not good practice) we just call them droppers, don't know what other groups call them?
BB 094.JPG

In my last post I mentioned about the drop boards and the under bridge (also showing my track pin hammer). The scenic section will not go down to the bottom of the drop board but to the stringer that's running across the bottom of the bridge.
BB 92.JPG
BB 93.JPG

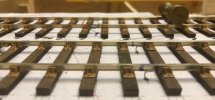
The lads are away this weekend 26 & 27/3/22 at a show so I decided to go up to the club on Saturday for a few hours and get a bit of work done on the layout. The first bit was threading more chairs onto rails, that job done it was time to solder the droppers to the base of the rail, that's when I found out that Ian had taken "his" soldering kit with him to the show! The numbers at the sleeper ends are for the amount of chairs I will need for that one length of rail, if the sleeper has a tick or dot at the end that shows me that I have stuck the chair down. Some times I tick or dot the ones with a number but I tend to sick these down first.
BB 095.JPG
BB 096.JPG

So what to do now? I know I'll form the four lengths of rail that will start to be the stock rails for the first two points.
BB 096 - Copy.JPG

So a bit of soldering and sticking down chairs and then onto the points, that should be fun.

ATB

From a sunny Barrow,

OzzyO.
 
Last edited:

OzzyO

Western Thunderer
Hello all,

I'm about to start laying one of the stock rails on my first point on the front of the layout using the chairs from Off the Rails. What I would like to ask is do the keys have a small and large end and how do you know which end is which?
BB 74 - Copy (2).JPG

Or do you put them in place using the small bit of sprue and cut it off after you have them in place?

Confused of Barrow,

OzzyO.
 

S-Club-7

Western Thunderer
What I would like to ask is do the keys have a small and large end and how do you know which end is which?

Or do you put them in place using the small bit of sprue and cut it off after you have them in place?

The keys are prototypicaly tapered, the thicker end being where the sprue attaches. And yes, the idea was to leave the sprue attached to enable insertion. Just don't push too hard as the taper will snap the chair.

Good luck.
 

OzzyO

Western Thunderer
Hello all,

started work on the first stock rail for one of the points on the front of the layout last night, so here's some photos to show the slow progress.

First the check rails and chairs, the check rails are from Off the Rails and are about 10 thou below the running rail height. The first and last chairs have the correct lead in and out to them. To me these look better than cutting and shutting S1 chairs to do this job.
BB 097.JPG

First on the running rail from the check rail chairs are 9 S1 chairs from Exactoscale, then onto the special point chairs the "names" of which you can see at the top of the point in red.
BB 098 - Copy.JPG
The second part of the point showing how we're going to move the blades via the two large (5mm) holes.
BB 099 - Copy.JPG

I've still go to fit the droppers to the stock rail, for these I'm thinking of three of them on these point stock rails, one near to the track joint off the photo to the left, one between the last/first S1 chair and one near to the BBJ. The switch rail will have at least one dropper near to the S1 chair. I may fit one near to the common crossing along with another on the stock rail.

ATB from a grey Barrow,

OzzyO.
 

Joe's Garage

Western Thunderer
Oooh, errr, that looks like a lot of work…

Lovely stuff.....The late Malcolm Parker of SECR fame once showed me his wooden keys he used for his O gauge track, hmmmmm. But very satisfying in the knowledge that you are building track as per prototype.

I will now take cover!

Julian
 

simond

Western Thunderer
I do like the idea of mounting the check rails lower than the running rails, it’ll allow track cleaning whilst keeping prototypically rusty checks.
 

simond

Western Thunderer
Oh, I saw it was a different colour, but I hadn‘t realised that it was plastic. I wondered if you’d pre-painted it. D’oh!

very good idea!
 

OzzyO

Western Thunderer
Oh, I saw it was a different colour, but I hadn‘t realised that it was plastic. I wondered if you’d pre-painted it. D’oh!

very good idea!
Hello all,

Simond, yes the check rails were pre painted before I fitted them.

Finished sticking the chairs down for the first point stock rail on the front of the layout (no photos of the glue drying, sorry).

Buffer track laying when this is happening, the first loco to run on Lochmaben went to Rick with his Dapol 08 :thumbs:.
IMG_5452.JPGIMG_5454.JPG

IMG_5455.JPG

IMG_5456.JPG


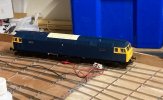
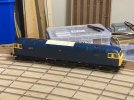
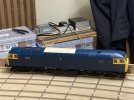
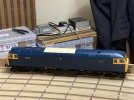
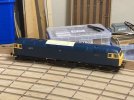
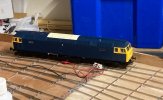
Then he went and did this the second loco to run on Lochmaben a Heljan 47 also from Rick:thumbs:.
IMG_5457.JPG
IMG_5458.JPG
IMG_5459.JPG

The running through the points was fantastic but what else should I expect from Mr. Ricktastic.

Hope to have a link to a short video soon.

ATB

OzzyO.
 

Attachments

  • IMG_5459.JPG
    IMG_5459.JPG
    207 KB · Views: 7
  • IMG_5458.JPG
    IMG_5458.JPG
    194 KB · Views: 6
  • IMG_5457.JPG
    IMG_5457.JPG
    218.5 KB · Views: 5

daifly

Western Thunderer
It's probably an optical illusion but clearance looks really tight between the outer track and the'wall'. Long wheelbase diesels look like they could have an interesting time!
Dave
 

OzzyO

Western Thunderer
It's probably an optical illusion but clearance looks really tight between the outer track and the'wall'. Long wheelbase diesels look like they could have an interesting time!
Dave

Hello Dave, all,

we did have a look at the clearance between the wall and locos that was one of the reasons that we ran a 47 around the same line (it has one of the longest bogie to bogie centres that we will be running) and it still had all of its paint on. This line will normal be used by 57' stock or some of our short wheel based trains that will live in the turn back sidings at the end of this road wrong road.

Onto the first point on the front of the layout, the first stock rail was in place so it should be simple to fit the common crossing! How wrong can you be just a few chairs and a bit of glue and Bobs your uncle, wrong.

All of the problems were caused by me, I had decided on a 1:8 crossing angle for the front of the layout but the very nice chairs from Off the Rails are for a 1:6 crossing angle, so a bit of work is involved in chairing up the common crossing. The photos show where I'm up to I'm looking at fitting some of the "packing blocks" in between some of the vee rails to get the correct look.
BB 098.JPG
BB 097.JPG

I think that it's looking better than a RTP point that I could mention.

Thank god I only have four to do, not like Rick.

ATB

OzzyO.
 
Last edited:

simond

Western Thunderer
Ozzy,

post 93, alignment of third track left of the 08 looks a bit dog-leg odd. is it intentional or unfinished?

atb
Simon
 

OzzyO

Western Thunderer
Ozzy,

post 93, alignment of third track left of the 08 looks a bit dog-leg odd. is it intentional or unfinished?

atb
Simon

Hello Simond, all

the dog leg on that road is intentional, it was done like that to move the fouling point closer to the point by a couple of inches. If any of you have seen the fiddle yard for Swiss Pass or Coppell you will know that we will use every available inch that we can!

ATB

OzzyO.
 

OzzyO

Western Thunderer
Hello all,

not much to show for eleven days of no posts, but the first point of the front of the layout is coming along I may have some photos of it tonight?
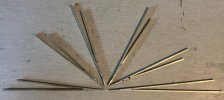
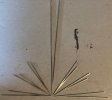
Talking about points I have been making these for the fiddle yard gang seven point common crossing (point vees), 1:8 X 2 and 1:10 X5. The 1:8 not a problem as I have a jig for this angle but the 1:10s no jig so I used the 1:8 jig for the basic cuts and filing angles and well?
I made a jig in the best bodging it style and this is what I came up with. Its not pretty or elegant but it worked for what I wanted.
BB 99.JPG

The first common crossing (can I just call them vees from now on?) The long 1:10. This vee is about 9" long to stop us having to use short bits of rail on the lead up to the point.
BB 101.JPG

Most of the vees assembled including the two 1:8s but not cleaned up and the last bit of the nose to sort out.
BB 102.JPG

All of the vees cleaned up and sorted, not to bad for about a days work.
BB 103.JPG

With a bit of luck these are the last vees that we need for the fiddle yard.
Or more to the point on with more point work (sorry) tonight at the club.

ATB

OzzyO
 

farnetti

Western Thunderer
Hello all,

not much to show for eleven days of no posts, but the first point of the front of the layout is coming along I may have some photos of it tonight?
Talking about points I have been making these for the fiddle yard gang seven point common crossing (point vees), 1:8 X 2 and 1:10 X5. The 1:8 not a problem as I have a jig for this angle but the 1:10s no jig so I used the 1:8 jig for the basic cuts and filing angles and well?
I made a jig in the best bodging it style and this is what I came up with. Its not pretty or elegant but it worked for what I wanted.
View attachment 161800

The first common crossing (can I just call them vees from now on?) The long 1:10. This vee is about 9" long to stop us having to use short bits of rail on the lead up to the point.
View attachment 161801

Most of the vees assembled including the two 1:8s but not cleaned up and the last bit of the nose to sort out.
View attachment 161802

All of the vees cleaned up and sorted, not to bad for about a days work.
View attachment 161803

With a bit of luck these are the last vees that we need for the fiddle yard.
Or more to the point on with more point work (sorry) tonight at the club.

ATB

OzzyO
Hi Ozzy,

I am doing something similar at the moment. Are they silver soldered or soft soldered?

Regards,

Ken
 
Top