7mm Mickoo's Commercial Workbench

Overseer

Western Thunderer
Looking lovely. Really needs a turned brass dome. Then you can match the dome to the loco, a quick look at online photos suggests there were 3 or 4 differing shapes - different tapers and different base profiles. The resin one looks like it may be the more modern version with nearly no taper and small, consistent, radius around the base.
 

mickoo

Western Thunderer
I see that you keep using that invisible solder;)
Lovely work!

Michael
Oh it's there alright, just that I've developed a solder free filter in my picture processing software :))

To be fair there has been quite a lot of cleaning going on, most soldering is inside but there are some places where it had to go on externally and that all needs cleaning up.
 

mickoo

Western Thunderer
Looking lovely. Really needs a turned brass dome. Then you can match the dome to the loco, a quick look at online photos suggests there were 3 or 4 differing shapes - different tapers and different base profiles. The resin one looks like it may be the more modern version with nearly no taper and small, consistent, radius around the base.
You're right and the resin one was a fall back, or in my case, primary contender. I have no issue over using resin and was exploring paints and coverings to get it back to a brass colour, there's some rather good ones out there but you'll never compete with real polished brass.

The problem I had was a brass dome that was oval and lopsided, part of the usual casting process we've all come to expect and this dome is no worse or better than many other kit domes I've had to deal with. If the dome were to be painted then I could of simply filled the gaps at the base with solder and the joint would be fine. In this case the dome is to be brass coloured and cannot be soldered or glued to seal the gap at the base post paint, therefore the fitting has to be perfect on the boiler. The 3D print achieved that, but at the cost of being the wrong material so I had to resort to plan B.
 

mickoo

Western Thunderer
After much dialogue on other forums I decided I had nothing to loose and threw the kit dome in the lathe.

To be fair the kit dome may have sufficed if you were opting for a later era when they were painted and then it could be fixed permanently and the gaps in the base filled with solder, I don't have that get out of jail card so the base has to be a perfect gap less fit, hence my probable over working of the item.

The dome was oval and slightly longer on one side, typical for any cast dome really so this one wasn't an exception from the norm, all the domes I've built commercially all suffer in one form or another of mould lines, ovality and slight deformations due to the casting process.

Anyway, I set to it with vigour late last night and turned it true, then set about blending in the base flare with big files and lots of Viking language. It took a while but eventually I have something that is getting somewhere near to where I wish to be. The next step was to panel beat the flare to match the boiler diameter better and remove as much of the gap as possible, it's not perfect yet, there are a few more lumps and bumps to tease out.

I've had to loose the beading in the process and I may try and add that back, but then again....I might not :D it is very fine and barely discernible in this scale. There's still a little kick toward the rear so I'll level that out and try not to loose anymore of the flare at the front end during that process.

The side image does now show how badly the bonnet fits, so that'll be next to get attacked with the big rough tools and then beaten to form to give a better fit.

I also need to remove the capuchon as they were not present on earlier engines.

IMG_0669.jpg

IMG_0670.jpg

IMG_0671.jpg
 

LarryG

Western Thunderer
That is developing into a really beautiful model. Things like large domes are always a problem due to the weight of whitemetal and G forces on the two halves of the spinning mould. But ultimately, a turned brass dome of the calibre you have made cannot be bettered. The best whitemetal castings I ever saw were produced by a jeweller in the Midlands. Barely any miss-match or shrinkage......I don't know how he did it on 1/50th scale bus roofs.
 

mickoo

Western Thunderer
Larry I agree, there is a limit to the casting process for objects like this, a fresh mould will get better results but as time passes they tend to wear and shift and then it becomes hard to post process items from them.

This dome was cast brass and I think centrifuge cast so the material mass has stretched it in one axis over the other, in addition the feeds are into the two lower sides and that extra mass has caused them to widen slightly, the result is that the top part of the dome that sits on the boiler has the correct radii to suit the boiler, but the lower sides have opened out to a larger radii. I was left with a gap of around 0.3-0.4 mm, it was enough to see and on the finished model would have stood out like a sore thumb. As mentioned previously, if the dome were to be painted you could permanently fix it and then fill the gap with sole low melt solder and be done.

You can see the effect on the bonnet, the base has a variable boiler radius, fine in the middle and probably out toward the edge for say 60%, then the last 40% starts to spread wider.

The bonnet is an easy fix because the flare is rather wide and sweeping and it'll not be hard to panel beat that outer edge to the correct radius over some formers, I'll probably end up loosing the beading as the bonnet core needs cleaning up as well, you can still see the ripples in the surface after removing the joint line.

The dome on the other had is huge in relation to the boiler, it's flare is much smaller and the other edges are near vertical, thus the material is much thicker and harder to form to shape. More modern engines have bigger boilers and often smaller domes, so the flare becomes larger, more shallow and easier to blend into shape.

I didn't actually turn this one from a blank, it's the cast one just trued up, I only had to correct the errors so can't really take any credit for the overall shape and profile. Having said that and having done this, the next step would be to turn up ones from blanks and if I need a brass dome then that's probably the route I'll go over a casting (depends on the supplied quality), if it's going to be painted then it'll be 3D hands down.

I'm not a GWR (or even early pre grouping engines) anorak by a long margin, but as I've said many times before when I do these older engines, I cannot turn a blind eye to the grace and style they exude, once fully painted and polished out they do make very nice models.
 

michael mott

Western Thunderer
The work on getting that casting to look "decent" is rather good, and I am sure that there might be a least one person in the thousands who would look at it and say....Ahh yes look at that micro flaw. But I am also guessing that it might be just you sir!
Pretty nice fix for a wonky casting.....Perfection demands a very high price, looks like you have deep pockets of skill.

Michael
 

mickoo

Western Thunderer
The work on getting that casting to look "decent" is rather good, and I am sure that there might be a least one person in the thousands who would look at it and say....Ahh yes look at that micro flaw. But I am also guessing that it might be just you sir!
I only have one response to that :)), wire valve handles ;):cool:

Pretty nice fix for a wonky casting.....Perfection demands a very high price, looks like you have deep pockets of skill.

Michael
Cheers, it's not technically hard, just eats the hours up. A model is only as good as it's lowest denominator and being as the dome is so large and so prominent visually, then it can make or break the look of the model in a glance.
 

mickoo

Western Thunderer
Mini update on the Finney7 Duke.

A lot of the parts are still loose fitted as they need to be painted and lined behind.

Most of the upper works is all but complete, some extendable handrail knobs and replacement buffers to fit (in the post hopefully), add the turnbuckle to the firebox cleats and turn a couple of whistles.

Watch out for the front stand pipe, you get two in the kit, high level and low level, the low level is fine as the pipe work turns back under the front bogie stretcher. The high level turns back directly under the buffer beam and impacts the bogie stretcher. Long story very short, cut the bottom off the low level one and graft onto the high level one.

Back head will get a waft of paint and then the rest of the shiny fittings and pipework can be added, following that it's all below the hem line.

All axle boxes need fitting, sans springs, so that they can be lined around, then it's brake gear (if the replacement cylinders turn up in the post), ash pan base, outside cosmetic axle boxes, sand pipes, leading driver internal spring and finally the inside motion; so nearly there now :thumbs:

IMG_10676.jpg

IMG_10678.jpg

IMG_10679.jpg

IMG_10680.jpg
 

mickoo

Western Thunderer
Despite the winge, they are in the post with an extra bit that might give you an idea or two:p. I've been under orders from the Present Mrs T for the last few days.:confused:
:)) Despite the winge....about the winge...it wasn't a winge at all :)) but re reading it, I should have worded it a bit better :cool:

The postal system has become steadily worse this year and this time of year is not helping either, I have two MyHermes packages waiting for collection, they have been since Sunday and yet no word when they'll come and collect. Nor is 'Holly' the online assistant any good at sorting the issue either, so they're going to get dropped at the drop off shop shortly, despite paying for home pick up to stay safe during a pandemic, useless!
 

King Crab

Western Thunderer
With reference to your wonderful Duke build, perhaps you could give some advice?
I have a 4mm 'Mallard' Duke in my (enormous and ancient) 'to do' pile.
One thing that has always given me pangs of anxiety was the idea of forming that curved footplate.
Perhaps I am overthinking it, but to do it right, so that all the curves are the same, and match the outside frames, seemed like a difficult thing to pull off.
Any thoughts on that?

Peter
 

Dog Star

Western Thunderer
Perhaps I am overthinking it but to do it right, so that all the curves are the same, and match the outside frames, seemed like a difficult thing to pull off.
Any thoughts on that?
I share your concern and I hope that Mick can expand on your question.

regards, Graham
 

mickoo

Western Thunderer
With reference to your wonderful Duke build, perhaps you could give some advice?
I have a 4mm 'Mallard' Duke in my (enormous and ancient) 'to do' pile.
One thing that has always given me pangs of anxiety was the idea of forming that curved footplate.
Perhaps I am overthinking it, but to do it right, so that all the curves are the same, and match the outside frames, seemed like a difficult thing to pull off.
Any thoughts on that?

Peter
Peter, I'll not misguide you, it's not easy.

It might be easier in 4 mm as you're dealing with a smaller area but in 7 mm it can be a faff. The Duke has half etched footplates with rivets on top, this makes it hard to use a former as the raised rivets create stress points in the material. you could coat your formers in tape or thin flexible material so the the raised rivets sink in and you form the actual base material. Curves on the underside are easier as you have a smooth surface that sits flat on the former.

I did one top bend with a former and it creased the footplate around the rivets, luckily I over bent it, so when flattening it out most of the creases.......became less obvious :oops: It took quite a while to dress the rest out to give a nice flat finish. All of the other bends were done with Mk I fingers and thumbs bit at a time. Probably took two near three hours to get the whole footplate where I wanted it to be.

If I have another Duke to do in the future then I'll not use the kit footplate, I'll etch a new one up that is full thickness with half etched rivet idents on the underside, that way both top and bottom can be shaped over formers and then the rivets punched out afterward. That'd also allow you to etch little pockets for the steps where the footplate rises over the coupling rod bosses; it'd make it easier to hold them in place whilst fixing. You could add a peg to the rear riser and a corresponding hole in the slot for a more secure fixing, allowing them to be soldered from below and remove the need for cleaning up above.

I'd also add a longitudinal slot to locate the outer frames in, either one long slot or several short ones, currently there's nothing to stop it wandering in and out other than squinting down it to make sure it's straight. The slot isn't essential, just saves time, more an enthusiasm feature than a must have.

MD
 

mickoo

Western Thunderer
Last assembled shots of the Finney7 Duke.

Crank axle needs fixing up and inside motion fitting, but it really needs striping down to accomplish that and I'm not rebuilding it afterward for a couple of photos :cool:

There are one or two pieces of bright work not fitted, handrails, polished snubbers etc, again, no point adding them, then taking them off for paint, adding them back afterward.

Axle boxes are all fixed, springs all cut off and wire pegs added to fit them back to the axle boxes post paint, basically all the springs are removable to aid painting; which is only necessary if you have red frames lined out, if you're modelling black frames then leave them all complete.

The tender spring castings are more heavily modified because the snubber is moulded into the pseudo frame bracket and into the dropper, I just cut the lot off, added new wire droppers and had some L brackets etched which hold everything in place.

IMG_10688.jpg

IMG_10689.jpg

IMG_10690.jpg

It's not that clean anymore, after about three weeks of handling the brass just reaches a point when it naturally tarnishes, I used nitrile gloves for three weeks with zero skin touch as an experiment and it didn't stave off the inevitable. Household cleaners will get the grease and flux off but not restore the brightness, this close to shipping for paint it really doesn't matter.
 

King Crab

Western Thunderer
Peter, I'll not misguide you, it's not easy.

It might be easier in 4 mm as you're dealing with a smaller area but in 7 mm it can be a faff. The Duke has half etched footplates with rivets on top, this makes it hard to use a former as the raised rivets create stress points in the material. you could coat your formers in tape or thin flexible material so the the raised rivets sink in and you form the actual base material. Curves on the underside are easier as you have a smooth surface that sits flat on the former.

I did one top bend with a former and it creased the footplate around the rivets, luckily I over bent it, so when flattening it out most of the creases.......became less obvious :oops: It took quite a while to dress the rest out to give a nice flat finish. All of the other bends were done with Mk I fingers and thumbs bit at a time. Probably took two near three hours to get the whole footplate where I wanted it to be.

If I have another Duke to do in the future then I'll not use the kit footplate, I'll etch a new one up that is full thickness with half etched rivet idents on the underside, that way both top and bottom can be shaped over formers and then the rivets punched out afterward. That'd also allow you to etch little pockets for the steps where the footplate rises over the coupling rod bosses; it'd make it easier to hold them in place whilst fixing. You could add a peg to the rear riser and a corresponding hole in the slot for a more secure fixing, allowing them to be soldered from below and remove the need for cleaning up above.

I'd also add a longitudinal slot to locate the outer frames in, either one long slot or several short ones, currently there's nothing to stop it wandering in and out other than squinting down it to make sure it's straight. The slot isn't essential, just saves time, more an enthusiasm feature than a must have.

MD

Thank you for the thoughtful reply.
So first grab a former, then courage in both hands...
Peter
 

mickoo

Western Thunderer
Brief update on the current project, Finney7 Hall and 4000G tender.

Steps on the frames and lamp irons on the buffer beam will complete the lower chassis, all hopefully done tomorrow.

It does all strip down to allow the wheels to be removed for painting and reassembly afterward.

IMG_10722.jpg

IMG_10723.jpg

IMG_10727.jpg

Next week it's back to the Garratt with all new etched brake gear and motion brackets/slide bars.

IMG_10732.jpg
 

mickoo

Western Thunderer
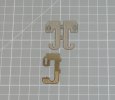
Moving onto the Garratt and the recent etches, I did a quick test build and happy to say that thus far they are fit for purpose. I've included a 'spot the difference' image of the new motion bracket and the kit one, I didn't do the same for the slide bars; they're essentially a T shaped form as far as I can tell from the parts and notes.

Onward, only another three to do, then two sets of brake gear :D

IMG_0733.jpg

IMG_10734.jpg

IMG_10736.jpg
 
Top