JimG
Western Thunderer
After a small sortie into building a TT120 coach here I thought I might have a go at something a bit more adventurous. ") So I dug out my S scale drawings of a 48ft Caledonian 7 compartment First and did the necessary re-scaling and generaton of files. The major consideration was the CNC GCode file which cut the bolections. For my S scale builds and also the 1:32 scale builds, I had to hand code the CNC file to do the contour profiling of the bolections. That was about ten years ago and I had to get my brain round what I had written then. Fortunately I had written the program to take input of key dimensions so on the face of it should have been easy, but there was still room for finger trouble.
So I dug out my S scale drawings of a 48ft Caledonian 7 compartment First and did the necessary re-scaling and generaton of files. The major consideration was the CNC GCode file which cut the bolections. For my S scale builds and also the 1:32 scale builds, I had to hand code the CNC file to do the contour profiling of the bolections. That was about ten years ago and I had to get my brain round what I had written then. Fortunately I had written the program to take input of key dimensions so on the face of it should have been easy, but there was still room for finger trouble.
The first attempts didn't look right so there was a good few attempts on small test pieces to get it right.

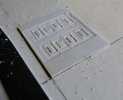
This is an 0.3mm ball end cutter parts way through the rounds on the top left bolection...

...and a fraction of the test pieces as a result. But I got there in the end. Apart from finding out my dodgy garbage in/garbage out situations, I was having to deal with bolections which were about 0.1mm x 0.1mm (0.004" x 0.004") in section, so a thou one way or the other could make a noticeable difference.

I then went ahead with the main body construction, similar to the four wheel coach previously, in the Jenkinson "box" style with a 1mm floor, partitions and ends.


They were all put together to give the box...

...and the shaping of the inner sides provides the base for then outer sides to support the tumblehome.

The outer sides were machined and I had a bit if a fight getting them off the double sided tape which holds them flat on the CNC table - the top one looks decidedly crumpled. I managed to find an old roll of Letraset low tack tape and used that for the panelled ends, but the left hand end shows that it hadn't worked too well with the spiral flutes of the cutter tending to pull the styrene up in places and giving a deeper cut than intended. The ends were re-done.

The outers were glued to the box then I applied solvent to the bottom edges and pushed them in using the rules and weights to form the tumblehomes. I started using D-Limonene which had just arrived from Ebay. The D-Limonene is in the left hand glass bottle - also off Ebay (ten for £2.50). It's got a soft rubber stopper which I can get off easily with one hand which makes working with it a lot easier. The left hand bottle hold the MekPak and that's about fifty years old - it first held Haliborange capsules for my daughter in her infancy. This method didn't work too well since I must have overdone even the D-Limonene and the rules left impressions on the styrene.

So I went through the whole process again, taking more care when gluing the tumblehomes, and that work well.

Here's a closer shot showing the bolection detail, which might be a tad heavy. I remember a discussion with Cynric and Steve Cook at Larkrail's predecessor maybe ten years ago, trying to decide how heavy bolection detail should be. I had brought some S scale sides with three varieties of bolection dimensions and the general feeling was that the finest dimensions were best, giving more of a suggestion of the bolections. I think they might have thought that these ones are a tad on the heavy side.

The sides project the required amount to represent the panelling on the ends. They look quite good now and will benefit from some light sanding once the atyrene has hardened off.

One problem I find is that the tops of the sides between the partitions tend to wave about in the breeze - particularly the two closest on the left, so I'm looking at incorporating a partial "ceiling" on top of the partitions to locate the tops of the sides to hold them in line.
All good fun and it feels almost archaic in today's 3D printing world.
Jim.
So I dug out my S scale drawings of a 48ft Caledonian 7 compartment First and did the necessary re-scaling and generaton of files. The major consideration was the CNC GCode file which cut the bolections. For my S scale builds and also the 1:32 scale builds, I had to hand code the CNC file to do the contour profiling of the bolections. That was about ten years ago and I had to get my brain round what I had written then. Fortunately I had written the program to take input of key dimensions so on the face of it should have been easy, but there was still room for finger trouble. The first attempts didn't look right so there was a good few attempts on small test pieces to get it right.
This is an 0.3mm ball end cutter parts way through the rounds on the top left bolection...
...and a fraction of the test pieces as a result. But I got there in the end. Apart from finding out my dodgy garbage in/garbage out situations, I was having to deal with bolections which were about 0.1mm x 0.1mm (0.004" x 0.004") in section, so a thou one way or the other could make a noticeable difference.
I then went ahead with the main body construction, similar to the four wheel coach previously, in the Jenkinson "box" style with a 1mm floor, partitions and ends.
They were all put together to give the box...
...and the shaping of the inner sides provides the base for then outer sides to support the tumblehome.
The outer sides were machined and I had a bit if a fight getting them off the double sided tape which holds them flat on the CNC table - the top one looks decidedly crumpled.
I managed to find an old roll of Letraset low tack tape and used that for the panelled ends, but the left hand end shows that it hadn't worked too well with the spiral flutes of the cutter tending to pull the styrene up in places and giving a deeper cut than intended. The ends were re-done.The outers were glued to the box then I applied solvent to the bottom edges and pushed them in using the rules and weights to form the tumblehomes. I started using D-Limonene which had just arrived from Ebay. The D-Limonene is in the left hand glass bottle - also off Ebay (ten for £2.50). It's got a soft rubber stopper which I can get off easily with one hand which makes working with it a lot easier. The left hand bottle hold the MekPak and that's about fifty years old - it first held Haliborange capsules for my daughter in her infancy.
This method didn't work too well since I must have overdone even the D-Limonene and the rules left impressions on the styrene.So I went through the whole process again, taking more care when gluing the tumblehomes, and that work well.
Here's a closer shot showing the bolection detail, which might be a tad heavy. I remember a discussion with Cynric and Steve Cook at Larkrail's predecessor maybe ten years ago, trying to decide how heavy bolection detail should be.
I had brought some S scale sides with three varieties of bolection dimensions and the general feeling was that the finest dimensions were best, giving more of a suggestion of the bolections. I think they might have thought that these ones are a tad on the heavy side. The sides project the required amount to represent the panelling on the ends. They look quite good now and will benefit from some light sanding once the atyrene has hardened off.
One problem I find is that the tops of the sides between the partitions tend to wave about in the breeze - particularly the two closest on the left, so I'm looking at incorporating a partial "ceiling" on top of the partitions to locate the tops of the sides to hold them in line.
All good fun and it feels almost archaic in today's 3D printing world.
Jim.