7mm On Heather's Workbench - 37 Varieties

Heather Kay

Western Thunderer
I managed a short test run on The Plank. All the lights worked, but pickup was awful. So much clag on the wheels.

First job this morning, then, was to clean the wheels. I also tried to mop up a lot of the grease that the gear trains tend to expel. I don’t need to weather the underframe to represent diesel spills! With the wheel tyres a bit shinier, a quick tootle on the rolling road showed it sort of worked okay. Sadly, I don’t think my tiny Gaugemaster handheld controller is quite up to the task. It needs full power to get the thing running at all, so I assume it can’t supply sufficient angry electron pixies for both motor bogies together.

I’ve done a quick visual check that the final drive gears, which are still OEM nylon jobbies, haven't split. My goodness, isn’t there a lot of slop in that gear train‽ No wonder it throws grease everywhere!

Having satisfied myself the mechanicals and electricals are within tolerance, I suppose I need reunite the chassis and body, and sort out the final little details.
 

Daddyman

Western Thunderer
I also tried to mop up a lot of the grease that the gear trains tend to expel.
In my experience of RTR, that's not enough. They need a complete degreasing by soaking in, say, white spirit. That may necessitate the removal of the bogies, or it can sometimes be done by hook and/or crook with the bogies still attached to the model. I've skimped on this in the past and regretted it when bogies, carefully weathered to look dusty, take on a gloss sheen within a couple of weeks.
 

Heather Kay

Western Thunderer
take on a gloss sheen within a couple of weeks

Duly noted, thanks. That recommendation will be passed on to the owner. It’s something that perhaps could be dealt with when it all comes apart again for electronics to be installed.

As it is, I’ve just wrestled the wiring loom into place, and attached the body shell to the chassis. Next on the agenda is some soldering to make new wipers and brake attachments - and then (gasp!) I think it’ll be done!
 

Dog Star

Western Thunderer
Actually, next on the agenda is taking it all apart again. As I feared, the floor doughnuts clash with the flywheels.
Seeing as there are a fair number of these models working into the Forest (ssshh, nothing to be said to Ian Pope (@Ian Pope)) and as there is a possibility that cab detailing might be on the agenda, can you please highlight what you did to present a real-estate conflict?

thank you, Graham
 

Heather Kay

Western Thunderer
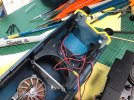
Graham, I think the older HJ models have larger flywheels, and the plain cab bulkhead a larger cover. It appears newer models have smaller flywheels and the detailed bulkhead parts consequently smaller covers. It’s of an order of about 10mm radius smaller, and fouls the flywheel. The solution has been to saw off the bottom of each bulkhead, complete with the cover.

CE064E62-5204-444E-85AC-0FE329D9F771.jpeg

It leaves a large semicircular hole in the floor of the cab. I think I may have to paint the top of each flywheel black to try and help make it less obvious.

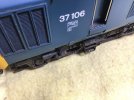
This photo was taken to illustrate that the inevitable occurred - the tail lamp lenses snapped off at the No1 end. I’ve effected a repair, as I didn’t lose the broken ends, by supergluing the parts back together. I then opened the lamp apertures slightly with a taper broach, and used some PVA to hold the light units in place. Not ideal, and it’s certain a breakage will happen again at some point in the future. The question is why the lighting loom wasn’t designed to fit in the body, with a single multi-pin lead to the PCB in the chassis. Instead, this annoying setup means you can’t easily lift the body away from the chassis without unplugging eight fragile lights.

So, two steps forward, one and a bit back.
 

richard carr

Western Thunderer
Tim

No that is a standard version 1 Heljan 37 from quite a long time ago now, must be 2005 or around then. I'm very surprised the gears haven't split though, both of mine did a few years back.

Richard
 

TheSnapper

Western Thunderer
Thanks Richard.
I learn something every day on WT!
My first Heljan loco was the original Hymek in 2008, but can’t remember the lights being wired like this.
I may be wrong of course…..
Tim
 

Heather Kay

Western Thunderer
No that is a standard version 1 Heljan 37 from quite a long time ago now, must be 2005 or around then. I'm very surprised the gears haven't split though, both of mine did a few years back.

That certainly explains some of the odd layout inside. As to the gears, knowing a little of the model's history, I doubt it’s done much running.

1640097B-A864-477B-8586-609AD092F46E.jpeg

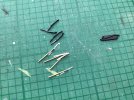
Four moulded plastic wipers, four replacement metal wipers. They need adjusting to touch the glazing, then painting. I still need to organise the handbrake pull levers, two of which (the only two in this case) are upper right. They’re not even the right sort of shape. Some brass or nickel strip will need to be mangled into shape, and some fine chain found.
 

Heather Kay

Western Thunderer
Handbrake lever doodads.

32D861E9-DD47-42EE-8B22-AD44C9222654.jpeg

I found some suitable brass etch underframe parts, probably from brake linkage under a coach. Tweaked to the right shape, so they cranked out from the body like the real thing, the question arose of how to attach the chain. Remember, it needs to be easily unhooked so the bloomin' body can be removed. My original idea was to attach the chain to the end of the crank, and fashion some kind of hook affair the other end that attached to possibly the step brackets. Obviously, it makes much more sense the other way about. So, fine wire was used to "tie" the chain to the brake cylinder push rod, and a hook affair made for the other end, bent up from 0.45mm brass wire. This hooks into the crank. A spot of PVA will stop it unhooking inadvertently.

A dab of weathering paint will hide shiny brass. I’ll paint the wipers tomorrow, fit them, and arrange a session with the official photographer.

Yay! Nearly done!
 
Top