On The Pugsley Workbench

Pugsley

Western Thunderer
It's been a long time, but over the last few months my modelling mojo has returned and I've finished off a few projects that were started years ago (2014 in the case of the OBA's!):eek:

All of these are 4mm scale, and destined for ebay, as they don't fit in with future plans. I have kept a few 4mm scale locos and all of my tank wagons, so something may happen there at some point but I'm planning on concentrating on 7mm scale for the time being.

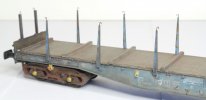
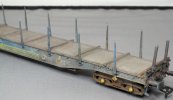
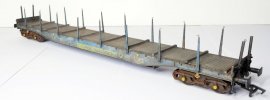
Heljan Cargowaggon flat:
01070061web.jpg01070069web.jpg05230078web.jpg

I need to take better pics of these, which I hope to do over the weekend, but they're pretty much complete:
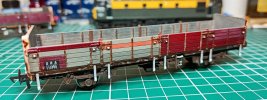
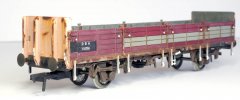
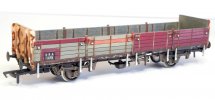
IMG20230131203442web.jpgIMG20230131203502web.jpgIMG20230131203605web.jpgIMG20230131203614web.jpg
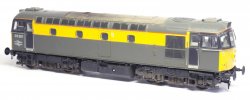
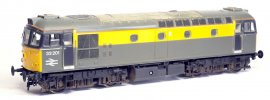
These are both based on pics of wagons found on the internet, with a little modelling licence applied in a couple of areas. The 33 in the background needs a couple of small tweaks and then that will be done as well.

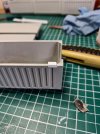
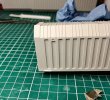
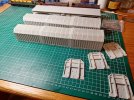
The next project on the bench will be two of the Impressionist Models KIA Tiphook/VTG covered coil carriers:
IMG20230201172910web.jpg

The first impression is that they capture the size and shape of the prototype quite well, but there is going to be plenty of detail to add. It should be an interesting project and will keep me out of mischief for a while!
 

Dog Star

Western Thunderer
Welcome back,

Nice work on the Cargos and the OBAs.

Which era / direction are you likely to take when working in 7mm?

best wishes, Graham
 

Pugsley

Western Thunderer
Thank you all for the kind words and welcoming me back! Don't expect particularly rapid progress, but there will definitely be more progress than the last few years :D

Which era / direction are you likely to take when working in 7mm?
Spring 1991, just before the demise of Speedlink. North-west-ish, I have got a layout plan forming in my head, but it will be some time before that goes anywhere. I need more stock first!

Following your layout build on RMweb all those years ago got me in to model railways. :)
Wow. I had no idea! Glad to have been of help (or maybe hindrance, I guess ;) ) I do miss that layout and sometimes wonder if it still exists somewhere.
 

Pugsley

Western Thunderer
Thanks Andrew, I've enjoyed the last few projects and am looking forward to building something new.

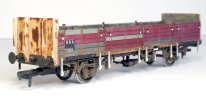
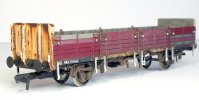
Better pics of the completed OBA's, including a few touch-ups of things I noticed in the last pics, including the strapping on 110766. I find photos incredibly useful for noticing those things that you might not otherwise pick up.

02060061web.jpg02060062web.jpg02060066web.jpg02060075web.jpg
Rust is gouache, a combination of both raw and burnt sienna and umber, applied from light to dark. The streaking is achieved by running a very slightly damp flat brush over the dried patch, re-wetting it and dragging some down. The EWS maroon was faded and some was painted after the rest of the wagon was matt varnished, to protect the finish before applying decals. Decals are custom made in Corel Draw and printed on a laser printer.

The tension locks have been retained as these are sale projects, and I can't seem to remove them without wrecking something, so the purchaser can do that instead :D

Here's a couple of pics of the 33 too. This was originally started for my Southern Region layout that I never finished. I used T-cut on the body to give it a it of a sheen as I wanted to replicate a loco that wasn't long out of the paint shop. One thing I had noticed was that the fibreglass roof panels aren't cleaned particularly well in works, so always look matt and dirty even with a fresh paint job.
01070072web.jpg01070073web.jpg02060077web.jpg
A bit of light weathering to the roof and underframe completes the effect.

Work has started on the KIA's, first step is to work out what additional detail I want to add. I took some pics of these wagons at Long Marston many years ago. If I'd known I'd be building some nearly 14 years later, I'd have taken more! Between mine, and some others I've found on the net, I've got enough to be going on with. I've dug out my collection of plastic and metal sections, so need to work out sizes.

To do this, I'll use Corel Draw again to scale the size of the features I want to replicate by scaling from a photo, using a known dimension. It's not foolproof, but I've found it's a good way to get things to the right proportion, even if they're not 100% accurate.

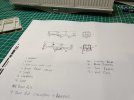
I'm also making a little diagram as a to do list to make sure I don't miss anything.

IMG20230209191448.jpg
I might be good with paint, but I'm no artist :D
 

Pugsley

Western Thunderer
Thanks Steve. The faded ends were a custom mix based on photographs. Unfortunately I did that bit so long ago I've got no idea of what colours I used! Where I've faded the EWS maroon (like the far end of 110766 in the last pic), that was using water washable white oil paint, brushed on sparingly with a flat brush.
 

Pugsley

Western Thunderer
Sometimes. I do have one and I do use it, but only if I really have to because there's no other way of achieving the finish I want. It takes so long to set everything up and then clean again after, I avoid it as much as possible!
 

Pugsley

Western Thunderer
With the 4mm stuff out of the way (for now, there's a few more to finish off and sell) I've made a bit more progress with the KIA steel wagons.
IMG20230326182118.jpg
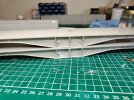
All of the moulded detail I wanted to replace is gone, the plan is to make replacement steps out of brass and plastic strip and the new air pipe will be 0.7mm wire. I keep telling myself that, one day, I'll build a kit in the way that the designer intended! Just a bit of final tidying to do in this area now, I may give the chassis a quick spray of primer to see how it's looking, it's often hard to tell how smooth a surface is when it's different colours.

One of the hoods had an air bubble in the casting, so that's been cut out and a bit of plastic strip glued into place:
IMG20230326182047.jpg
This was subsequently cut and filed into shape:
IMG20230328190537.jpg
The next stage is to work out the size of the various detail parts and get making. I think I'm going to make and detail the bodies and chassis separately, so the final assembly stage will be to glue the two parts together.
 
Top