Rob's Painting, Lining & Weathering

Rob Pulham

Western Thunderer
Way back in 2011 when I painted Severn Cynric posted this.

Rob Pulham's Work Bench - Severn Finished at Last, it's even painted!

Thats very nice Rob :thumbs: I think it needs lining though :))

I am pleased to say that I finally fulfilled his wish and it's sad that he didn't get to see it.

I make no apologies for the photo overload here.

IMG_5688_zpsfb628d5c.jpg

IMG_5687_zpsfd997219.jpg

IMG_5686_zpsc2f1a66e.jpg

IMG_5684_zps2b2c4a71.jpg

IMG_5680_zps4072d8c1.jpg

IMG_5679_zps1a5b25de.jpg

IMG_5678_zps8a1ce571.jpg

IMG_5677_zps8d889ddf.jpg

IMG_5675_zps53e00b65.jpg

IMG_5674_zpsc9a6c548.jpg

IMG_5673_zpsa363b8ec.jpg

Although I doubt that Colonel Stephens would ever have funded such an elaborate paint job for his stock - rule 1 applies:D

Thanks also go to Warren because if he hadn't generously shared his time and knowledge I doubt that I would have ever have had the confidence to give this a go.
 

Rob Pulham

Western Thunderer
Thanks Both,

Adrian, I agree with you with Cynric's probable thoughts on the weathering but I am not going there:) I quite like the ex works look for this one.
 

Steph Dale

Western Thunderer
Rob,
Utterly, utterly charming, the lining sets it off to a 't'.

Adrian,
Naughty! It did make me chuckle though. And I think you may well be right.

Steph
 

Rob Pulham

Western Thunderer
As promised these are the pens and jigs that I used to do the lining job on Severn.

IMG_5690_zpsdb077ef2.jpg

Although I have a Haff pen and compass they are not as fine as those in the photo, the pen is a Kern head that was attached to a strange compass so I made a new handle from some suitably sized brass tube. The compasses are an unknown German make that I picked up in a mix set with the Kern one fr a few quid on Ebay some time ago. I used one of the emery board type files that you get as a free gift each time you place an order with Scale Hardware - they have four different grades of abrasives and the too finest are perfect for honing the pens and compasses.

The flat brass with the washer on the end is for creating the corners

The plastic card curve was used to create the lozenge shape around the name plates

The wire with the small shoe is a dog legged skate that replaces the straight pin in the bow compass to allow me to do the curves on the splashers fronts etc. by reaching above and beyond the rivets on the edge of the splasher tops.
 

Rob Pulham

Western Thunderer
It's quite pleasurable once you get started.

The lighting has brought out the reds a bit more than they are in reality but I am quite pleased with the result. I have also done the cab floor/ bits and pieces which is what got me started - I will update the loco thread once it's all dry.
 

Steph Dale

Western Thunderer
Rob,
You might need a touch more 'rust' on the top of the sides, most open wagons had a steel capping strip that would soon have got worn and tarnished.
Just a thunk.
Steph
 

Rob Pulham

Western Thunderer
Rob,
You might need a touch more 'rust' on the top of the sides, most open wagons had a steel capping strip that would soon have got worn and tarnished.
Just a thunk.
Steph


Cheers for the input Steph.

A close look at it reveals that the capping strip has been represented by Slaters too:thumbs:
 

Ressaldar

Western Thunderer
Hi Rob,

you need to get to a very good redundancy package agreed with Chris as she will be out of a job soon - well done, keep it up.

cheers

Mike
 

Rob Pulham

Western Thunderer
I am still working away on the can for my A3 which is now ready for glazing but in between that I have been progressing the shelf queens and doing some more weathering.

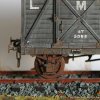
First up is the Slaters Midland van that featured earlier in the workbench. This is a joint effort in so much as Chris had made a start by weathering the roof and I picked it up and did the body and underframe. Some said to me that weathering is addictive and I have to agree...

IMG_6044_zpsa56aa07e.jpg

IMG_6042_zps7768d513.jpg

IMG_6037_zpsf08245fe.jpg

IMG_6036_zpsa2d2784f.jpg

IMG_6035_zps289f4dd8.jpg

IMG_6033_zps88a99168.jpg

IMG_6032_zps1917d179.jpg

IMG_6025_zpsd3aa3e6a.jpg
 

Overseer

Western Thunderer
Rob,

The wagons are looking good. I hope you don't mind me commenting but I suggest you add more black to the rust colour you are using on the underframes, then keep the brighter rust colour to highlight unpainted or damaged parts such as brake blocks and around pivot points etc. Then add washes to tone down some parts and to represent dust and dirt from the track, plus near black for oil or grease leaks on the axle boxes.
 

Rob Pulham

Western Thunderer
Hi Fraser,

No I don't mind anyone commenting/suggesting ways to improve, I am still very much a beginner on this. - Big L Plates.....:thumbs: The main thing from my point of view is that I have got over my "fear of doing it wrong" and I am really enjoying it.

The photos don't seem to show it very well but there is a representation of weeping oil on the axle boxes.
In the cold light of day and listening to feedback I think perhaps it doesn't show up well because I did it with Vallejo "metallic gunblue" which looks like new grease/oil - with a thick "bluey green" colour. They possibly look as if I haven't actually done any weathering on the top of the axle boxes and that its the base plastic showing through (this has been suggested in a comment on another forum). So you are right I need add some black etc. to it.

Thanks for your interest and for taking the time to share your tips.:thumbs:
 

Rob Pulham

Western Thunderer
I made a start on another wagon last night and made a discovery that I thought worth sharing.

When using enamels I am aware of and have used the technique of using a cotton bud soaked in white spirit to remove unwanted enamel paint - as long as it hasn't been on too long. I have seen examples of the technique used in weathering.

What I didn't know or appreciate until last night was that you can do something similar with acrylics by using a cotton bud soaked in meths.

These are a few shots of the wagon that I am now working on that I used the technique on last night.


IMG_6050_zpsbfe0690b.jpg

IMG_6049_zps3bac3862.jpg

IMG_6047_zpsc77a43fb.jpg

It has quite some way to go but I feel that I have a bit more freedom to experiment knowing that even when it's gone on quite thick and had some drying time it's still maneuverable.
 
Top