You are using an out of date browser. It may not display this or other websites correctly.
You should upgrade or use an alternative browser.
You should upgrade or use an alternative browser.
The D&RGW and Rio Grande Southern in 0n3
- Thread starter PhilH
- Start date
-
- Tags
- d&rgw narrow gauge
mickoo
Western Thunderer
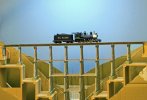
Hard to resist a little photo editing fun.
View attachment 154781
Next the scenery, backscene and maybe lots of trees ? (can't do #464 at present !)
Superb structure all round

Scale7JB
Western Thunderer
Why didn’t I think of doing that?
JB.
PhilH
Western Thunderer
Hard to resist a little photo editing fun.
A bit more editing and I wouldn't have to bother with the scenery

Scale7JB
Western Thunderer
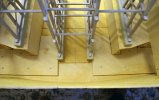
From this angle the room lighting makes the timber appear yellow
Phil, can you change the options in your camera to tungsten light? It should help to lose all of the yellow colour casts.
PhilH
Western Thunderer
Phil, can you change the options in your camera to tungsten light? It should help to lose all of the yellow colour casts.
Yes I can, I'll try that next time. I usually do any adjustments in Photoshop, but it doesn't always work well for everything.
Thanks for the advice.
PhilH
Western Thunderer
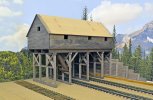
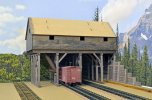
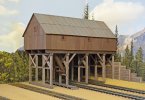
Another building nearing completion is the tramhouse at the end of the through station sidings.
The tram in this instance is actually an aerial tramway or aerial ropeway. Such systems were used in mining areas of Colorado to connect mines to ore processing mills and then to loading points on the nearest railroad. The model was built from the Banta Modelworks kit of the tramhouse at Ophir on the Rio Grande Southern Railroad, although its been reduced in length by about a third, reduced in height and with a modified support structure to suit the location.
In theory the ropeway would enter the back end of the building (against the backscene) and there would be a horizontal return wheel inside the building. The rope would be driven from the mine or mill end of the system. The trams or buckets would be taken off the rope, emptied onto the floor of the building and returned to the rope. The ore would then be shovelled through a hole in the floor into a round steel chute for loading into boxcars on the track below.
The short half section of tube at the bottom of the main loading tube would be loose in the prototype and slid forward and down through the open door of the boxcar for loading. The processed ore was carried in boxcars rather than open gondolas because of its relatively high value and probably a couple of planks would be placed across the bottom of each door opening during the loading process.
The support against the backscene will be vertical when its fixed in position ! Also don't take too much notice of the surface finish of the walls and roof as the entire structure will be sheeted with corrugated iron. That's the next job.
PhilH
Western Thunderer
Progress on the layout grinds slowly on......
The corrugated sheeting has been added to the Tram House. Corrugated aluminium was supplied in the kit in the form of a strip 2" wide, giving a scale sheet length of 8ft measured along the corrugations. This was OK for the walls, but used on the roof with two sheets each side it would have left a narrow strip to fill with only part of a sheet. The prototype which the model is loosely based on had only two sheet lengths each side of the roof and I think the normal size for the prototype corrugated iron sheets would have been 9ft long x 3ft wide. So the roof was done with Slaters Plastikard corrugated sheets. The corrugations match fairly well so I don't think the difference is too apparent.
The end of the siding on the left will be hidden from view when the loco shed is in place.
The sheets were sprayed both sides with Halfords grey primer, painting the back gives a better bond when gluing the aluminium or Plastikard to the wooden structure. The aluminium also had an initial coat of etch primer.
The front faces were then individually painted with rust colour to give some variation between individual sheets when placed in position. Initially the sheets were cut to 4ft scale width but this was later reduced to 3ft. width. The sheets were fixed in position with Aleene's Tacky Glue.
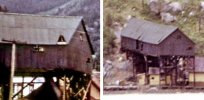
Photos of the prototype at Ophir appear to indicate that the roof sheets were less rusted than the wall sheets.
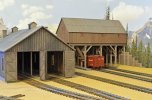
Now the building is complete, before I can fix it in position I need to think about painting the track and ballasting.................
Good, I've thought about it , so I'll move on to something else
The corrugated sheeting has been added to the Tram House. Corrugated aluminium was supplied in the kit in the form of a strip 2" wide, giving a scale sheet length of 8ft measured along the corrugations. This was OK for the walls, but used on the roof with two sheets each side it would have left a narrow strip to fill with only part of a sheet. The prototype which the model is loosely based on had only two sheet lengths each side of the roof and I think the normal size for the prototype corrugated iron sheets would have been 9ft long x 3ft wide. So the roof was done with Slaters Plastikard corrugated sheets. The corrugations match fairly well so I don't think the difference is too apparent.
The end of the siding on the left will be hidden from view when the loco shed is in place.
The sheets were sprayed both sides with Halfords grey primer, painting the back gives a better bond when gluing the aluminium or Plastikard to the wooden structure. The aluminium also had an initial coat of etch primer.
The front faces were then individually painted with rust colour to give some variation between individual sheets when placed in position. Initially the sheets were cut to 4ft scale width but this was later reduced to 3ft. width. The sheets were fixed in position with Aleene's Tacky Glue.

Photos of the prototype at Ophir appear to indicate that the roof sheets were less rusted than the wall sheets.

Now the building is complete, before I can fix it in position I need to think about painting the track and ballasting.................

Good, I've thought about it
 , so I'll move on to something else
PhilH
Western Thunderer
As summer is still here it seemed a good idea to get outside with the same layout theme but to a different scale.
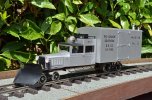
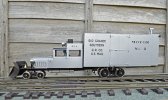
Most narrow gauge fans will probably be familiar with the Rio Grande Southern Railroad's Motors - more commonly known as "Galloping Geese". These were introduced in the early 1930's when running steam hauled passenger trains became uneconomic, and with the occasional steam hauled freight train, kept the railroad open for another 20 years. The Accucraft model of Motor No.2 in Fn3 Scale (1:20.3 Scale on 45mm gauge track) is supplied track powered and has been converted for battery operation with radio control and sound.
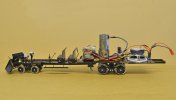
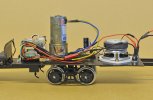
From the left, the controller and receiver are mounted on an aluminium stand with the sound card below. Two rectangular slots were cut in the brass floor, one on each side, to allow radio signals to reach the receiver in the enclosed metal body. The brass clamp holds the infra-red receiver for the sound card to enable sound programming with the body on, the receiver itself is just visible below the floor to the right of the sandbox. To the right of the motor on the far side is the existing Accucraft constant lighting control for the headlights, and at the rear are the lighting on/off switch (far side), main on/off switch (centre) and battery charging socket.
The original idea was to fit the rechargeable battery in the extension at the rear of the freight compartment. On the prototype this was an afterthought to accommodate a stove, because the U.S.Post Office complained that their mail was getting damp in the colder weather. The four later "Geese" were three truck affairs with larger freight compartments which could accommodate the required stove. However what I hadn't reckoned for was the weight of the battery and the rear overhang, and while it didn't quite lift the front bogie wheels off the track it was a close run thing. I had visions of it doing "wheelies" like a motorbike as it went down the track . So, change of plan, the battery is now in the front of the freight compartment above the controller and receiver.
It bumps a bit over the Peco point frogs, but a little less velocity might be appropriate
Most narrow gauge fans will probably be familiar with the Rio Grande Southern Railroad's Motors - more commonly known as "Galloping Geese". These were introduced in the early 1930's when running steam hauled passenger trains became uneconomic, and with the occasional steam hauled freight train, kept the railroad open for another 20 years. The Accucraft model of Motor No.2 in Fn3 Scale (1:20.3 Scale on 45mm gauge track) is supplied track powered and has been converted for battery operation with radio control and sound.
From the left, the controller and receiver are mounted on an aluminium stand with the sound card below. Two rectangular slots were cut in the brass floor, one on each side, to allow radio signals to reach the receiver in the enclosed metal body. The brass clamp holds the infra-red receiver for the sound card to enable sound programming with the body on, the receiver itself is just visible below the floor to the right of the sandbox. To the right of the motor on the far side is the existing Accucraft constant lighting control for the headlights, and at the rear are the lighting on/off switch (far side), main on/off switch (centre) and battery charging socket.
The original idea was to fit the rechargeable battery in the extension at the rear of the freight compartment. On the prototype this was an afterthought to accommodate a stove, because the U.S.Post Office complained that their mail was getting damp in the colder weather. The four later "Geese" were three truck affairs with larger freight compartments which could accommodate the required stove. However what I hadn't reckoned for was the weight of the battery and the rear overhang, and while it didn't quite lift the front bogie wheels off the track it was a close run thing. I had visions of it doing "wheelies" like a motorbike as it went down the track
 . So, change of plan, the battery is now in the front of the freight compartment above the controller and receiver.
It bumps a bit over the Peco point frogs, but a little less velocity might be appropriate

PhilH
Western Thunderer
Back to the trestle.
Having done the easy part - the trestle structure, now comes the difficult part - the scenery .
.
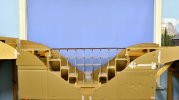
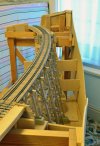
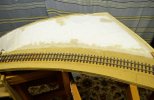
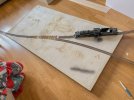
First step is to decide on the profiles at the front and rear of the layout section, so before cutting any wood these have been mocked up in cardboard.
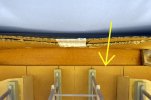
There isn't much room behind the trestle structure especially at the base of the tallest bents - the yellow arrow shows the actual edge of the baseboard. I can gain an extra 3" or so here by curving the back profile into the window opening. Even with this there isn't really much room for a slope or high rock face behind the trestle as suggested earlier in the thread to avoid the shadow of the trestle on the backscene. In any case I would prefer some indication of a valley beyond the scene with a small stream flowing under the trestle. The idea is that the stream enters the scene in a waterfall at the rear then flows under the centre span of the trestle.
Some form of overhead lighting might possibly eliminate the shadow.
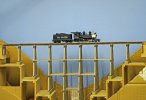
With additional overhead lighting and a higher waterfall - promising, the shadow is there but hardly visible. I think a bit more experimentation with the lighting is called for before I start the woodwork.
Having done the easy part - the trestle structure, now comes the difficult part - the scenery
 .
.First step is to decide on the profiles at the front and rear of the layout section, so before cutting any wood these have been mocked up in cardboard.
There isn't much room behind the trestle structure especially at the base of the tallest bents - the yellow arrow shows the actual edge of the baseboard. I can gain an extra 3" or so here by curving the back profile into the window opening. Even with this there isn't really much room for a slope or high rock face behind the trestle as suggested earlier in the thread to avoid the shadow of the trestle on the backscene. In any case I would prefer some indication of a valley beyond the scene with a small stream flowing under the trestle. The idea is that the stream enters the scene in a waterfall at the rear then flows under the centre span of the trestle.
Some form of overhead lighting might possibly eliminate the shadow.
With additional overhead lighting and a higher waterfall - promising, the shadow is there but hardly visible. I think a bit more experimentation with the lighting is called for before I start the woodwork.
PhilH
Western Thunderer
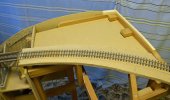
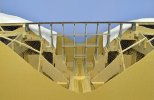
The rear profile has been fixed in position, gaining about an extra 3" in depth in the centre by extending into the window opening. Its been useful to be able to remove the trestle section of the layout while working on the rear, but its going to be fairly heavy when all the extra scenery supports and plaster work are provided so hopefully once back in position it won't have to be removed again.
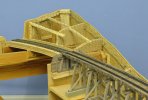
Supports for the scenery at the rear of the trestle have been provided with profiles of 9mm MDF and chicken wire......
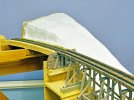
......then covered with several layers of Modroc plaster bandage. I've never used this before but it was generously donated by a friend who changed his layout plans from Colorado narrow gauge with lots of scenery to a US modern image standard gauge diesel urban/industrial layout (well that kind of thing appeals to some I guess
 ). The instructions advise to soak the bandage for a few seconds then squeeze out the excess water before placing in position, but I found it tended to fold and stick together before I could place it in position so instead I laid it in position dry then applied the water by brush.
......then covered with polystyrene foam ex packing material shaped as required. I didn't have a hot wire foam cutter so the foam was shaped with a knife and file, messy but probably easier to shape as required, just need a vacuum cleaner handy !
Both types of surface will be provided with a 2-3mm layer of polyfilla/sawdust mix shaped to the finished profile.
PhilH
Western Thunderer
To continue......
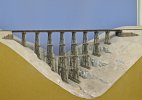
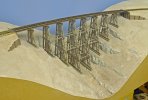
Front fascia in place and support for scenery added. A waterfall will enter the scene at the rear then the stream will flow under the centre span of the trestle and over a smaller waterfall near the front.
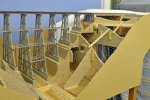
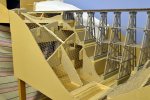
A problem is deciding where the rocky bits fit in with the slopey bits, and its a bit of guesswork which goes where at this stage.
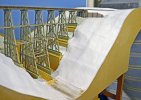
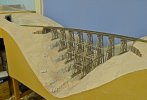
Modroc plaster bandage added. I've used 6 layers at the front to hopefully stand the occasional accidental leaning on the scenery.
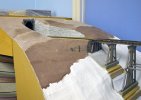
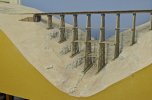
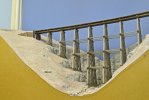
The start of applying the final surface layer. This comprises a mix of 50% Polyfilla and 50% sawdust with a water based paint to add a bit of colour. It starts to set fairly quickly but the thicker areas take a day or more to completely dry out.
Front fascia in place and support for scenery added. A waterfall will enter the scene at the rear then the stream will flow under the centre span of the trestle and over a smaller waterfall near the front.


A problem is deciding where the rocky bits fit in with the slopey bits, and its a bit of guesswork which goes where at this stage.

Modroc plaster bandage added. I've used 6 layers at the front to hopefully stand the occasional accidental leaning on the scenery.

The start of applying the final surface layer. This comprises a mix of 50% Polyfilla and 50% sawdust with a water based paint to add a bit of colour. It starts to set fairly quickly but the thicker areas take a day or more to completely dry out.
PhilH
Western Thunderer
Do you ever get the feeling when you've completed some project or part of a project and you look at it and think that's great, its turned out exactly as I imagined and all the time spent has been really worthwhile ?  I often wonder what that feels like
  ................. I digress.
Anyway, as I plough my lonely furrow (nobody else is building a US narrow gauge layout on WT as far as I know are they ????), and after applying about half a ton of Polyfilla (slight exaggeration, but that's what it seems like) the scenery around the trestle is fully plastered - the rock formations and ground surface are all in place. Whether its all topographically, geologically or otherwise feasible in a real landscape I don't know, and quite frankly I don't care as I'm definitely not going to do it all again ! Poking, placing and smoothing the wet plaster behind and between the trestle bents has been something of a trial, and in retrospect it would have been better to place the trestle foundations, finish the scenery, and only then build the trestle itself. Fortunately the trestle woodwork has come through relatively unscathed so far, usually remembering to remove wrist watch before poking hand under trestle. There was just some splashes of wet plaster on the woodwork which are easily wiped off. However painting the rock and ground surface is a different matter so I'll probably have to cover all the woodwork with cling film before starting that - Oh, joy !
The rock castings are made from Woodland Scenics rubber moulds, 12 different ones being used in the process. The biggest problem I found using these was air bubbles in the plaster mix forming hollows on the face of the finished casting. I tried different mixes of plaster from fairly stiff to runny liquid - the latter taking ages to fully dry out; wetting the mould before applying the mix as recommended; vibrating the mix before pouring or after pouring in the mould to bring air bubbles to the surface, i.e. the back of the finished casting; poking it when in the mould with a sharp object to try to burst any bubbles; shouting at it; swearing at it; but never really solved the problem. Sometimes the surface hollows can be carved out or filled in, but at other times it was straight in the bin usually accompanied by more bad language. The plaster used was mainly Polyfilla but I did try Woodland Scenics Lightweight Hydrocal, the only noticeable difference was the quicker drying time of the Hydrocal. The rock castings were set in more Polyfilla and any gaps between the castings filled with the same. Prior to that the original surface whether it was wood, foam or plaster was given a coat of PVA adhesive, and the back of the rock castings were also coated with PVA.
I like to colour the plaster with water soluble paint to take the stark whiteness away and for the ground surface I used a cheap dark brown shed/fence paint. I should have added more paint as it dries much lighter than the mix and goes lighter again when its sanded to remove any knife or trowel marks in the surface. I have most of the 5 litre tub left, and its too dark for the shed ! Not that it really matters as it will be painted before I add the ground cover material. For the rock castings I used a black poster paint to add a light grey colour.
I need a trip out to some local river or stream to get suitable small pebbles for around the stream bed. For the ground cover, or "dirt", I collected material from disused mine tips several years ago, probably laced with traces of lead, cyanide, arsenic or other nasty materials, but the colour looks about right.
tbc
 I often wonder what that feels like
  ................. I digress.
Anyway, as I plough my lonely furrow (nobody else is building a US narrow gauge layout on WT as far as I know are they ????), and after applying about half a ton of Polyfilla (slight exaggeration, but that's what it seems like) the scenery around the trestle is fully plastered - the rock formations and ground surface are all in place. Whether its all topographically, geologically or otherwise feasible in a real landscape I don't know, and quite frankly I don't care as I'm definitely not going to do it all again ! Poking, placing and smoothing the wet plaster behind and between the trestle bents has been something of a trial, and in retrospect it would have been better to place the trestle foundations, finish the scenery, and only then build the trestle itself. Fortunately the trestle woodwork has come through relatively unscathed so far, usually remembering to remove wrist watch before poking hand under trestle. There was just some splashes of wet plaster on the woodwork which are easily wiped off. However painting the rock and ground surface is a different matter so I'll probably have to cover all the woodwork with cling film before starting that - Oh, joy !
The rock castings are made from Woodland Scenics rubber moulds, 12 different ones being used in the process. The biggest problem I found using these was air bubbles in the plaster mix forming hollows on the face of the finished casting. I tried different mixes of plaster from fairly stiff to runny liquid - the latter taking ages to fully dry out; wetting the mould before applying the mix as recommended; vibrating the mix before pouring or after pouring in the mould to bring air bubbles to the surface, i.e. the back of the finished casting; poking it when in the mould with a sharp object to try to burst any bubbles; shouting at it; swearing at it; but never really solved the problem. Sometimes the surface hollows can be carved out or filled in, but at other times it was straight in the bin usually accompanied by more bad language. The plaster used was mainly Polyfilla but I did try Woodland Scenics Lightweight Hydrocal, the only noticeable difference was the quicker drying time of the Hydrocal. The rock castings were set in more Polyfilla and any gaps between the castings filled with the same. Prior to that the original surface whether it was wood, foam or plaster was given a coat of PVA adhesive, and the back of the rock castings were also coated with PVA.
I like to colour the plaster with water soluble paint to take the stark whiteness away and for the ground surface I used a cheap dark brown shed/fence paint. I should have added more paint as it dries much lighter than the mix and goes lighter again when its sanded to remove any knife or trowel marks in the surface. I have most of the 5 litre tub left, and its too dark for the shed ! Not that it really matters as it will be painted before I add the ground cover material. For the rock castings I used a black poster paint to add a light grey colour.
I need a trip out to some local river or stream to get suitable small pebbles for around the stream bed. For the ground cover, or "dirt", I collected material from disused mine tips several years ago, probably laced with traces of lead, cyanide, arsenic or other nasty materials, but the colour looks about right.
tbc
adrian
Flying Squad
Trail-blazingAnyway, as I plough my lonely furrow

mickoo
Western Thunderer
My On3 anorak is more puffer jacket than cagoule, once opened it has a habit of smothering all other anoraks and they get quite vocal.
I'd really like an On3 layout either D&RGW or some Shay type logging environment, JB of this parish keeps tempting me with all his models he's slowly acquiring but so far I have held off.
I admire everything here, the carpentry, simplicity, the grandeur and embryonic detail, but I don't quite have enough room to model something similar.
Last edited:
PhilH
Western Thunderer
Apologies - this is a shopping rather than a making post, but may be of interest.
More Brass, call these two Christmas Presents - from me to me !
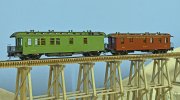
Berlyn Rio Grande Southern business cars B20 and B21 "Rico". In addition to carrying officials and distinguished visitors around the system they were also used as mobile offices and accommodation when maintenance or rebuilding works were carried out in remote locations. In the last few years they were also used on enthusiast special trains. Both were preserved after closure of the railroad, B20 at Knott's Berry Farm in California and B21 at the Colorado Railroad Museum.
Isn't Ebay wonderful - Sometimes !
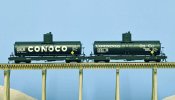
So, I ordered one of the recently released San Juan Car Co's Conoco 0n3 tank cars from a seller in the US on Ebay. These were offered in 4 different Era's liveries with about six different car numbers in each. What I ordered was the post 1940's version as on the left in the photo, but what turned up was the one on the right - the 1930 version. The date that the layout represents is a bit vague but definitely post 1940. I immediately contacted the seller via Ebay and he offered to send the one actually ordered with a return label for the one received. I wasn't sure how this would work and apparently neither was he, as he hadn't realised at that stage that I was a customer in the UK not the US ! When he found that out and worked out the cost he decided it wasn't worth paying the cost of the return, so said I could keep the wrong one free of charge and he would send the right one anyway, which duly turned up as promised. As it happens I have a 1940's Era Conoco decal set in stock, so in due course the "wrong" one will be turned into another "right" one.
These were delivered via Ebay's Global Shipping Programme which I like, it can be a bit dearer or a bit cheaper overall, but its much quicker and hassle free usually with tracking all the way.

