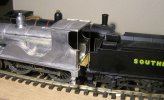
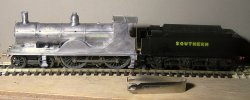
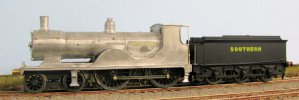
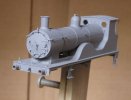
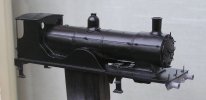
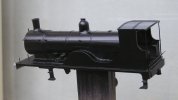
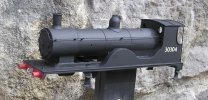
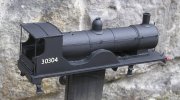
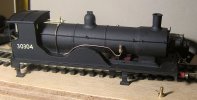
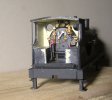
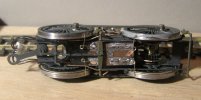
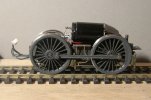
Wills T9 Repair and Upgrade in 4mm 00 Gauge

Stevers

Western Thunderer
Have had a few problems with test running the T9 with the Zimo DCC chip fitted today. Initially there seemed to be a problem with it changing direction like the reverser was stuck. It would take quite a few volts to unstick, then it would shoot off - it also seemed 'buzzy' at low speeds. Once it had changed direction I had very good control over it again. This is a chassis that has never had even a trace of binding at any stage, the coupling rods would go slowly through horizontal OK and when reversing it didn't seem to matter where the coupling rods were.

Now I had made some quite significant changes to my EM test track to add a power take off to feed the 00 Gauge test track, and here's the rub - I was given the EM test track by a friend who was migrating to the senior scale, it has a built-in black faced Gaugemaster controller that I knew nothing about, but functioned well with all my Mashimas and ready -to-run stock. It didn't seem to be a mechanical problem and control via my chopped DC mini-controller hadn't been great either prompting the change to use the Gaugemaster. 2020-04-08_20-39-38_820.jpg
The controller in question with Penbits fitted 33/1 and Bachmann N Class with SEF etched chassis.

It did seem to me that things had been OK up to the point that the Zimo chip came into the equation, so I thought it was time to eliminate that from my investigation. With no blanking plugs in stock, one was rustled up and fitted. This eliminated any problems with reversing, but now there was a distinct growl on moving off in either direction. A quick scan of the forums suggests that black faced Gaugemaster controllers have feedback which would explain the growl. Can anyone confirm if this is the case?

To be fair a DCC chip trying to work with the output from a DC feedback controller is not something that anyone in their right mind would try to cater for. Now I need to go and find that old H&M Flyer controller that was so utterly useless at powering my mini-drill!
 
Last edited:

Stevers

Western Thunderer
With the H&M Flyer in charge, normality has been restored, even with the Zimo chip fitted. No hesitation or jerkiness, just lovely smooth power - another day wiser!

PC300316.JPG
PC300317.JPG

For the much vaunted test run, I wanted the fall plate to be fitted, and so one was fabricated from piano wire, N/S strip and a piece of Brassmaster's etched fall plate. The steel has been soldered into slots in the brass strip, and then the whole assembly is pinned to the back of the whitemetal floor. The fall plate lifts up for coupling and uncoupling, and I did have to gently round the corners as they just caught the handrails on entering my short length of second curve.
PC300313.JPG
The loco, but not the tender is on the second curve, and looking at that front driver it's a bit of a stretch for the loco. In the background is the Hornby T9 patiently awaiting its next moment in the limelight.
PC300314.JPG

The loco level with the tender again now that the tails on the injector pipes have been snipped off flush. In the foreground is the Hornby tool that is essential for unplugging the tender. The missing top lamp iron has been fitted and this Greyhound is raring to go!
 
Last edited:
Stevers

Western Thunderer
To cut a long story short. Whilst the loco ran well on DC with the Zimo chip, it was impossible to program it on DCC. When taken to a local DCC expert, the chip eventually released the dreaded magic smoke, and it was left with him. For this engine the Hornby tender loom is being used with the Hornby plug and wires used to connect the loco motor and pickups, so quite a lot going on. The problems reported by the DCC expert were:
1. Two of the wires were interposed, the pickup and motor feed.
2. There was occasional body to wheel contact.
Anyway, the loco has now returned to its owner, and on DCC is reported to be running well - phew!

I shall view it in-situ next week and next steps will be discussed.
 

Tim Hale

Western Thunderer
The T9 is once again being progressed. The electrical gremlin was the very devil to find and isolate, almost impossible when used on DC but fatal on DCC, as mentioned, two wires of the Hornby harness were interposed. Now, after killing three Zimo* decoders, it is gliding around Beaminster Road, I use the world gliding as there is no perception of actual movement just a gentle forward motion. The HLK motordrive is certainly worth every penny as are the Markit RP25 steel wheels.

E7616ECF-21E7-4CCD-B558-505835FFE40C.jpeg

Thank you for your patience

BR

*They had to be Zimo rather than Lais……
 

Stevers

Western Thunderer
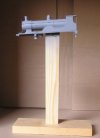
After a diversion to build one side of Normans' Bridge for Evercreech New for its recent trip to the Bath & West, and with the veg. garden nearly up to scratch, I can no longer put off trying to splash some paint on the heavy metal monster. A couple of days ago, I gave it a good clean with 'Barkeepers Friend' and then detergent. It was then rinsed in water from the dehumidifier and left to dry in a dust free box. Whilst it was drying I made a very 'dad' like device to hold it whilst spraying and to put it down safely to dry when I wasn't spraying it. The following day (a nice warm afternoon) I warmed the Autotek etch primer in some water, gave it a good shake and finally applied some paint.
P4260363.JPG
And I suppose in one way at least I'm right back to where I started!
P4260367.JPG

The rather crude screw expands the device to split the body open grip the body. As I'd just replaced the tape on a set of drop handlebars, a couple of squares of used bar tape were used to pad the contact area. Still paintphobic, the plan for later today (when it's a bit warmer) is to mask off the buffers - somehow without any skin contact. After which I'll splash some Halfords Satin Black over it - also warmed up to help it flow. Still lots to think about - dab of gloss for the transfers, paint (& number?) the buffer beam. I'm thinking the lightest of weathering to kill the blackness on loco and tender, and then some matt varnish - we'll have to see what my instructions are...

The tender has a 13' underframe in a dark greeny brown colour. I do have the correct 14' set of Hornby frames for it (from their Black Motor) that are already black, but dare I risk swapping them over, and somehow stop it all working again, or worse frying another DCC chip? Again I shall await instructions, happy to go either way.
 

Stevers

Western Thunderer
I'm going to have to back pedal like mad on the green thing! There was some swapping of tanks and underframes in the early days of the build, and I reckon it's picked up a weathered set of black frames. The frames certainly don't look green in the photos above. Colour is very personal, but checking in the light of my 'daylight' LED work light, it just looks a bit brown as in lightly weathered, and that of course is probably exactly what we want!
 

Tim Hale

Western Thunderer
I'm going to have to back pedal like mad on the green thing! There was some swapping of tanks and underframes in the early days of the build, and I reckon it's picked up a weathered set of black frames. The frames certainly don't look green in the photos above. Colour is very personal, but checking in the light of my 'daylight' LED work light, it just looks a bit brown as in lightly weathered, and that of course is probably exactly what we want!
Steve,

the tender undergubbins and its pick-ups is essential for good running, that one works 24/7. The previous comment about friable decoders still causes all sorts of fear related symptom. Neither does 6-wheel tender suffer from the airborne front wheels the Hornby watercart - a tender drawbar design failure.
Hence, of the three 4-4-0s on the roster, two use the smaller tender and the tender drawbar on the K10 is currently being replaced.
However given the choice of any LSWR available tender, the Hornby is still number one, very good value for money and technically advanced with the DCC interface and excellent harness.

Gosh, that was a long two cents worth

Tim
 

Tim Hale

Western Thunderer
Jumping the gun and not wishing to steal Steve’s thunder, here are his images of the latest progress on the T9. It is its debut in satin black rather than the grey primer that it has worn for the past twenty-two years.

6DB0FD0B-3EAF-40DF-AD98-426841C7021D.jpeg

6E2B6337-C125-402E-8ABC-3D02C2243AC9.jpeg

This is the third and possibly the last exLSWR 4-4-0 planned, unless Terry Page can resuscitate his promised L12 or Paul offers the S11.

Tim
 

Stevers

Western Thunderer
A quick update with the results of what I feared could be a fairly traumatic painting process. P1010346.JPG

Over the Halfords Satin Black, some lippy, transfers and a coat of Humbrol Enamel matt varnish have been applied. A vintage 1980s Methfix transfer sheet supplied the numbers, and I have to say they worked a treat - though the sheet is now getting a bit short on 3s and 0s! I sat the spray cans in warm water beforehand, and gave them a good shake. I have no idea if that helped or not, but the painting has gone well, and I shall proceed with the pipework which I plan to lightly tarnish with metal black. It needs buffers, that little hook under the buffer beam to take the dangly end of the coupling, a vacuum brake pipe, and I'm told that a BR Smokebox number is in the post. No steam pipe is required as it's summer on Beaminster Road.

P1010349.JPGHappily there is a photo of 30304 taken at Bournemouth in 1949 with a freshly applied Gill Sans number with Southern Sunshine lettering on the tender, which could well be an unusual combination based on a quick review of Richard Derry's book of the T9s.
 

Tim Hale

Western Thunderer
The T9 30304
BAB0C095-4112-4C1F-B4A7-F4DAA4B12933.jpeg

217AA77D-2F76-4E18-AADB-59D7F44C0573.jpeg

80E42879-A666-4600-AA71-A11C25EF6D63.jpeg

All captured in the Bournemouth area:-

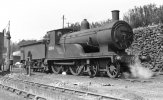
Bournemouth MPD still with Southern on the tender BR number on cabside and smokebox door plate
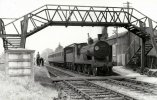
Downton SDJR on an up Bournemouth West-Salisbury
Wimborne on a down Salisbury-Bournemouth West vis the SDJR
 

Stevers

Western Thunderer
P5240283.JPG
The fragile placcy Hornby brake handle had finally given up the ghost, so a spot of accurate marking out and drilling was required so that I could plant a short handrail knob with an offcut of PB wire bent to shape and soldered in. The coal shelf was fabricated from styrene as the Hornby part was missing.
P5230277.JPG
The Markits SR Clack valves were very sharply square in shape, whereas all photographs of actual T9s show rounded corners, so the corners were filed off prior to assembly. I used springy PB wire rather than the soft copper wire supplied. All the holes seemed a tad large for the wire, and they were not the most straightforward things to assemble. The bit in the middle on one side disappeared during assembly, and even fabricating an almost perfect replacement out of bits of microbore tube couldn't make it reappear. :-(
P1010291.JPG
My friend had very successfully rescued a complete Hornby cab interior from a scrap body, and after some thinning of material, this was duly installed in the cab. Reversing lever is on the left, and I'm told sanding lever on the right. The Milliput used to blend it in was still soft when the picture was taken. The cab is almost ready for the painted Modelu crew already allocated to it - what a splendid shortcut to a great result!
P5250286.JPG
Almost entirely in soft focus 30304 pilots a Hornby Weymouth (it's awaiting devaluation to EM Gauge). The T9 tender looks wonky because the underframe wasn't fully home in the body. Getting perilously close to the finish line!
 

Stevers

Western Thunderer
P1010298.JPG
First of all, an update on the pickup situation. These are the neat little pick ups fitted by the DCC expert - more effective than my bottom scratchers which also had the very real potential to short across to the metal wheel centres on Markit's Wheels. They are exceedingly springy and cope extremely well with the albeit small vertical movement of the drivers from them being compensated.

P1010295.JPG
The balance weights are now fitted. The position on the front drivers was clear from prototype photos, but not so much with the rear driven wheels, where generally only the weight or coupling rod was fully visible in each photo. A happy couple of hours was spent looking at prototype photos in The Book of the T9s by Richard Derry, and the conclusion was that looking forwards they were fitted as follows:

Front Left - Same side as pin, spanning five spokes - offset half spoke anti-clockwise Page 28
Front Right - Same side as pin spanning five spokes - offset half spoke anti-clockwise Page 39
Rear Left - Opposite pin, spanning two spokes - offset one spoke clockwise Page 23
Rear Right - Opposite pin, spanning two spokes - offset one spoke clockwise Page 57

The SEF etched weights were used. but the short weight was far too deep and the long weight was a little too long, so both were trimmed to be a closer match to the prototype. The Markits wheels have the pin between spokes, so the placing here is a compromise, but one that I think works OK. Adding the weights has added much interest to the moving loco. And, I've just noticed that a bit of the injector has gone missing - doh!

P1010293.JPG
It was in looking at the photos from my last post that I realised that the weirdly short regulator handle was incomplete. I rashly thought that something suitable would be on the Mainly Trains cab detailing etch, but no - one had to be drawn up in QCAD and fretted out of .010" nickel silver. Being a tight fit in a carefully drilled hole it can be posed in different positions to suit the driver fitted.
 

Stevers

Western Thunderer
The heavy metal monster has been collected and courtesy of its new owner it can be seen here on Beaminster Road.
30304 on Beaminster Road.jpg

What next... As well as the Hornby T9 nearing completion, there is the unfinished Crownline Q, and my Bachmann N Class with SEF chassis needs repairs after it rolled from a great height onto the quarry tiles in the workshop. This has prompted a serious upgrade to the N, since this loco had been a mule to try out a Tsunami sound chip and as a result the pickups were only fitted to the tender and the loco and tender were permanently wired which was very inconvenient for the required repairs to the tender. Jack P was interested in this EM conversion, so I'll document that in a new thread.

P1010315.JPGP1010316.JPG
On the T9 front, and at significant expense, I've just ordered some EM Sharman Wheels for a Westward T9 kit that I built this water cart tender from a while ago. It was a test for low melt solder assembly, and it runs beautifully on the SEF etched bogies that came in the chassis kit that was donated to the heavy metal monster. Only the narrower Sharman Wheels will ever fit under the splashers on the Westward T9 - and then only as a sort of sliding fit without further relief. Happily the Hornby T9 has a set of matching Sharman bogie wheels that I can replace with Gibsons. One of the tender sides was easily the worst casting in the kit and will require a fair bit of filler. Interestingly, Westward and SEF had quite different views on where the bogie pivots should be.
P1010314.JPG
There was a casting fault on the smokebox, and a wrapper was made up on my GW Models rivet press and fitted to resolve that. The intention is that this engine will be 30721. In my time frame, this engine had visible rivets on the front of the smokebox, and one of my doubts is whether the ones on the Westward casting are up to the job. Those rivets are pretty crucial to the 'face' of the engine, and it would not be impossible to emboss a replacement ring of rivets following the instructions with the rivet tool and a bit of trig in a spreadsheet.

This engine will be built to EM Gauge, and I'm fairly sure I can use P4 frame spacing to take advantage of the kit option to fit a wider footplate with trimmed splashers to make a bit more room in the cab for the crew. After all, providing any sort of side play under those splashers will not be an option! Overall, the Westward kit seems nicely detailed and everything appears to be about the right size. Setting the correct ride height with the supplied full length Perseverance chassis will be a challenge, but T9s lend themselves to 'power pods' with twin beams, and that is likely to be the way forward. There is still no sign of etched chassis or the replacement roof for my Wills T9 from SEF; given that I'm on a bit of a T9 roll, and that this kit has been started, I'm sorely tempted to build it in a new thread alongside the Crownline Q - as I'd like to think, another Ricicle style blast from the past!
 

Tim Hale

Western Thunderer
As the current custodian of the T9, may I thank Steve for his patience and skill rebuilding it. It joins a very small roster of mostly very elderly examples of kits that needed rebuilding and the T9 was the last in the queue.

Tim
 
Last edited:
Top