ZiderHead's Workbench - Tools and Soldering

Rob Pulham

Western Thunderer
Sorry I forgot to add a plus one:thumbs: for the Building O Gauge flux and a good tip for using it is get yourself one of the cheap syringes that are sold on eBay for refilling printer cartridges (search syringe ink refill for many options £2/£3 for 4) grind/file the tip back and you can dispense flux just where you want it in small quantities with out the risk of knocking over the bottle etc.

Using this method I have just started on my second bottle the first having lasted going on for 3 years.
 

ZiderHead

Western Thunderer
I really appreciate everyone's advice here, many thanks :thumbs:

Just noticed that there are 6 parts on the RHS of this etch for hopper extensions when carrying slag (which I wont be using.) I can use these to practice with - they are supposed to be folded together then sweated so I can do some like that and some folded at 90deg to try and get a neat looking seam.

IMG_0192.jpg

If I make a dog's breakfast of these I'll pick up some brass sheet and have a go at that til I get it right. Any idea what thickness this is? Looks about 0.25-0.33mm to me. I guess a Stanley knife will be man enough to score fold lines.

For visible 90deg fold and solder seams (solebars etc) Ive noticed that some people use permanent marker along the etched line, then run a triangle file along it before folding and soldering to get a really neat seam. Worth doing?

Jon
 
S

SteveO

Guest
A good thread Jon, and very similar to my own when I started to learn last year (have a look at my wagons thread in my sig below). I've bought some of the same solder and flux you have and find it really good - although I have no experience of anything else so I can't compare it and that limits the value of my advice.

As some here, I also solder the bulk of my work in 188 and then add smaller details in 145 when they are close to previous solder joins. I found that just after one simple experiment I was confident enough to start my first kits (as Rob mentioned, I'm building 3 Lochgorm vans) and I'd not soldered a single thing before this, not even electrical soldering.

I chose Lochgorm beginners kits as they were the cheapest and labelled as beginners kits, plus at only £25 each I figured out of the three I would hopefully end up with two good ones. I'm fairly happy with all three at the moment but I've yet to tackle all that fine brake gear! They are pretty old and basic, and originate from 4mm hand-drawn etches but I have learned a lot in the process. For the ultimate beginner experience I would have probably chosen Connoisseur and have since bought a couple for the pile.

When I'm soldering I use a glass chopping board (please don't tell the Mrs – it was REALLY expensive!) as it handles heat really well and the solder doesn't stick to it, and it helps to keep everything square and flat. My only problem is finding the time to keep going with these. The least amount of time between sessions is ideal as you can almost pick up from where you left off, but with extended time you may find that you have to do more recleaning of parts you'd previously prepared.

Keep at it, I'm looking forward to seeing the results.
 

Tim V

Western Thunderer
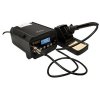
Very nice iron.

However, if it goes wrong (like mine, the thermocouple) spares are V expensive/unavailable. Might need to think about another iron.
 

Steve Cook

Flying Squad
The only couple of things that spring to mind Jon (having read everyone elses contributions) are to consider the use of tip cleaner/tinner from Maplins and glass fibre sticks/brush for cleaning up prior and after soldering. The tip tinner is a small pot with a comparatively massive price tag. However, I paid £8 for mine 7 years ago and I reckon I've still got about 85% of it left after a lot of practice and reasonable number of kits. Its great for ensuring new tips don't oxidize straightaway as well as cleaning up old tips - it also helps during a long session to keep the tip bright and shiny. The tinner is also slightly abrasive which can aid with tip rejuvenation.
There have been a couple of threads about the fibreglass brushes on here, I swear by mine, I know others swear at them :)
Above all, expect to learn, persevere and enjoy the process, it opens up a whole world worth exploring....
Steve
 

ZiderHead

Western Thunderer
A good thread Jon, and very similar to my own when I started to learn last year (have a look at my wagons thread in my sig below).

Thanks Steve, reading through your thread it seems we have started in about the same place, I just hope my first build turns out as well as yours did :thumbs:

edit: that 2mm tank is lovely, nice work!

So you got to the MMP dogfish from RMW before me, any pointers you need let me know Ive built 7 of them, and have the photos of the build available.
My old RMweb thread of the builds http://www.rmweb.co.uk/forum/viewtopic.php?f=8&t=24622&st=0&sk=t&sd=a
Ian G

Hi Ian, I happened to check RMW about 15mins after the ad was posted and sent a PM straight away, I suspect I may have pipped a few WTers to the post on that one :D

Your build thread is bookmarked and offer gratefully received, I'm sure I'll be picking your brains at some point. Do you have any pics of the finished ballast rake?


Very nice iron.

However, if it goes wrong (like mine, the thermocouple) spares are V expensive/unavailable. Might need to think about another iron.

I stripped the TCP and it all looks to be in good condition and its appears to be newer than the base station, a good sign. Although Ive never seen it working it was free, so I figured it was worth throwing £20 of parts at it to find out. A rather heavy box arrived from Maplin this morning but I wont have time to look at it til the weekend, so fingers crossed ...
 

Ian G

Western Thunderer
The ballast brake is still unfinished but the sides are plated over, cant remember where its stored at the moment, here is the last pic I took.

Ian G

Shark 4.jpg
 

ZiderHead

Western Thunderer
The only couple of things that spring to mind Jon (having read everyone elses contributions) are to consider the use of tip cleaner/tinner from Maplins and glass fibre sticks/brush for cleaning up prior and after soldering. etc.

I've always re-tinned tips regularly while I'm working, using ersin multicore and a quick wipe on a (barely) damp sponge, seems to keep them nice and shiny :thumbs:

Never even heard of a fibre brush before reading various build threads but was intrigued so picked up one from Eileens along with a gravity rivetter, an 8" blade for folding and a pack of assorted brass rod.


All in I havent had to spend that much on tools and supplies thankfully, but I have been keeping my postie busy :D
 

ZiderHead

Western Thunderer
so ... 4 hours of fiddling, filing, fettling and F-words this morning resulted in a resurrected iron! Temp control working fine, left it on for over an hour with no problems. Quick session after lunch finishing off a couple of PCBs, no problem. Fired it up at teatime to finally attack some brass, went to make a brew, came back and the LED showed it still heating and a blued tip ... burnt out pencil. Seemed strange so I tested the transformer on its own and its putting out 27.6VAC instead of 24VAC. I dont expect mil-spec stuff from Maplin but a simple transformer 15% over spec? :headbang:

Anyway Plan B, picked up one of these for £60:

A55KJ.jpg
60W and usefully has 3 buttons for different temp settings. Cant wait to start building something at last, nothing booked for Monday so its all me-time :thumbs:
 

marsa69

Western Thunderer
I got one of those, I got one of those :thumbs:

I'm just waiting for some solderign bits to come fro buildingOgauge online before I start my first foray into burning my fingers soldering kits :p

Mark
 

ZiderHead

Western Thunderer
cool, have you used it yet? I didnt have time to give it a workout but it comes up to temp quickly and holds it, and seems pretty well built.

Its strange - on the one hand I keep reading about the impending demise of railway modelling, on the other there seems to be plenty of people moving to 7mm and/or building in brass ... :confused:

What are you going to build first?
 

marsa69

Western Thunderer
I've only run it up to temp to ensure it at least switched on lol. I'm going to tackle a Welcome Wagons Conflat A first that the wife bought me for christmas :thumbs:
 

Railwaymaniac

Western Thunderer
Seemed strange so I tested the transformer on its own and its putting out 27.6VAC instead of 24VAC. I dont expect mil-spec stuff from Maplin but a simple transformer 15% over spec? :headbang:
Ah! - that'll be the 'no load' output figure, then. :)
You probably find that it needs to put out that voltage on no load so that it will supply the rated voltage at the rated current output.:thumbs:

Ian
 

Railwaymaniac

Western Thunderer
And I too have one of those 60w units from Maplins. :thumbs:
It's my primary spare iron, second only to my Antex 40W 'Temperature Controlled Pencil' iron

I keep it at 400 degrees C, with a big-ish bit fitted, and use it for seam soldering (which the TCP won't do no-how!)

Ian
 

ZiderHead

Western Thunderer
so Ive built several kits over the last few weekends ... all flatpack furniture though :rolleyes:

finally had a spare 30mins and a cleared desk this morning to have a quick play with the spare etches and have learnt a few things:

1. my cutting mat melts much easier than I thought it would
2. the 8" bending blade was £1 well spent
3. the BOGO safety flux is truly wonderful stuff
4. taking pics of shiny brass with an iPhone is really tricky

anyway, my first ever bit of brass soldering:

IMG_0238.jpg

This is with Multicore 179deg and a quick swipe with the fibre brush (mostly to remove the multicore flux blobs). It turns out Ive been using Sn62 all these years and not standard 60/40 as I first thought, and it flows beautifully with the extra flux and stays shiny even after reworking. At ~£40 a reel it flippin well should! Hard to tell from the pic but up close it looks like a mini seam weld, I'm pretty chuffed with it :)

I also folded one of the spare pieces over completely and used 145deg to laminate it. The flux really does seem to suck the solder into the gap and the Maplin iron had no problem even with the piece clamped in a steel vice. No pic because after a quick file on the edges it just looks like a single piece of brass, but thicker.


Having a play with the riveter punch now. Theres no spare bits with half-etched rivets to try it on but I think I may have to file the point down a bit as Ive gone through the spare fret brass a couple of times.


Jon
 

Rob Pulham

Western Thunderer
It's good to hear that you are having successes Jon. Its very satisfying as the mysteries start to evaporate:thumbs:
 

Heather Kay

Western Thunderer
Sounds good. Learning new techniques is fun. :thumbs:

I have several offcuts of softwood I use to support the work while I solder. I also use wooden pegs in a variety of guises to hold things to avoid singed fingers. I've just invested a few quid on some Tufnol sheet from Eileen's Emporium. If I managed to burn that while soldering, I'll be definitely doing something wrong!

I find the best way to remove surplus solder is a scraper of some variety. I have a small chisel-shaped stainless steel thing, which I can sharpen on a whetstone or with a carborundum disc in the minidrill. I use it scrape and chip away at where solder has escaped. A set of cheap needle files is also useful, cheap because they will be ruined by the solder eventually.
 
Top