7mm A Brighton Van

PaulR

Western Thunderer
Last autumn I made the decision to build my next layout in O Gauge. I have some O Gauge stock from a project I worked on - up to about fifteen years ago. The layout was never finished and the stock has been in storage since then. Having only 7ft 3ins to play with does sharpen the mind somewhat in 7mm scale but a plan is emerging - more about that anon.

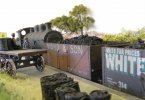
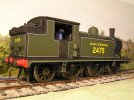
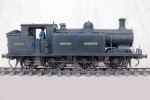
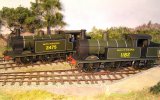
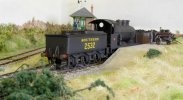
Here are some photos of the stock on the old abandoned layout. The colour reproduction isn't great I'm afraid. There's an LBSCR E4 from a Roxey Mouldings kit, an SECR H Class and an LBSCR C2X, both from Meteor Kits. There's also a Terrier from a Roxey kit which I'm rebuilding and will post photos of that up when it's finished.
PB230051.JPG


Picture 2 comp.JPG

Picture 3 comp.JPG

SR E4 1.JPG
 

PaulR

Western Thunderer
Anyway, to make a start, and because my shed isn't very serviceable until I can get in and clear it out. I decided to scratchbuild a Brighton 8 ton van on the kitchen table - I've really enjoyed it

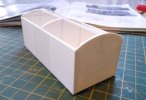
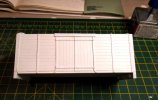
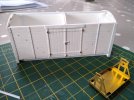
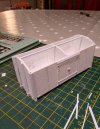
Here are the first stages of the build. The basic box was made from a laminate (three layers) of plasticard, basically because I only had thin stuff in stock.

26-01-23 1.jpg

Strapping was added, and rivets floated on.

01-02-23.jpg

Hinges were made from short bits of brass rod, and chain from twisted bits of fine fuse wire.

11-02-23.jpg

The ends were built. It was beginning to take shape quite pleasingly.

14-02-23 2.jpg
 
Last edited:

Joe's Garage

Western Thunderer
That is very very nice Paul, I chuckled when you said the layout was never finished...looks very close to completion from the photos!
I am looking forward to the new layout if you previous layouts are anything to go by.
Cheers
Julian
 

King Crab

Western Thunderer
Anyway, to make a start, and because my shed isn't very serviceable until I can get in and clear it out. I decided to scratchbuild a Brighton 8 ton van on the kitchen table - I've really enjoyed it

Here are the first stages of the build. The basic box was made from a laminate (three layers) of plasticard, basically because I only had thin stuff in stock.

View attachment 184037

Strapping was added, and rivets floated on.

View attachment 184034

Hinges were made from short bits of brass rod, and chain from twisted bits of fine fuse wire.

View attachment 184035

The ends were built. It was beginning to take shape quite pleasingly.

View attachment 184036

That is looking good.
Can I ask, where are the bolt heads from?
Peter
 

PaulR

Western Thunderer
That is looking good.
Can I ask, where are the bolt heads from?
Peter

Hi Pete

It's quite a contemplative art! You slice a very thin length of fine Plasticard - approximately 0.5mm wide but I do it by eye, and cut it off into tiny squares (0.5mm x 0.5mm). A lot of them will fly off into the cosmos but that's OK because you can make hundreds with a single strip.

I'm left handed so I hold a craft knife in my left hand and a fine brush in my right. I pick up a single piece on the knife blade. Drop a small blob of plastic glue onto the required spot, and float the little piece on. As it dries it naturally forms into a round rivet. The effect is very pleasing.
 
Last edited:

PaulR

Western Thunderer
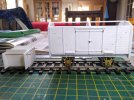
I used compensating LBSCR W-irons from EB Models which went together easily, and needed no adjustment to get the correct buffer height. I made a height jig out of plastic which will be useful for further projects.

02-03-23 1.jpg

Lurking in the background was the nagging thought that I was going to have to make my own brake gear. Because I'm going to finish it in pre-1936 Southern Railway livery I decided that it must have brakes on both sides. Like many others, I don't throw away old brass and nickel silver frets and they get shoved into a 'just in case' box. It proved its worth this time because I was able to gather the bits to make the brake gear from nickel silver left overs.

First of all I made the lamp irons for the van ends. Here it is with a part finished Slaters Midland van. I've also fashioned the brake lever guides. The Axlesbox/spring units are 3D prints from Ian MacCormac of EB Models.

06-03-23 1.jpg

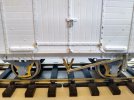
I'm grateful to members of The Brighton Circle who came up with photos of Brighton vans and close ups of their lower regions. I actually enjoyed this part of the project; I suppose the fact that it was a challenge increased the satisfaction when it worked. The great thing about scratchbuilding is that you can always start again if it goes wrong - it's not like that dreadful moment when you mess up something from a kit and you can't replace it. In this photo the brake levers are finished and fitted.

08-03-23 1.jpg

Also in this photo you can see where I've marked three rivets for replacement where I decided they were unsatisfactory. It's easy to rub them down and start again.
 
Last edited:

PaulR

Western Thunderer
That is very very nice Paul, I chuckled when you said the layout was never finished...looks very close to completion from the photos!
I am looking forward to the new layout if you previous layouts are anything to go by.
Cheers
Julian
Thanks for that kind comment Julian. The layout was a little less developed than it might seem - the photos were cleverly posed! Soon after, it was abandoned because of a house move. Model railways took a back seat for a time and when I came back to it I was lured by the glittering riches of all those fantastic RTR 4mm locomotives (and they certainly are fantastic!) - O Gauge was forgotten for a time.
 
Last edited:

AJC

Western Thunderer
Lovely van, Paul, though it’s a bit big. :p

I have one of these on the list of things to do, though mine won’t be on its wheels (my station needs a store).

Adam
 

PaulR

Western Thunderer
Lovely van, Paul, though it’s a bit big. :p

I have one of these on the list of things to do, though mine won’t be on its wheels (my station needs a store).

Adam

You may be more sensible than me Adam - I worked worked out that the 7ft shelf in my shed will give me just 300ft of railway in 7mm!
 

AJC

Western Thunderer
You may be more sensible than me Adam - I worked worked out that the 7ft shelf in my shed will give me just 300ft of railway in 7mm!

What are the measurements of Arun Quay again? It's fine, just about, unless you want to cater for passengers and then there's a high chance it may look daft (quite big, coaches). That said, having just acquired a tender engine, I'm suffering the realisation that they're quite big, too...

Adam
 

PaulR

Western Thunderer
What are the measurements of Arun Quay again? It's fine, just about, unless you want to cater for passengers and then there's a high chance it may look daft (quite big, coaches). That said, having just acquired a tender engine, I'm suffering the realisation that they're quite big, too...

Adam

Arun Quay is 7'6", but it's also a masterful compromise with short points and a brilliant track design. Also Gordon and Maggie only run terriers and a P Class on it. I want to run my E4 and C2X on mine so I'm sacrificing the joys of a reversing loop - even the E4 is surprisingly big when you start planning small layouts.

I have a plan in development but it's a busy year ahead with my daughter getting married, so I'm not going to start it till September. By then the shed should also have been cleared out and re-organised.
 

Joe's Garage

Western Thunderer
Hi Paul
The photos are certainly well "posed" as it looks very effective. You've opened that can of worms on the small layout front. The planning will be very interesting. One small layout springs to mind, that is St George by Ian Hopkins, it appeared in an early edition of the MRJ. Depends what you are are looking at.... just goods or passenger. Admittedly Ian's was a Victorian era depiction so 4 wheel coaches were the order.
Do you have any more photos of the old layout?
Happy doodling
Cheers
Julian
 

PaulR

Western Thunderer
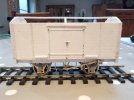
The rest of the brakes were added on both sides.

09-03-23-2.jpg

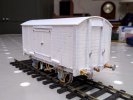
Buffers and coupling hook came next. The buffers are Markits and the couplings are Slaters. I curved the roof by wrapping it round a cafetiere jug and filling it with boiling water - it turned out to be the perfect diameter. It's not fixed yet.

15-03-23 2.jpg

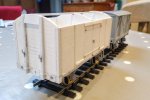
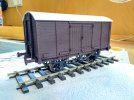
I had flirted with the idea of finishing it in Brighton livery but this would have put it at odds with the majority of my O Gauge stock, so I settled on Southern Railway pre 1936 livery. My chosen period is 1936-9 so this would seem like a sensible choice. This is where I'm at with it right now. I knew I had some HMRS Methfix transfers for Southern Railway freight vehicles but had forgotten that they are 4mm, so there's a pause while I've sent off for 7mm ones - Bah!

30-03-23 2.jpg
 

WM183

Western Thunderer
Gorgeous modelling! Are the brake shoes also 3d prints? And how did you scribe the plank detail on the body? Its so clean!
 

PaulR

Western Thunderer
Gorgeous modelling! Are the brake shoes also 3d prints? And how did you scribe the plank detail on the body? Its so clean!

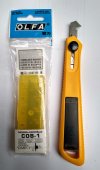
Thanks for the endorsement. To score the planks I used an Olfa Cutter, commonly called a 'scrawker', which I think describes what it does almost perfectly. The brakes shoes were sculptured from bits of Plasticard - I made a few and chose the best ones.

IMG_20230405_083919034_HDR.jpg
 

WM183

Western Thunderer
Thank you. I have got to get one of these "skrawkers" as your planks are so cleanly scribed! (shriven? Idk what the past tense is... hmm)
 
Having acquired some of my late grandfathers scratchbuilt SER, LCDR and SECR rolling stock its always nice to see the more obscure being modelled.

Slight tangent. How was the Roxey E4 to build? Its on my hit list for my layout but i cannot find any info or topics on building one.
 

PaulR

Western Thunderer
Having acquired some of my late grandfathers scratchbuilt SER, LCDR and SECR rolling stock its always nice to see the more obscure being modelled.

Slight tangent. How was the Roxey E4 to build? Its on my hit list for my layout but i cannot find any info or topics on building one.

The Roxey E4 is quite an old kit now. I built mine 20 years ago. It's white metal with a brass boiler. I can't remember too much about it to be honest, but I'm an average builder and I think mine looks OK and it runs very nicely. I would say it's a very sound starting point, it fits together well and you can produce a decent model with a bit of care. It has the post 1913 boiler.
 

Yorkshire Dave

Western Thunderer
I would say it's a very sound starting point, it fits together well and you can produce a decent model with a bit of care. It has the post 1913 boiler.

Yes, I second this. It was the first O scale loco I built about 15 years ago and finished in immediate post-nationalisation livery. The only modification I carried out was to make a new cab roof from brass as I felt the whitemetal one was too chunky.

E4 005.jpg
 
Top