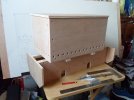
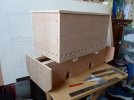
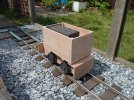
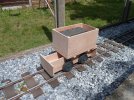
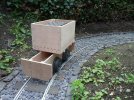
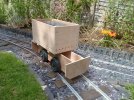
A speeder - finescale of a sort!

Peter Insole

Western Thunderer
Way back in the early 1970's, a friend of mine started to build a petrol/electric version of an LMS 10000 locomotive in 5 inch gauge. He was inspired by a similar Brush type 4 that a member of the Cambridge Model Engineering society had completed and was operating. I accompanied my friend when he went over to the group's track on a couple of joyous occasions.

On one of those days, a large gentleman arrived in an estate car, bringing with him a partly completed "LBSC Tich". He obviously had also been charged with taking care of his tiny, toddler son! He had a simple solution to the problem of being able to fully engage in the serious business of model engineering - and childcare at the same time...

He produced two contraptions from the back of his car - one rather odd looking motive power unit, and another was a driving truck. The loco had very basic, bare timber, wagon style underframes - and get this... an old, vitreous enamelled bread bin, complete with handles and lid, some wires and a switch hanging out, and the whole shebang screwed on top!

The container was a pale green colour, with the original large legend "Bread", in black serif letters on the side - to which the chap had slightly crudely added above and below "The Flying" and "Bin"!

A motorcycle battery was dropped inside and connected up - then the very small boy was installed on the truck and handed the switch - and he quite happily whizzed off, independently on the circuit! Round and round he went - goodness knows how many times in the next hour or so - but I seem to recall it was until the battery ran out?!

That hilarious vision has left a lasting impression me... and I have been known to refer to it on many occasions since!

Well, after the passage of so many years, I am now convinced the time has finally come where there is a pressing need for our own, albeit marginally more grown-up version of such practical traction!

The key requirements are that it must be cheap, extremely simple, robust enough to suffer all but the worst weather, rough handling, hard knocks and survive being stored in a garden shed!

I think I have found an ideal candidate?
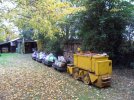
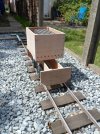
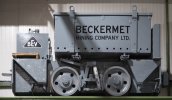
zCsar_News275.jpg
(Copyright image shown here for illustrative purposes only)

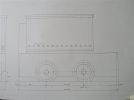
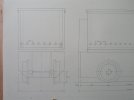
We already have a set of wheels, some timber and sheets of 9mm ply, steel angle, a battery and various other electrical bits and bobs in stock... while a 12V motor is on order - so all that was needed was a drawing to work from:
zcxSAM_8919.JPGzcxSAM_8917.JPG

It is not to scale, but more a compromise design, based on practicality, the available wheels, size of battery etc., that I hope will present a "flavour" of the genuine machine?!

I am still severely restricted by the hours that I can use noisy tools in the workshop, but I did manage to get the main frame and headstock blanks shaped yesterday, and hope to do the cut out details and begin assembling them by this evening...?
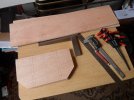
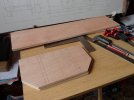
zcxSAM_8921.JPGzcxSAM_8922.JPG

This should hopefully be kept as a bit of a speedy, fun-running flyer of our own!!

Pete.
 

Peter Insole

Western Thunderer
A little later than hoped, but the frames are in one solid lump now! I have still got to mark up and cut a plate to be fitted over the leading headstock - on the horizontal timbers. The length of the plate should hopefully help to hold the frames square and reduce the possibility of twisting.
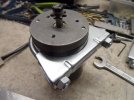
zcxSAM_8925.JPGzcxSAM_8926.JPGzcxSAM_8927.JPG

I have tried to make sure that all the horrible cross-head countersinks (at least those that will show anyway) are driven in deep enough to be hidden by filler! - The original locos were of fully welded construction after all!

My neighbour has stopped doing shift work today, and for the next couple of weeks I have been given permission to make as much noise as I like!

Wallop, wallop in the workshop time again!

Hurrah!

Pete.
 

oldravendale

Western Thunderer
Hi Pete. May I suggest you use Ronseal 2-part wood filler for those countersinks. It's rather expensive but (IMHO) does the job it's meant to do (except for curing wet rot - what a stupid claim!). I used it at least a year ago on some stairs against the recommendation of my builder who said it'd fall out but it doesn't and hasn't. There are other two part fillers which are probably less expensive and I can't speak for them.

It's wonderful to see you on the warpath with something new. Mrs I must be a saint, yet to be beatified:D.

Best wishes.

Brian
 

Peter Insole

Western Thunderer
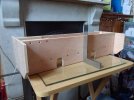
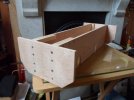
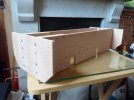
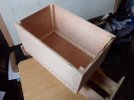
The "bread bin" battery container is coming along now...

zcxSAM_8937.JPG

Just a very basic, no nonsense, timber structure, done in the same way as the tender/driving truck and wagons. The construction method might not be best practice, nor remotely prototypical, but it has certainly proven itself to be sufficiently robust - while the simplicity of the "glue-and screw" method saves an awful lot of time!

zcxSAM_8938.JPG
zcxSAM_8939.JPG

I was sure that there was a part sheet of 5mm ply lurking about at home somewhere - and there was! What I had completely forgotten was scrawling "Scrap" and "Fit only for firewood" in large letters on both sides! - And it definitely is!

The stuff will be essential for the lid rim, two short sections of fore and aft foot-plating and some other bits of boxing up...

Going shopping was not part of the plan!

Pete.
 

Peter Insole

Western Thunderer
I have perhaps been getting a bit too happy with the rate of progress, as well as remaining content with a "design on the hoof" approach to this project! Whilst I am known to moan and groan about having to frequently engage in lengthy head scratching and subsequently doing contortions to solve a problem or two, it is a process that I find most enjoyable - especially when the odd bodges are (to some degree) successful!

Using planed timber for framing might be nice and friendly to use, but does seem a rather foolish choice when applied to a working locomotive?! Unfortunately (?) there are occasional benefits though.

I like to pretend that I am fully aware of the limitations of the material, and dutifully consider the grain quality and direction, as well as squareness (or rather the lack of) when marking up or choosing a particular cut. Oh, how many times have I taken such great care, only to ruefully discover that I had assembled the piece back to front, or upside down - and then always - only when everything is firmly locked in place?!

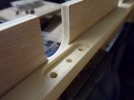
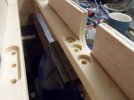
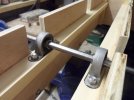
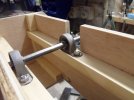
When planning the construction of this engine I had decided to keep it simple by using the original plastic axle bearings that came with the wheelsets, and as the wheelbase is a mere eight inches, not bother with any suspension either. The support framing was measured and fitted accordingly. During the weekend, I finally convinced myself that fitting decent, pillow block bearings all round would be a much more sensible option! The problem was that the dimensions of the new items are at odds with the existing structure!

There seemed to be but one solution - and that was a bit of a fraught exercise, but nonetheless eventually doable...

zcxSAM_8946.JPGzcxSAM_8947.JPG

Not particularly pretty, or at least neatly done I do admit, but for the want of a router, was slightly awkward to execute!

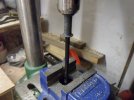
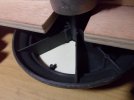
It took me ages to seek out a suitably sized hole cutter that could be sacrificed for this particular task. The bit required cutting short, so that when held in the drill press chuck, the complete loco frames could slide underneath, and against a clamped fence on the bed plate. Having initially set up the frames on a heavy sheet of plate glass, I was reasonably confident that they were parallel and square, so by adjusting the limiter screw, was able drill to a constant, 4mm depth. The remainder of the task was the fiddly - in such a restricted space - use of a good, old fashioned chisel.

zcxSAM_8949.JPGzcxSAM_8950.JPG

All very satisfying when it came to fitting... That was when the fun really started!

When bolting down, the previously superb, free running bearings were binding terribly! I quite naturally assumed that inattention had (once again) caused me to fail!

I was somewhat perturbed realising that it would be near impossible to work out where the error had occurred, but tried the first test of simply swapping the bearings round in their seating's - just to see what might happen.

Ah, ha! That surprisingly revealed one offending unit - and not apparently anything that I had done?!

It took me a while, a couple of fags and another cuppa, to spot it:

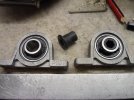
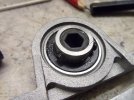
After much searching, and unless I have missed something, it would seem that pillow block bearings of the "self-aligning" type are usually only the larger bore ones. These little fella's are solidly fixed (and note - therefore completely unsuitable for any form of flexible suspension any way!) so their fitting is critical.

Close inspection of the offending bearing revealed a tiny shard of metal that should not have been where it was! The entire ball race was set wonky in it's housing! As I really didn't fancy any attempt at forcing re-alignment, the answer was to utilise my new, Aluminium "Bastard" file for it's intended purpose, and shaved a slight angle off both faces of the lugs!

Bingo! The axle whizzes round something lovely now!

Pete.
 

Peter Insole

Western Thunderer
I have decided to retain the original hexagonal rear (driving) axle, so the wheel hubs won't require the drastic modifications of the Horwich loco! It would also mean that a nylon final drive pinion, salvaged from the donor, can be used with a suitable chain sprocket bolted on.

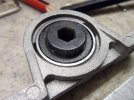
The original bearings were little, injection moulded cotton-reel affairs with a hexagonal bore to fit on the axle, and I had noted that, rather conveniently, the external diameter was a slightly odd 12.75mm.

By lodging both on the bare axle, set in the drill press, I was able to spin off two of the rims in the centre, and at the same time reduce the diameter to snug, interference fit in 12mm bore pillow blocks!

zcxSAM_8957.JPG
zcxSAM_8953.JPG

The "cotton reels" were so snug that they needed to be squeezed home in the bench vice. I was very happy that they went in straight and true. The fit almost seemed as if they had been specially made for job!

zcxSAM_8958.JPGzcxSAM_8959.JPGzcxSAM_8960.JPG

Yet again, I found one of the ball-races is noticeably misaligned in it's housing - which is a great shame, considering that the seller makes much of their products being proudly "British made"!

zcxSAM_8962.JPG

At least I am wise to it now, and bit of judicious use of a file should again be sufficient - although it really shouldn't be necessary?!

Despite all that, I am absolutely delighted with the way the new loco is progressing.

Pete.
 

Peter Insole

Western Thunderer
Now all the bearings have been set up, I thought it would be a good idea to do a rolling test of the chassis.

After pushing it light round the circuit, I popped the "bin" on and loaded it with five of the very dense and quite heavy "Staffie" paving bricks - mainly to get a better impression of it's behaviour on the curves...

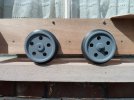
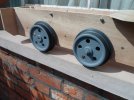
zcxSAM_8967.JPGzcxSAM_8968.JPG

The am greatly relieved to say that there is very little "creep" resistance, thanks in part to it's short wheelbase, and the lack of suspension doesn't seem to have any adverse effect either - although that might be a different matter when under it's own power?

zcxSAM_8969.JPGzcxSAM_8971.JPG

It runs like a real sweetie... or rather, it has a tendency to run away!

zcxSAM_8972.JPG

At least a healthy portion of the battery and motor output should be focussed on hauling happy passengers!

Pete.
 

Peter Insole

Western Thunderer
I know this new engine is supposed to be basic and ultimately purposeful, but I am afraid that I couldn't resist a bit of an indulgence!

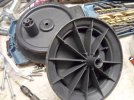
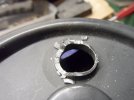
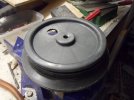
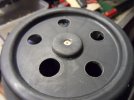
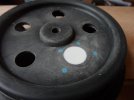
To my eyes, the wheels still looked a bit too much like the ones fitted to the Horwich loco - plus removing the moulded crankpins from the main drivers left a large hole in a plain disc that I couldn't really live with...

zcxSAM_8963.JPGzcxSAM_8964.JPG

The "Wheelie-bin" plastic used in the manufacture may be fantastically tough, but it is horrible to work with!

It was a little disconcerting to discover how adrift the core mould was when cutting into the crank!

zcxSAM_8965.JPG

I had forgotten to record the next stage, so took the above shot to show the method used to find the correct centre.

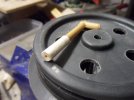
It is always a good idea to keep a box full of old, spare styrene "tree" sections - I have long lost count of the sheer number of solutions that stuff has solved?!

zcxSAM_8966.JPG

A major issue with the plastic is that it is quite unaffected by solvents - or indeed any other type of adhesive come to that! A more mechanical solution had to be found to fill the hole!

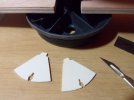
Measuring the thickness of the wheel moulding, I calculated that I could use two layers of styrene sheet to bring the finished filler plug up flush with the outer face. The first sections were cut to be a really snug fit in the segment between the spokes on the rear faces, where it was hoped there would be little chance of subsequent movement...

zcxSAM_8974.JPGzcxSAM_8975.JPG

The next act was to use yet more saved styrene "tree", and form hot knife rivets to lock the segments in place...

zcxSAM_8976.JPG
zcxSAM_8979.JPG

The carefully cut plugs were then cemented to the backing sheets, and when sufficiently set, were whole lot was smoothed down!

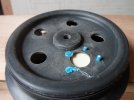
Cutting the new holes turned out to be an even greater nightmare than I could of imagined! All the previous care bestowed on the plugs and fillets was almost destroyed by the drill bit. Despite going easy, the bit went bonkers at the joint between the two distinctly different plastics!

I should consider removing the rivets, cleaning up the damage behind and re-setting them, but decided to leave well alone for the time being!

zcxSAM_8980.JPG
zcxSAM_8981.JPG

Any paint finish applied to this type of plastic will not bond terribly well, and is bound to get rather chipped and flaky after a short time in service - so perhaps I need not be too troubled?

I am still wondering how best to fit a "dummy" stud and nut on the driving axle to match the leading set though?! There are several options available, but I think that getting the motor and transmission sorted out is a much higher priority in the meantime?!

Pete.
 

Osgood

Western Thunderer
Looks like the hole is smaller than the exposed thread on other wheel set, so drill and tap hole to suit a length of threaded rod?
 

Dog Star

Western Thunderer
The "Wheelie-bin" plastic used in the manufacture may be fantastically tough, but it is horrible to work with!

Any paint finish applied to this type of plastic will not bond terribly well, and is bound to get rather chipped and flaky after a short time in service....
I am thinking that you might find a trip to an auto paint shop useful.... take a piece of the plastic with you and ask if there is a suitable primer available (such as is used now for car bumpers). Does a wheel have a "number in a triangle" mark to identify the material?

regards, Graham
 

Tom Insole

Western Thunderer
I'm unsure how much meat you have to play with but would you be able to get a bolt and file some of the head off to make a consealable end to ether heat and sink into the plastic or carefully cut the shape in and glue into place and then add a nut to it as a dummy fixture.
IMG_20230802_090520.jpg
If there's thick enough plastic on the end. If you could get away with a thin layer of filler/styrene over the head of the sunken bolt head to conseal it also this would save any visual presence of the bolt head.

A bolt head would also provide a stronger base for adhesion in case of accidental bashing of said nut in service.

Tom.
 

Peter Insole

Western Thunderer
Thank you Tony, Graham and Tom for your replies.

The axle bosses are actually quite different mouldings, but in a way that is not obvious in the photographs!

The original leading axle was 8mm diameter rod, knurled at both ends and pressed into the wheel hubs. Grip was improved by the simple fact that the bores are tapered - a necessary feature of injection moulding.

The original pair of 8mm plastic bearings had been forced over the slightly enlarged, knurled ends, to run on the true, 8mm axle shaft. Changing those bearings to steel, ball-race, pillow blocks was not possible - as they would not pass over the knurled ends - so a new, plain, 8mm rod axle had to be substituted - not a problem as I already had some in stock! Of course, it also meant that the new axle, being of fractionally smaller diameter at those ends would have to pressed further into the bore in order to regain grip! It was still not enough though, so the "blind" bore in the hub had to be drilled through, and the new axle cut to a longer length. The protruding ends were then threaded M8 to accommodate keep nuts to stop the wheels working outwards and becoming coming loose!

The main driving axle - and hub mouldings are again 8mm - but are of HEXAGONAL section, primarily to prevent slippage under load.

There was just not enough plastic on the hub to permit opening-out for a larger diameter, round rod - hence my bodging wheeze in adapting the "cotton-reel" plastic bearings for use in the new, 12mm pillow blocks!

I had to drill centre holes into both sets of hubs at the beginning of the process, and with each wheel in turn supported at the back for the majority of it's circumference, I was then able to use a nail punch to strike against the buried axle ends in order to remove the wheels from their original axles. That was the only way to extract them without risking collateral damage to the plastic!

Strictly speaking, I would prefer much larger nuts on all wheel centres, as shown on the (copyrighted) image below...

zBEV 2 51913423518_209b07bc68_h.jpg
(image shown for illustrative purposes only)

but am restricted to M8 at the front!

Thanks again to all for your helpful suggestions, and I do appreciate them, but at the moment any solutions will require making specific purchases of new material - while attention, and pocket money allocation must be concentrated on the vital issue of getting the motor and transmission issues finally settled!!


Who was I trying to kid when I thought the latter part was going the easy bit...? Ha-hah!

Pete.
 

Peter Insole

Western Thunderer
Here's a question - although I don't really expect an answer: Why, oh why does it take longer to receive a small parcel from Birmingham to a Cambridge postcode than a similar one all the way from China?!

Ah, the mysteries of life! While I wait for various essential bits and bobs to arrive, I have been plodding on!

Unable to progress with the Horwich locomotive suspension refurbishment, attention has returned to the not quite so speedy speeder...

zcxSAM_9039.JPG

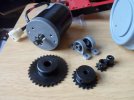
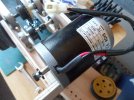
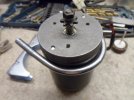
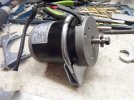
This nice little collection had turned up reasonably promptly, including the handsome and hopefully adequate, one hundred watt motor.

Time to start working out how to fit it all:

zcxSAM_9047.JPGzcxSAM_9048.JPG

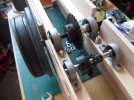
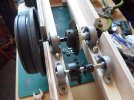
I really should have made a decent set of drawings beforehand, as yet again, odd screws and other fixings have got in the way of drilling more! There does seem to be a risk that those frames are becoming too perforated, and starting to resemble timbers affected by ship worm - like the poor old Barmouth Bridge!

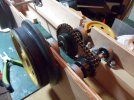
The reduction gear shaft will not quite be in the originally intended position, but I trust it should still work well enough here?

Working out the best way to fit the big, heavy lump will be a really interesting exercise...

zcxSAM_9049.JPG

The proportions dictate that it will have to project it's rear end through the frames on one side. Fortunately, on the prototype locomotives, the resistance coils were located directly beneath the control cubicle on the footplate, and were usually "boxed in" with protective covers.

zcxSAM_9050.JPGzcxSAM_9051.JPG

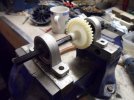
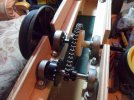
Now I feel compelled to say that as a former cyclist, I have had some previous experience of adjusting bicycle chains, so I naturally imagined that this task would present no particular difficulty.

The issue however, was that my old tools were not suitable for these narrow, 25H links. As the halcyon days of "local" shops are long since passed, I had to order a new one online. The result was that I spent good money on an utterly useless object that is only fit for the scrap bin!
I had to resort to grinding down two rivets and prising the subsequently wrecked link off with a chisel blade - a rather brutal method, and a waste of time and effort into the bargain!

Goodness knows how, but I actually managed to insert the damned fiddly spring clip on the new link - without pinging it across the workshop and into another universe though?!

As a postscript to my query at the beginning of this post; Even as I wrote, I have now been informed that the "late" parcel from Brum has apparently gone astray, and that "other parties" are getting involved! I don't want to be bitter and twisted, but I do have an awful feeling that it will probably take several weeks to finally resolve?! All for want of a couple of ball race bearings. I was trying to salve my conscience by ordering from a UK retailer, but am beginning to wish now that I had stuck with the Chinese?!

Pete.
 

Peter Insole

Western Thunderer
Hi Tim, no - just good ol Royal Mail! Need I say more?!

There is one possible explanation: Fairly recently, two new flats were built nearby as an infill development along the main road. Because the land was originally part of a property on our own cul-de-sac, someone decided that their postal addresses should reflect that. As a consequence, the flats are numbered 2A and 2B. You can imagine that if someone types, or hand writes a "lower case" B (b) for the address, it can easily be mistaken for 26?!

Our regular, "Local" postie is clever enough to recognise names, but all sorts of problems happen when he rather selfishly goes on holiday!

On those occasions, we frequently get 2b's post through our letterbox. We are always prepared to walk the short distance down the hill and deliver it - but nothing, so far as I am aware, has ever come back the other way!

Whatever, it is probably more likely to be a simple case of loss somewhere in the system - it wouldn't be the first time that has happened?!

Pete.
 

cmax

Western Thunderer
Peter , Contact your local delivery office, ask to speak to the COM (Customer Operations Manager) and ask them to do what they are paid to do and Make sure all the Post, Letters as well as parcels are delivered and not just Bonus related Tracked Items.
 

Peter Insole

Western Thunderer
Unfortunately, the items were supposed to be dispatched at "Large letter" rate - and as no one has owned up to the missing consignment, despite the vendor being a so-called "premium" seller, (they refused to reply to any of our queries) I do rather suspect that it was more likely that the items were not even posted in the first place. (?) Whatever had gone wrong, the "famous trading site" took it upon themselves to refund me today, so a new set of bearings were ordered, this time from another source - and where the goods can also be tracked!

Meanwhile, I have been quietly suffocating in our little corner of the Suffolk sauna, while desperately trying to stay awake and at the same time keep some semblance of momentum in the project! The only good thing I would say about the heatwave is that at least primer and filler dries nice and quickly!

I did go out and about on one occasion seeking a suitable, right angled steel bracket that might be adapted to form a mount for the speeder's motor, but apart from enjoying a couple of bus trips around town with Rich as driver, the effort was otherwise unrewarded. I resigned myself to the prospect of some serious metal wrangling as the only reliable option!

Yesterday, a brief storm at last brought some relief from the stifling heat, and I was able to slowly start coming back to life: I even managed to have an idea, (!) and couldn't wait to go shopping at the first opportunity today!

zcxSAM_9053.JPG
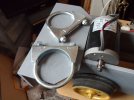
The really great bit was that the required items, of just the right size, were not only available off the shelf, but even better; were a measly 99 pence (not including the 20p VAT) each!

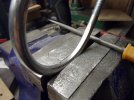
If there was a fly in the ointment; it was simply that the U-bolts were not particularly round - and just a fraction undersized. Tightening these clamps firmly enough to grip risked damaging the motor casing.

The solution was straightforward enough, if a tad time consuming, by filing back the inside of the bolt with a rat tail to remove all the pinch points:

zcxSAM_9055.JPG
zcxSAM_9056.JPG

Carefully removing a bit at a time, tweaking in the vice jaws and offering up until a snug fit was achieved.

The saddle pressings were slightly misaligned and ill-fitting too, (probably, perfectly acceptable for the intended exhaust pipe?) but for our peculiar purposes, a bit more filing finally did the trick...

zcxSAM_9057.JPGzcxSAM_9059.JPG

I must admit that there is not an awful lot of lead left for attaching to any form of support plate, nor much room for additional fixings either, but knowing that the motor will have extremely sturdy, four point anchorage should make the rest of the challenge a bit more enjoyable now!

Pete.
 

Peter Insole

Western Thunderer
Ironically, the "bearing issue" doesn't actually belong on this particular thread, but as I was talking about it here I might as well close the matter here!

The new order was placed yesterday morning at around ten o'clock...

hSAM_yx9060 Delivered less than 24hrs later.JPG

Our keen, local postie was a tap, tapping on our door at eight thirty, on the dot, this morning with the parcel!

Very impressed I am, but it was a shock in two ways:

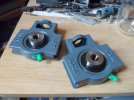
hSAM_yx9062 Much too big though.JPG

These bearings are magnificent beasties... but... They are much, much larger overall than I had expected!

Without being able to find any diagrams or other references on the web, I had rather foolishly assumed that the minimum, 12mm bore bearings might be set in smaller housings, (as per regular pillow block varieties) but no!

The huge great lumps of iron would be absolutely perfect for the "Tram" project - except for the small bore, so I'm now wondering what the best course of action will be. (?) Do I carefully re-pack and return them, along with a re-order of the full eight, larger bore versions required? That would be an unexpectedly big hit to my account - but then again; having got them in my mitts and "felt the quality", I am now certain that I really do want such things in the very near future anyway.

I suppose "a fool and his money are easily parted" applies?

"What money dear boy?" I hear the echoing cry.

Well, quite!

Pete.
 
Top