You are using an out of date browser. It may not display this or other websites correctly.
You should upgrade or use an alternative browser.
You should upgrade or use an alternative browser.
 .
.45609
Member
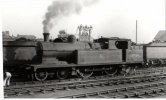
A nice collection of C13 photos here to browse through. At least one is a C14 misidentified as a C13
Deano747
Western Thunderer
Sorry Dave, to mention another rivet tool.....The rivet embossing tool could be from LRM or Eileen's, as John at LRM used to supply them. Until that is Derek Russan found out who was making them for LRM and went direct. The design was from the late John Hayes, a fellow member of the S4 North London Group with John Redrup.
Dick Ganderton makes the Graskop riveter. See Jim McGeown's website FAQ Answer 15 Luxury Tools
Fantastic build, by the way!!
Regards
Rob
Dave Holt
Western Thunderer
Not very much progress with the the C13 recently. What with Christmas and a visit from a long-time (since 1958) friend to see our band play last night, not much modelling time. However, some small progress has been squeezed in. Four of the footplate support brackets have been fixed to the frames (not photographed) and a number of smaller outstanding etched parts made up ready for when the further etched and 3D parts are received. These parts include the brake cross beams and pull rods (awaiting brake hangers and brake blocks), buffer beam gussets (awaiting new, rivetted buffer beams) and valve rods (awaiting valve spindle cross- heads) and are shown in this photo.

The rear part of the brake pull rods has been left over length and is loosely plugged into the rear cross-beam shackle. The final length will be determined once the brake hangers are in place and clearance to the wheels set.
Happy New Year to all.
Dave.
The rear part of the brake pull rods has been left over length and is loosely plugged into the rear cross-beam shackle. The final length will be determined once the brake hangers are in place and clearance to the wheels set.
Happy New Year to all.
Dave.
Dave Holt
Western Thunderer
Brian, I don't think you've missed anything because I haven't said anything about the motor or gear-box, although the gear-box does appear in some of the chassis photos. The gear-box is some sort of High Level extended box - could be a Road Runner Plus - not sure of the ratio. Sorry to be so vague but I bought it some time ago, probably at an exhibition, and it just came in a plastic bag with no identifying information. The motor is one of their new coreless can types, a 1420 size by the looks of it.
Dave.
Dave.
Dave Holt
Western Thunderer
I recently received a package of goodies from Justin and have cleaned up the 3D printed backhead to try in place. Looks rather good to me. I particularly like the integral level gauges. The injectors, brake ejector and whistle manifold are all rather complex and very delicate separate prints. I'll need to hold my breath and keep a steady hand to remove them from the support structures without damage.

Sadly, due to an oversight on my part, the bottom is too low (to scale but not allowing for model compromises) and is preventing the rear compensating beams from rocking and thus locking up the suspension. Damn. Have requested a modified version to overcome the problem.
Dave.
Sadly, due to an oversight on my part, the bottom is too low (to scale but not allowing for model compromises) and is preventing the rear compensating beams from rocking and thus locking up the suspension. Damn. Have requested a modified version to overcome the problem.
Dave.
Dave Holt
Western Thunderer
A little bit of visual progress as a result of fiddly manipulation of tiny or recalcitrant etched detailing parts. These include the angle between firebox and cab front (actually two separate pieces), the cladding band cleat on top of the firebox, sockets where the boiler handrail meet the tank front plates and the cover plate for the hillside snifting valve on the smokebox. All seen, somewhat indistinctly in this photo.

In addition, the buffer beam gussets have been attached to the chassis.
Many of the 3D printed items have been cleaned up ready for fitting. Unfortunately, the survival rate for some of the more delicate features was not very good and replacements, some beefed up a bit, have been ordered.
Dave.
In addition, the buffer beam gussets have been attached to the chassis.
Many of the 3D printed items have been cleaned up ready for fitting. Unfortunately, the survival rate for some of the more delicate features was not very good and replacements, some beefed up a bit, have been ordered.
Dave.
Dave Holt
Western Thunderer
Not much visible progress with the C13 chassis, but quite a few changes have been made recently. The obvious items are the buffer beam gussets and footplate support brackets either side of the driving wheels. What is not so apparent is the replacement of the leading coupled wheels to get rid of the wobbly one, elimination of slight side play in the driven axle, by fitting 0.125 mm thick washers, and levelling up a rear end droop by soldering 0.25 mm pads on the tops of the axleboxes.
The ride height issue partially came about by a late change from having the top of the over-scale thickness footplate at the scale height above track to having the bottom face at the correct height. This change was due to having new, scale etched buffer beams made on which the buffers are slightly lower than on the original beams seen so far in the body photos.
Chassis with the wheels re-fitted and awaiting the coupling rods.

As you can see, the wheels are rather close to the frames, so elimination of any side play is essential.
I've been promised some updated 3D prints shortly, so further progress with these parts should soon be possible.
Dave.
The ride height issue partially came about by a late change from having the top of the over-scale thickness footplate at the scale height above track to having the bottom face at the correct height. This change was due to having new, scale etched buffer beams made on which the buffers are slightly lower than on the original beams seen so far in the body photos.
Chassis with the wheels re-fitted and awaiting the coupling rods.
As you can see, the wheels are rather close to the frames, so elimination of any side play is essential.
I've been promised some updated 3D prints shortly, so further progress with these parts should soon be possible.
Dave.
Dave Holt
Western Thunderer
67421 lives! I've finally bitten the bullet and motorised the loco. Pick-ups, using 0.31 mm brass wire collect from the four coupled wheels only. Hopefully, with compensation keeping all wheels firmly on the rails, this will suffice. Initial results are very promising with smooth running in both directions right from the off. If more pick-ups prove necessary, it might be possible to fit some for the rear truck.

Since the last post, the coupling rods have been re-fitted, retained by 16 BA nuts, tapped out to 14 BA. The wiring is only temporary, prior to fitting a DCC chip.
Dave.
Since the last post, the coupling rods have been re-fitted, retained by 16 BA nuts, tapped out to 14 BA. The wiring is only temporary, prior to fitting a DCC chip.
Dave.
Dave Holt
Western Thunderer
Some additional and modified 3D prints arrived this morning. Amongst the first items looked at was the replacement smokebox door. I broke the hinge off the original, so the replacement has slightly beefed-up hinge detail although this isn't really apparent on the finished item. Here it is loosely tried in place with the locking handles in situ. Some further smoothing of the back face of the door, where it seats on the brass backing ring, will be required to get a closer fit.


The guard irons have been formed and fitted to the frames, front and rear.
Dave.
The guard irons have been formed and fitted to the frames, front and rear.
Dave.
Last edited:
Dave Holt
Western Thunderer
Detailing of some cab features has been started.
The reverser has been finished by attaching the top cut-off indicator plate and the bake ejector/integral steam brake valve, together with the etched vacuum brake handle and some related piping, have been fitted to the backhead. As has the regulator handle. Currently awaiting some injector re-prints to replace those broken during removal from the support structure. I think I may have pushed the printing technology just past the edge with these items.


Mightily relieved to get the ejector print cleaned up and fitted without snapping off the steam brake handle, which is rather fine and delicate.
The right hand support foot and part of the lagging on the backhead has had to be cut back to clear the front end of the reverser screw. Sadly, yet another example of poor planning on my part. Fortunately, fairly easily rectified.
Dave.
The reverser has been finished by attaching the top cut-off indicator plate and the bake ejector/integral steam brake valve, together with the etched vacuum brake handle and some related piping, have been fitted to the backhead. As has the regulator handle. Currently awaiting some injector re-prints to replace those broken during removal from the support structure. I think I may have pushed the printing technology just past the edge with these items.
Mightily relieved to get the ejector print cleaned up and fitted without snapping off the steam brake handle, which is rather fine and delicate.
The right hand support foot and part of the lagging on the backhead has had to be cut back to clear the front end of the reverser screw. Sadly, yet another example of poor planning on my part. Fortunately, fairly easily rectified.
Dave.
Last edited:
Dave Holt
Western Thunderer
A couple of steps forward and at least one back with detailing the backhead. Work has been concentrated on the injectors and associated overflow and water feed pipes, both formed from 0.6 mm brass rod with one end reduced to just under 0.4 mm where they plug into the gland nuts on the injector bodies. Sadly, I broke the latter in removing them from their supports and have requested replacements with the small hand-wheel replace by a through hole to allow an etched brass wheel and shaft to be fitted.
I then discovered two further prints in the package and managed to drill the necessary holes and dress off the support pips without further accidents. Hurrah! Then a set back. After fitting the LH injector to the back head, I spotted that part of the hand wheel rim had broken off, so the whole thing was whipped off again before the super glue got hold.
I had better luck with the RH one and this is now fixed in place and the overflow pipe fixed (nearer the backhead). The rather curly water feed pipe (outboard of the overflow) is just loosely plugged into position. The outer loop looks to need a slight tweak in order to be vertical and will be trimmed to length to just touch the top of the side tanks after fixing to the backhead.
Slightly blurry photo of the current state.

Dave.
I then discovered two further prints in the package and managed to drill the necessary holes and dress off the support pips without further accidents. Hurrah! Then a set back. After fitting the LH injector to the back head, I spotted that part of the hand wheel rim had broken off, so the whole thing was whipped off again before the super glue got hold.
I had better luck with the RH one and this is now fixed in place and the overflow pipe fixed (nearer the backhead). The rather curly water feed pipe (outboard of the overflow) is just loosely plugged into position. The outer loop looks to need a slight tweak in order to be vertical and will be trimmed to length to just touch the top of the side tanks after fixing to the backhead.
Slightly blurry photo of the current state.
Dave.
Dave Holt
Western Thunderer
The backhead is now complete and ready, together with the reverser and gauge mounting board, to be painted and fitted after the cab interior is painted.
Here's the finished backhead and also tried in place, just to get the overall effect.
The finished backhead:

Sadly, some small, fragile features have been broken in handling, namely the LH water gauge drain handle, small ejector handle on the brake ejector and the RH up-stand on the whistle manifold. In the gloom of the cab interior, I think I can live with it and, in any case, rectification would be extremely difficult.
And fitted in place:


Dave.
Here's the finished backhead and also tried in place, just to get the overall effect.
The finished backhead:
Sadly, some small, fragile features have been broken in handling, namely the LH water gauge drain handle, small ejector handle on the brake ejector and the RH up-stand on the whistle manifold. In the gloom of the cab interior, I think I can live with it and, in any case, rectification would be extremely difficult.
And fitted in place:
Dave.
Congratulations Dave, that must be the most exquisitly detailed interior ever fitted into a 4mm cab! Just one tiny concern; I see the stay-heads are visible in the boiler front plate - surely these were lagged: it would be a high hazzard environment otherwise?
Excellent thread and many thanks for the posts which are inspirational.
Best Wishes,
Howard
Excellent thread and many thanks for the posts which are inspirational.
Best Wishes,
Howard
Dave Holt
Western Thunderer
Hi Howard.
Thanks for the kind words.
Certainly, the more modern steam locos, which I generally model, had insulation and cladding on the backhead, but I understand that many older types did nor. The GC drawings for the C13 (9K?) clearly show the back head unclad with the stay heads visible, as modelled. To be honest, I have no idea if cladding was fitted later by either the LNER or BR and have never seen a photo showing the cab interior on these locos.
Dave.