Liver & Fry's workbench

Liver & Fry

Western Thunderer
Hello everyone!

Welcome to my workbench where I shall be chronicling my modelling endeavours as well as general musings on the historical influences behind them.

As stated on my welcome thread 'Greetings from the Fens', the eventual aim is to model the L&FR. However, time, space and, notably, skill restraints currently prevent this and so it is hoped you might stick around and join me for the ride as I slowly develop towards this end goal.

In the meantime, I plan to begin by retrospectively sharing some of the projects I've worked on up until now. There will be potential for "a bit of everything" but the primary themes will be pre-grouping Norfolk and the Highland Railway and, for the time being, these will be in OO gauge.

Feedback and discussion are most welcome (actively encouraged, in fact!) and I look forward to hearing from you!

Best wishes

- James
 
GER lowmac 'Mac K'

Liver & Fry

Western Thunderer
To start things off, here is a wagon build I undertook in January 2023 during some downtime between night shifts.

It is a GER lowmac (later Mac K), using the Dapol lowmac kit as a starting point. The Dapol kit is based on the BR built 'Mac K' lowmacs which themselves were built to a GER design incorporating Diagrams 25/50/75 between 1886 and 1914. This gave me the perfect starting point for a kit bash that would give me another GER wagon.

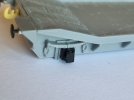
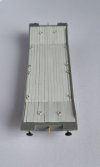
The starting point for this was to prepare the wagon sides; namely removal of the axleboxes and fitting appropriate GER ones. This was done using a dremel and by making a makeshift guard out of plasticard the slot around the axlebox, allowing me to sand back to a level without damaging the rivet detail on the original mould. The moulded bearings were then drilled out to take brass bearings. This process is demonstrated below:

20230123_140323.jpg
20230123_142249.jpg
20230124_093807.jpg

Other erroneous details were also removed as part of the preparation process.

The kit was then built "as intended", following the instructions provided, with the exception of fitting a brass coupling hook and whitemetal buffers that are of a greater quality than those provided by Dapol.

20230124_132938.jpg

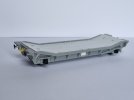
Having built the kit, I then fitted the new axleboxes. These are GER Type E axleboxes salvaged from a spare Oxford Rail GER van chassis.

20230124_152946.jpg

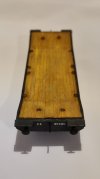
One of the main visual differences between the original GER wagons and the later Mac K's is the orientation of the planks on the deck; on the later wagons, as represented by the kit, these are horizontal but on the GER examples these were longitudinal. To rectify this on the kit, I sanded down the raised moulded details on the deck and used Evergreen 2mm plastic strips (1.5mm for the outer edges), cut to size and laid plank by plank on the deck of the wagon. I then created and fitted some wire tie down loops using a technique I discovered in this handy video:

This was the result of those efforts:

20230126_112307.jpg

Some final details were added and Alan Gibson wheels were fitted, meaning that the building aspect of the project was now complete:

20230126_110825.jpg

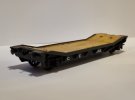
All that was left was to paint and add lettering, using Powsides presfix transfers (a fiddly job for the smaller letters and numbers!):

20230130_181034.jpg
20230130_181250.jpg

Weight in the form of Liquid Gravity was added underneath, although it is my long term intention to build and add a load, such as a stationary engine, to aid this.

I have to say I'm quite proud of what I achieved! It was my first foray into learning how to paint a realistic wood finish and this is something I've continued to develop and enjoy as the year has progressed (In fact, my current wagon builds, a pair of Jones Highland Railway opens with sheep flakes fitted, were chosen so I had an excuse to paint some more wood!).

Let me know what you think!

- James
 
Achieving a wood effect

Liver & Fry

Western Thunderer
So, as a nice segue from the lowmac build, one of my main take aways from said build was that of learning how to achieve a painted wood effect (after all, you kind of have to learn when the main surface and visual focus of the wagon is a wood deck!).

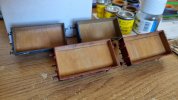
As such I revisited a number of open wagons I'd previously worked on; these included two kit built HR Jones open wagons (Mousa Models) and two reworked NB jubilee wagons from Oxford Rail. Originally I had painted the insides of these wagons with a generic "wood" colour, but this lacked any tonal variation and the shade was far too golden. It did (and does) however make for a great base colour to build up from.

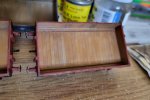
My method involves drybrushing; first applying a patchy layer of earth brown, focusing on crevices, corners, plank gaps and the like. This is followed by a more generalised layer of a sandy yellow/brown (I've actually been using a tin of loco tan!) to lighten the overall tone before finishing with highlights of light grey, owing to the fact that sunlight bleaches wood to give it a silver sheen.

This results in the effect seen below:

20230806_102936.jpg
20230806_102628.jpg

Hopefully this offers a little insight for anyone wondering how to approach this same challenge!

- James
 
GER covered goods vans

Liver & Fry

Western Thunderer
Right, strap in because this one's potentially a long one!

In early 2022 Oxford Rail brought a ready-to-run model of the GER Dia.72 covered goods van to the market. This naturally peaked my interest and so I purchased six of these, plus two of the later LNER banana vans, in order to see what I could do with them and how many variants I could create.

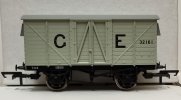
Straight out of the box, we are presented with this:

20230927_210145.jpg20230927_210205.jpg

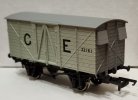
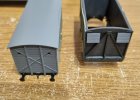
For all intents and purposes, this is a faithful recreation of the van in question. However, two errors are immediately noticeable: the ends of the van are too light (they should be slate grey) and the sole bars are black, whereas they should be French grey like the bodyside.

So, my first reworked van is simply a corrected version of GE 32161:

20230927_212435.jpg20230927_212506.jpg

For this I used Phoenix Precision P505 and P506. Keeping the "as released" running number meant I could paint around, and thus keep, the running number on the solebar.

Next up, some body swapping! The Dia.72 vans were introduced in 1911 and were a 19ft long version of the earlier Dia.47 of 1903, which was almost identical aside from being a whole 3 inches longer. In 4mm scale this equates to a 1mm discrepancy which is unnoticeable and thus something I'm willing to accept if it provides wider variety in my fleet.

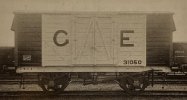
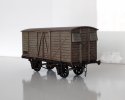
With that in mind, here is a photo from 1st September 1910 of Dia.47 GE 31050 (Credited to Peter Tatlow):

20220222_183846.jpg

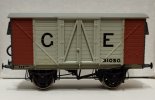
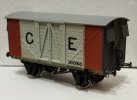
This particular example was fitted with vacuum brakes and carried a special livery that incorporated red oxide end panels to denote this feature.

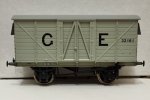
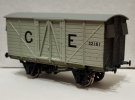
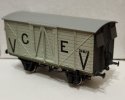
The diagram of banana van also released by Oxford Rail was based on the Dia.72, except these vans were all fitted with vacuum brakes and had no end vents and thus this presented me an opportunity; by swapping the bodies of a Dia.72 van and a banana van, I could add two more variants to my GE van fleet.

First up is my take on GE 31050:

20230927_210020.jpg20230927_210818.jpg

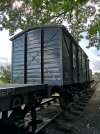
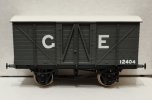
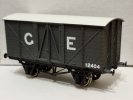
Of course, this body swap meant I was also with an unfitted, unventilated van. Enter GE 12404, now preserved on the Mid Suffolk Light Railway:

IMG_20190818_153658.jpg20230927_212919.jpg20230927_212820.jpg

Being unventilated means GE 12404 carries GER slate grey as opposed to the French grey bodysides seen on the other examples. The GE lettering and numbering was done using Powsides presfix transfers.

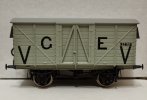
Finally we have GE 31612:

20230927_212945.jpg20230927_212700.jpg

This is another bodyswap to create a further vacuum fitted example, except this time the van carries the post-1912 livery for fitted vans, whereby the red ends were replaced by a large V. It's less aesthetically pleasing than the earlier livery, but I included it to complete the set and have one of each, so to speak.

Of the original eight vans purchased, three Dia.72s and both banana vans have been used to create four different variants of GE van. One of the spare chassis donated its GE axle boxes to the lowmac build previously discussed. Two Dia.72 vans remain "in store" for whenever I decide I want to model yet more vans. So what of the final unaccounted for Dia.72 van? Well, the body from this was cannibalised for another project. Stay tuned for Part 2 to find out more...

- James
 
GER covered goods vans

Liver & Fry

Western Thunderer
Part 2 of the GE van thread is shorter but takes us back, chronologically speaking, to both the first vans I built, and to an earlier design of van.

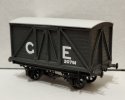
This time the focus is on Dia.15 vans, of which I built three of these from the 3D printed resin kits by Mousa Models. These were some of the first wagon kits I'd ever worked on and I really enjoyed the build process, gaining the confidence to venture further into kit building rather than just detailing/improving rtr models. Each one had interal weight added, Alan Gibson 8 open spoke wheels fitted and the lettering was once again done using Powsides GER presfix transfers.

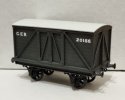
I decided from the start that I wanted to have each one finished in a different livery variation in order to add variety to the fleet and so the first two examples represent pre and post 1903 lettering variants:

GE 20156 with pre-1903 lettering:

20230927_210421.jpg

GE 20791 with post-1903 lettering:

20230927_210346.jpg

The final one, however, came about following the release of the Oxford Rail Dia.72 vans. From 1902, a number of Dia.15 vans were fitted with ventilators and this design of ventilator was perpetuated on the Dia.47 and Dia.72 vans. I therefore cannibalised one of my Dia.72 van bodies, relieving it of its ventilators and fitting them to the third Dia.15 kit.

20220206_164845.jpg

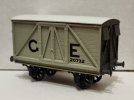
Because this van was now a ventilated example, it could be finished in the GE French grey livery with black lettering as GE 20732:

20230927_210239.jpg

With that, I believed I'd represented the full compliment of vans possible from the two sources available to me, having three Dia.15, one Dia.47 and three Dia.72 vans in a range of conditions. However, since posting Part 1 yesterday, @Herb Garden has informed me that there is another diagram that can be easily modelled using the Oxford Rail van as a basis. Work has already begun and this will eventually be detailed in Part 3... Stay tuned!

- James
 

James Spooner

Western Thunderer
Right, strap in because this one's potentially a long one!

In early 2022 Oxford Rail brought a ready-to-run model of the GER Dia.72 covered goods van to the market. This naturally peaked my interest and so I purchased six of these, plus two of the later LNER banana vans, in order to see what I could do with them and how many variants I could create.

Straight out of the box, we are presented with this:

View attachment 196860View attachment 196861

For all intents and purposes, this is a faithful recreation of the van in question. However, two errors are immediately noticeable: the ends of the van are too light (they should be slate grey) and the sole bars are black, whereas they should be French grey like the bodyside.

So, my first reworked van is simply a corrected version of GE 32161:

View attachment 196864View attachment 196865

For this I used Phoenix Precision P505 and P506. Keeping the "as released" running number meant I could paint around, and thus keep, the running number on the solebar.

Next up, some body swapping! The Dia.72 vans were introduced in 1911 and were a 19ft long version of the earlier Dia.47 of 1903, which was almost identical aside from being a whole 3 inches longer. In 4mm scale this equates to a 1mm discrepancy which is unnoticeable and thus something I'm willing to accept if it provides wider variety in my fleet.

With that in mind, here is a photo from 1st September 1910 of Dia.47 GE 31050 (Credited to Peter Tatlow):

View attachment 196869

This particular example was fitted with vacuum brakes and carried a special livery that incorporated red oxide end panels to denote this feature.

The diagram of banana van also released by Oxford Rail was based on the Dia.72, except these vans were all fitted with vacuum brakes and had no end vents and thus this presented me an opportunity; by swapping the bodies of a Dia.72 van and a banana van, I could add two more variants to my GE van fleet.

First up is my take on GE 31050:

View attachment 196870View attachment 196871

Of course, this body swap meant I was also with an unfitted, unventilated van. Enter GE 12404, now preserved on the Mid Suffolk Light Railway:

View attachment 196872View attachment 196873View attachment 196876

Being unventilated means GE 12404 carries GER slate grey as opposed to the French grey bodysides seen on the other examples. The GE lettering and numbering was done using Powsides presfix transfers.

Finally we have GE 31612:

View attachment 196877View attachment 196878

This is another bodyswap to create a further vacuum fitted example, except this time the van carries the post-1912 livery for fitted vans, whereby the red ends were replaced by a large V. It's less aesthetically pleasing than the earlier livery, but I included it to complete the set and have one of each, so to speak.

Of the original eight vans purchased, three Dia.72s and both banana vans have been used to create four different variants of GE van. One of the spare chassis donated its GE axle boxes to the lowmac build previously discussed. Two Dia.72 vans remain "in store" for whenever I decide I want to model yet more vans. So what of the final unaccounted for Dia.72 van? Well, the body from this was cannibalised for another project. Stay tuned for Part 2 to find out more...

- James
James

These are some really interesting and innovative uses of the Oxford van. I also bought a couple but one of the other members of my EMGS area group gently pointed out to me that the brake rigging is incorrect. I can’t remember how at the moment but he did point out that if one pulls the brake lever down then the brakes wouldn’t be applied because of the way it is structured. One day I might get around to correcting mine…

Nigel
 

Herb Garden

Western Thunderer
James

These are some really interesting and innovative uses of the Oxford van. I also bought a couple but one of the other members of my EMGS area group gently pointed out to me that the brake rigging is incorrect. I can’t remember how at the moment but he did point out that if one pulls the brake lever down then the brakes wouldn’t be applied because of the way it is structured. One day I might get around to correcting mine…

Nigel
Has anyone else tried converting these Oxford vans to EM cos when I did I found the supplied axle was longer than the standard length requiring a packing out of the bearings to suit a new wheeler..... what I really should have done is reused the axle and put the new wheels on it....
 

Liver & Fry

Western Thunderer
James

These are some really interesting and innovative uses of the Oxford van. I also bought a couple but one of the other members of my EMGS area group gently pointed out to me that the brake rigging is incorrect. I can’t remember how at the moment but he did point out that if one pulls the brake lever down then the brakes wouldn’t be applied because of the way it is structured. One day I might get around to correcting mine…

Nigel
Thank you Nigel!

You are absolutely right and I've just realised I completely neglected to include my correction in that post (mostly because I'd forgotten I'd ever done it! It was a while ago...).

Bear with me and I'll post it up tonight!

- James
 

Herb Garden

Western Thunderer
I also reused the axles on my GER van, placing Gibson wheels on the Oxford axle.

View attachment 196975

Here's a shot of the GER van at the Mid Suffolk.

View attachment 196974

Tony
So @Liver & Fry you that convo we had last night re position of vac on the right/and air on the left brake pipes that photo of Tony's may debunk that theroy.... but it also depends on how modified that van at the middy is....

Pity most of the GER official photos are all side on....
 

Liver & Fry

Western Thunderer
So @Liver & Fry you that convo we had last night re position of vac on the right/and air on the left brake pipes that photo of Tony's may debunk that theroy.... but it also depends on how modified that van at the middy is....

Pity most of the GER official photos are all side on....

I believe it's been added in pres by the Middy so that the van can run in their passenger set. The running number is 11873 and the van was built 1913. Not sure that Tatlow gives a list of running numbers for which Dia.72 vans were fitted as built but maybe someone will know a way to check this?

- James
 

Herb Garden

Western Thunderer
I believe it's been added in pres by the Middy so that the van can run in their passenger set. The running number is 11873 and the van was built 1913. Not sure that Tatlow gives a list of running numbers for which Dia.72 vans were fitted as built but maybe someone will know a way to check this?

- James
Someone somewhere in the GERS will have a bit of paper with the answer....

In fact I think there's a wagon link article in a journal back issue on the 19ft vans....
 

Liver & Fry

Western Thunderer
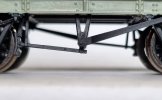
As promised to @James Spooner, here is a quick segment on correcting the brake gear on the Oxford Rail Dia.72 vans!

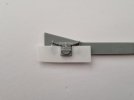
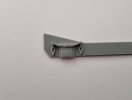
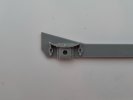
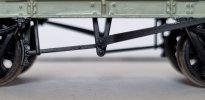
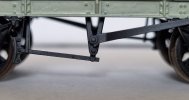
As released, Oxford appears to have duplicated the same Morton clutch arrangement on both sides of the wagon. Looking at each side of the wagon shows this will only work in one direction:

The correct side:

20230930_121315.jpg

The erroneous side:

20230930_121210.jpg

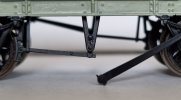
As can be seen, dropping the handbrake on this side will release the brake, rather than apply it. Thankfully it is an easy fix as the handbrake lever can be gently prized away from its locating lug:

20230930_122620.jpg

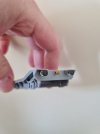
The Morton clutches and locating lug are then cut and filed away, with the handbrake lever being reapplied the the clutch below:

20230930_123821.jpg

The brake would, in practice, now be applied should the handbrake lever be dropped.

Whilst it is frustrating that said error is present on the released wagon to start with, it is an easy five minute fix! Hopefully this will be useful to others!

- James
 

Joe's Garage

Western Thunderer
Very nice range of GE wagons James, interesting to see such variations.
Shame so many RTR wagons have the brake error but before anyone shouts I know it is a compromise between cost and accuracy. Given the scale most would accept.
Keep posting, I do like the Lowmac conversion particularly.
Thanks
Julian
 
Top