You are using an out of date browser. It may not display this or other websites correctly.
You should upgrade or use an alternative browser.
You should upgrade or use an alternative browser.
LSWR G6 0-6-0 tank engine
- Thread starter Jon Nazareth
- Start date
Jon Nazareth
Western Thunderer
Thanks, Garry, but one would have thought that they could have come up with something a bit more technical than a cork! 
Jon
Jon
Jon Nazareth
Western Thunderer
Paul
Thank you for the pictures. I have that picture of 257 but when I tried to enlarge it, it just blurred.
Jon
Thank you for the pictures. I have that picture of 257 but when I tried to enlarge it, it just blurred.
Jon
JimG
Western Thunderer
Thanks, Garry, but one would have thought that they could have come up with something a bit more technical than a cork!
I think you would be hard pressed to find an alternate material that would do the job as well as a cork does.
")
Jim.
Dog Star
Western Thunderer
On the GWR... a cork with a piece of split cane down the centre of the cork. The cane was to allow the oil reservoir to "breath" as (a) oil was used and (b) the air in the reservoir expanded (thereby stopping the cork from being blown out of the aperture and oil forced into the bearing).I think you would be hard pressed to find an alternate material that would do the job as well as a cork does.
regards, Graham
Jon Nazareth
Western Thunderer
Dog Star
I've seen out of focus pictures of coupling rods and have noticed something thin sticking out of the top and wondered what it was. Now I know!
Jon
I've seen out of focus pictures of coupling rods and have noticed something thin sticking out of the top and wondered what it was. Now I know!
Jon
Jon Nazareth
Western Thunderer
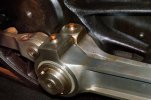
I soldered the rear spacer plate on the wrong way around and had to make some new holes.
Jon

Jon
Jon Nazareth
Western Thunderer
Nick Baines very kindly lent me his 3D print file for a pair of LSWR whistles. I sent the file at first to Ian Turner who very bravely had a go with his printer but the whistles print wasn't a success. I then sent the file to Ian MacCormac, of this parish, and her kindly printed me off what you see in the picture. I'm sure that you can appreciate that they haven't been cleaned up as yet.
Thank you to both Nick and Ian.
Jon

Thank you to both Nick and Ian.
Jon
Jon Nazareth
Western Thunderer
I haven't started the body as yet but, I was looking at the spectacle plates and wondered how to glaze the holes therein. From the photos that I've looked at, these windows (not sure what they are called) were made opening inwards. Not only that but they were top hung with some sort of catch on the lower edge. The 'windows' that I've turned up are glazed with a microscope slide cut to fit the rebate. When the time comes, I'll most probably glue them in place.

The top three are glazed and have the inner and outer frame fitted together.

In this picture, the glass is laying in the frame rebate on the left and the upstand on the frame on the right will fit into it holding the glass in place. Originally, I had allowed for a glass thickness of 0.016" as that is what the thickness measured at. When I came to actually cut the glass, I realised that when I measured the thickness of the glass, two pieces had stuck themselves together and the real measurement was 0.008". It all turned out okay in the end, though.
Jon
The top three are glazed and have the inner and outer frame fitted together.
In this picture, the glass is laying in the frame rebate on the left and the upstand on the frame on the right will fit into it holding the glass in place. Originally, I had allowed for a glass thickness of 0.016" as that is what the thickness measured at. When I came to actually cut the glass, I realised that when I measured the thickness of the glass, two pieces had stuck themselves together and the real measurement was 0.008". It all turned out okay in the end, though.
Jon
Jon Nazareth
Western Thunderer
I've made a start on the body. I found the soldering a bit of a problem as I hadn't done any for some years but started to get the knack towards the end of the session. I noticed that number 257 has a row of rivets just below the roof line on the spectacle plates and so I've included them on my version. The brass, I decided, was too thick to impress and so I drilled out for 1/32" brass rivets, peened them over on the back and filed off any excess. I did have some 1/16" copper snap head rivets that I had used on enigma but there weren't enough left for this job. I would have ordered some more but couldn't remember where I bought them and couldn't find any o the internet either. I think that I ordered the originals from Reeves 2000 but they weren't listed on their website. A shame as I would have liked to have used them on Jennifer Who when I get a round to her.
Jon

Jon