MOVING COAL - A Colliery Layout in 0 Gauge

PhilH

Western Thunderer
Hi Phil,

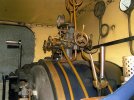
That all looks lovely and has been beautifully executed. One small practical point, is the reversing lever not the wrong way around? On all locos I have driven with a reversing lever, rather than a screw gear, the ratchet handle is at the front, rather than the back, of the lever. If you think about that from a practical perspective, it gives the driver a chance to hold the main handle in his/her hand and lift the ratchet with some fingers, without losing the ability to place the lever in the correct position.

Nigel

Nigel,
Interesting question - while having the catch lever in front of the handle seems to be the norm, Pecketts usually had it to the rear, also Andrew Barclay locos usually had it the same way.


Cab Detail 1B.jpg


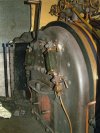
Cab Detail 2B.jpg

Very nice detail in the cab.
The water gauges are impressive, did you make them or are they bought ??
Rgds Keith

Keith,
The water gauges were bought and I've had them in stock for some time, I think they were by Hobbyhorse Developments and possibly not now available unless someone else has taken over their range.
 

James Spooner

Western Thunderer
Nigel,
Interesting question - while having the catch lever in front of the handle seems to be the norm, Pecketts usually had it to the rear, also Andrew Barclay locos usually had it the same way.


Keith,
The water gauges were bought and I've had them in stock for some time, I think they were by Hobbyhorse Developments and possibly not now available unless someone else has taken over their range.
Well, you certainly learn something new every day!! Happy to be proven wrong and impressed by your research!

Nigel
 

PhilH

Western Thunderer
Photo No.16.jpg

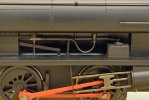
The existing reversing lever and front sandbox linkages were replaced with metal strip, and new lids provided for the front sandboxes.


Photo No.17.jpg

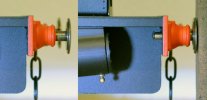
Works photographs of these locos usually show them fitted with "normal" size buffers, probably 18" diameter. However most Class E locos were actually supplied with the larger diameter buffers as fitted to the Minerva model. At least one - the loco supplied to Hodbarrow Mines in Cumberland - had the smaller diameter buffers, so as this was not to be based on any particular prototype the smaller type would be fitted as I prefer the appearance. The new buffer heads were turned from nickel silver rod to fit the existing buffer stock and the stems drilled and tapped 12BA. The heads are retained by 12BA screws at the rear with the head filed down so that the fixing is barely visible with the head in the normal position.

The couplings were replaced by Laurie Griffin castings No.9-003 shackle/link couplings, and handrail knobs added to represent the cylinder drain cocks.


Photo No.18 Minerva Peckett 002B.jpg

Yellow lining kindly provided by LarryG, which represents the livery applied at Walkden Workshops to NCB Manchester Area locos after Nationalisation. It just requires name and works plates to complete, and some weathering to relieve the blackness.


Photo No.19.jpg

Comparison of the 15" cylinder Class E Peckett with the slightly smaller 14" cylinder Class W6.


PhilH

Western Thunderer
A total of 52 Class E 0-4-0ST locomotives were built by Peckett between 1903 and 1940, the first 8 going to the Ebbw Vale Steel & Iron Co.Ltd. in South Wales who eventually acquired a total of 14. Ebbw Vale also built three similar locomotives for their own use with some parts supplied by Peckett, Ebbw Vale Works Nos. 2, 3 and 7. Maybe Peckett couldn't supply complete locos at the time required and agreed to supply the parts instead.
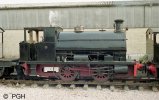

Photo No.20 P 1351 © PGH.jpg

The only surviving Class E loco is works no.1351 photographed at the Foxfield Railway in 1994. Peckett 1351 was ex works on 8/8/1914 and despatched to the Royal Arsenal, Woolwich, named LION. After EVSIC the Royal Arsenal was the second biggest customer for Class Es with a total of 8 locos. In 1950 it was sold via a dealer to the Wallsend Slipway & Engineering Co.Ltd., Northumberland, where it was fitted with large block buffers and numbered 2. It was converted to oil firing in 1959 with an oil tank mounted on the cab roof. In 1974 it was sold for preservation and moved to the Chasewater Railway in January 1975. At Chasewater the oil tank was removed, the loco converted back to coal firing and a new bunker provided at the rear of the cab. Also the large block buffers were replaced with appropriate Peckett sprung buffers. In 1993 it moved to the Foxfield Railway and then in 1998 to the Lincolnshire Wolds Railway where I believe its currently out of service.
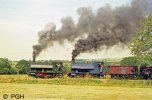

Photo No.21 P 1351 © PGH.jpg

By July 1995 P 1351 had been repainted blue and regained the LION nameplate. Photographed on Foxfield Bank in company with the Bagnall HAWARDEN.
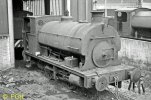

Photo No.22 P 1465 © PGH.jpg

Another Class E loco provided with a rear bunker was Peckett 1465, photographed at Hafodyrynys Colliery in May 1970. One of the hazards of unarranged unofficial visits was that they sometimes coincided with the pits summer holiday period, nothing was operating and the loco was under repair with both injector feed pipes dismantled. Peckett 1465 was ex works on 5/3/1917 and despatched to EVSIC, Ebbw Vale Works, named SIR CHARLES ALLEN and with the fleet number 31. By 10/1936 it had been transferred to Marine Colliery, Cwm, on which date ownership of EVSIC's collieries were transferred to Partridge, Jones & John Paton Ltd. It was still at Marine Colliery at Nationalisation and remained there with a couple of visits to Tredegar Central Workshops until transferred to Hafodyrynys in 1969. However shortly before that transfer it was rebuilt at Marine Colliery with parts of Peckett 1524 and one of the Ebbw Vale built locos, EV works no.2 named NASMYTH.
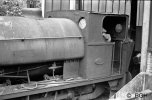

Photo No.23 P 1465 © PGH.jpg

A closer view of the LH side. The oval Ebbw Vale cast numberplate still remains on the cabside bearing the number 31 - appropriate to P 1465. It reads "Ebbw Vale S I & C Co. Limited No.31 Ebbw Vale Works". The space for the missing nameplate has NASMYTH crudely painted or chalked on, so the tank was from the Ebbw Vale built loco EV 2. Note that the coupling and connecting rods have round ends with bushes rather than the usual rectangular ends with split brasses fitted by Peckett. I noted the livery as green with faint traces of a yellow lining. It was transferred to Tymawr Colliery in 1973.
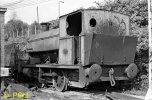

Photo No.24 P 1465 © PGH.jpg

Peckett 1465 at Tymawr Colliery in September 1974, apparently out of use by that date so it saw very little if any use at Tymawr. It was scrapped on site in 1976. The added rear bunker looks rather rudimentary and doesn't appear to have ever been painted. Note that the Ebbw Vale numberplate has disappeared, presumably part of someone's collection by then !

Peckett 1010 named PONTYPOOL also had a rear bunker added, a rather neat addition with a flared top to the rear and involving an extension to the frames and footplate, and the Ebbw Vale built loco EV 2 NASMYTH also had a similar rear bunker.

For those modelling the GWR/BR versions, there were variations in the type of coupling and connecting rod ends as noted on P 1465:
BR 1143 P 1105/08 New to Rowlands No.12 ROUND (photo 1959)
BR 1145 P 1522/18 New to SHT No.18 RECTANGULAR (photo as GWR 1098 in 1946)
BR 1151 P 1449/16 New to P&M No.4 ROUND (photo 1962)
BR 1152 P 1179/12 New to P&M No.12 RECTANGULAR (photo 1959)
 

daifly

Western Thunderer
Not forgetting
BR 1141 P 1053/06 Rectangular (photo 1951)
BR 1150 P 1328/13 Round (photo 1952)
and
GW 927 P 1054/07 Rectangular (photo c1925!)
But also, 1151 had rectangular rod ends until the late 1950s
Dave
 

Matt.S.

Western Thunderer
Great to see you posting again Phil - I really enjoyed your posts on the other place, a model with atmosphere working like a railway is pretty special.
 

PhilH

Western Thunderer
There hasn't been much progress on the layout itself recently, the work remaining is mainly the provision of more buildings including lots of brickwork :(


Layout 100B.jpg

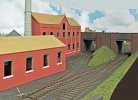
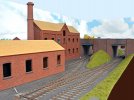
This was the end of the layout (furthest from the colliery) when last pictured.


Layout 101B.jpg

A start was made on painting the brickwork, but when it came to picking out individual bricks with variations in colour unfortunately the enthusiasm ran out. I'm currently trying to work up the enthusiasm again to resume this process, and get this end of the layout finished.
I'm not sure whether to remove the top of the chimney which protrudes above the backscene or not. Its a resin one by Skytrex with a flat machined on the back.


Layout 102BB.jpg

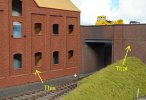
The idea is to get This brickwork the same as possible to That. Both started with a overall coat of Humbrol #70 Brick Red, but I don't know whether they changed the colour in the meantime or not. I'll only be able to tell how close it is after the process is completed, and methinks I might have to dull it down quite a bit.


Layout 103B.jpg

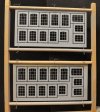
The etched window frames have been hanging around for some time, painted in etch primer.


Layout 104B.jpg

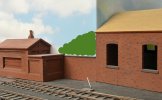
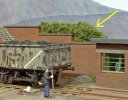
The corner in the backscene at the rear of the loco shed is unfortunate, but its not normally viewed from this side. The best I can do to hide the fact that you can't see the back of the loco shed from the other normally viewed direction is to add some vegetation above the wall as shown in green, similar to this:


Layout 104BB.jpg


Layout 105B.jpg

I was never very happy about shortening the weigh house at the rear, but....


Layout 105BB 20817B.jpg

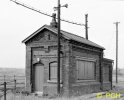
The prototype had a pole next to the end carrying a pair of lamps, probably provided (if they were adjusted correctly) to illuminate the wagons on the weighbridge, so....


Layout 105BB.jpg

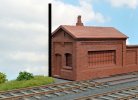
if I stick a similar pole further back in the corner thus it should disguise the missing bit of the weigh house. It wouldn't serve the purpose of the prototype there very well, but we'll gloss over that.

tbc (perhaps ?)
 

LarryG

Western Thunderer
The idea is to get This brickwork the same as possible to That. Both started with a overall coat of Humbrol #70 Brick Red, but I don't know whether they changed the colour in the meantime or not.
A much diluted wash of Precision/Phoenix Dirty Black might do the trick and dull the newer paint down to a near match. Experiment on a piece of embossed brick sheet first. If you consider there is a risk of a 'wash' messing the brick red up, spray the building with Halford matt acrylic beforehand as a barrier.
 

PhilH

Western Thunderer
Layout 106B.jpg

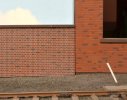
What a difference a couple of coats of varnish makes ! The wall on the left was exactly like the shed wall on the right, but has just had a coat of satin varnish, the mortar added with Polyfilla tinted with black poster colour and then a coat of matt varnish. It will be dulled down, or weathered to use the popular term, with a wash of very thinned down black water colour.

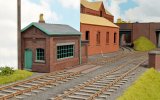
Trying to blitz all the brickwork in the corner of the layout in one go was a little too ambitious and a more sensible approach would be to complete each item individually, so to start with the smallest building - the weigh house.


Layout 107B.jpg

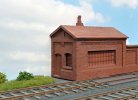
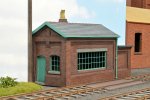
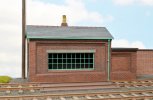
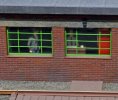
The progress so far, temporarily plonked in position. It needs glazing and some interior detail before being finally fixed in position at the right level. A few items need attention that stand out in the photo - running a knife between the door and its frame on the left hand side where some paint has filled the gap; there seems to be a slight undulation in the bottom of the large window frame that I hadn't noticed before; possibly a bit of paint touch up required round the window and door frames and door step and I'm not too happy with the brickwork in the panel on the extension to the right, possibly a bit of re-pointing needed. However the good thing is I haven't felt the urge to put it on the floor, jump on it and start it all over again - Yet !

How I wish I'd taken the prototype photo shown in the previous post in colour. But back in the day (1960s/70s) black and white was the norm particularly if you did your own negative developing and printing. The colour film only usually came out for a nice shiny subject on a sunny day and normally in the second best camera. The weigh house of course is long gone along with the rest of the buildings at Parsonage Colliery, but you can sometimes get an idea of some of the colours in the same locality (Wigan/Leigh Area of Lancashire) such as brickwork, etc, if you can find some of the older buildings still remaining on Google street view. For example the chimney pots with the serrated or crown tops in the area seem to be all yellow rather than the usual orange clay of the other shapes. But the "get out" is - its not intended to be a model of the prototype but rather based on it, or more vaguely inspired by it, so there !


Layout 108B.jpg

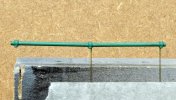
The downpipe from the gutter is 2mm OD brass tube which is fixed in position on the building by two lengths of 0.5mm brass wire soldered in holes in the tube. The fixings are covered by Modelu 3D printed brackets with a slot cut in the back for the wires. On the prototype there is a further downpipe at the right hand end of the extension, which has a flat roof so I can't really understand the need for that. But my motto is - if in doubt leave it out, and things like that can always be added later if necessary (they never are of course !).


Layout 109B.jpg

For the area to the left of the building I'm proposing some vegetation on the backscene in the small gap between the building and the post, which will merge into bushes beyond the post.


Layout 110B.jpg


Layout 111B.jpg

Unfortunately the weighman will not get a mug of tea on his desk like the one in the colliery weigh house. I don't have the patience now to solder tiny little handles on tiny little brass turnings like I did when the other weigh house was done many years ago.
 

steve50

Western Thunderer
That brickwork looks superb! Did you mix shades of brick red or use different colours? I've never thought of using Pollyfiller for the mortar either, is that just applied then wiped off the brick faces?
 

LarryG

Western Thunderer
While the brickwork on the new wall looks great as a stand alone structure, it looks like a newly built wall when seen in the background of the weighbridge building. The latter looks more realistic, particularly the added on lavatory...(?). I find a diluted wash of PPC 'Dirty Black' with more of it under gutters and behind drainpipes usually does the trick.

You have certainly captured the appearance of mortar correctly on the weighbridge, as the mortar is not obvious from a distance.
 
Last edited:

PhilH

Western Thunderer
That brickwork looks superb! Did you mix shades of brick red or use different colours? I've never thought of using Pollyfiller for the mortar either, is that just applied then wiped off the brick faces?

I start off with a spray of Humbrol No.70 Brick Red, which seems a reasonable starting point for old brickwork. Spraying a thin layer rather than brushing means you don't fill in the mortar courses with too much paint. I then paint individual bricks with the Brick Red mixed with other colours such as Humbrol Nos.98, 82 or 62, probably doing about 25 to 30% of the bricks in the process. Then I spray the brickwork with a thin layer of either satin or gloss varnish to give the painted bricks some protection from the next operation. The Polyfilla is tinted with black water colour, although it does dry much lighter than the original mix, then applied over the whole surface. Remove as much as possible off the surface of the bricks as its drying but any traces left can easily be polished off after it has dried. If the mortar is too light you can darken it with a wash of dilute black water colour, wiping it off the surface of the bricks if you don't want them any darker. This is very much a case of trial and error as when initially applied it goes very dark and then dries much lighter, so its best to build it up in very dilute washes. If it goes too dark just rub the mortar with a damp cotton bud to lighten it. At the end of all this give the brickwork a spray of matt varnish to finish.

This works well with areas of flat brickwork but with different layers, such as the weigh house, it takes some effort to get the Polyfilla into the mortar courses in all the corners and then get it off the surface of the bricks in the same areas.
 

PhilH

Western Thunderer
ALLEN at Astley Green © PGH.jpg

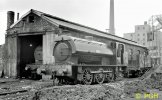
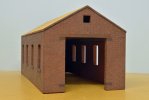
The loco shed is based on the prototype at Astley Green Colliery, which was a single road shed with sliding doors back and front holding 3 locos. I've had to shorten it to fit the space available, but it should fit two small 0-6-0s or a large 0-6-0 and a 0-4-0. The only photo I have showing the whole length of the shed is the one above, taken on my first visit to Astley Green in August 1964. In fact all the photos I have showing the shed are because it was in the background behind a locomotive. In the case of the above the loco is ALLEN a Hudswell Clarke Austerity, the second Austerity to arrive on the Walkden System in April 1945 as a loan from the Ministry of Fuel & Power in War Department livery as WD 71500. It was purchased by Manchester Collieries in July the following year and permanently based at Astley Green apart from occasional visits to Walkden Workshops for repair.

The shed originally had a slate roof but this was replaced by corrugated sheets shortly after Nationalisation. I think judging by the rather wavy bottom edge of the sheets that it must be galvanised steel rather than asbestos and from what you can see in the photo the surface of the sheets looks in fairly good condition. The "barge boards" are sections of roof ridge capping. The small square openings in the brickwork at both ends above the doorways were a later addition, presumably to help ventilate smoke through the gap in the roof sheets. The small lean-to with the chimney on the left hand side would probably be for the sand drying oven, but I didn't have enough room to incorporate that feature.


CARR at Astley Green © PGH.jpg

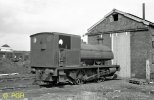
The back end of the shed with a different type of sliding door arrangement. Both ends would have originally had hinged doors with the hinge pins set in the holes in the sandstone blocks top and bottom on each side of the opening. With such a tall door you would have expected provision for another hinge halfway between the two. The loco is CARR another Hudswell Clarke, one of a batch of 4 similar 16" cylinder locos purchased by the NCB in 1948 and a regular resident at Astley Green until moved up to Cumberland in September 1965. It eventually finished up with one of its 'sisters' from the same batch on the scrap line at Ladysmith Washery and was scrapped there in November 1972.


Loco Shed 001B.jpg

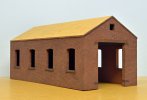
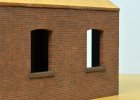
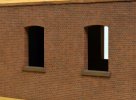
The progress so far, just the brickwork completed but for me the worst part of the job. The basic shell of the structure is 6mm thick MDF with Slaters brickwork attached with contact adhesive, exactly which contact adhesive I've no idea as it was done so long ago. I should have made a note as its fixed very well indeed. The roof is 3mm thick hardboard. When I started this layout back in the last century (or maybe the one before as it seems so long ago !) Slaters only did brickwork sheets in Stretcher Bond and Flemish Bond, but since then they now do English Bond - which is alternate courses of headers and stretchers. I've used that on the loco shed but its not ideal as most industrial buildings in the area relevant to this layout (South Lancashire) are built with 3 courses of stretchers to one course of headers - known as English Garden Wall Bond. Another problem with the Slaters sheets is the vertical joints are not exactly at right angles to the courses so you can't avoid some odd shaped bricks at the corners and window openings.


Loco Shed 002B.jpg

I've added a layer of brickwork to the inside back wall as it can be partly seen through the open door. It will be fixed in position when the window frames and glazing are in position behind it.


Loco Shed 003B.jpg

The edges of the MDF round the window openings were soaked in superglue and then given a layer of Araldite which was filed smooth. Its tied into the edges of the Plastikard brickwork reasonably well. The courses were cut with a razor saw.


Loco Shed 004B.jpg

There's some small unintended gaps in the mortar courses, but I think I'll leave them as they are, there's plenty of open joints on the prototype.
An awful amount of time was spent painting individual bricks !

tbc
 
Last edited:

Paul Tomlinson

Western Thunderer
Phil, your brickwork looks so realistic, and couldn't be improved upon - but as an aside, SEFinecast do vac-formed brickwork sheets in English Garden Wall Bond. I dare say these days one could also get some laser cut. Cheers.
 

PhilH

Western Thunderer
Phil, your brickwork looks so realistic, and couldn't be improved upon - but as an aside, SEFinecast do vac-formed brickwork sheets in English Garden Wall Bond. I dare say these days one could also get some laser cut. Cheers.
Paul,
Thanks for the information, I'll look into that. I think there may be at least one more building on the layout that should have that kind of brickwork.
 
Top