You are using an out of date browser. It may not display this or other websites correctly.
You should upgrade or use an alternative browser.
You should upgrade or use an alternative browser.
Salt?
simond
Western Thunderer
I went to the Ally Pally show yesterday, there were a couple of captivating layouts on display including a 4mm model of the Wantage tramway.
in what I took to be a gasworks siding was a pitched roof salt wagon. Judging by the vast range of models of this style of wagon in all sorts of colourful liveries, salt was obviously a significant source of trade, I guess originating in Cheshire, and going all around the country. This got me thinking.
Presumably not for the fish & chip shop market. So for what? Preserving fish & making bacon? What else?

Salt as an Industrial Chemical - The Salt Association
An understanding of chemistry grew out of the experiments of the alchemists and the skills of the apothecary. Alchemy tended to involve metals and substances which changed their form when heated, or mixed, etc and in this respect salt was not a promising raw material.
saltassociation.co.uk
timbowales
Western Thunderer
That’s an evil little rabbit hole you’ve posted there Mr. D
Tim T
Tim T
back to the bolsters
simond
Western Thunderer
SimonD’s workbench
Highly unlikely, but hypothetically possible, they started production in 1930 and I’m sure I can whistle up an appropriate local registration plate. In any case, it’ll need to be at the back of the layout as it’s a bit small… and the wrong model. Wikipedia has some photos. As a military...
www.westernthunder.co.uk
thirty pages and eight months on, I said something about them "staying this way for months". not wrong!
So a little progress on the bolster wagons. Unfortunately I cannot complete one of them this evening because I broke the coupling guide plate and I don't have a spare

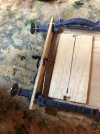
however, the buffers and couplings work very satisfactorily, even allowing for the very limited space between the Ambis W irons and the buffer plank. There is about a millimetre of travel, and marginally more for the hook.

And the end on which I didn’t break the reinforcement

Last edited:
simond
Western Thunderer
I’m back on this, amongst other things…
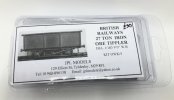
and still have the question as I have failed absolutely in my online search for a photo r drawing of this wagon, so have no idea how to letter it.
all suggestions or info most gratefully received!
cheers
Simon
SimonD’s workbench
There's something about the 1366 that seems to encourage kit and part manufacturers to freelance...
www.westernthunder.co.uk
and still have the question as I have failed absolutely in my online search for a photo r drawing of this wagon, so have no idea how to letter it.
Is “OWK/2” actually a diagram number?
all suggestions or info most gratefully received!
cheers
Simon
Paul Tomlinson
Western Thunderer
Simon, don't waste any time on "OWK2" - it is as you supposed the JPL catalogue number. ""0" Wagon Kit 2" is my guess...I’m back on this, amongst other things…
SimonD’s workbench
There's something about the 1366 that seems to encourage kit and part manufacturers to freelance...www.westernthunder.co.uk
and still have the question as I have failed absolutely in my online search for a photo r drawing of this wagon, so have no idea how to letter it.
all suggestions or info most gratefully received!
cheers
Simon
John57sharp
Western Thunderer
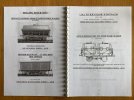
Some inflation in evidence there!
Rob Pulham
Western Thunderer
simond
Western Thunderer
I have one of those, and, to my shame, I still haven’t finished it. Made some progress, but…
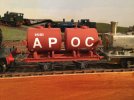
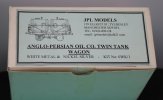
@John Baker will recall the tanks…. Which are 3DP after I made a nonsense of the metal ones in the kit (hint, don’t use elastic bands to hold it all together whilst the epoxy sets, or, at least, if you do, make very sure it doesn’t set with a twist in it…). Anyway, it’s easier to do the rivets in 3DP.
I must get around to doing the steam heating and then finish it off.
And for everyone else doing one of these, CRT do rub-down transfers, and whilst you can’t see it, each tank is labelled “A” on one side and “B” on the other, because I’m a prat.
i suppose I could have worked out the kit catalog number thing, thank you all.
Meanwhile, do we have any idea about appropriate 1930 lettering for the wagon, which I suspect to be of LNWR origins?

atb
Simon

@John Baker will recall the tanks…. Which are 3DP after I made a nonsense of the metal ones in the kit (hint, don’t use elastic bands to hold it all together whilst the epoxy sets, or, at least, if you do, make very sure it doesn’t set with a twist in it…). Anyway, it’s easier to do the rivets in 3DP.
I must get around to doing the steam heating and then finish it off.
And for everyone else doing one of these, CRT do rub-down transfers, and whilst you can’t see it, each tank is labelled “A” on one side and “B” on the other, because I’m a prat.
i suppose I could have worked out the kit catalog number thing, thank you all.
Meanwhile, do we have any idea about appropriate 1930 lettering for the wagon, which I suspect to be of LNWR origins?

atb
Simon
Last edited:
simond
Western Thunderer
On a whim I purchased @MarkR ’s siphon
As he said, it needed a little attention and is already looking rather better. One axle box had been damaged, has now been carved off, and will be replaced when I do a 3DP version
The bogies have had a dose of rattle can black and now boast blue (oil) axle box covers and I now need to obtain some matt varnish to cover the body, which is nicely transferred but appears unpainted.
I’ll then give it a dose of grime and call it a wrap. Here with my Minerva inside framed version.
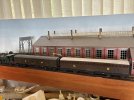

John Baker
Western Thunderer
I have one of those, and, to my shame, I still haven’t finished it. Made some progress, but…
View attachment 212080
@John Baker will recall the tanks…. Which are 3DP after I made a nonsense of the metal ones in the kit (hint, don’t use elastic bands to hold it all together whilst the epoxy sets, or, at least, if you do, make very sure it doesn’t set with a twist in it…). Anyway, it’s easier to do the rivets in 3DP.
I must get around to doing the steam heating and then finish it off.
And for everyone else doing one of these, CRT do rub-down transfers, and whilst you can’t see it, each tank is labelled “A” on one side and “B” on the other, because I’m a prat.
i suppose I could have worked out the kit catalog number thing, thank you all.
Meanwhile, do we have any idea about appropriate 1930 lettering for the wagon, which I suspect to be of LNWR origins?
View attachment 212081
atb
Simon
The twin tank is looking great! Good to see it on wheels
 You've been making good use of your printer since I did these for you - you could have a whole fleet of them.
 All the best,
John
AJC
Western Thunderer
The twin tank is looking great! Good to see it on wheelsYou've been making good use of your printer since I did these for you - you could have a whole fleet of them.
All the best,
John
So long as it's only a small one. Many years ago, I did see a picture that suggested there were at least three. But probably only three.
Adam
simond
Western Thunderer
We have progress on several fronts. The OWK2 wagon appears to LMS ex Caledonian, judging by the axleboxes which are grease type I think - anyway it’s part painted and a bit weathered and when I get around to ordering some transfers I’ll do a bit more.
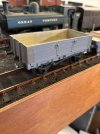
The bolster wagons that John Duffy kindly sent me have had a coat of grey and likewise are awaiting transfers and weathering - and the big shackles on the bolsters themselves.
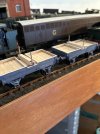
The siphon has had a new 3DP axle box fitted, and is awaiting a bit of filth to tone down the rather stark paint on the bogies, and lift the detail a bit
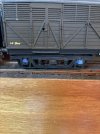
It’s the left one if you can’t tell…
And, on the bench today is the naughty pannier.
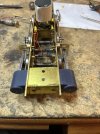
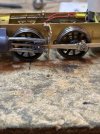
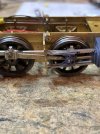
Which has crossheads, and better yet, they slide on the slidebars and they don’t catch on the coupling rods.
Not happy with the connecting rods. Not happy with the screw heads on the centre & rear crankpins either. Mmmm.
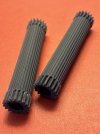
And these came off the printer last night
A bientot
S

The bolster wagons that John Duffy kindly sent me have had a coat of grey and likewise are awaiting transfers and weathering - and the big shackles on the bolsters themselves.

The siphon has had a new 3DP axle box fitted, and is awaiting a bit of filth to tone down the rather stark paint on the bogies, and lift the detail a bit

It’s the left one if you can’t tell…
And, on the bench today is the naughty pannier.


Which has crossheads, and better yet, they slide on the slidebars and they don’t catch on the coupling rods.
Not happy with the connecting rods. Not happy with the screw heads on the centre & rear crankpins either. Mmmm.
And these came off the printer last night

A bientot
S
simond
Western Thunderer
Dug my Guzzi out of hibernation and did some spring maintenance on the old girl yesterday. I then went motorcycling a bit today (spectating at Lydden Classic Bike racing, shame the wind was so bloody cold) but in between times, I have been doing a bit more on the dreaded pannier...
I ran the loco with coupling and con rods, crossheads, etc., fitted, and it's just not quite sweet. And, as I said, I didn't like the use of 12BA screws as crankpins. I was quite pleased with the 3DP crossheads, though I am a little concerned about their long term survival. I guess the answer is to make spares. (or get some cast in metal...). I suspect the etched con-rods that came with it are touching the motion brackets. They shouldn't, but clearances don't scale very well, especially with the variable position of the axle due to the CSB suspension.
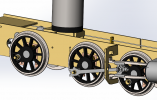
The front crankpins have been made - they will keep the 12BA CSK screws to retain the bushes - I have drawn up some crankpins for the driving and trailing axles which I shall perhaps turn up tomorrow evening. These will take a 10BA nut to retain the rods. At some point, I have to summon up courage to machine the conrods (and I have a set of coupling & connecting rods for Tony's Manor that need doing too...)
Still, onwards!
S
I ran the loco with coupling and con rods, crossheads, etc., fitted, and it's just not quite sweet. And, as I said, I didn't like the use of 12BA screws as crankpins. I was quite pleased with the 3DP crossheads, though I am a little concerned about their long term survival. I guess the answer is to make spares. (or get some cast in metal...). I suspect the etched con-rods that came with it are touching the motion brackets. They shouldn't, but clearances don't scale very well, especially with the variable position of the axle due to the CSB suspension.

The front crankpins have been made - they will keep the 12BA CSK screws to retain the bushes - I have drawn up some crankpins for the driving and trailing axles which I shall perhaps turn up tomorrow evening. These will take a 10BA nut to retain the rods. At some point, I have to summon up courage to machine the conrods (and I have a set of coupling & connecting rods for Tony's Manor that need doing too...)
Still, onwards!
S
Yorkshire Dave
Western Thunderer
I was quite pleased with the 3DP crossheads, though I am a little concerned about their long term survival. I guess the answer is to make spares. (or get some cast in metal...).
In theory there shouldn't be any concerns about the 3DP crossheads as they are not taking any strain nor transmitting forces.
3DP coupling rods on the other hand may give cause for concern as they are transmitting forces to the other wheels.
simond
Western Thunderer
Thanks Dave,
I just don’t have a feel for their long term survival.
As you say, the loads are negligible, though there is some rubbing, and there is likely to be a little oil around.
I guess @Pencarrow Chris (and I) will find out, in due course!
Coupling rods are Premier!
The conrods, and all the rods for Tony’s Manor will be milled mild steel. I hope.
atb
Simon
Yorkshire Dave
Western Thunderer
The fragility in the crosshead, if anywhere, is likely to be the thin edges which run either side of the crosshead guides.
As you say, only time will tell.
As you say, only time will tell.

