

Dikitriki
Flying Squad
Hi,
Well, it's been a quiet summer - too hot to work outside. I never thought I'd say that! We had all of July off, and resumed August once the weather broke.
One thing that had been on our minds was sag. Some of the boards were exhibiting a degree of sag. This was particularly true of the curved boards which were anyway unbalanced due to the nature of the construction. With the weight of the locos and ballast, I thought there could be a long-term problem, and levelling up between the posts was going to be very difficult. We kicked a lot of ideas around, but in the end the solution was straightforward. Not necessarily quick, but easy to implement.
Those boards at ground level were simply wedged into level by using suitably sized stone from the building pile placed midway between the scaffold posts under the cable trays. Those that were off the ground had 30mm angle bolted between the scaffold jacks, with 5mm wedges interposed between the top of the angle and the bottom of the cable tray at the middle between the posts.
The 30 x 30mm angle was cut to length and drilled to use the cable tray/jack bolts and given 2 x coats of Hammerite.

The angle was bolted under the jacks.
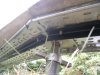
and looking at the middle, it's possible to see that the underside of the cable tray was almost touching the angle. Since the jacks are 5mm thick, there should have been 5mm clearance if the boards were true.

We cut some 5mm packing pieces from stainless steel strip.

and simply placed them in the middle of the poles between cable tray and angle.

Other side of the layout.


Job done! We can cut and paint 4 angles per day before moving onto other aspects of the layout.
Richard
Well, it's been a quiet summer - too hot to work outside. I never thought I'd say that! We had all of July off, and resumed August once the weather broke.
One thing that had been on our minds was sag. Some of the boards were exhibiting a degree of sag. This was particularly true of the curved boards which were anyway unbalanced due to the nature of the construction. With the weight of the locos and ballast, I thought there could be a long-term problem, and levelling up between the posts was going to be very difficult. We kicked a lot of ideas around, but in the end the solution was straightforward. Not necessarily quick, but easy to implement.
Those boards at ground level were simply wedged into level by using suitably sized stone from the building pile placed midway between the scaffold posts under the cable trays. Those that were off the ground had 30mm angle bolted between the scaffold jacks, with 5mm wedges interposed between the top of the angle and the bottom of the cable tray at the middle between the posts.
The 30 x 30mm angle was cut to length and drilled to use the cable tray/jack bolts and given 2 x coats of Hammerite.
The angle was bolted under the jacks.
and looking at the middle, it's possible to see that the underside of the cable tray was almost touching the angle. Since the jacks are 5mm thick, there should have been 5mm clearance if the boards were true.
We cut some 5mm packing pieces from stainless steel strip.
and simply placed them in the middle of the poles between cable tray and angle.
Other side of the layout.
Job done! We can cut and paint 4 angles per day before moving onto other aspects of the layout.
Richard


